With the back of the pet draped, I tackled the false compere front.
I mentioned previously that I wasn’t sure that sewing on the compere front as a false front, sewed on to a solid bodice piece, was accurate. I’m afraid I confused some of you, as you thought I wasn’t sure a compere front is accurate. I know the aesthetic is right, I’m just not sure my way of doing it (creating a solid bodice foundation, and just tacking on the fashion fabric piece as a false front) is historically accurate.
Janet Arnold’s pattern for a compere front gown, based on this gown, has the dress and compere front made up completely separately, with the compere front sewn in last (almost as if if was a stomacher that was sewn in), and all the other examples of compere front garments where I can determine the construction seem to have been assembled this way.
So, sigh. Mine may not be accurate. C’est la vie. I’ll get it right next time.
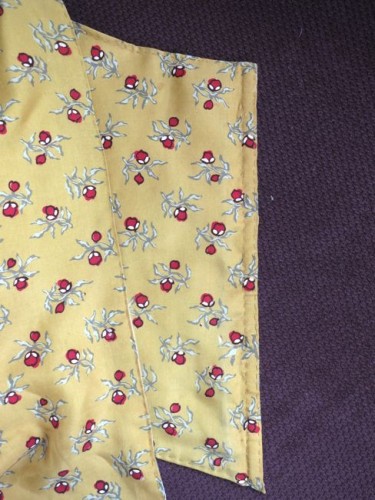
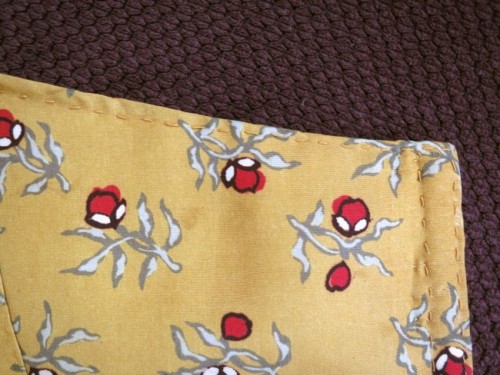
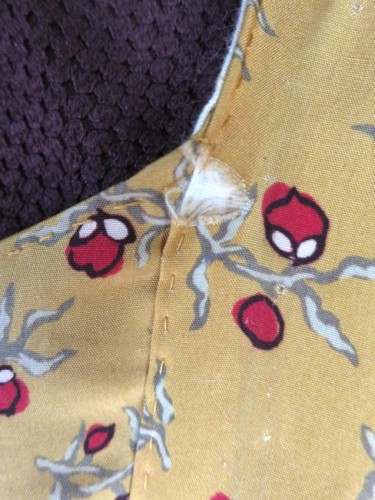
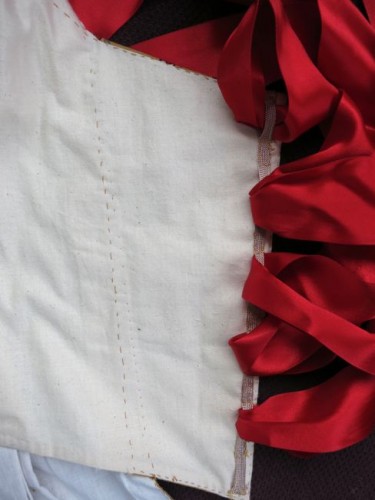
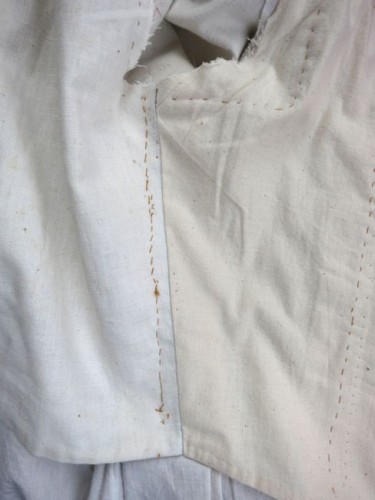
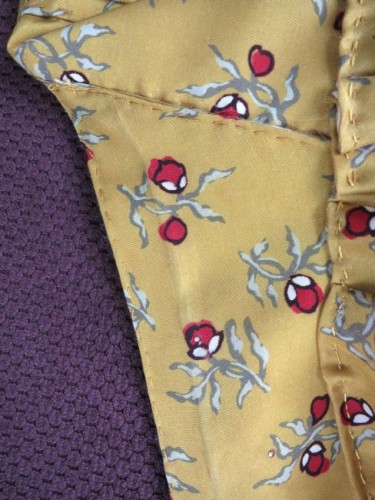
I didn’t take pictures the of the pet front as I was constructing it, but here are a bunch of detail shots which should give you a reasonable idea of how I put it together.
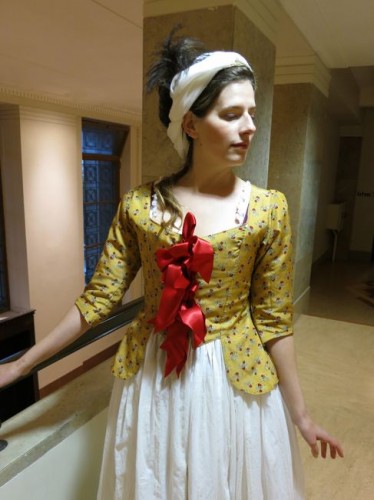
Another bit of the pet where I am not at all sure of the historical accuracy is my fastening method. My inspiration pet fastens up the front with ribbon ties. I’m pretty sure the ribbons on the original are simply sewn into each side of the pet, and then knot/bow in front. However, for both strength and practicality I thought it would work a lot better if I sewed loops into each side of my pet so that a single length of ribbon could thread through the loops from the back and then tie in a bow in front. This seems a lot stronger, will really hide the stays under the pet, and will allow me to replace the ribbon when I find something better than the super bright and shiny synthetic satin (and I think I have and I’m so excited about it!).
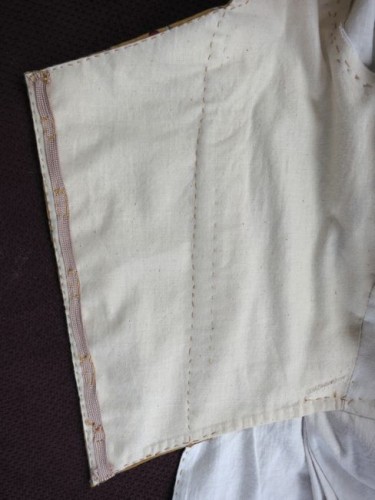
The ribbon tape sewn down the centre front for the red ribbon to lace through to fasten the pet-en-laire
So, a compromise. But the pet, while I took a lot of effort, is a very elaborate, loved, working toile. So I’m OK with a few compromises while I figure out how to make one perfect.
Not all compromises are historically inaccurate though. I had to piece the top of one bodice piece, and I think that just adds to the historicism.
Another imperfection that I like is that the sewing is a bit wobbly and erratic.
The irregularity in stitching is partly because the silk is very tightly woven, meaning that it was a real pain to sew through. It’s also because I kept setting the pet aside and then picking it up again – never great for a cohesive whole. Finally, it’s because a great deal of the handsewing on this pet was done by the wonderful Madame O, who came and sat on my couch and hand sewed for hours in the frantic days before the Tea Talk, ensuring that the pet was actually done. (not to imply that Madame O has erratic hand-stitching, on the contrary hers is much better than mine, which is why mine sticks out!). Finally, the sleeves were sewn on by models as we got dressed to head to Premier House – not the best environment to ensure tiny even stitches!
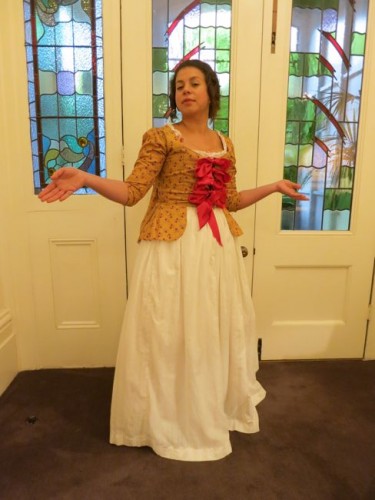
There are some imperfections I am fixing. For the first wearing of the pet en l’aire, at the Tea talk at Premier House, I hadn’t set a bone down the CF of the pet. Naturally it ruched up dreadfully and just looked terrible. I set bones in for the photoshoot with Theresa, and you can really see the difference it makes:





I’ve seen Gutterman silk thread here, I’m pretty sure it was at Spotlight (shudder). If not it might have been at a local quilt store but it’s definitely worth looking around for.
I’ve definitely never seen it at Spotlight, but am going to check at Sherazade for my next 18th century project (mmm…ice blue, or shall I do the green? Or what about the tartan….)
I’ve picked up Gutterman silk thread at Sherazade in the BNZ centre. Was only a year or two ago and they said at the time that they were planning to continue stocking it. Don’t know if the colour selection is up to what you need though – I was after black and bright red for blackwork embroidery…
Sherezade (sp?) used to sell me white silk thread, but you’d have to be interested in dying your own for other colours.
Embroidery silks? That would give the colour range.
I’ve actually considered that one, but my experience with embroidery silks is that they aren’t strong enough to be used for garment construction. 🙁 At least I am comfortable dyeing!
If you can get an off-white colour you may not need to dye. I’ve seen extant examples that used creamy coloured thread with no attempt to match the fabric colour, and I think that was quite common.
That’s exactly what I was thinking: it’s hard enough to find matching thread these days, I doubt the average seamstress had a huge selection in the 18th century
I made myself a kind of “modern” (as in wearable in real life) pet, and you’ve just given me a great idea about the ribbon closures on it. Thanks, your way will definitely be a stronger closure and I’ll be able to switch up the ribbon when I feel like it!
uibk.ac.atOoh, have you read about the 15th century “bras” found in Austria? I thought of you when I read the article… which is some sort of compliment, I swear! I wonder if they’ll be able to find out more information about them…
http://www.uibk.ac.at/ipoint/news/2012/buestenhalter-aus-dem-mittelalter.html.en
Thanks for posting that link! I always wondered what they did for support garments back then. I kind of assumed they must have worn something (maybe like a strophium), but I’ve never encountered any physical evidence before.
As fabulous as this seems, be aware that not all textile historians are in agreement that these are the medieval equivalent of ‘bras’. Some think that they are actually portions of fitted bodices (and thus, the clothes did the work of supporting the bust).
I used to purchase my silk threads from Scherzad, Anoop could probably tell you who’d have it otherwise
In reference to silk thread colour, I have also seen white/ivory silk thread used on other coloured textiles. Furthermore, most (if not all) the approx 100 extant 18th century dresses I’ve examined thus far use a method of a sort of backstitched prick stitch for bodice exterior seams (while edges do tend to be running stitched). This means that only a tiny, prick-sized stitch is visible from the right side, while it’s longer on the underside. Doing this would make the thread colour even less relevant.
Regarding the historical accuracy of your compere construction, I’m pretty sure I’ve seen this sort of thing done on an altered pet (or one that was the result of alteration). In addition to fabric piecing, alterations and modifications were ubiquitous – so much so that I’m doing an entire PhD dissertation on the practice, lol! So, from that pov what you’ve done is perfectly historically acceptable! There was also never just one way of doing things. For my MA thesis I came up with the term ‘flexible uniformity’. There seemed to be a repertoire of construction and stitching techniques that would be mix & matched within individual garments. My belief being that mantuamakers and needlewomen received training which ranged across a spectrum of formality, but there was no manual from which they all learned.
Love the pet, they’re so adorable! I should make one for myself. Looking forward to seeing the replacement ribbons, esp since you seem so excited about them/it!