
I had an afternoon tea this Saturday, and hoped to debut Polly Oliver at it.
On Friday, I was doing great: ahead of schedule even. Felicity was helping.
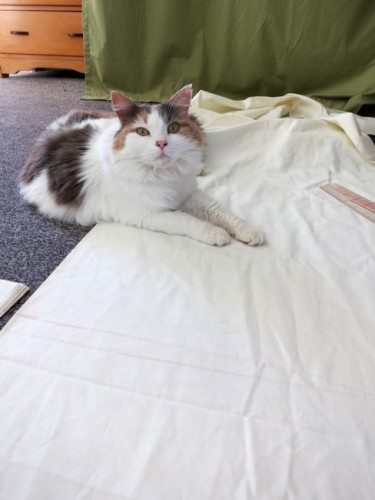
You didn’t need to cut where my paw is, right?
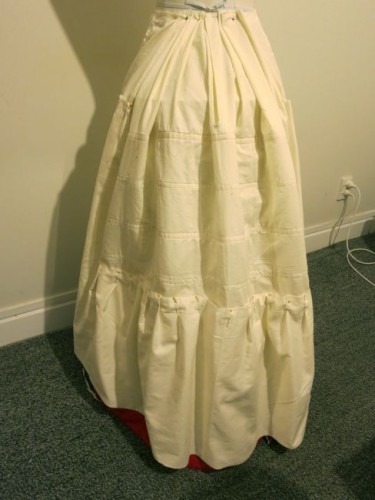
I had all my pieces cut: apron, over-train, bottom pleat/over layer (not sure how to describe it). I lined them, finished them, and had them all ready to attach to the skirt and assemble.
I started by pinning the bottom pleat/over layer on. It’s quite short in the back, over the skirt hoops, where it will be covered by the long over/train, and longer in the front where the apron will sweep up and reveal bits of the under skirt.
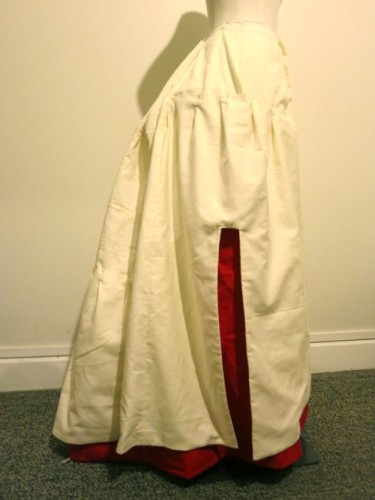
As with the 1886 dress in Janet Arnold, there is a part layer of good fabric over the original support layer. Based on my inspiration images, mine has a slit showing the red under-fabric. I’m not entirely pleased with how the part layer is hanging at the moment, but I’m hoping that the buttons can be used to hold everything neatly in place.
It took a LOT of pinning, and re-pinning, and re-adjusting to get everything to hang as well as it is!
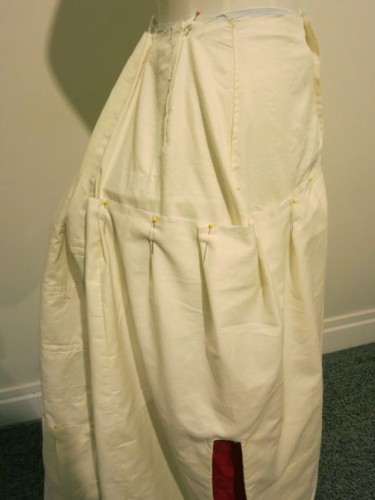
I finished up Friday evening by sewing the pinned over-layer on to the skirt base, and re-inserting my hoop bones. Then I pinned the skirt and all the layers on to the dress form just to see how it looked.
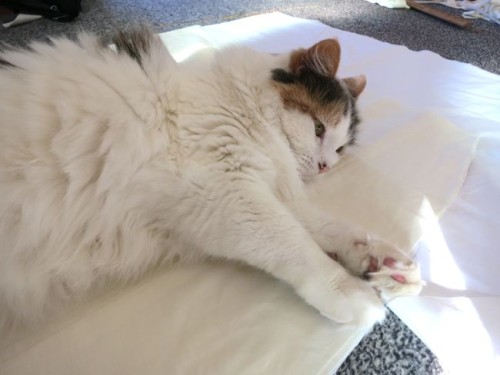
I didn’t take a photo of that, so here is another one of Felicity hogging the fabric:

As it happened, Felicity hogging the fabric is a lot cuter than the pinned together skirt was. And the burn-out photo shows just as much definition and detail as the pinned together skirt did. All the layers just merged together into one white blob, without the distinct layers that I wanted.
Ergh. What’s a girl to do?
Scramble some eggs!

I bought all this gold trim for the Polly / Oliver jacket, but it just didn’t look right when I tried it. However, on the white, in a large expanse of space, a trim of it was just the thing to provide the detail and definition I wanted.
My trim is a little more omelet than scrambled eggs: I kept it quite simple other than a bit of curves at the front of the apron, and the corners of the over-train.
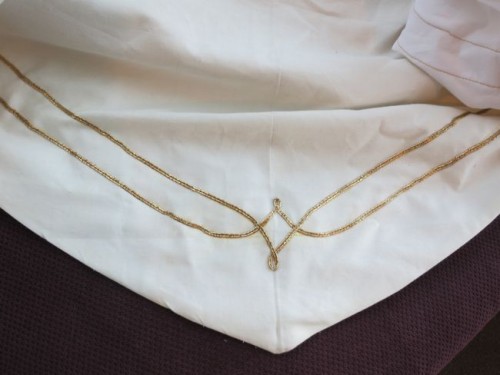
To make my trimming, I drew a scroll pattern as a pattern, and used transfer paper to mark it on to the apron front.
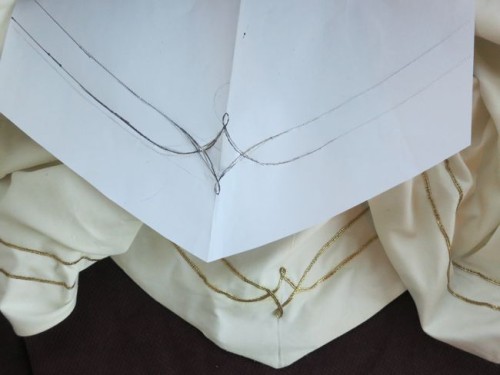
Then I drew on the rest of the lines with a chalk pen and a ruler, while trying to keep Felicity amused/out of the way.

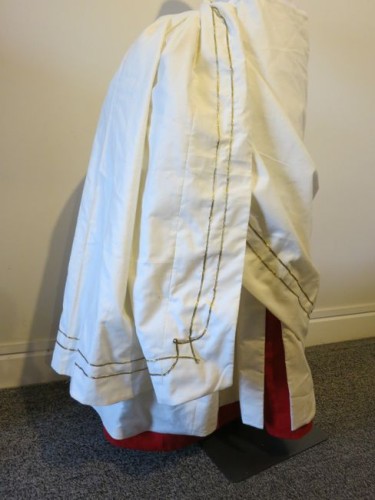
Then there was some 17+ metres of gold trim to stitch on, and the 5 hours that I had allocated to finishing the skirt were passed, and it was time to get dresses for my afternoon tea, and clearly I wasn’t wearing Polly / Oliver. So I debuted the 1903 Chinoiserie skirt, and I’m finishing Polly Sat eve/Sunday morning, aiming for a Sun afternoon photo shoot.
But I’m glad I took the time to do the skirt right, because it looks so much better, even just pinned together.
But maybe it needs more scrambled eggs….
Just a little…
The gold trim really brings it to life. I don’t know if it needs any more, but you can always try it and see.
Thanks Stella! I added a wee bit more, just so every piece of the skirt has it. I wouldn’t have minded a 3rd row on every panel, but I’m out of gold braid, and so is Wellington!
Oh, yes!! The very delicate scrambled egg just makes it. I’d have hated Polly to have a blah skirt. This is going to be great. Even a smidgin more gold wouldn’t hurt…
Yay! I am so pleased you approve! I’ve added a smidge more gold. I’d add even a bit more, but I’ve completely bought Wellington out of gold braid. 😛
What you REALLY need is more cat hair! Right, Felicity?
Cat hair doesn’t stick! Everything else sticks to the sateen, but it resists cat hair by some miraculous power!
Love the photos of Fissy. And I agree — some more trim would make it pop a bit and help it hold its weight with the amazing jacket.
She’s a little model, my cat! I put as much more trim on as I could. I hope it meets your approval when you see it tomorrow!
I love how you shape fabric like that! The trim is beautiful. Felicity is such a doll 🙂 My cat Ozzie sometimes snatches a pin from the fabric which scares me and I have to put my unfinished garments in the closet every time I leave the room.