
This weekend seems to be the time to write not-super-exciting catch-up posts that no-one is going to comment on, but that might be useful to someone later.
As you can see, not-super-exciting, and kinda weird:
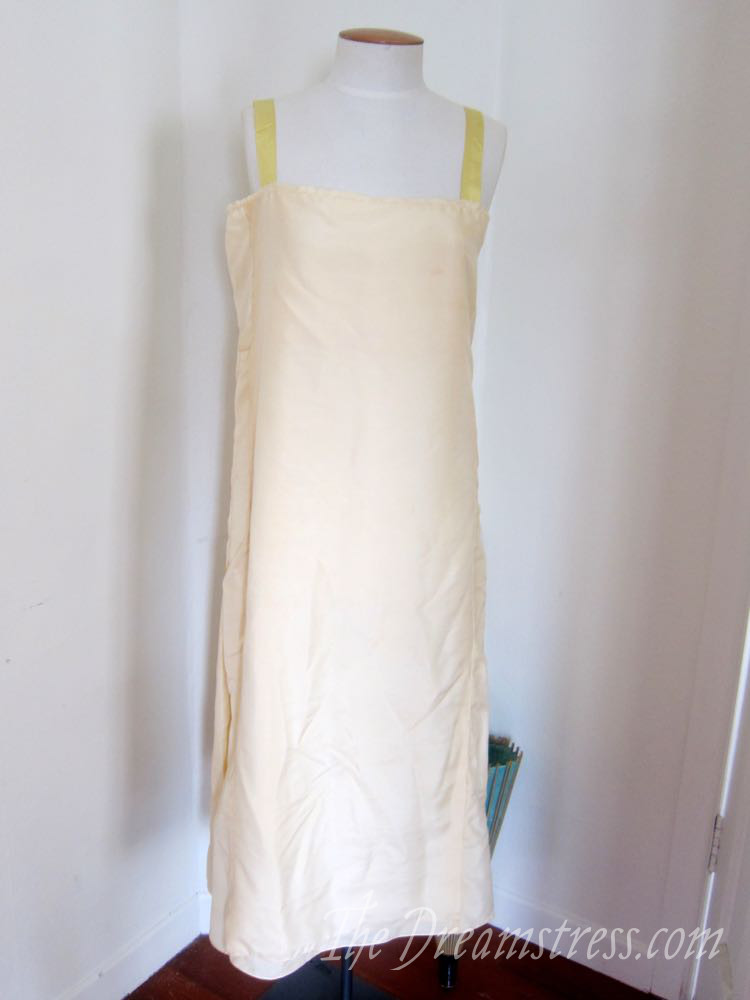
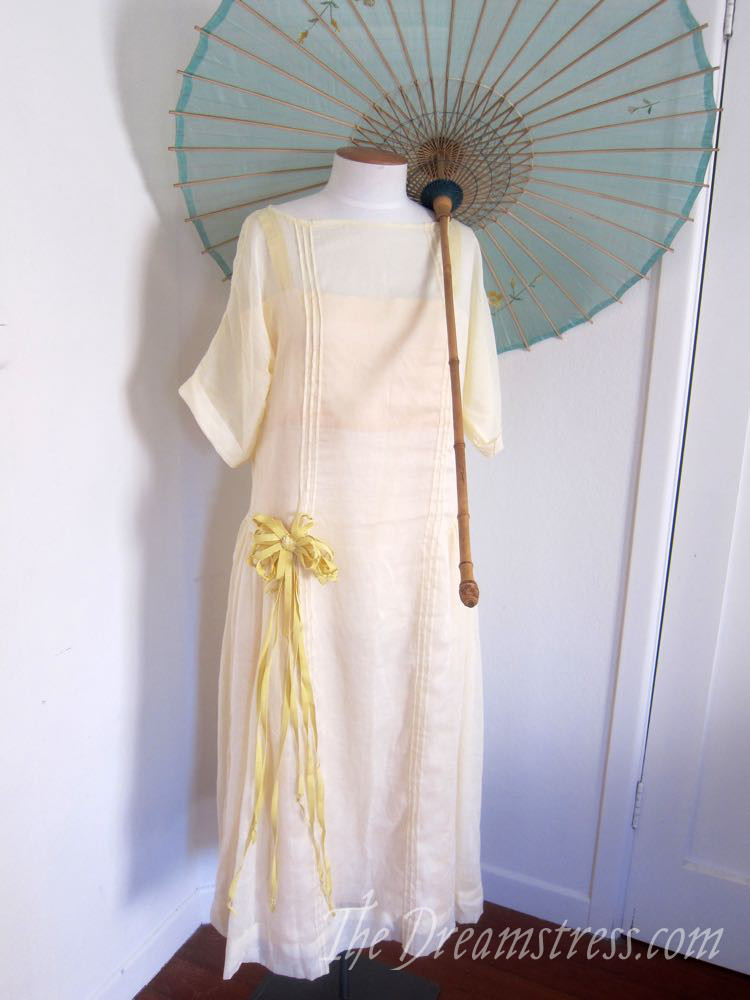
This is a silk slip to go under the Summer of 1921 yellow dress. It’s the product of desperation and curiosity. Desperation, because my attempts to find a suitable yellow silk (or cotton, or viscose) for a proper ’20s slip in Wellington had proved fruitless, and curiosity, because I wondered if I could make one out of kimono silk.
So this is made from lengths of 34cm wide vintage blonde silk habotai, originally intended for kimono linings, seamed together to be wide enough.
In my first attempt I used one length just long enough to wrap around my bust and give it a bit of compression support, and four lengths sewn together to form a wide tube:

I sewed big box pleats into the side seams, to shape the tube to my body, but give it enough volume to walk and move in comfortably.
The top length was sewn into a circle, folded over, and the raw edges of the four pieces were sandwiched between the two selvedges of the top length, to finish it inside and out.
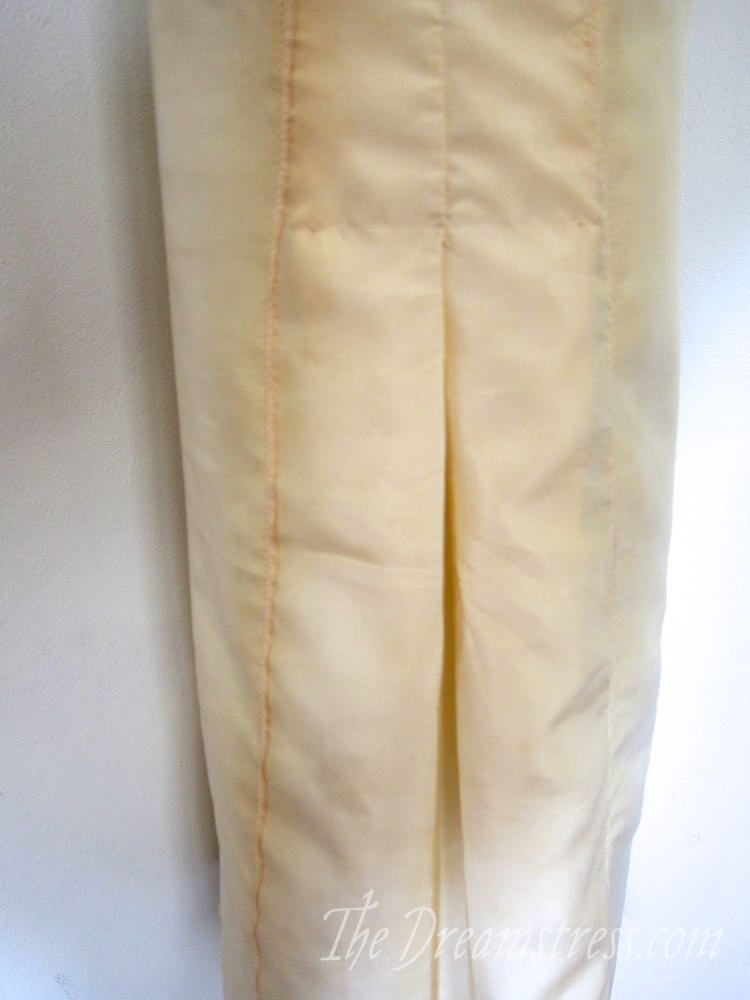
This worked pretty well: it was easy to move in, and did provide the right bust shape, but had two serious problems. First, it wasn’t quite opaque enough to hide any other undergarments, and two, the darker under-bust selvedge lines were visible through the outer dress:
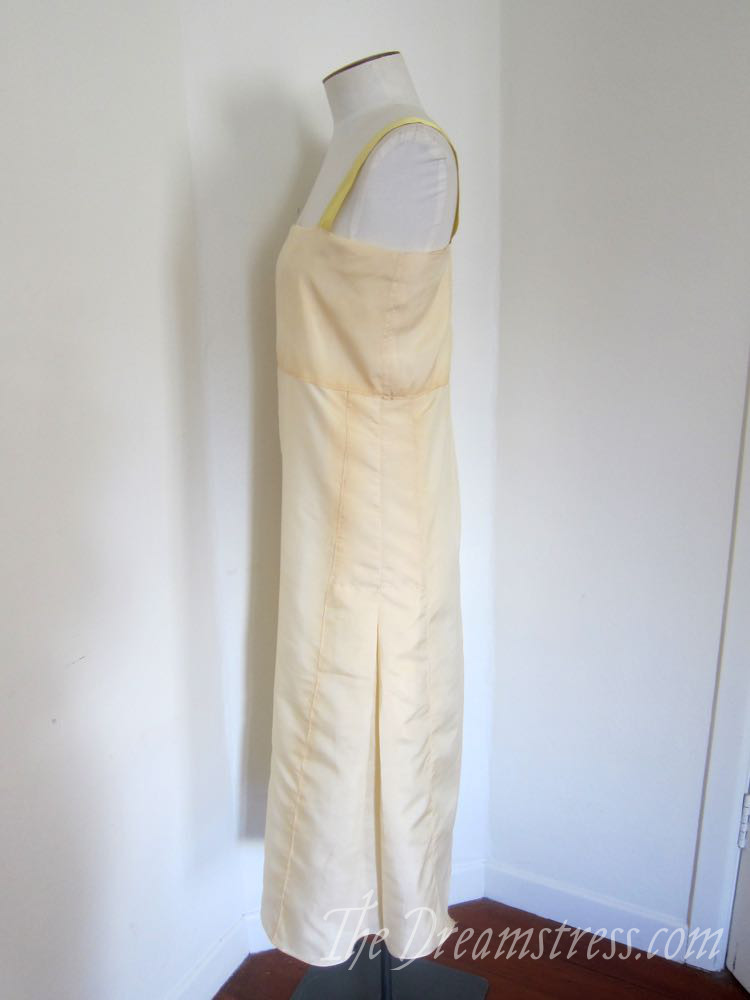
Two fix it, I cut two more lengths of the kimono silk, the length of the full slip, and stitched them down the front and back panels of the dress. Success!
You can still see the underbust lines at the sides, but they aren’t noticeable when the dress is worn.

It is an undeniably weird garments, and certainly isn’t period accurate (unless a missionary or such-like in Japan found herself attempting to make a slip out of kimono-width fabric, unlikely, as Western-style fashions were widespread in Japan by the 1920s), but the overall shape is, so it’s not a terrible waste of time as a prototype.
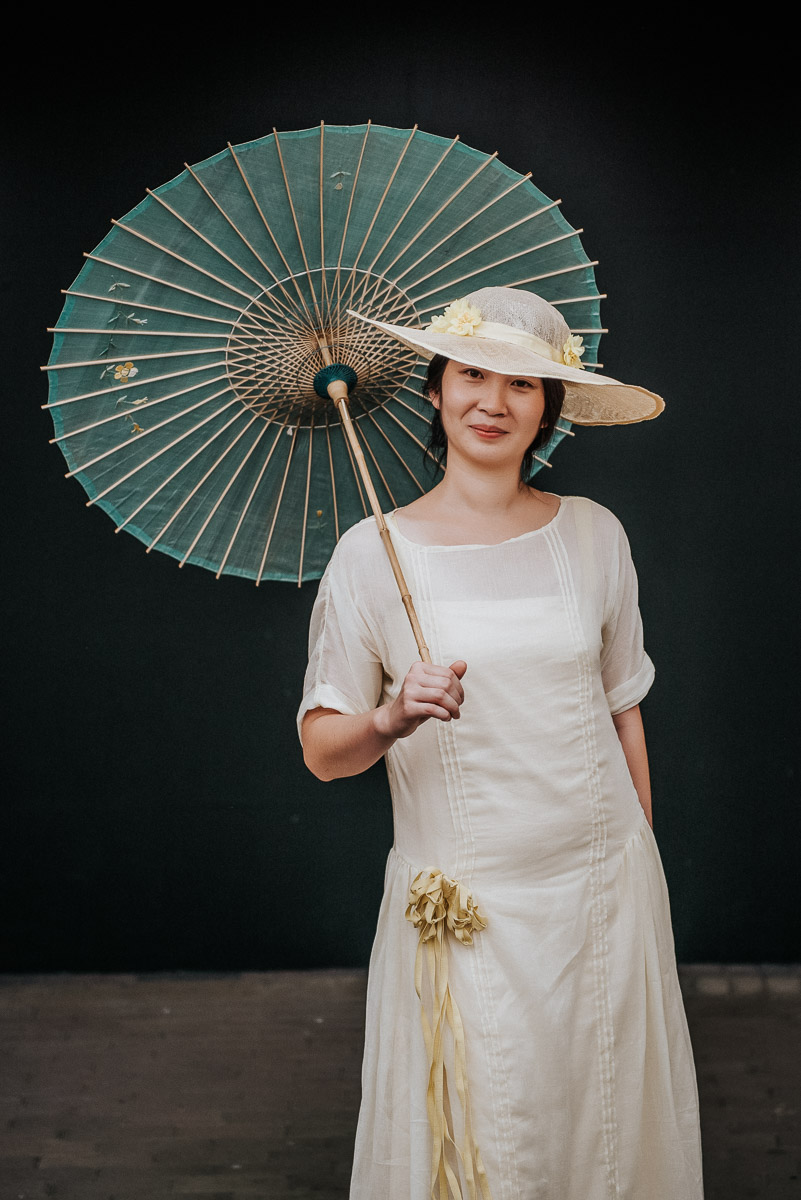
And it does look perfect under the Summer of 1921 dress!
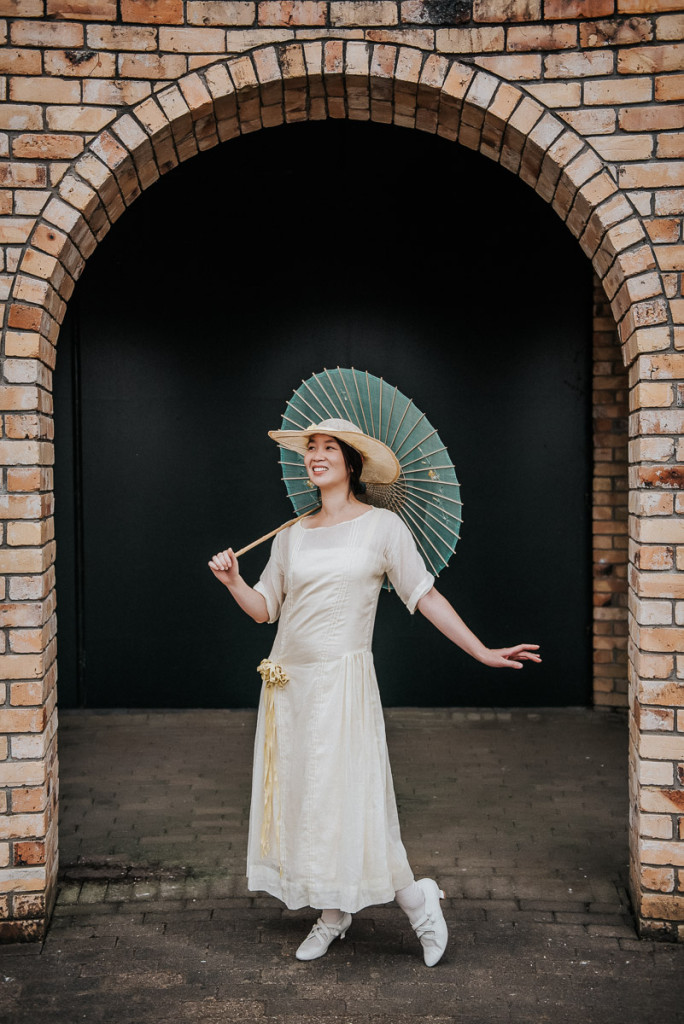
Courtesy of Tony McKay Photography and Glory Days Magazine
Not a seam in sight, and sufficiently modest.
What the item is: an early 1920s silk slip.
The Challenge: #2 Tucks & Pleating
Fabric/Materials: 6m of vintage kimono-width blonde silk habotai
Pattern: None, roughly based on vintage slips.
Year: 1921
Notions: 1m of rayon petersham (.60pm), cotton thread ($1).
How historically accurate is it? Meh. Ergh. The essential pattern is correct, but using kimono-widths of silk is not, nor are my construction techniques. It’s possible that a home dressmaker, working with scrape of leftover silk, might have come up with the same construction. Maybe. 50%
Hours to complete: 2 hours – at least it was quick.
First worn: By a model at the Hamilton Gardens ‘Mansfield Garden Party’ on Waitangi weekend.
Total cost: $5
Well, it works – that counts for me with undergarments! And I love reading about resourceful sewing, because I often end up going that route myself. 🙂
I agree with Hana-Marmota – it works! And very well, too. How interesting. I like the way you solved the see-through problem with the extra lengths of silk.
Okay, so I am not the only one who does some rather unique (in my case strange) things during some sewing projects. The important part, however, is that it works!
Sometimes you’ve got to do what you’ve got to do. I like it. It really does create the perfect 1921 shape.
Thanks for sharing this post. I’m still new to historical garment construction so it’s extremely interesting to me. I love seeing how things are put together. 🙂