You know when you go to post a single ca. 1800 portrait for a ‘Rate the Dress’ post, but it describes the sitter as ‘in Hungarian dress’, and then you have to figure out:
- what ‘Hungarian dress’ means, and;
- how Hungarian dress arrived at what it looked like in ca. 1800;
- and how it changed after that,
And then you end up down a Wikimedia Commons and Hungarian-to-English translation rabbit hole 19 hours and 57 photos deep?
Well, now I do…
So much so that I ended up with two posts worth of content exploring Hungarian dress as a follow up from my previous post of Alexandra Pavlovna in Hungarian dress
Or, more specifically and accurately, what was Hungarian court dress for women ca, 1800 as shown in Alex’s portrait, and how did it evolve from a style of dress worn by specific noble groups in what we now call Hungary to become díszmagyar: the formal court dress of Hungary under the Austro-Hungarian Empire.
Hungarian Dress in Portraits, 1600-1699
Based on portraits, a specific Hungarian costume with a laced bodice and full shift sleeves on view was developing at least as early as the first decades of the 17th century. It also usually featured an elaborate apron, and, on upper class women, multiple ropes of pearl beads draped across the bodice.

Krisztina Nyáry, second wife of palatine Miklós (Nikolaus) Esterházy, 1626
Unknown painter – Middle Class Woman of Lõcse – WGA23848 1641
Éva Viczay, second wife of Pál Esterházy, the ancestor of the Zólyom branch 1650

Portrait of Ferenc III. Nádasdy (1622-1671) and his wife Anna Juliana Nádasdy (1630-1669). Philipp Kilian 1650
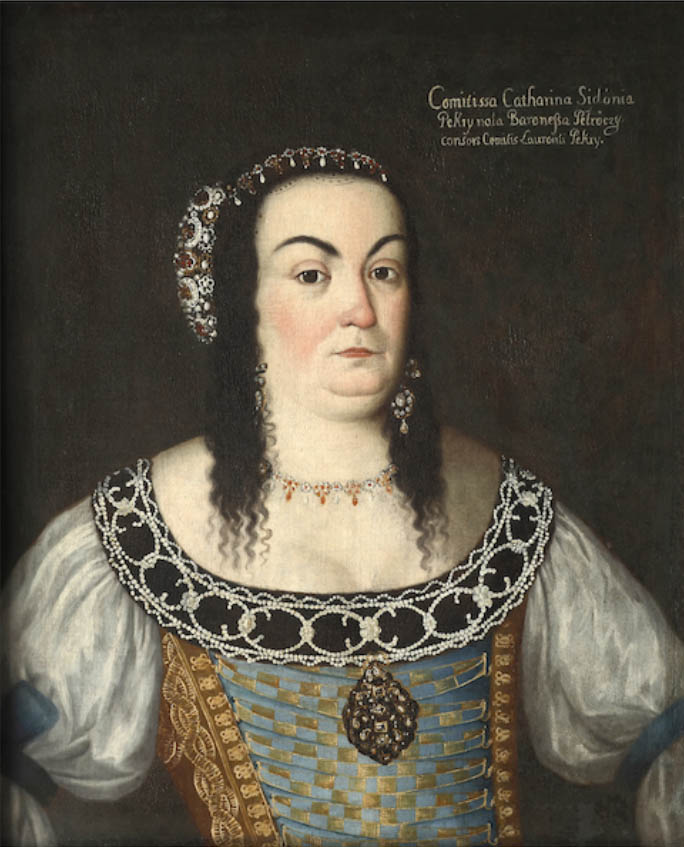
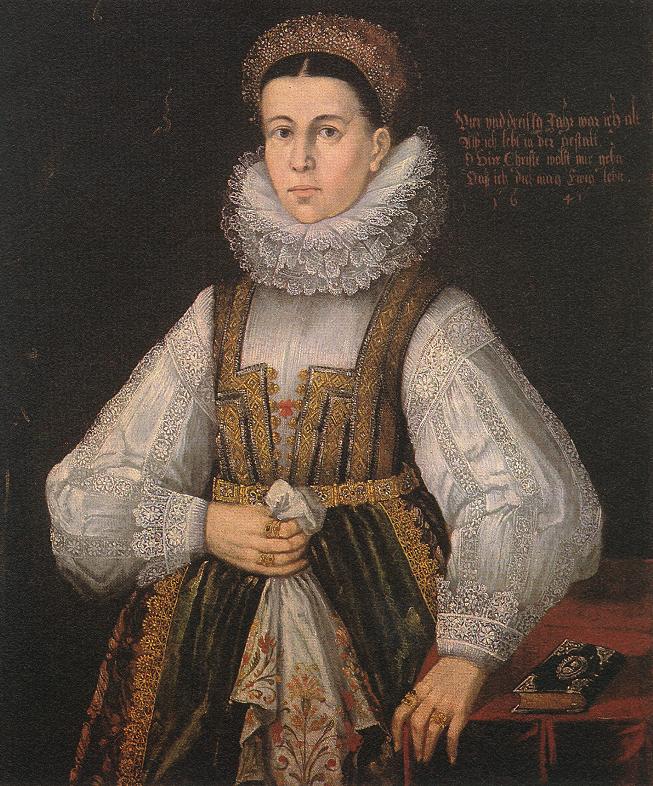
Portrait of Kata Szidónia Petrőczy 1650s
By the second half of the 17th century a version of the Hungarian formal dress that is clearly identifiable as the inspiration for outfits like Alexandra Pavlovna’s was firmly established, as shown in portraits like this:
Wife of Count Ferenc Esterházy, Ilona Illésházy 1650

Rumi (Rumy) Judit Eszterházy Dániel felesége. Rézmetszet (1654)
Benjamin von Block – Portrait of Princess Anna Julianna Eszterházy, Wife of Count Ferenc Nádasdy – WGA02269 1656
(check those pearls! And those sleeves! And that incredibly sheer apron!)
Anna Mária Széchy of Rimaszécs, 1656
Orsolya Esterházy, wife of Paul I, Prince Esterházy of Galántha 1668

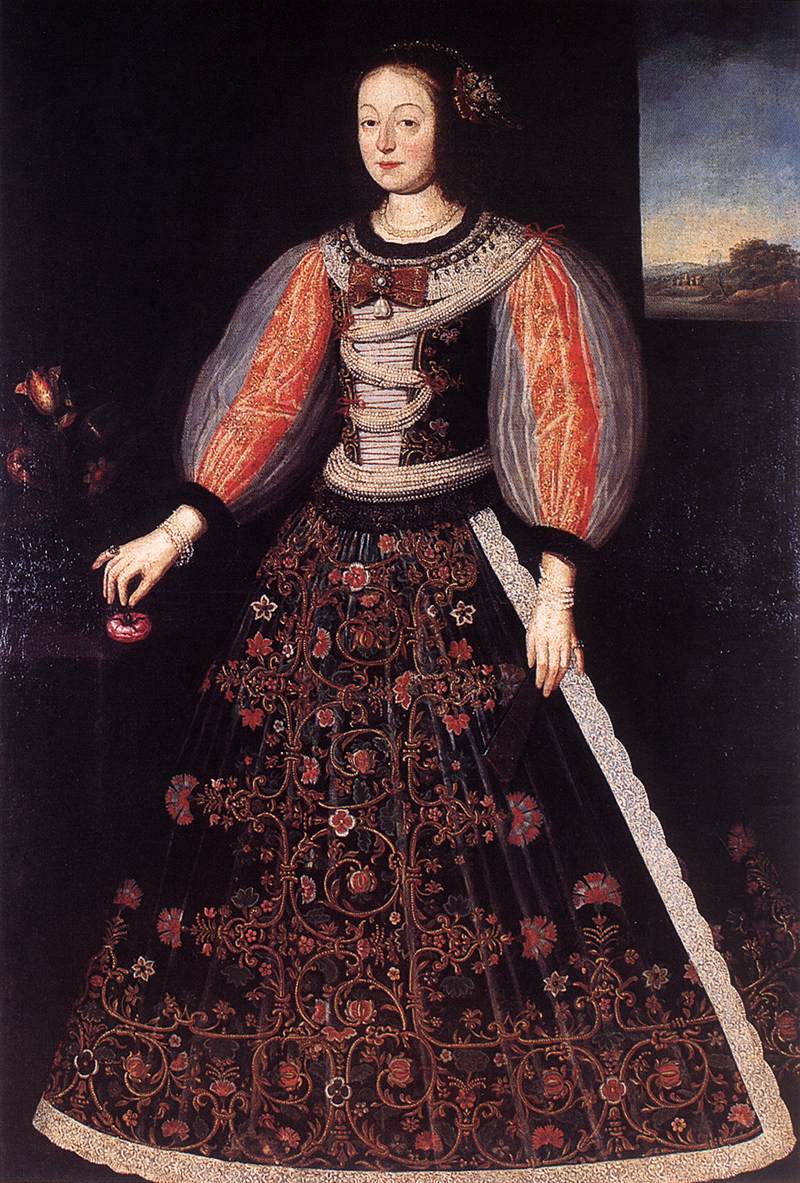
Katalin Thököly (1655-1701), consort of Esterházy Ferenc, fourth quarter of the 17th century
The laced bodice and full shift are usually shown paired with a heavily decorated skirt and an elaborate sheer and lace apron as long as the skirt itself, as well as layers and layers of pearl beads wrapped around the waist.

Mária Thököly, sister of Éva (1672)
Given the price of pearls in the 17th century, these were certainly imitation pearls: perhaps glass beads with a pearlised finish.

Countess Éva Thököly de Késmárk (1659–1716)- wife of Pál Esterházy (1635–1713) palatine of Hungary, ca 1690
Hungarian Dress in Portraits, 1700-1750
Although the pearls were important, the most iconic element of Hungarian dress was the laced bodice. A portrait could allude to the sitter being a Hungarian royal simply by showing a glimpse of a laced bodice worn with fashionable French or Austrian styles.

Princess Charlotte Amelie of Hesse-Wanfried (1679–1722), princess of Transylvania, wife of Francis II Rákóczi, daughter of Charles, Landgrave of Hesse-Wanfried, David Richter the Elder 1704
In the 18th century the numerous ropes of pearls around the waist disappear from most portraits, but pearls are still an important trim on caps and headdresses. The characteristic laced bodice and full puffed sleeves, however, are very much in evidence:
Portrait of Baroness János Podmaniczky née Judit Osztroluczky (1690–1766). Ádám Mányoki, 1724
Klára Kajali (1677-1733) by Ádám Mányoki 1724
Mányoki’s portraits of the Hungarian nobility primarily feature families who were extremely patriotic, and thus specifically trying to show themselves in Hungarian dress, rather than the less nationalistic fashionable 18th century attire worn at the French, English and Austraian courts.

Baron János II. and Baroness Judit (1716–1758) Podmaniczky de Podmanin et Aszód. Judit Podmaniczky was the wife of Baron Lőrinc Orczy de Orcz. Ádám Mányoki 1724
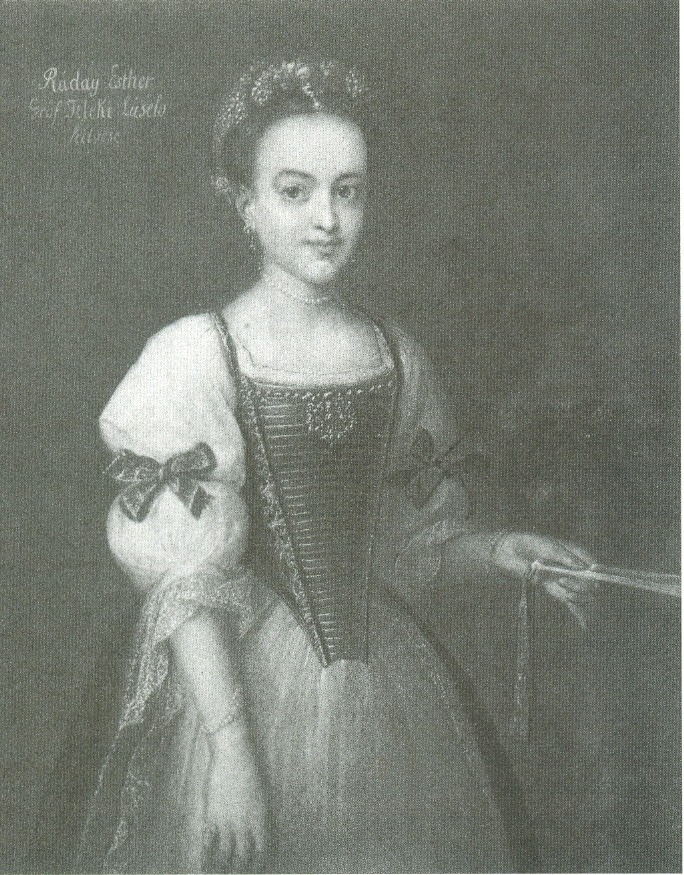
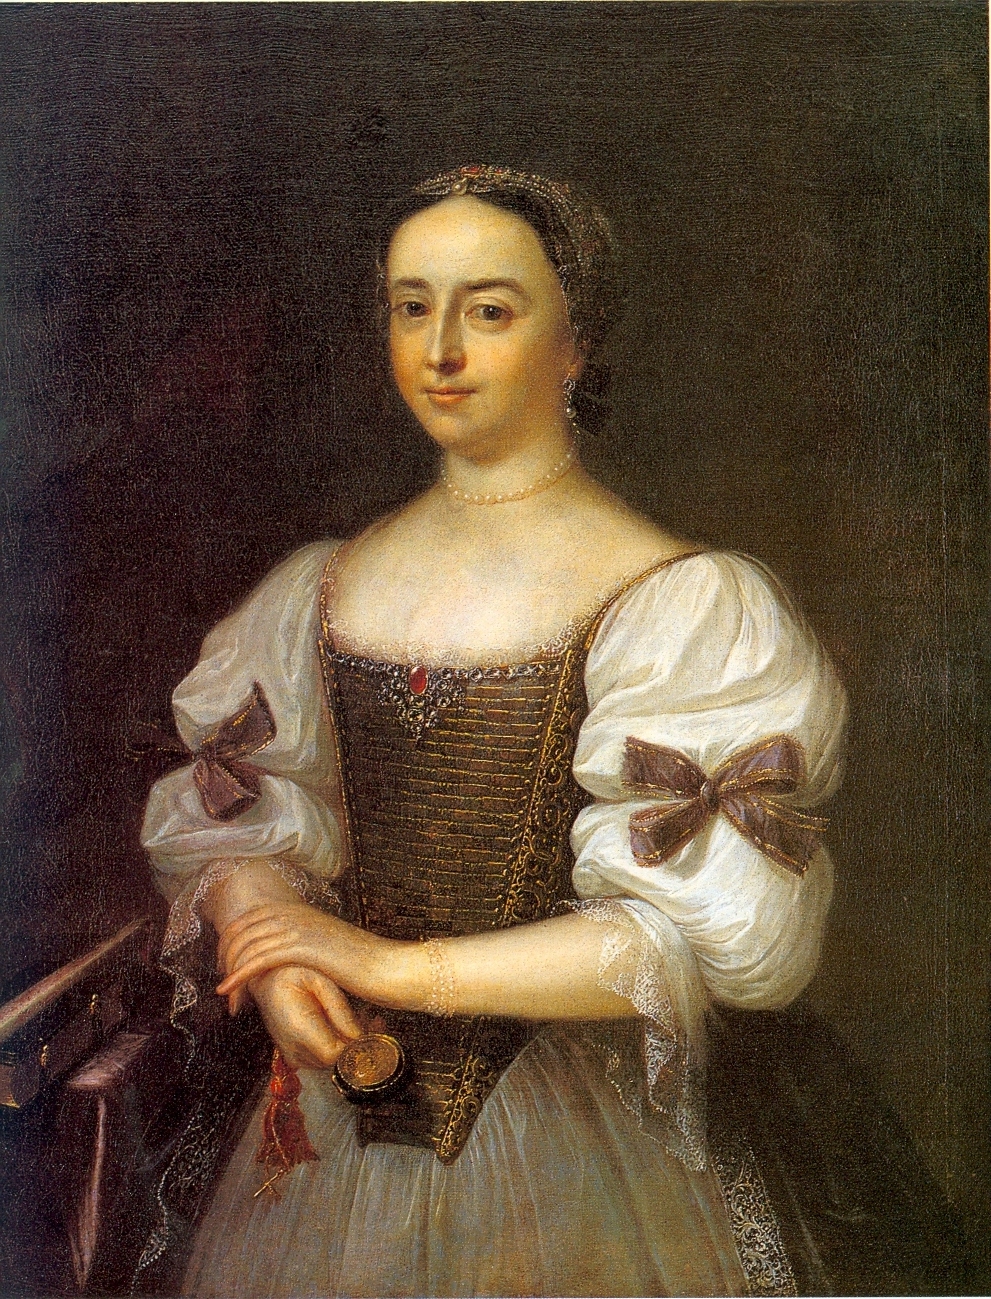
Korabeli portré Ráday Eszter (Losonc, 1716. április 24. – Gernyeszeg, 1764. június) Ádám Mányoki 1764
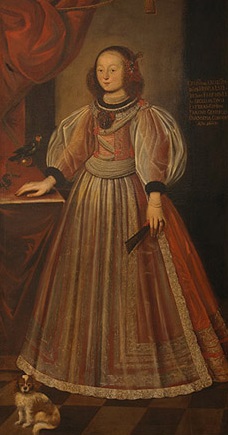
Most portraits show skirt decorations focused on the hem, but there are examples that show all over decorations:
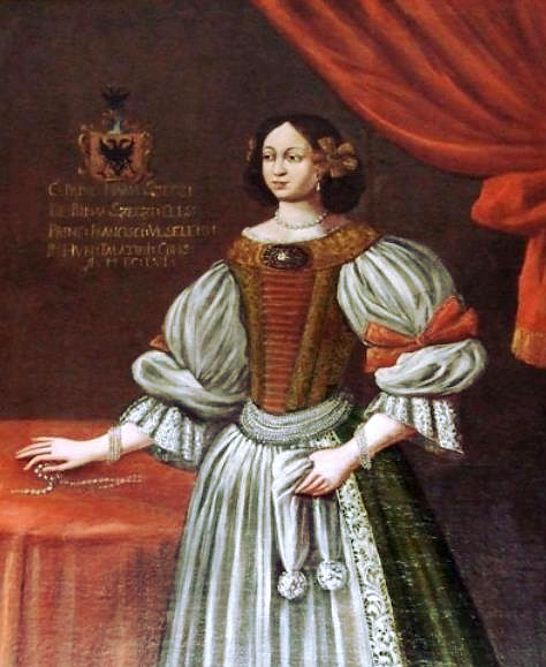
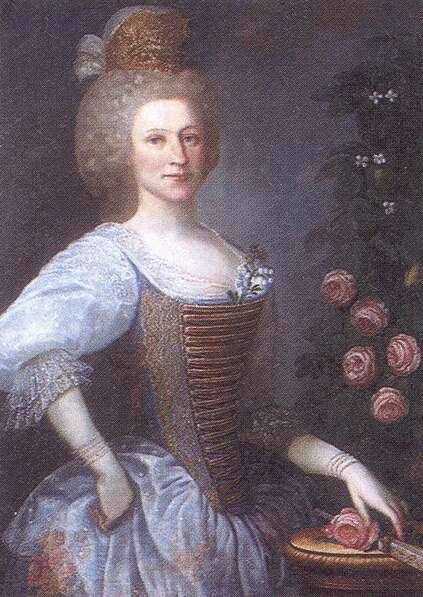
Róza Rebeka Freiin von Schrattenbach 1673 – 18 May 1717
Maria Theresa solidifies her claim to the Hungarian Throne through Hungarian Dress
While the formal Hungarian dress shown in most portraits from the first three decades of the 18th century leaves off the lavish waist pearls shown in 17th century portraits, they are in full florish in all portraits of Maria Theresa of Austria as Queen of Hungary.
Circle of Andreas Møller (1684–1762) Portrait of Maria Theresa of Austria as Queen of Hungary
Maria Theresa’s portraits aim to solidify her claim as Queen of Hungary. Although her father Charles VI had spent his entire reign attempting to ensure her right to inherit the Hapsburg titles, his former allies immediately attempted to overthrow her or seize Hapsburg lands as soon as she came to the throne.
Additionally, a serious attempt had been made to free Hungary from Hapsburg rule in the early 18th century with Rákóczi’s War of Independence (1703–1711). The rebellion is named for its leader, Francis II Rákóczi, whose wife Charlotte Amelie’s 1704 portrait was shown earlier.
Although the Hapsburgs won the rebellion, the Hungarians were able to have some of their demands realised. The signing of the peace treaty that ended the conflict was one of Maria Theresa’s father’s first acts as Emperor, and he signed it knowing Austria could not continue to fight Hungary. Thus the Hapsburg’s were forced to make a number of concessions to the Hungarians in the treaty.

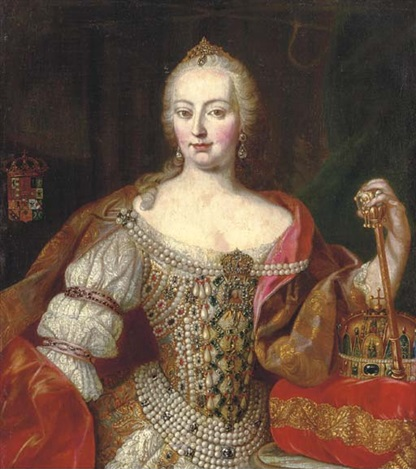
Portrait of Queen Maria Theresia of Hungary and Bohemia, Empress Consort of the Holy Roman Empire in Hungarian coronation robes. Daniel Schmidely 1743
Among the concessions given to Hungary was the right to retain their legislative body, the Diet. From 1713 to 1723 the Diet refused to agree to a female heir to the Kingdom of Hungary, leaving Maria Theresa in a particularly precarious position when she came to the throne in 1740.
Portrait of Empress Maria Theresa (1717-1780) in coranation robes as Queen of Hungary, Studio of Martin van Meytens
Her portraits served of reminders of her claim to the throne. They aim to showcase Maria Theresa’s status and inherent royalness, and reflect the importance of positioning her as Queen of Hungary, in full formal Hungarian dress. They show as many attributes of power, status, and links to traditional emblems of Hungarian royalty as could be crammed into a portrait.

Maria Theresa as Queen of Hungary, from the workshop of Meytens
Hungarian Dress 1750-1800
Maria Theresa’s portraits as Queen of Hungary demonstrate the importance that Hungary held for the Hapsburg Empire, and the importance that a specifically Hungarian costume held for those with power in Hungary. Hungarian dress became a symbol of Hungary’s place within the empire as a distinct land with rights of its own, rather than just a part of Austria. This ensured that the style survived, rather than being replaced by the increasingly homogenous fashionable European styles.

Mária Anna Cziráky (1724–1787) wife of Zsigmond Széchényi (1720–1769), mother of Ferenc Széchényi 1760
Thus Hungarian noblewomen continued to wear the dress at court in Hungary and when they visited Austria, and continued to have their portraits painted in it.
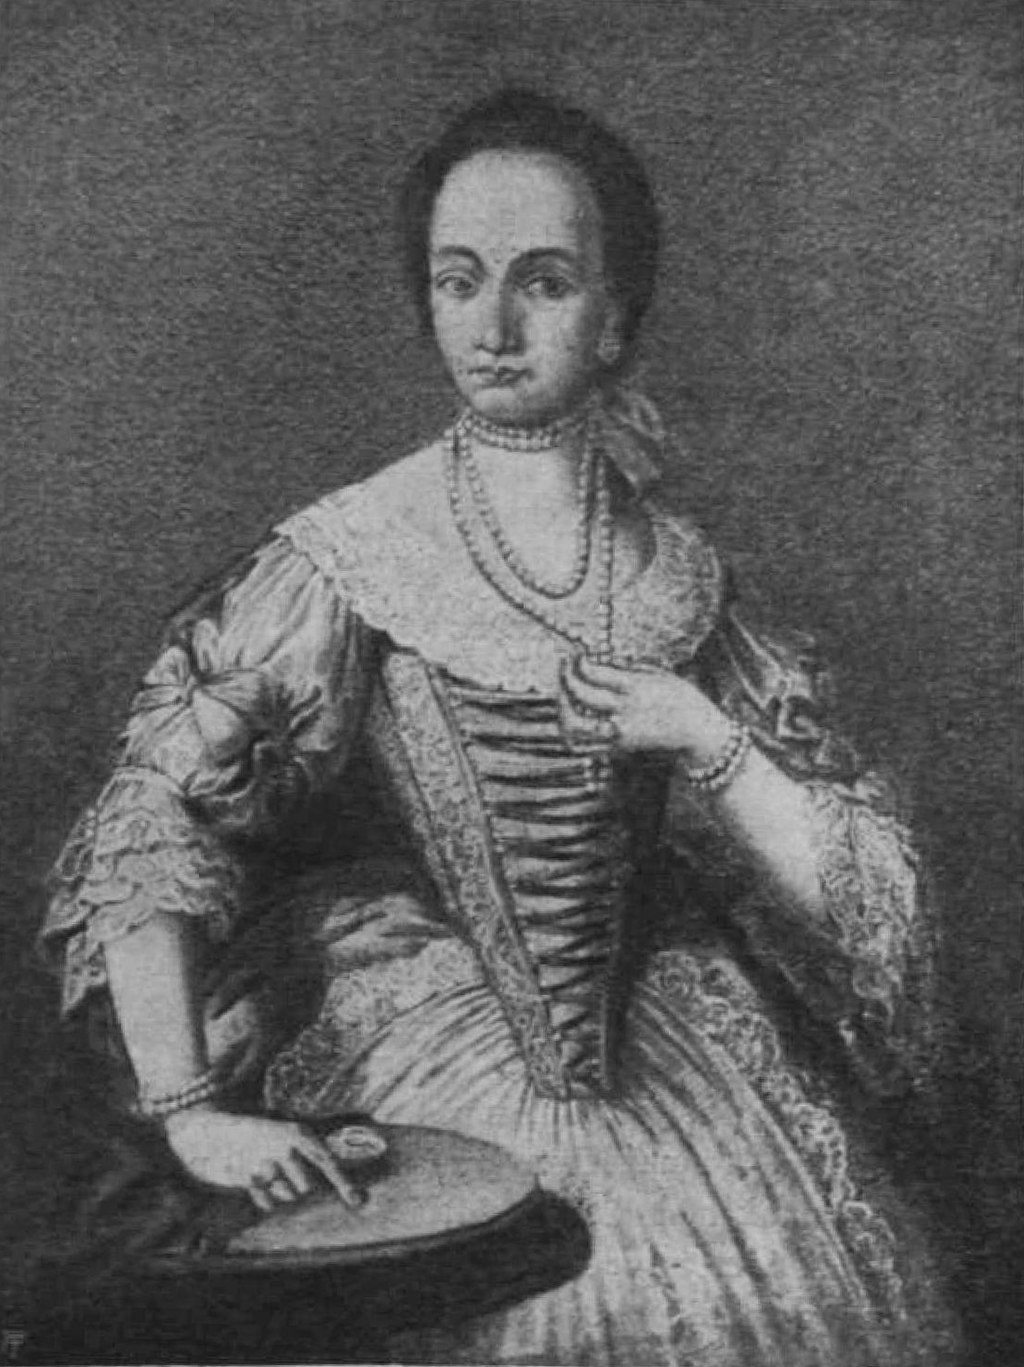
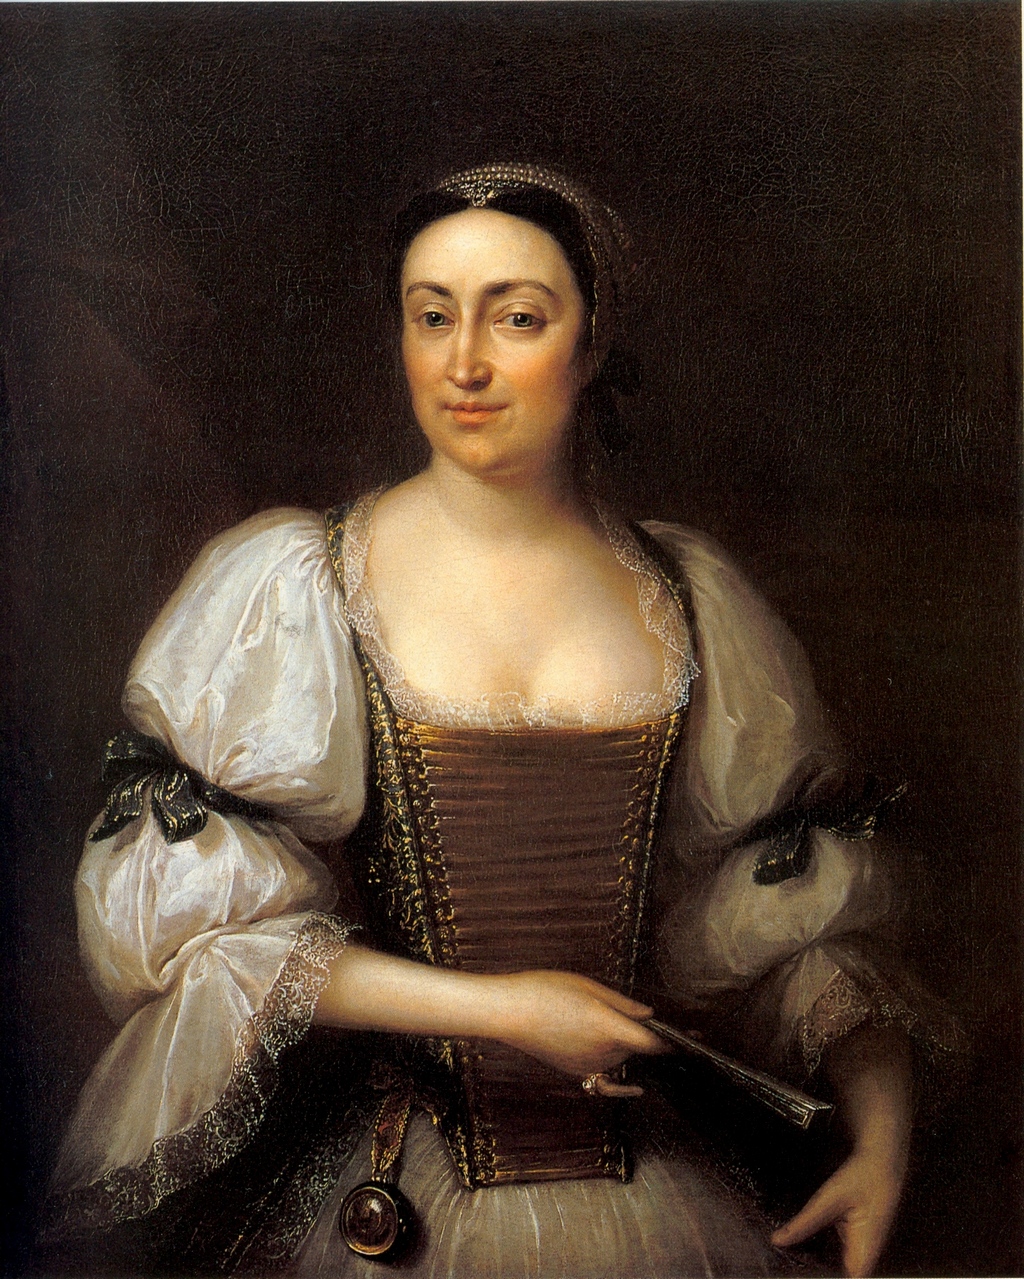
Sibrik Antalné felsőeőri Bertha Klára (1748-1772), 1770s
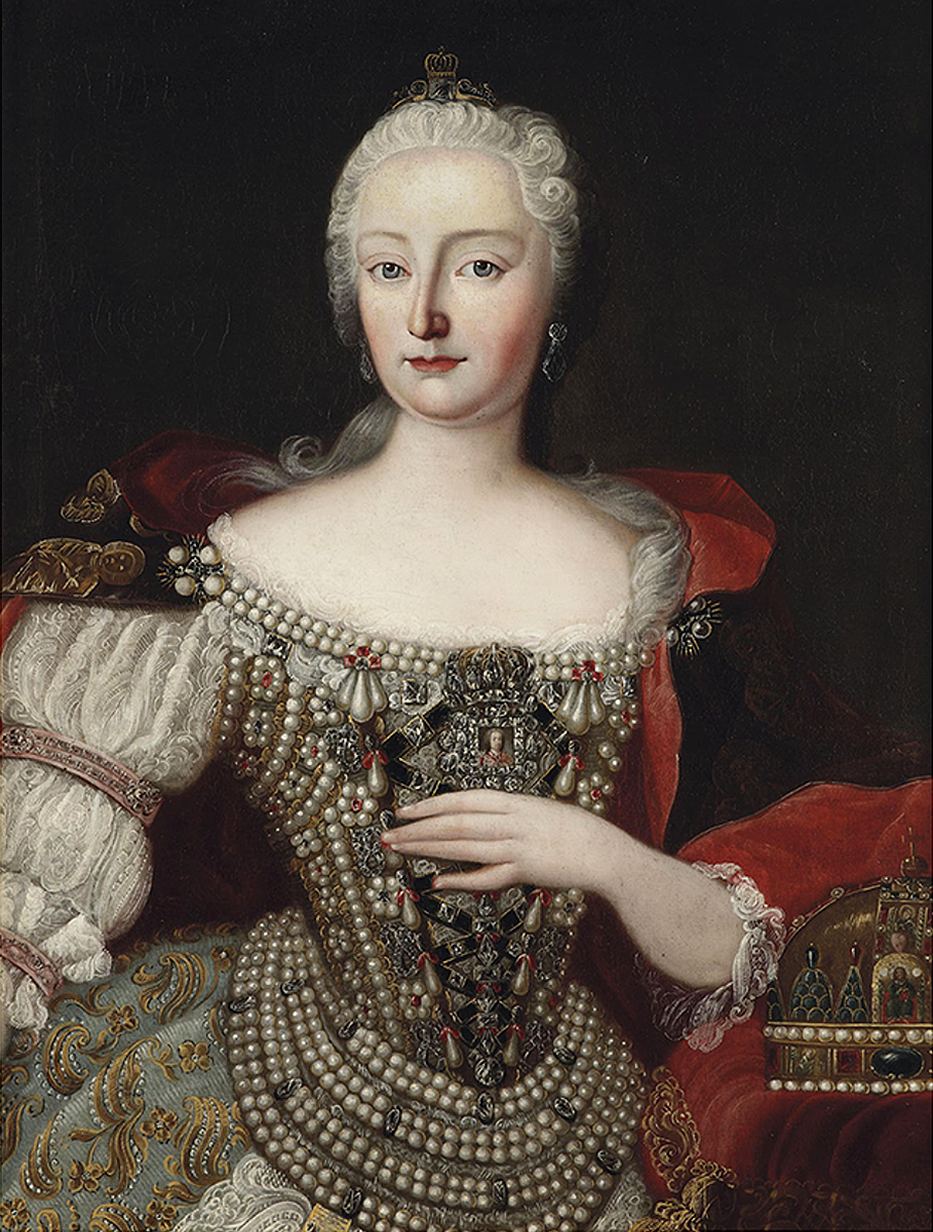
In their turn, Hapsburg royals, like Alexandra Pavlovna, wore Hungarian dress when in Hungary, and had their portraits painted in it
Archduchess Alexandra Pavlovna of Austria, Princess of Hungary and Bohemia (1783–1801), née Grand Duchess of Russia in traditional Hungarian costume. 1795-1801
Style changes in Hungarian Dress in the 18th century:
In earlier portraits the lacing is usually very dense and often looks functional:
Painting identified as Julianna Géczy Korponayné (c. 1680 – 25 September 1714) “the white lady of Lőcse”. Date unclear, although it appears to show 1780s styles.

Costumes of the Hungarian aristocracy, 18th century, Hungarian National Museum

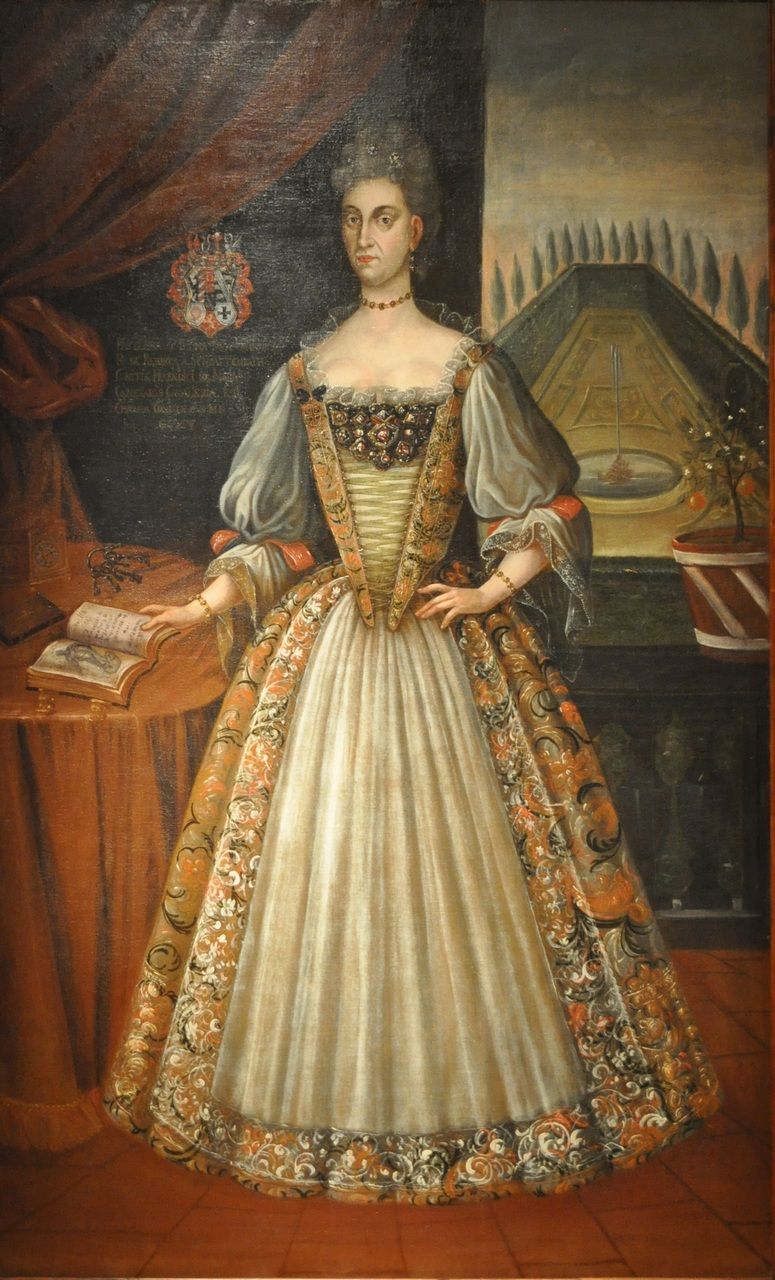
Stephan Dorfmeister (1729–1797) Portrait (possibly posthumous) of Borbála Barkóczy (1699-1772). Second half of the 18th century.
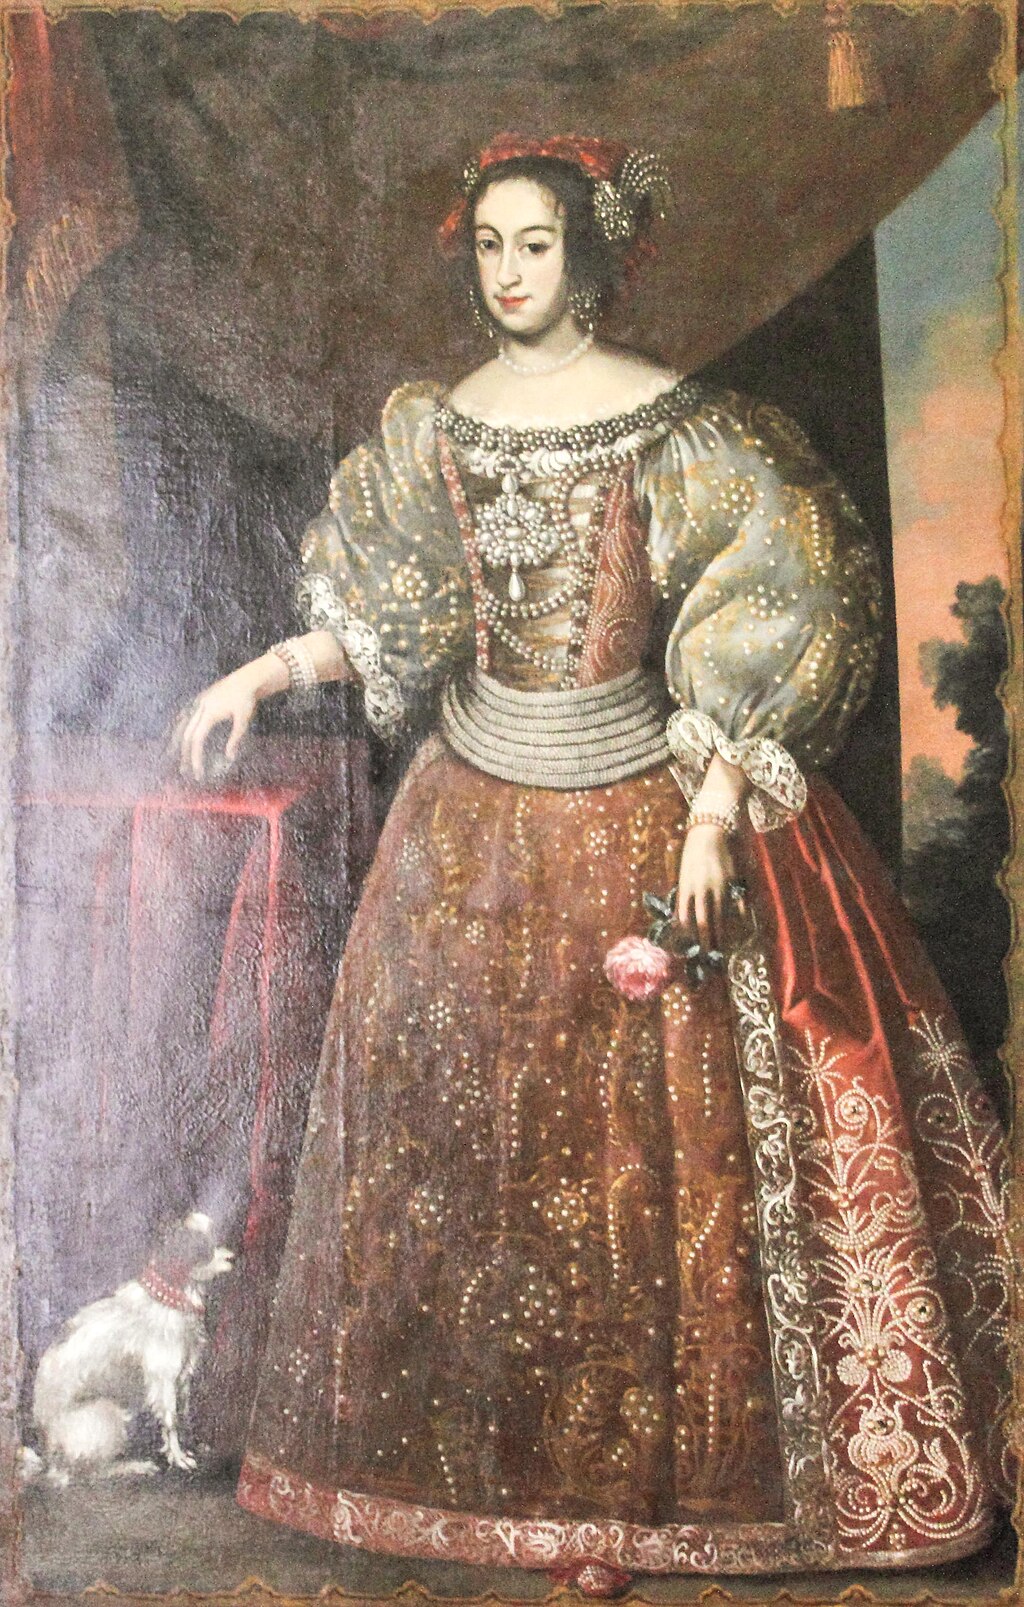
But by the end of the 18th century there are portraits and extant examples where the lacing is clearly purely decorative. Decorative lacing worked in jewels appears on all of the portraits of Maria Theresa as Queen of Hungary, and Alexandra Pavlovna appears to have diamond laces.
Walburga has pearl lacing, combining the laced bodices with the draped pearls of earlier portraits:

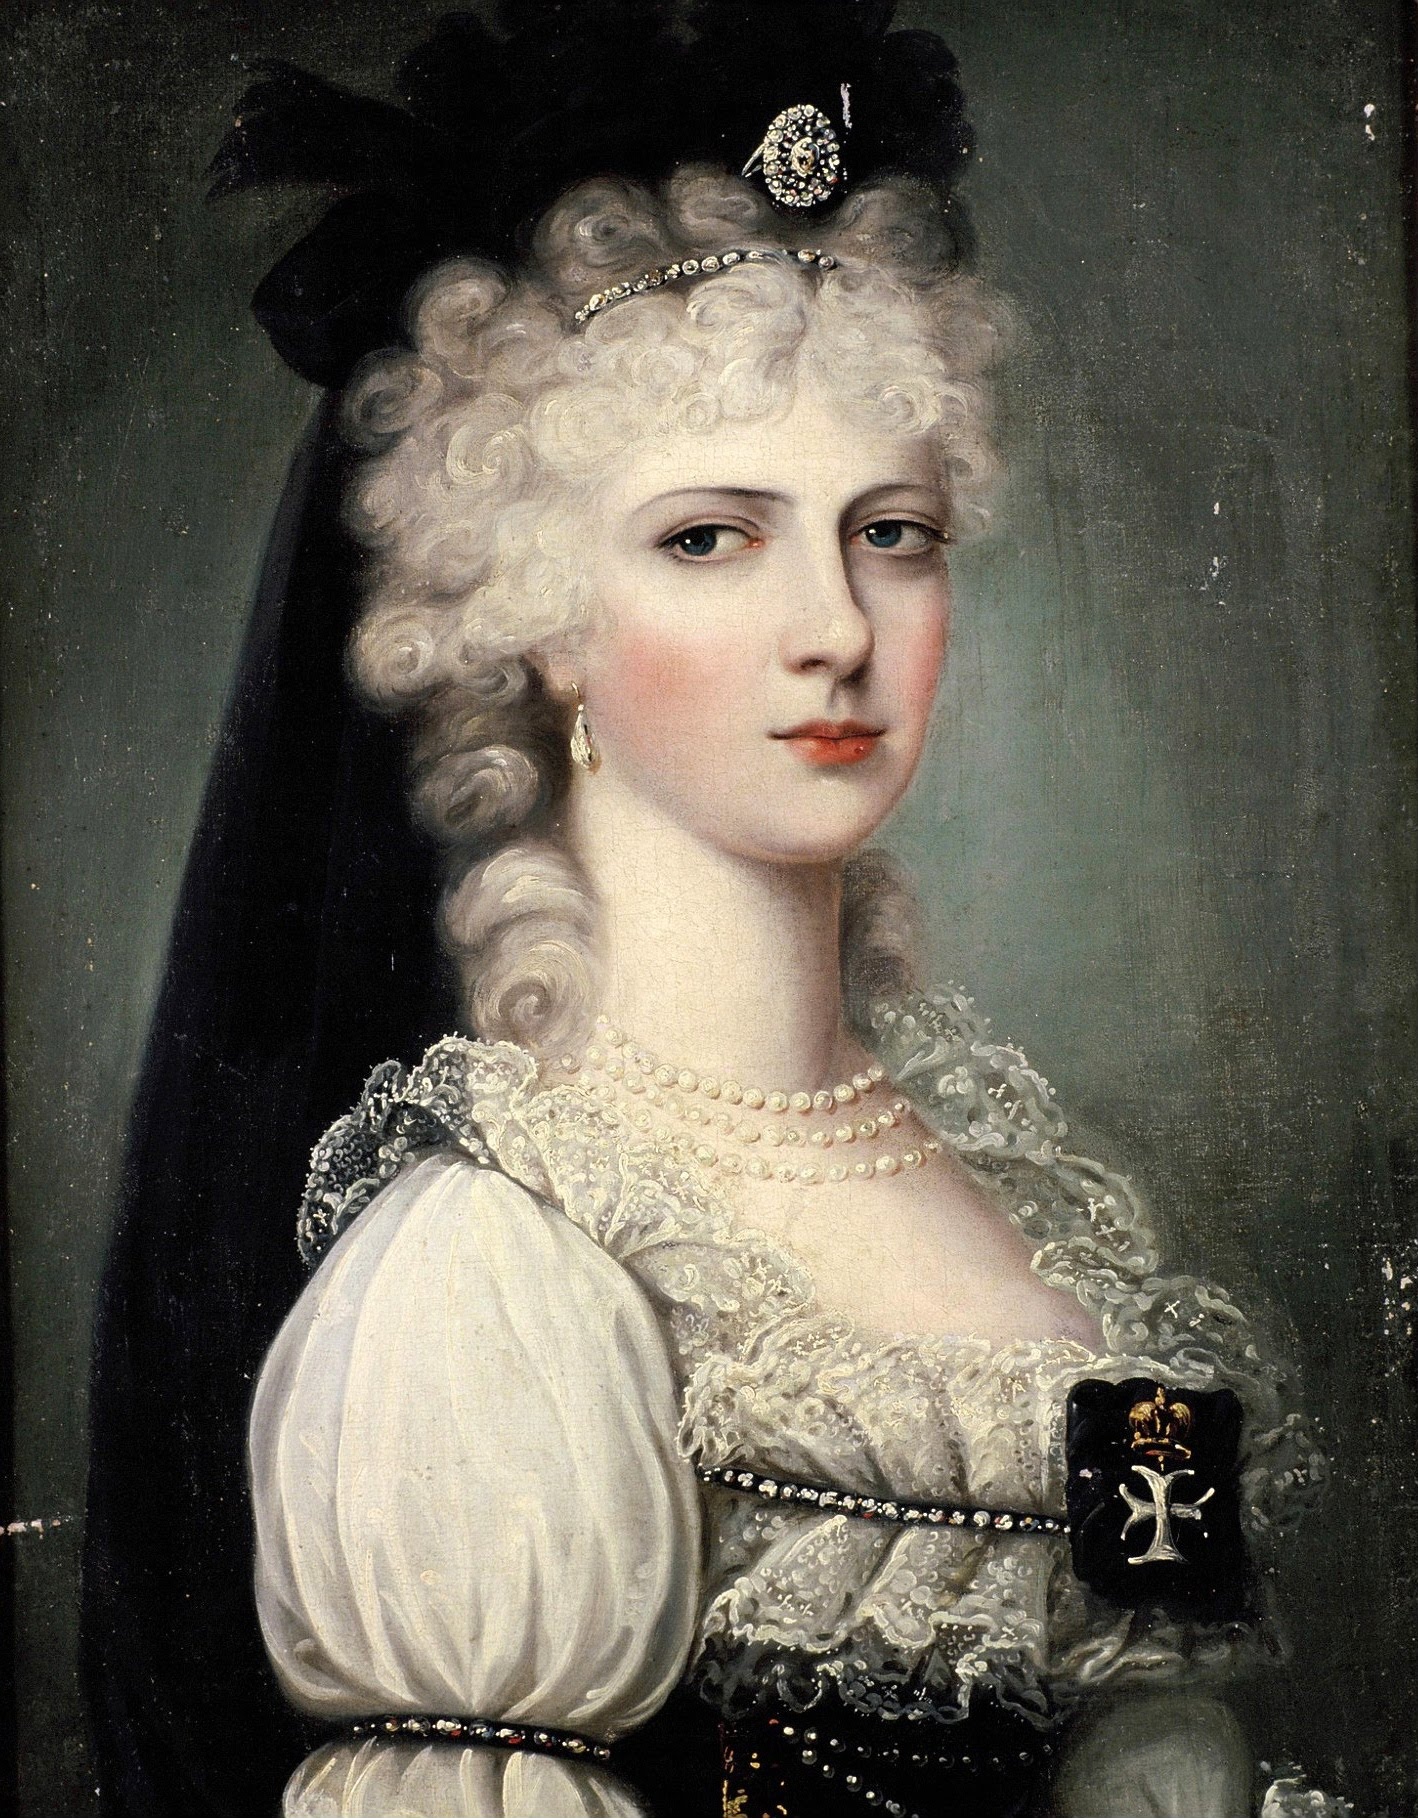
Portrait of Walburga Csáky (1762-1797), wife of József Andrássy (1762-1834), ca 1790

Portrait of Walburga Csáky (1762-1797) and her son Károly Andrássy (1792-1845), 1794
Next up:
Hungarian court dress in the 19th century, including that dress (iykyk)
All images from Wikimedia Commons