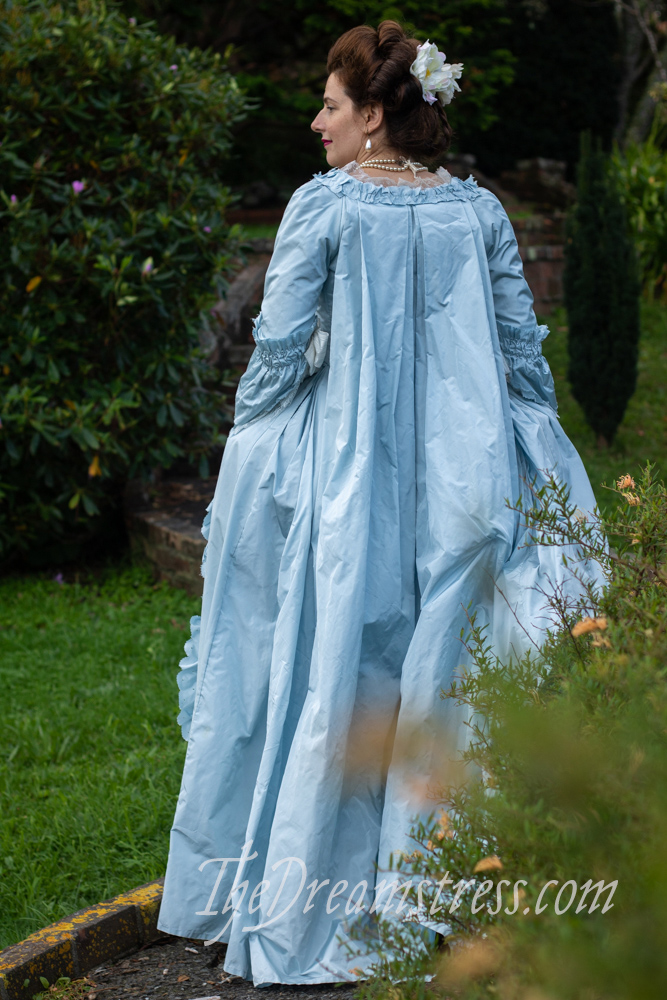
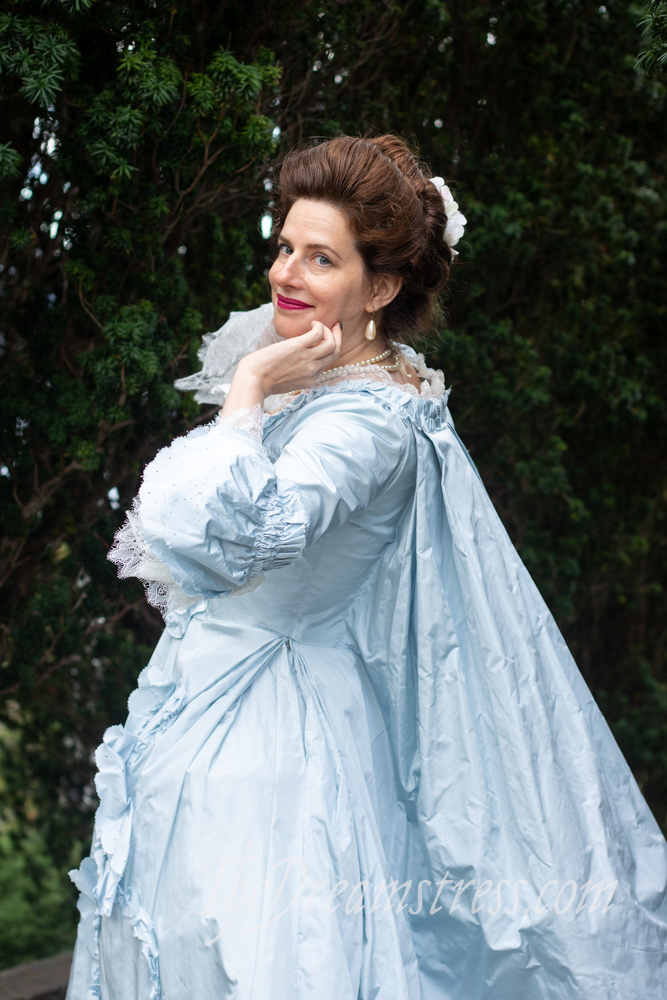
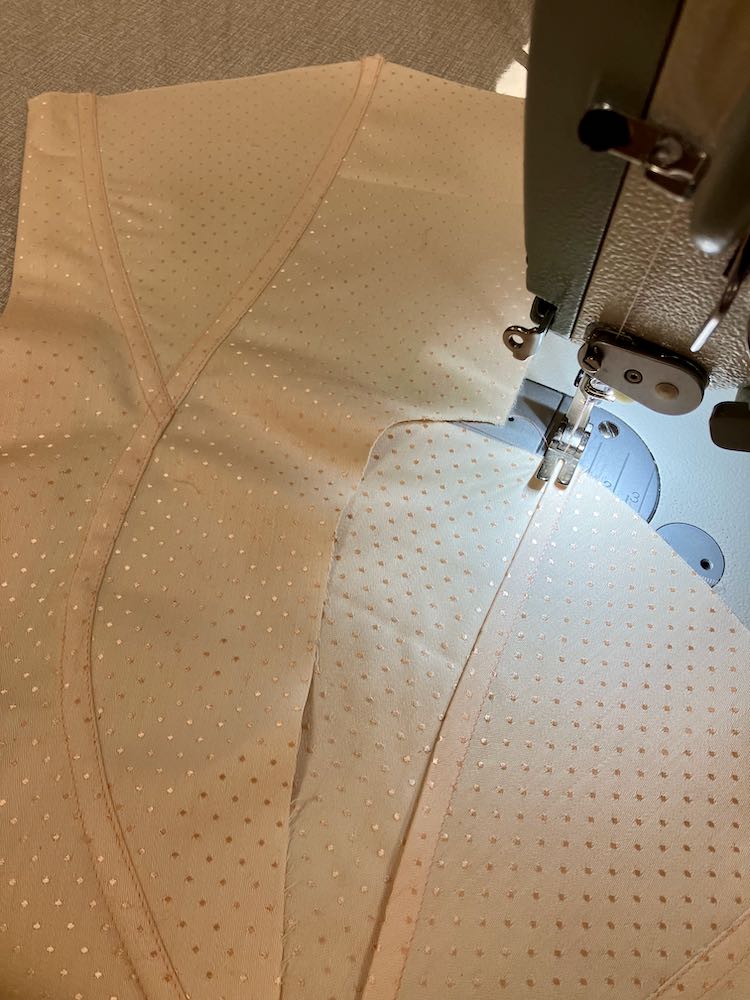
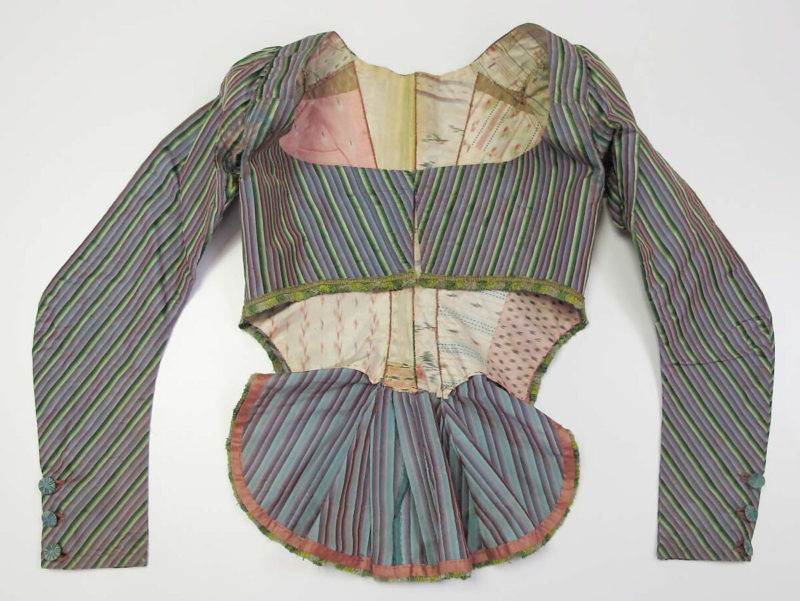
The sleeve patterns for the Scroop + Virgils Fine Goods Amalia, Angelica and Aidah patterns all give the option to cut the sleeves on the vertical or horizontal grainline. This might not be obvious in most fabrics, but it makes a huge difference when you’re working with stripes.

Why do we include both options? Because the 1770s-90s are a time of experimentation and transition in cutting and patternmaking techniques. In the first 3/4 of the 18th century women’s sleeves are almost always cut so stripes run horizontally across the sleeves. However, in the last quarter of the 18th c both grainlines are used, so stripes can run either way.
Let’s take a look at striped sleeves in 1770s-1790s dresses and jackets, and see how they are used:
Note: for all of these I’ve relied on the museum’s dating. I’ve indicated where I think a more precise, or alternative, dating is more likely.
1770s:
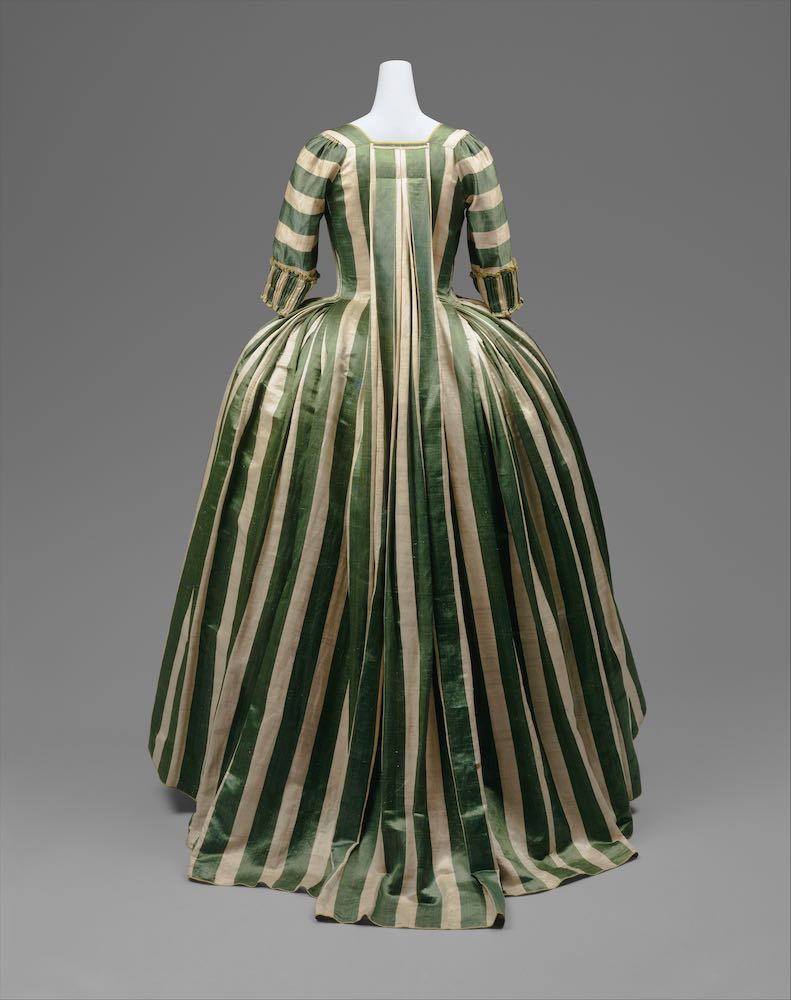
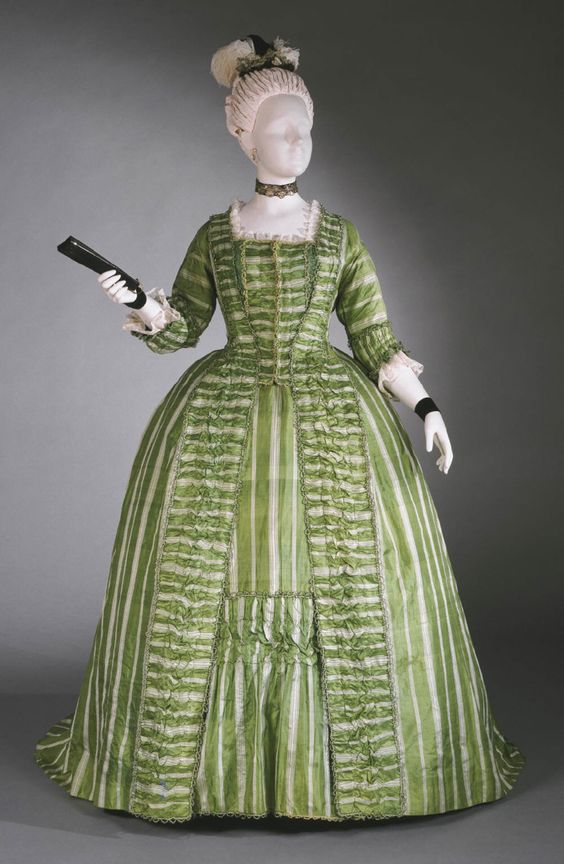
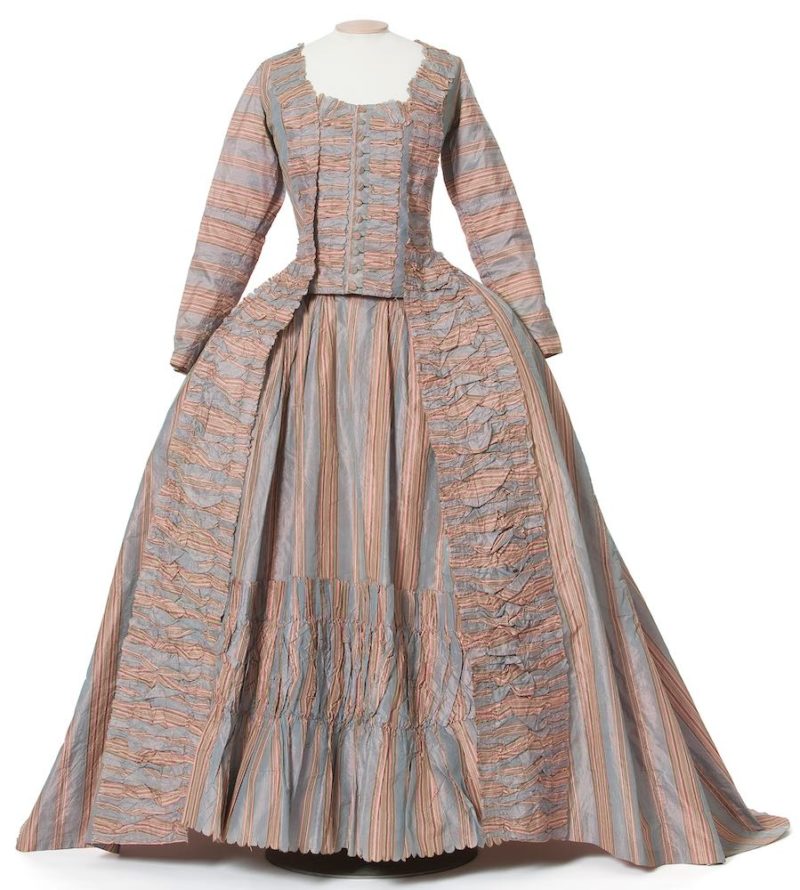
For most of the 1770s, sleeves are cut so that the stripes run around the arm, and up and down the skirts and body:

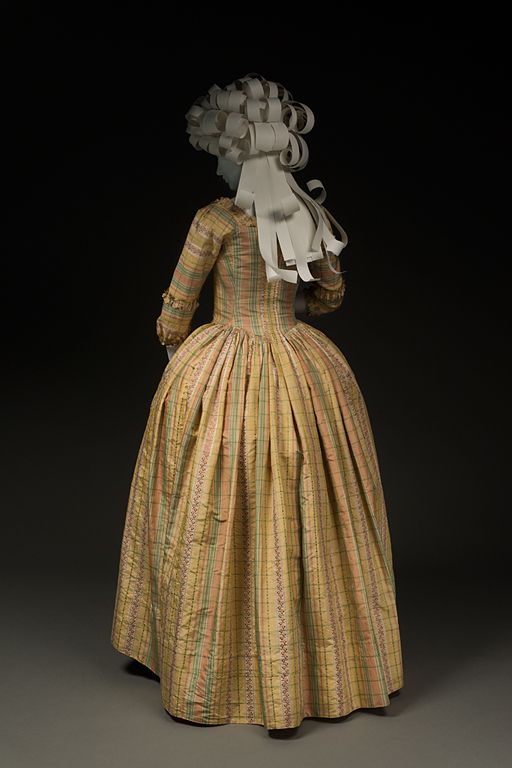
A woman’s sack and petticoat, English, 1770-75; purple and white striped silk with flowers, Spitalfields or French, 1770-75, Victoria and Albert Museum, T.161&A-1961
Robe a la Francaise 1770-1780 The Philadelphia Museum of Art
Robe à la française, manteau de robe, jupe et pièce d’estomac France, vers 1775 Pékin rayé, lancé, broché soie et lame argent ; gaze façonnée et imprimée, mignardises Achat, 1994 Inv. 994.2.1.A-C MAD, Paris
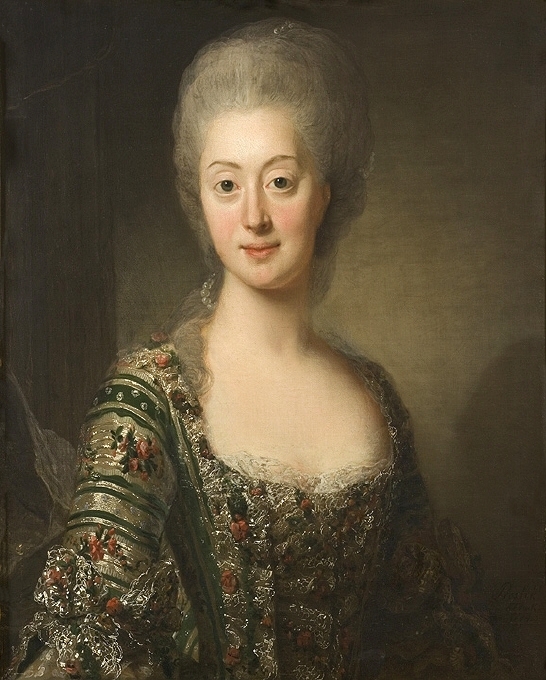
Alexander Roslin, Portrait of Sophia Magdalena of Denmark (1746—1813), c. 1774. Princess of Denmark 1746—1766, Crown Princess of Sweden 1766—1771, Queen of Sweden 1771—1792, NationalMuseum Sweden
Woman’s Robe à la Polonaise (Close-bodied Gown), circa 1775 LACMA
Louis de Carmontelle, Madame la Comtesse de Belsunce, 1775

Portrait of a Woman Drawing c. 1770-1781 Attributed to Catherine Lusurier (French, c. 1753–1781)

Portrait of a Lady by French School, ca 1772-85 France, the Bowes Museum
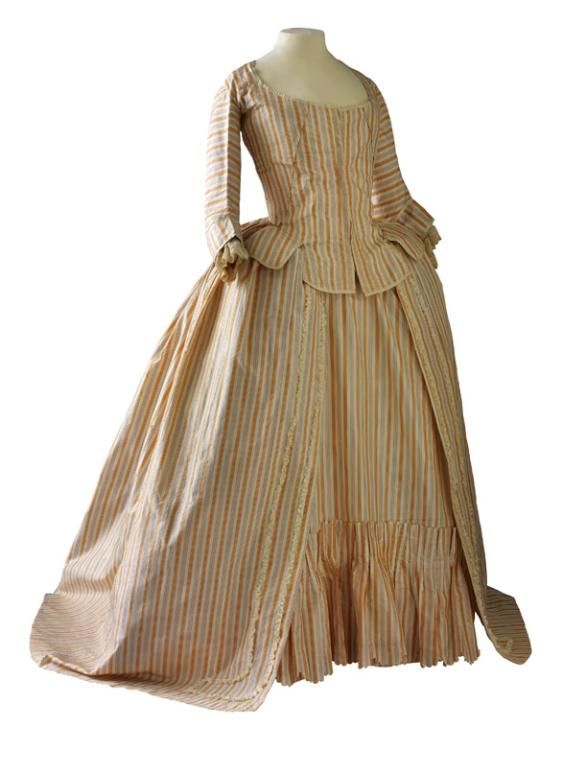
3/4 and elbow length sleeves are most common for most of the 1770s, but horizontal stripes are also used on full-length jacket sleeves (although I suspect this jacket is closer to the later end of its date range):
Rear view, pierrot ou caraco à l’anglaise, France, 1775-1785, Louis XVI. Striped silk mexicaine, rose satin stripes alternating with cream taffeta stripes brocaded with floral motifs and roses
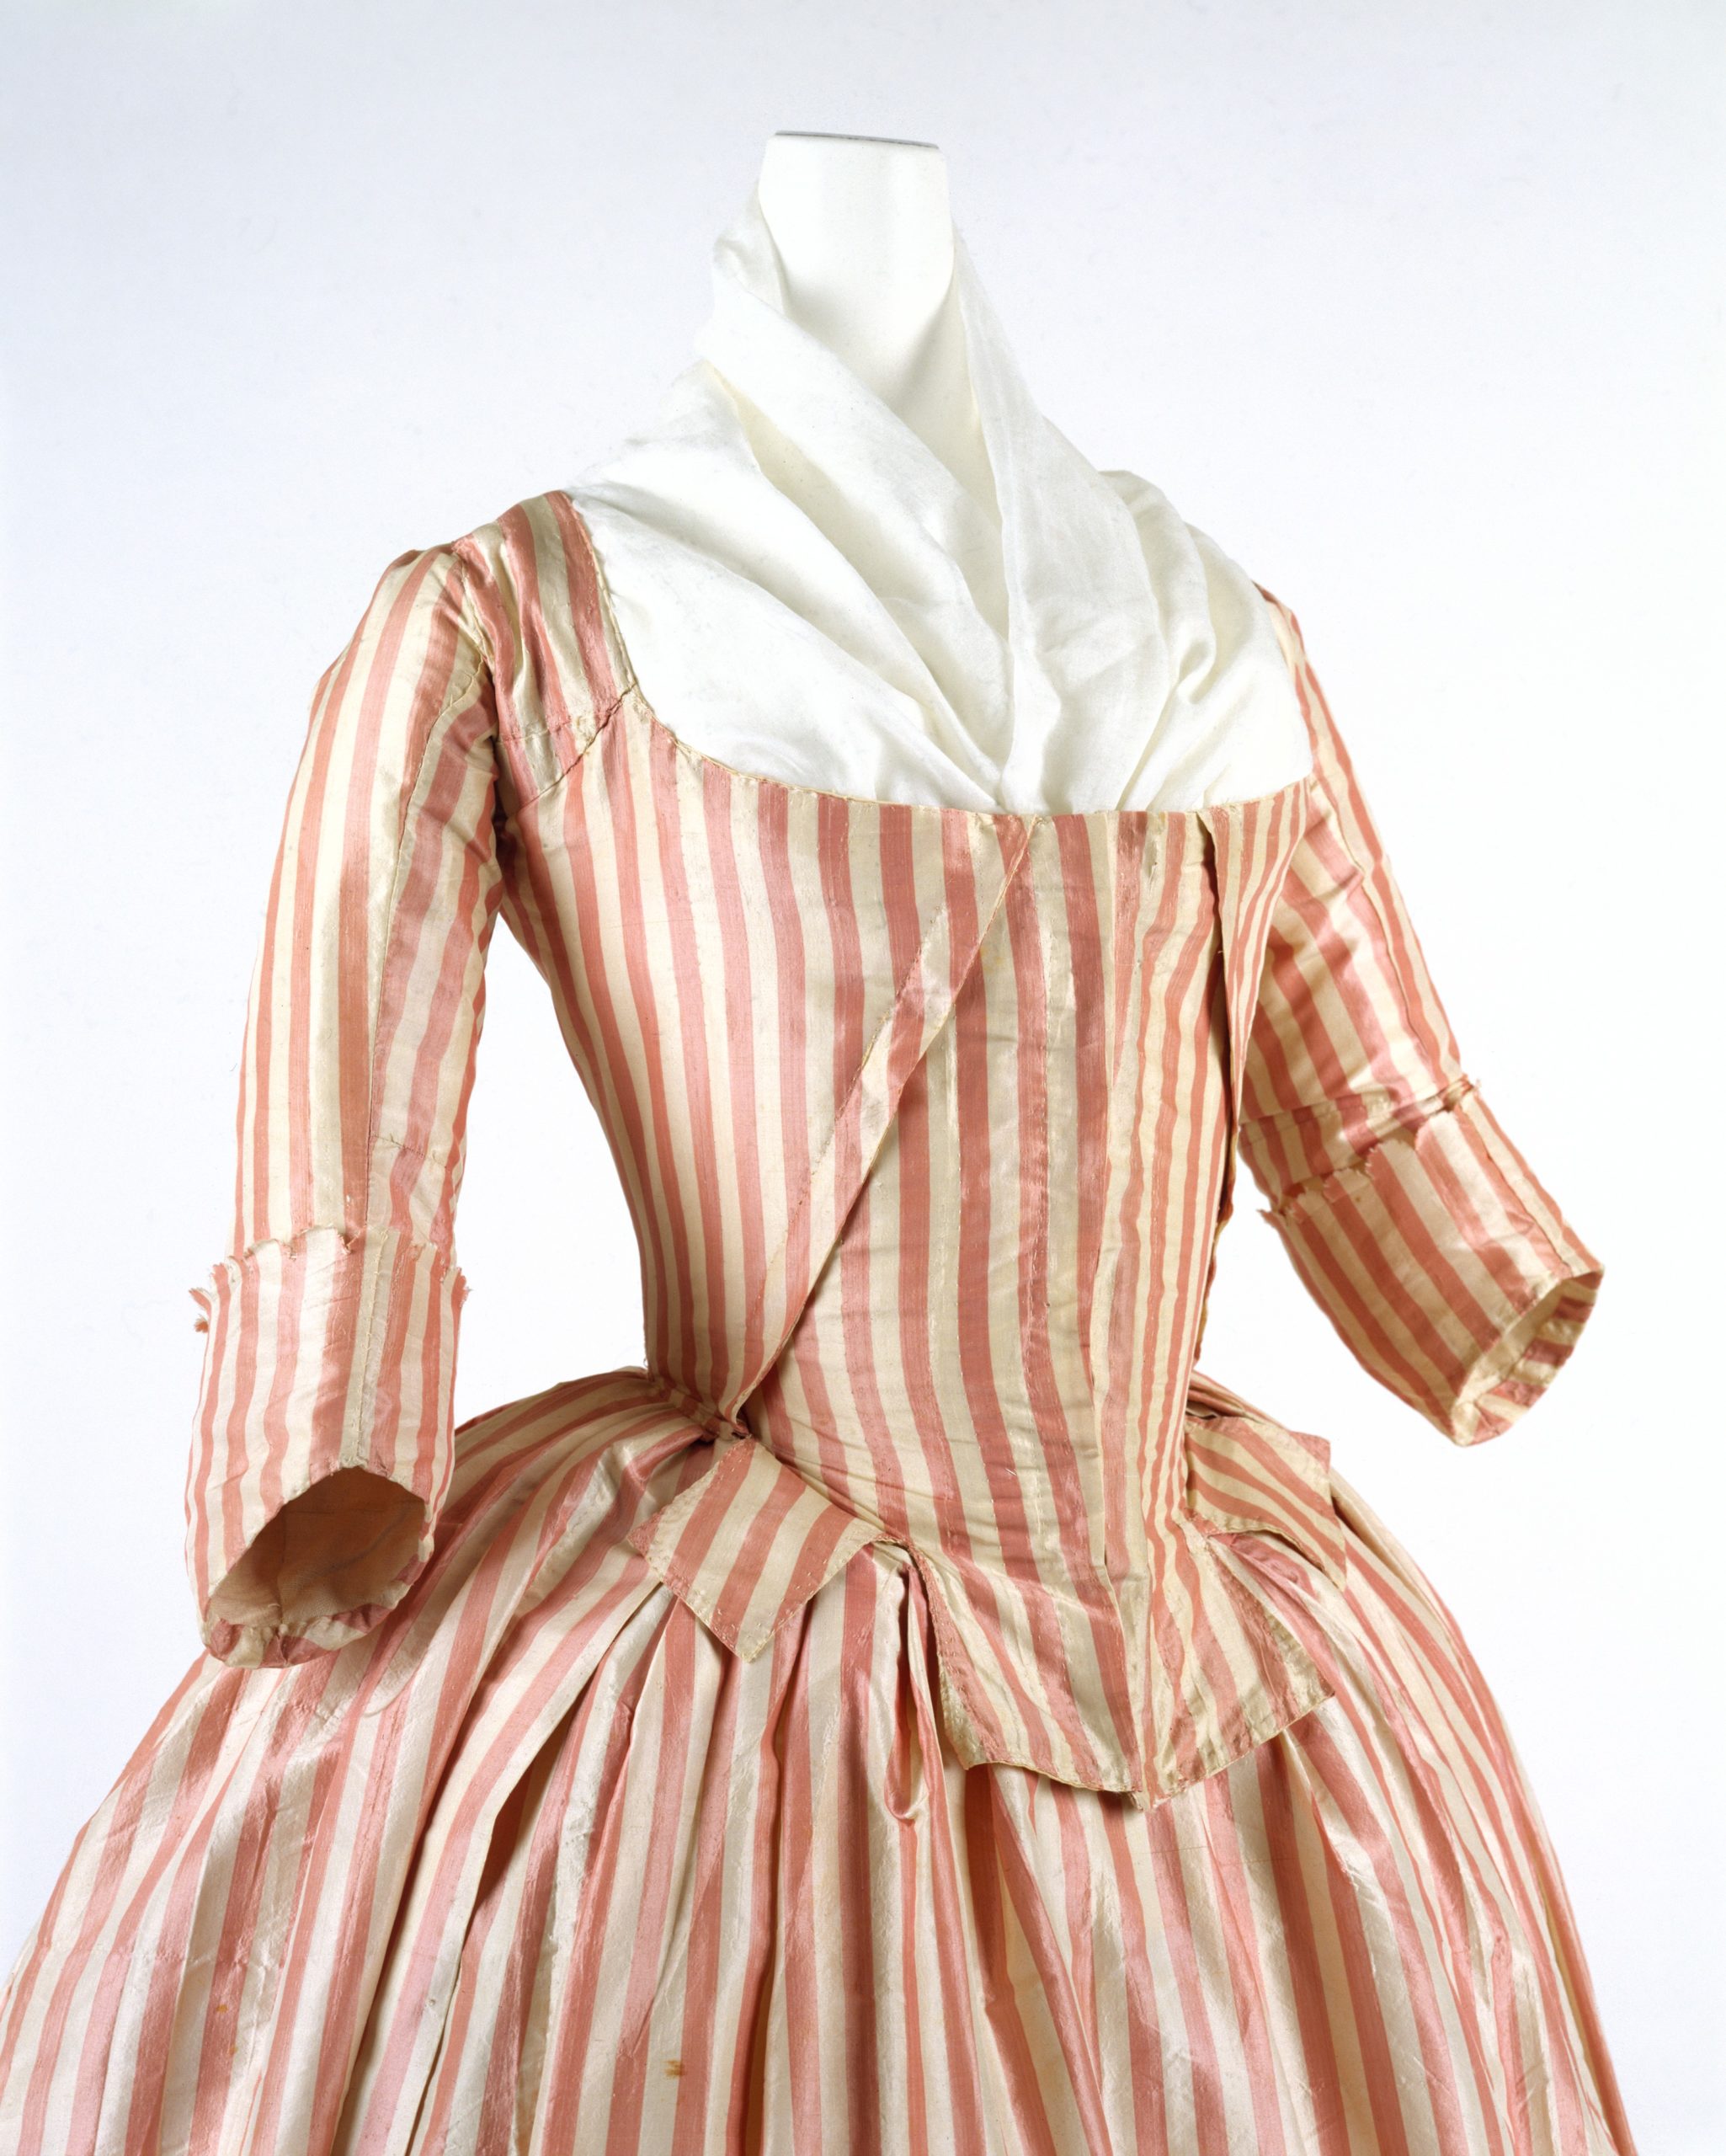
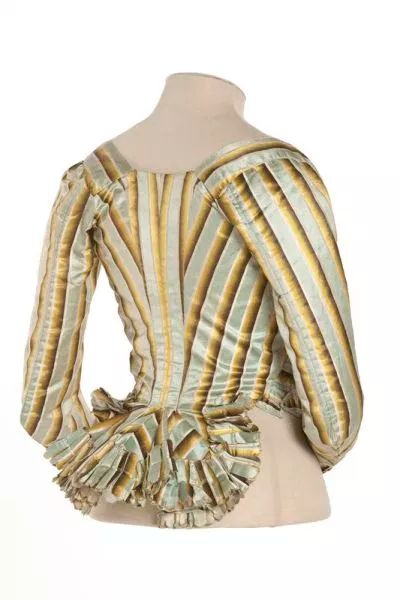
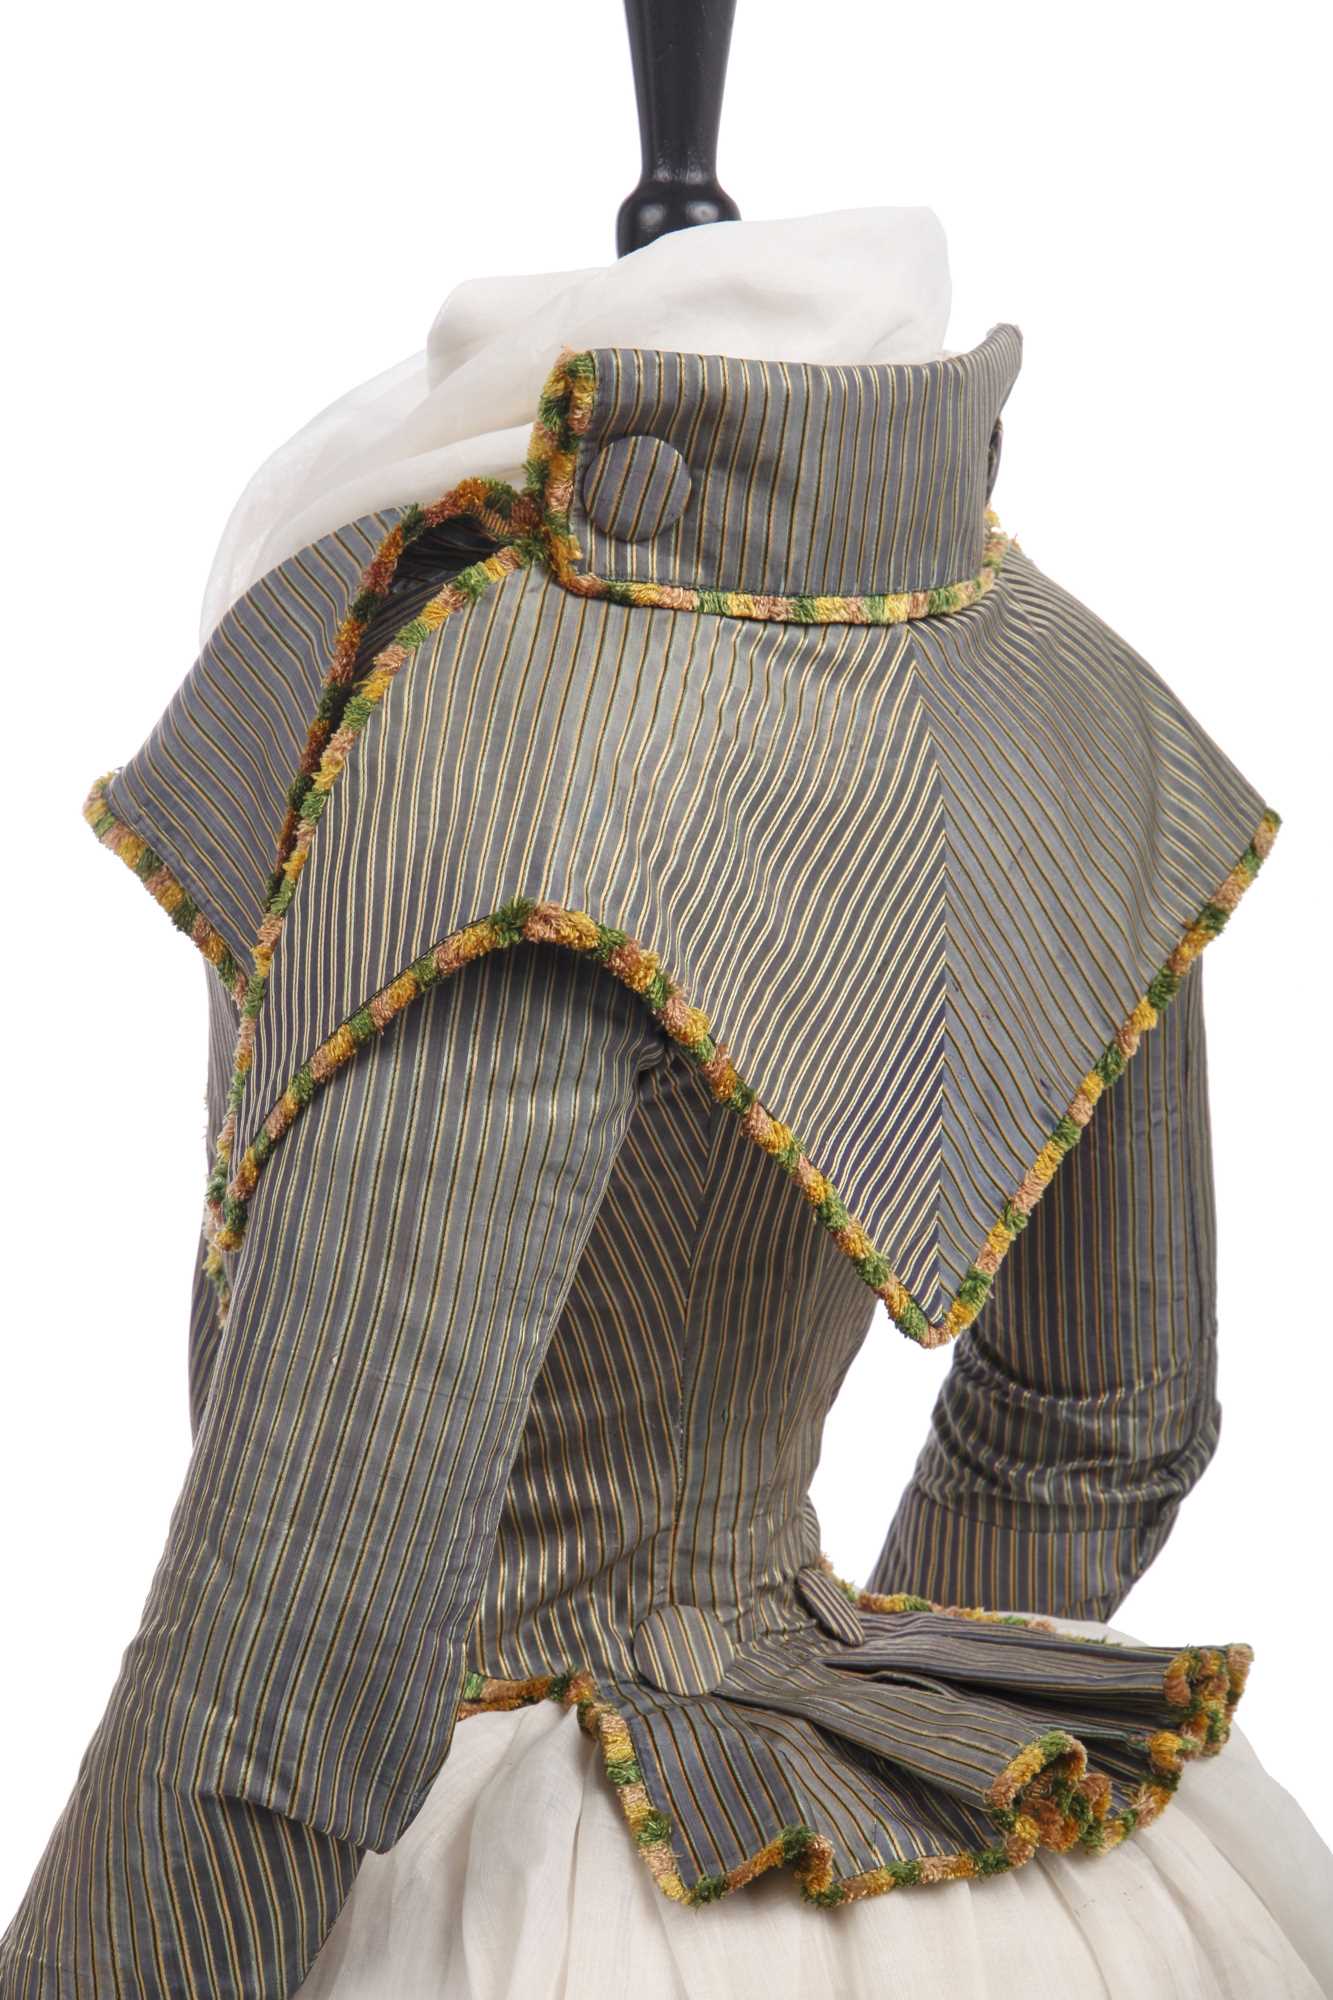
Around 1778 another option emerges: sleeves cut with the stripes running vertically down the upper arm. This means that on dresses and jackets with long sleeves, the stripes run on the bias below the elbow:
Dress, unaltered, 1778–80, French, silk, Metropolitan Museum of Art, C.I.60.40.3
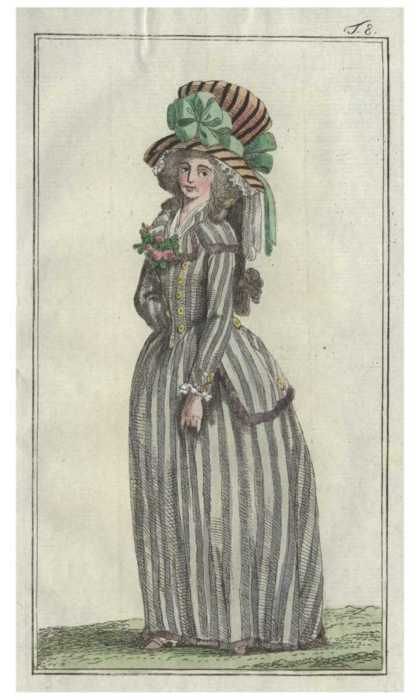
1780s:
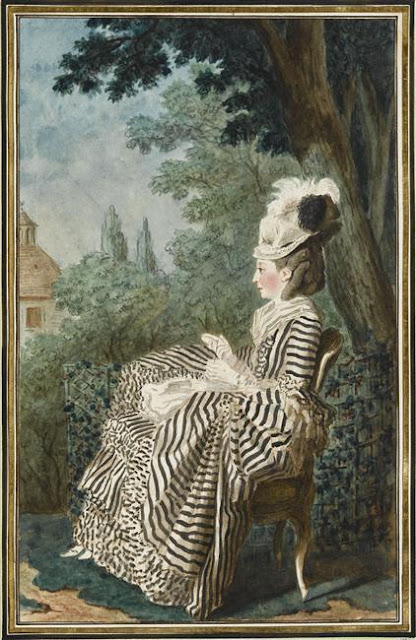
In the 1780s you see both cuts. Horizontal:
Louis de Carmontelle, Mme la Marquise du Dreneux, 1780
And, in this wonderful 1780 image, two very similar gowns, one with horizontal sleeve stripes, and one with vertical:
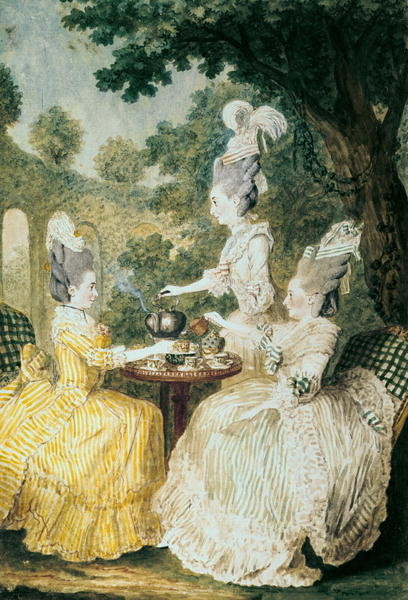
Louis de Carmontelle, La Marquise de Montesson, La Marquise de Crest and la Comtesse de Damas drinking tea, 1780
The number of images of vertically striped sleeves that can be firmly dated to 1780 demonstrate that the cut was well established by that date:

La Jeune Dame en robe bleue, the cover image, is a portrait of an unknown sitter by Adélaïde Labille-Guiard (1749–1803), pastel on paper, 622×510 mm, signed and dated 1780 private collection
It also appears in early 1780s garments:
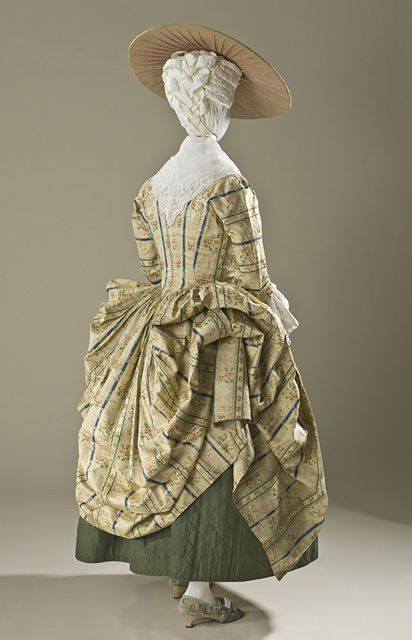
Robe a l’anglaise, ca 1780, France, Museo de la Moda
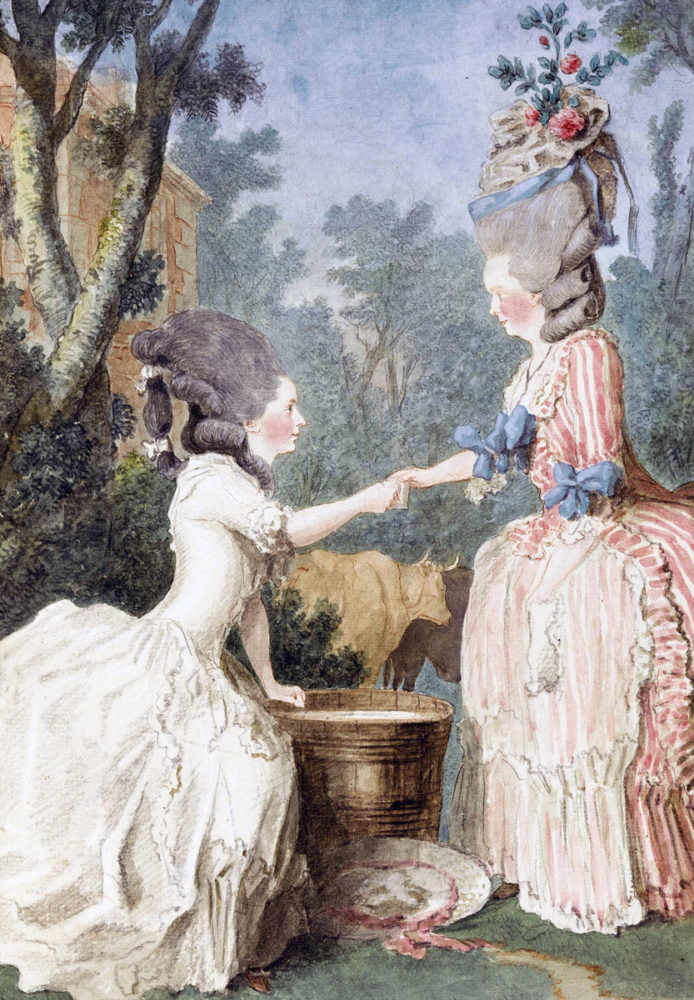
Louis de Carmontelle, The Farm Girls (Madame de la Houze and Mademoiselle de Longueil), ca. 1782. Photo Réunion des Musées Nationaux : Art Resource
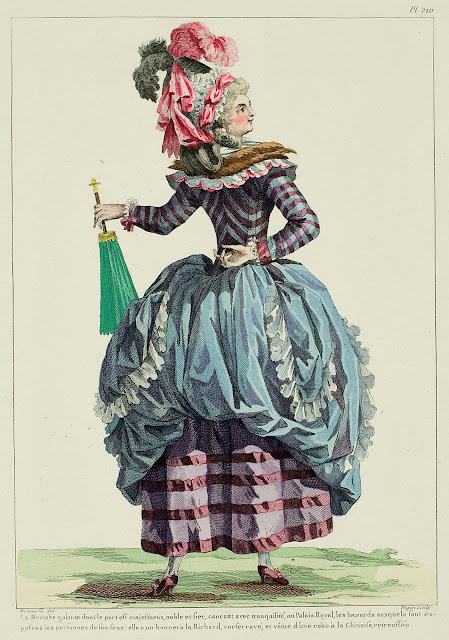
However, there are still images showing horizontal stripes, including in fashion plates which show the most a la mode trends:
Gallerie des Modes et Costumes Français, 1780
And garments with horizontally striped sleeves.
Although this sacque is given a fairly wide date range, the width of the back pleating, use of cotton fabric, and styling of the front of the dress all suggest a mid 1780s date:
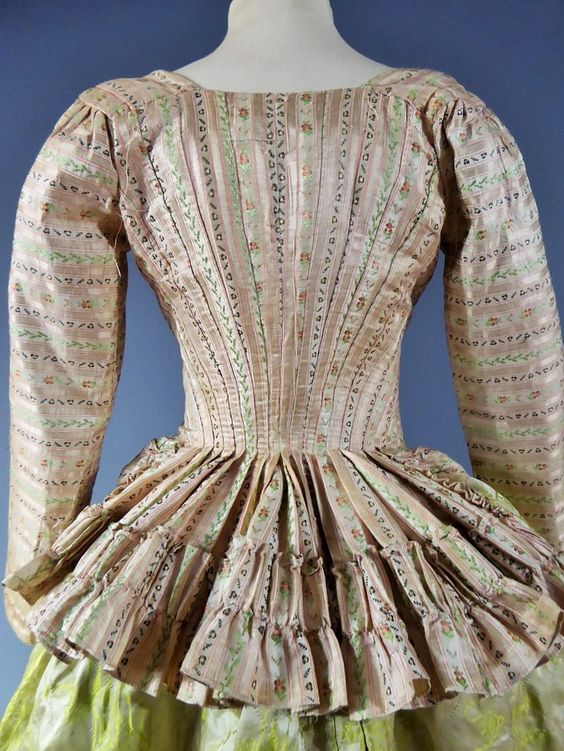
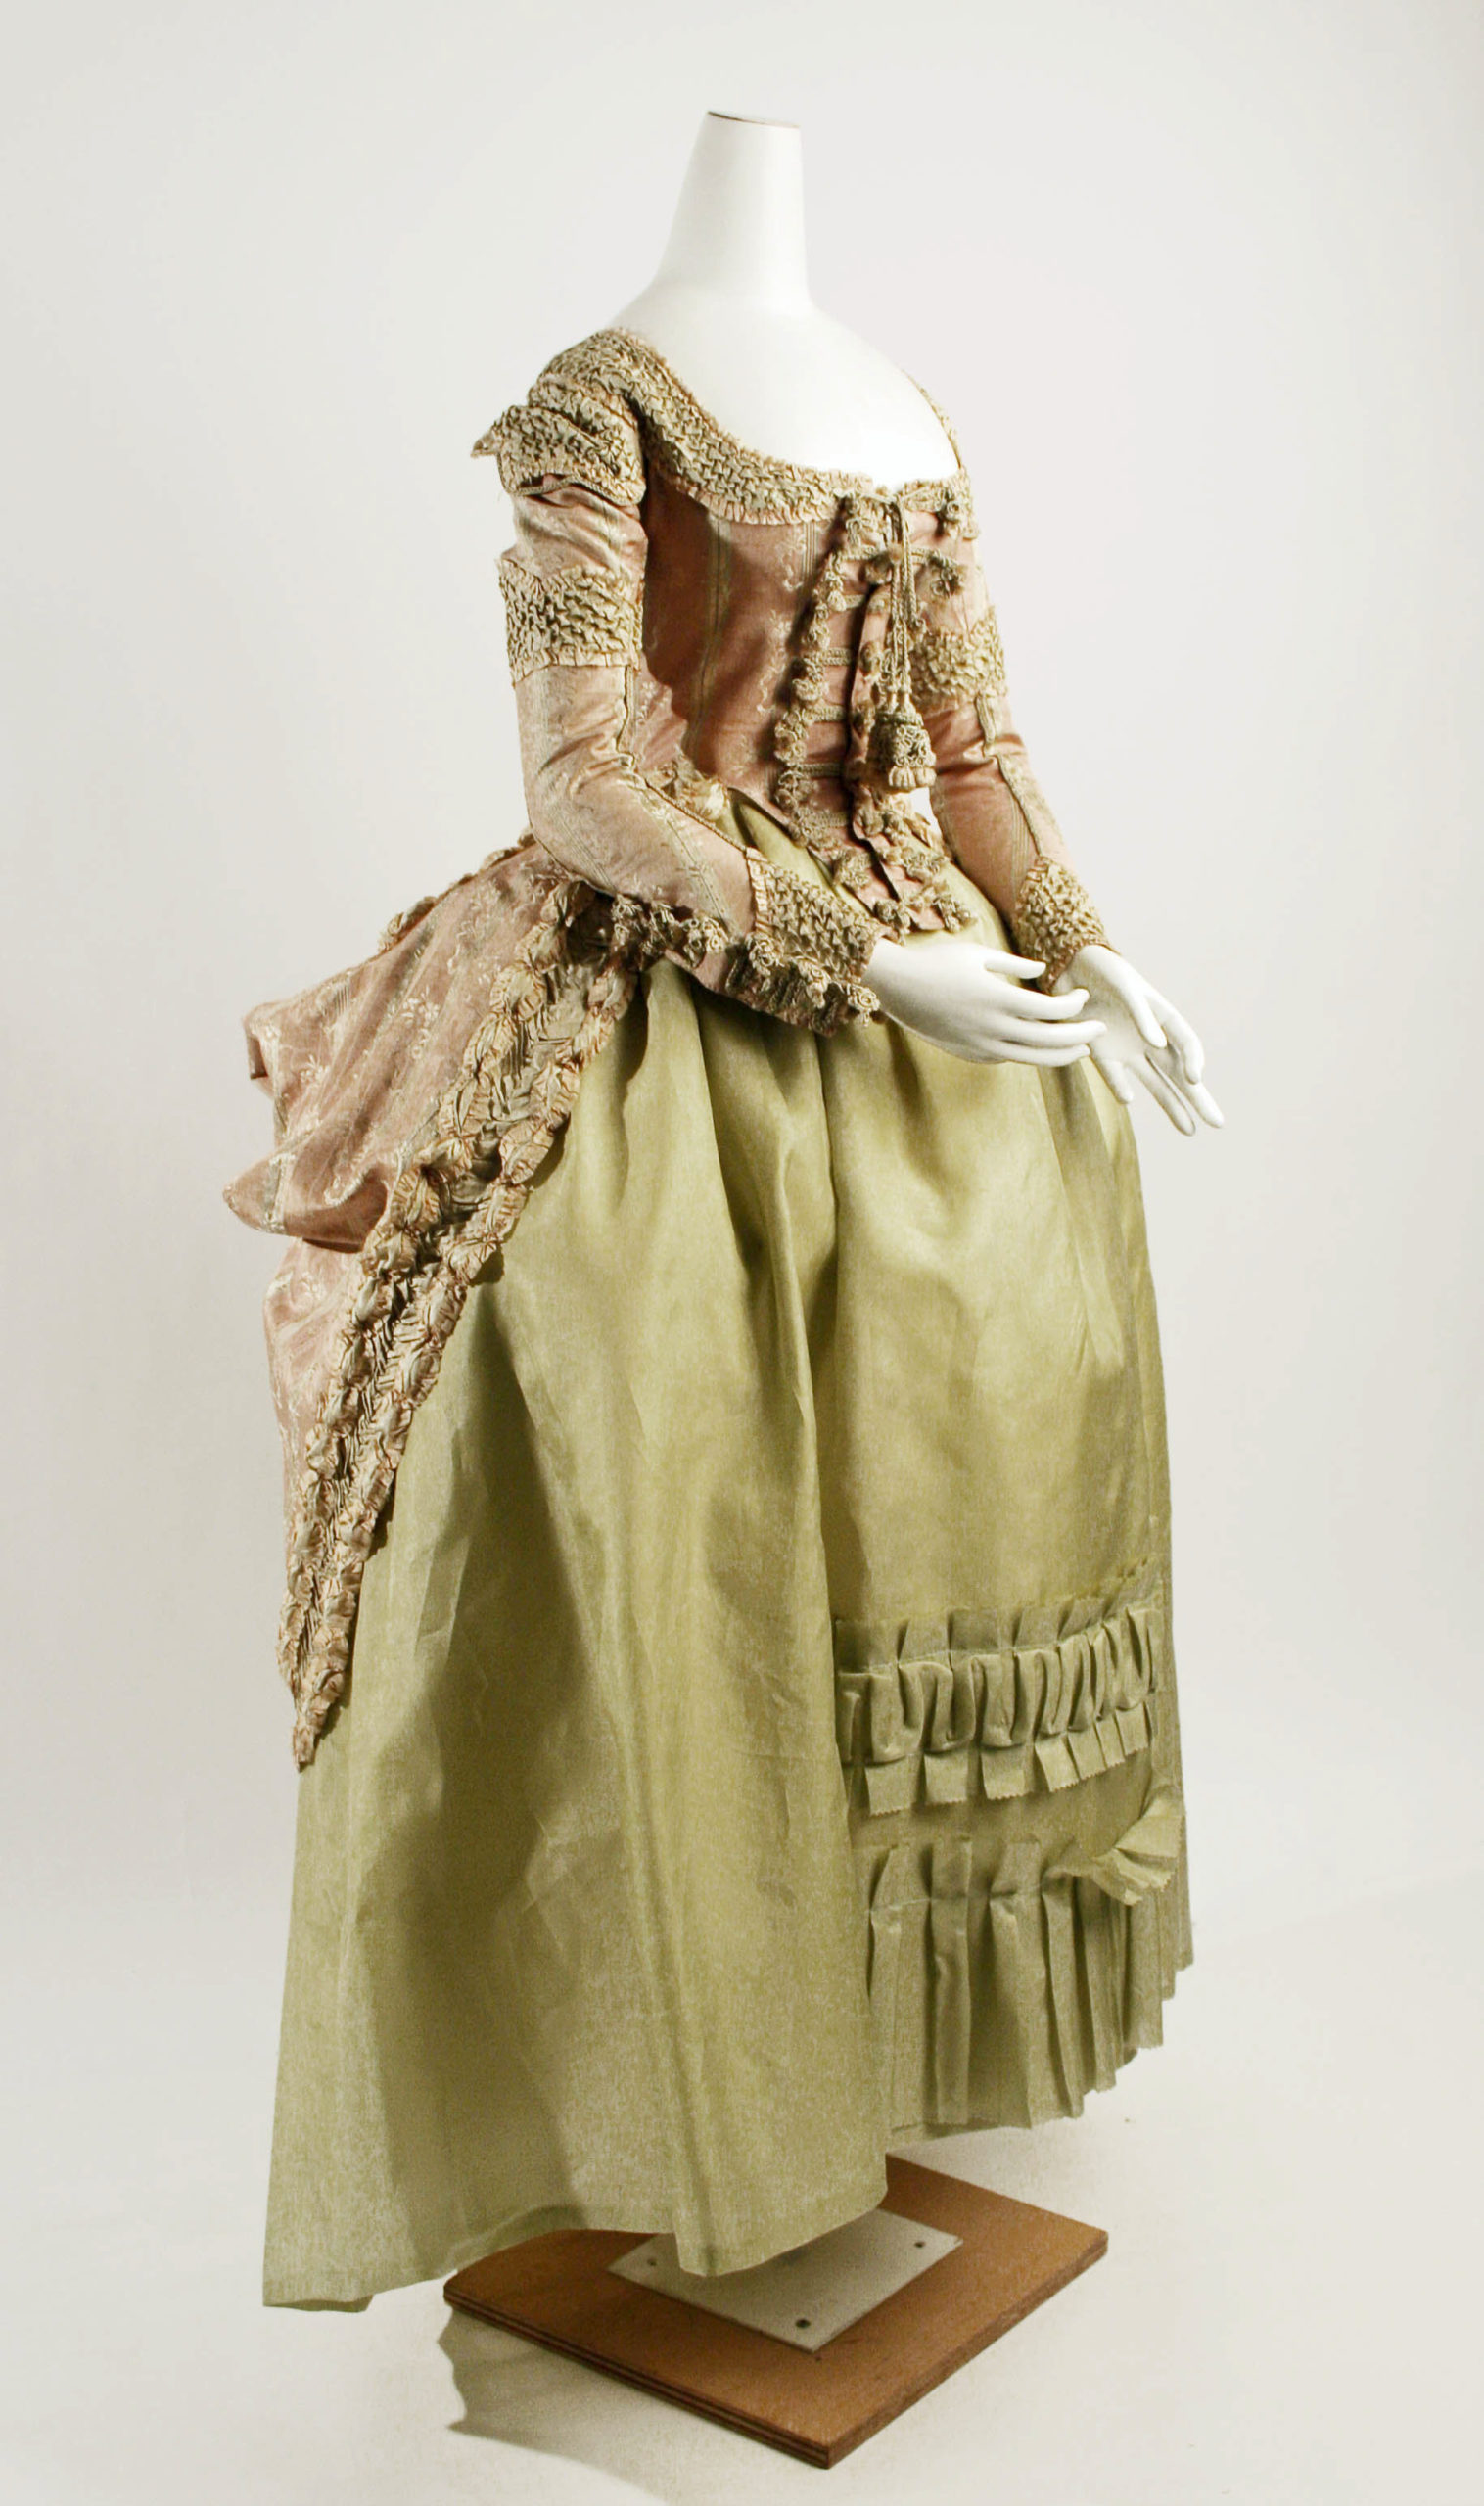
This française, with its unusual long sleeves, and compere front, is definitely a 1780s creation, but, like earlier française, continues to use horizontal stripes:
Robe à la française, France, vers 1780-1785 Taffetas changeant rayé, ombré Achat, 2009 MAD Paris Inv. 2009.2.1-2
As do these two fitted-bodice gowns:

Robe à l’anglaise retroussée, 1780-85 From the Museu del Disseny
Robe à l’anglaise ca. 1780 From the Musée des Tissus et des Arts Décoratifs de Lyon
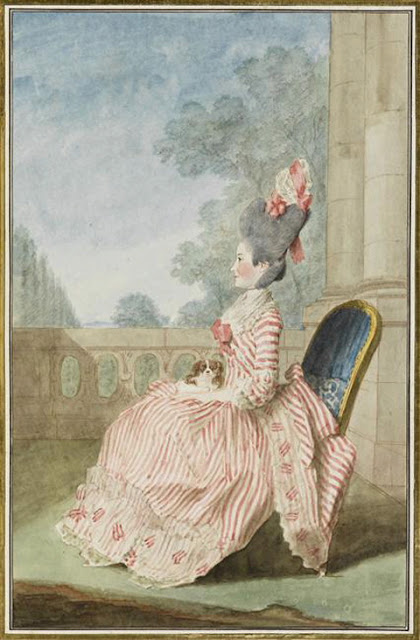
And this very a la modé portrait

Hester Lynch Piozzi (Mrs Thrale), Unknown Italian artist oil on canvas 1785-1786, National Portrait Gallery, London
And these gowns:

Robe a l’Anglaise, ca. 1780-90 via The Mint Museum
Like many 18th century dresses, both of these may have been re-styled from earlier gowns, and would thus have the sleeve cuts of the original 1760s or 70s garments.
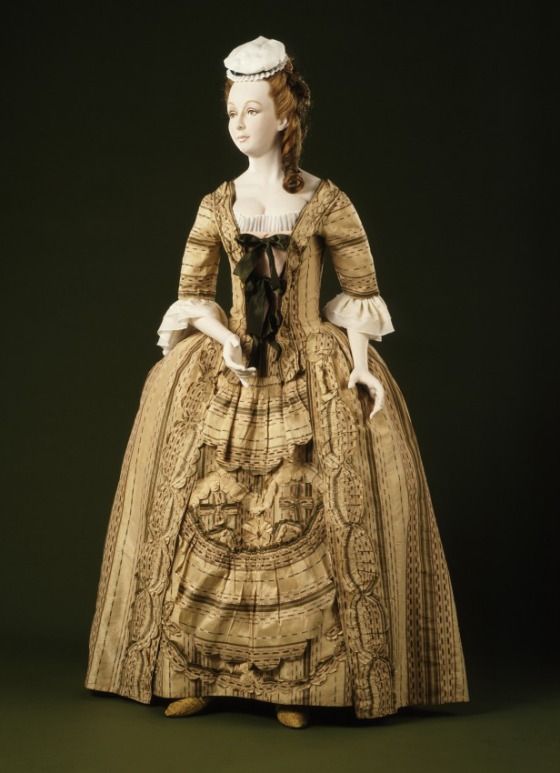
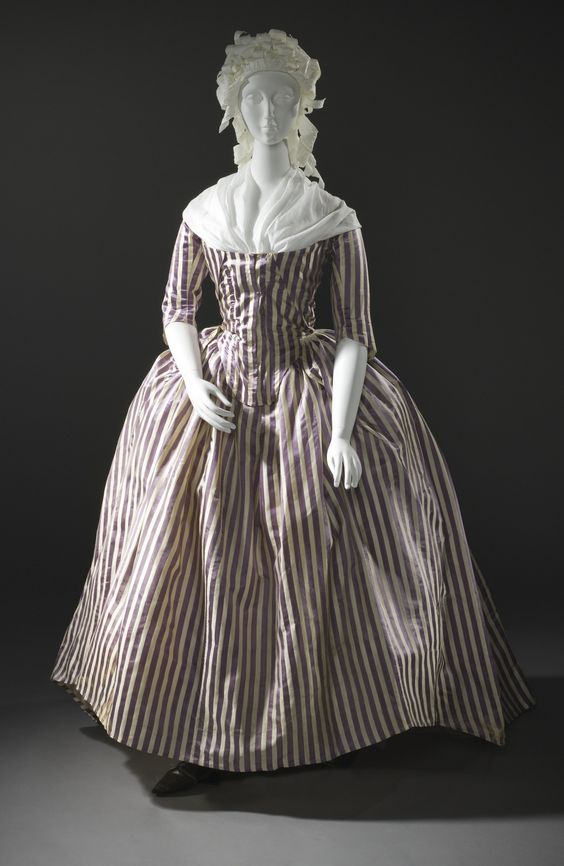
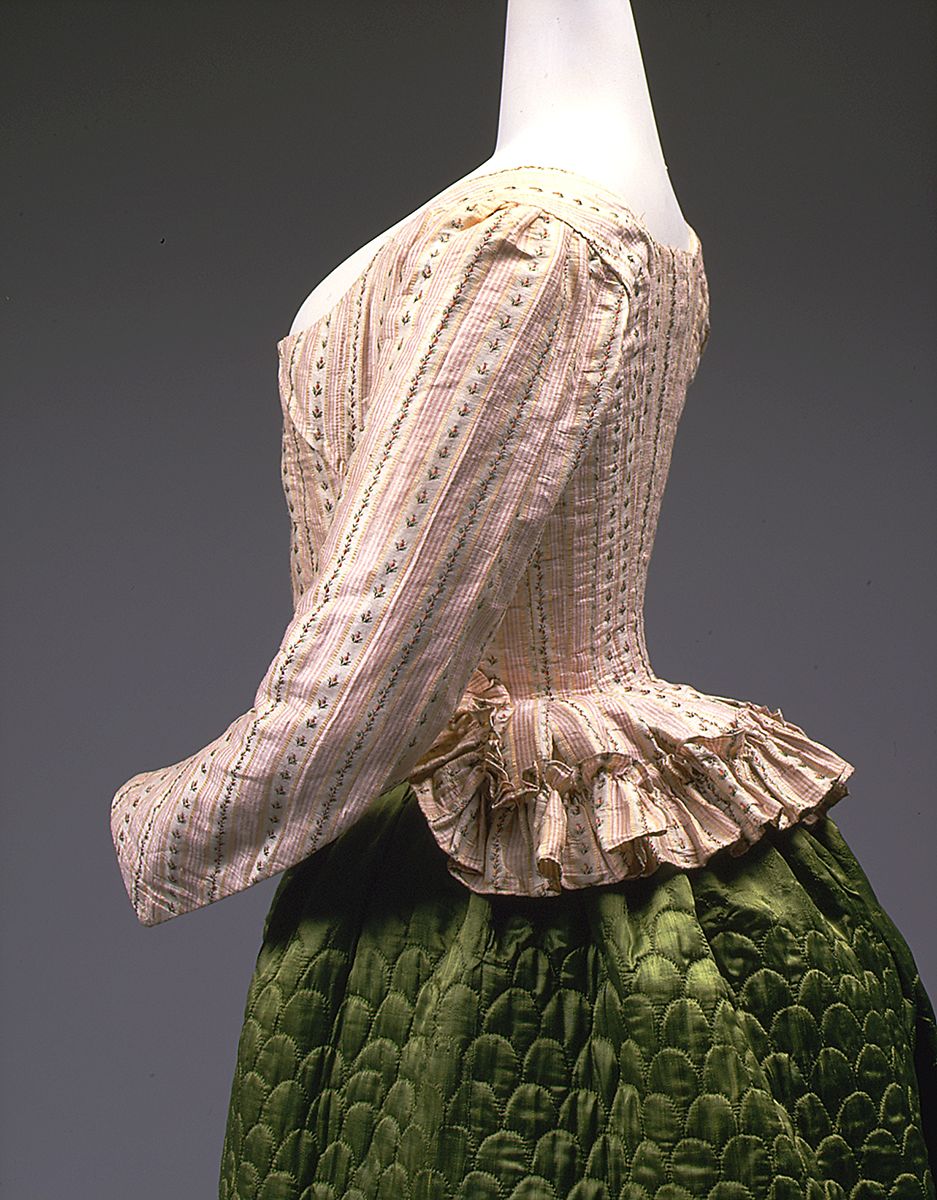
This Italian gown, which was one of the main inspirations for the Angelica gown, has vertically striped sleeves:
Robe à l’Anglaise (Italian Gown), 1780, Italy, Silk, silk thread embroidery, silk gauze, sequins Galleria del Costume di Palazzo Pitti
Robe à l’Anglaise (Italian Gown), 1780, Italy, Silk, silk thread embroidery, silk gauze, sequins Galleria del Costume di Palazzo Pitti
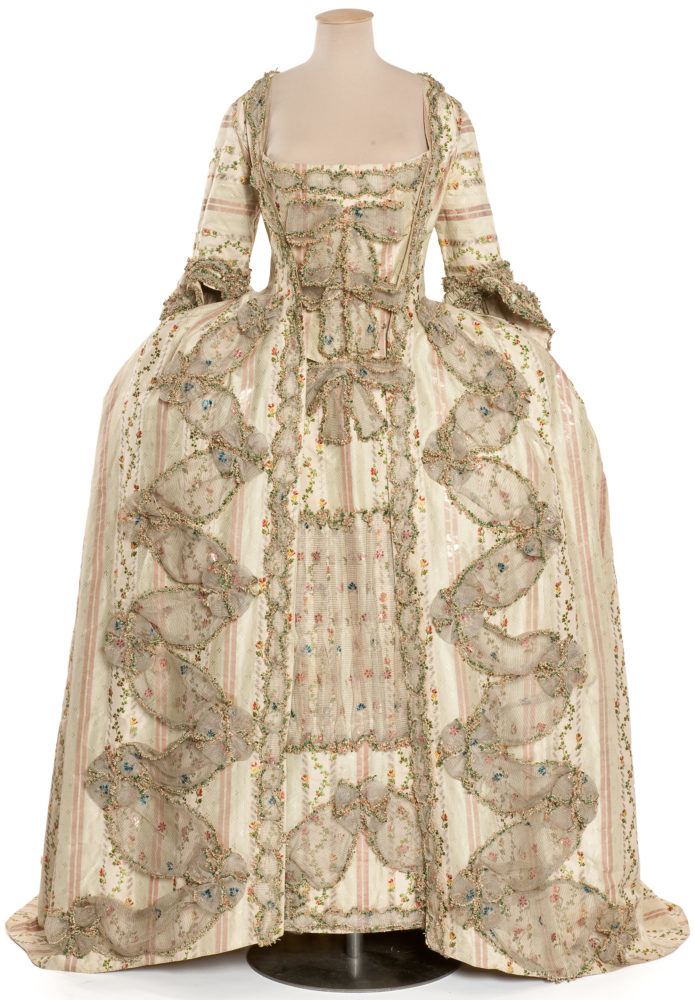
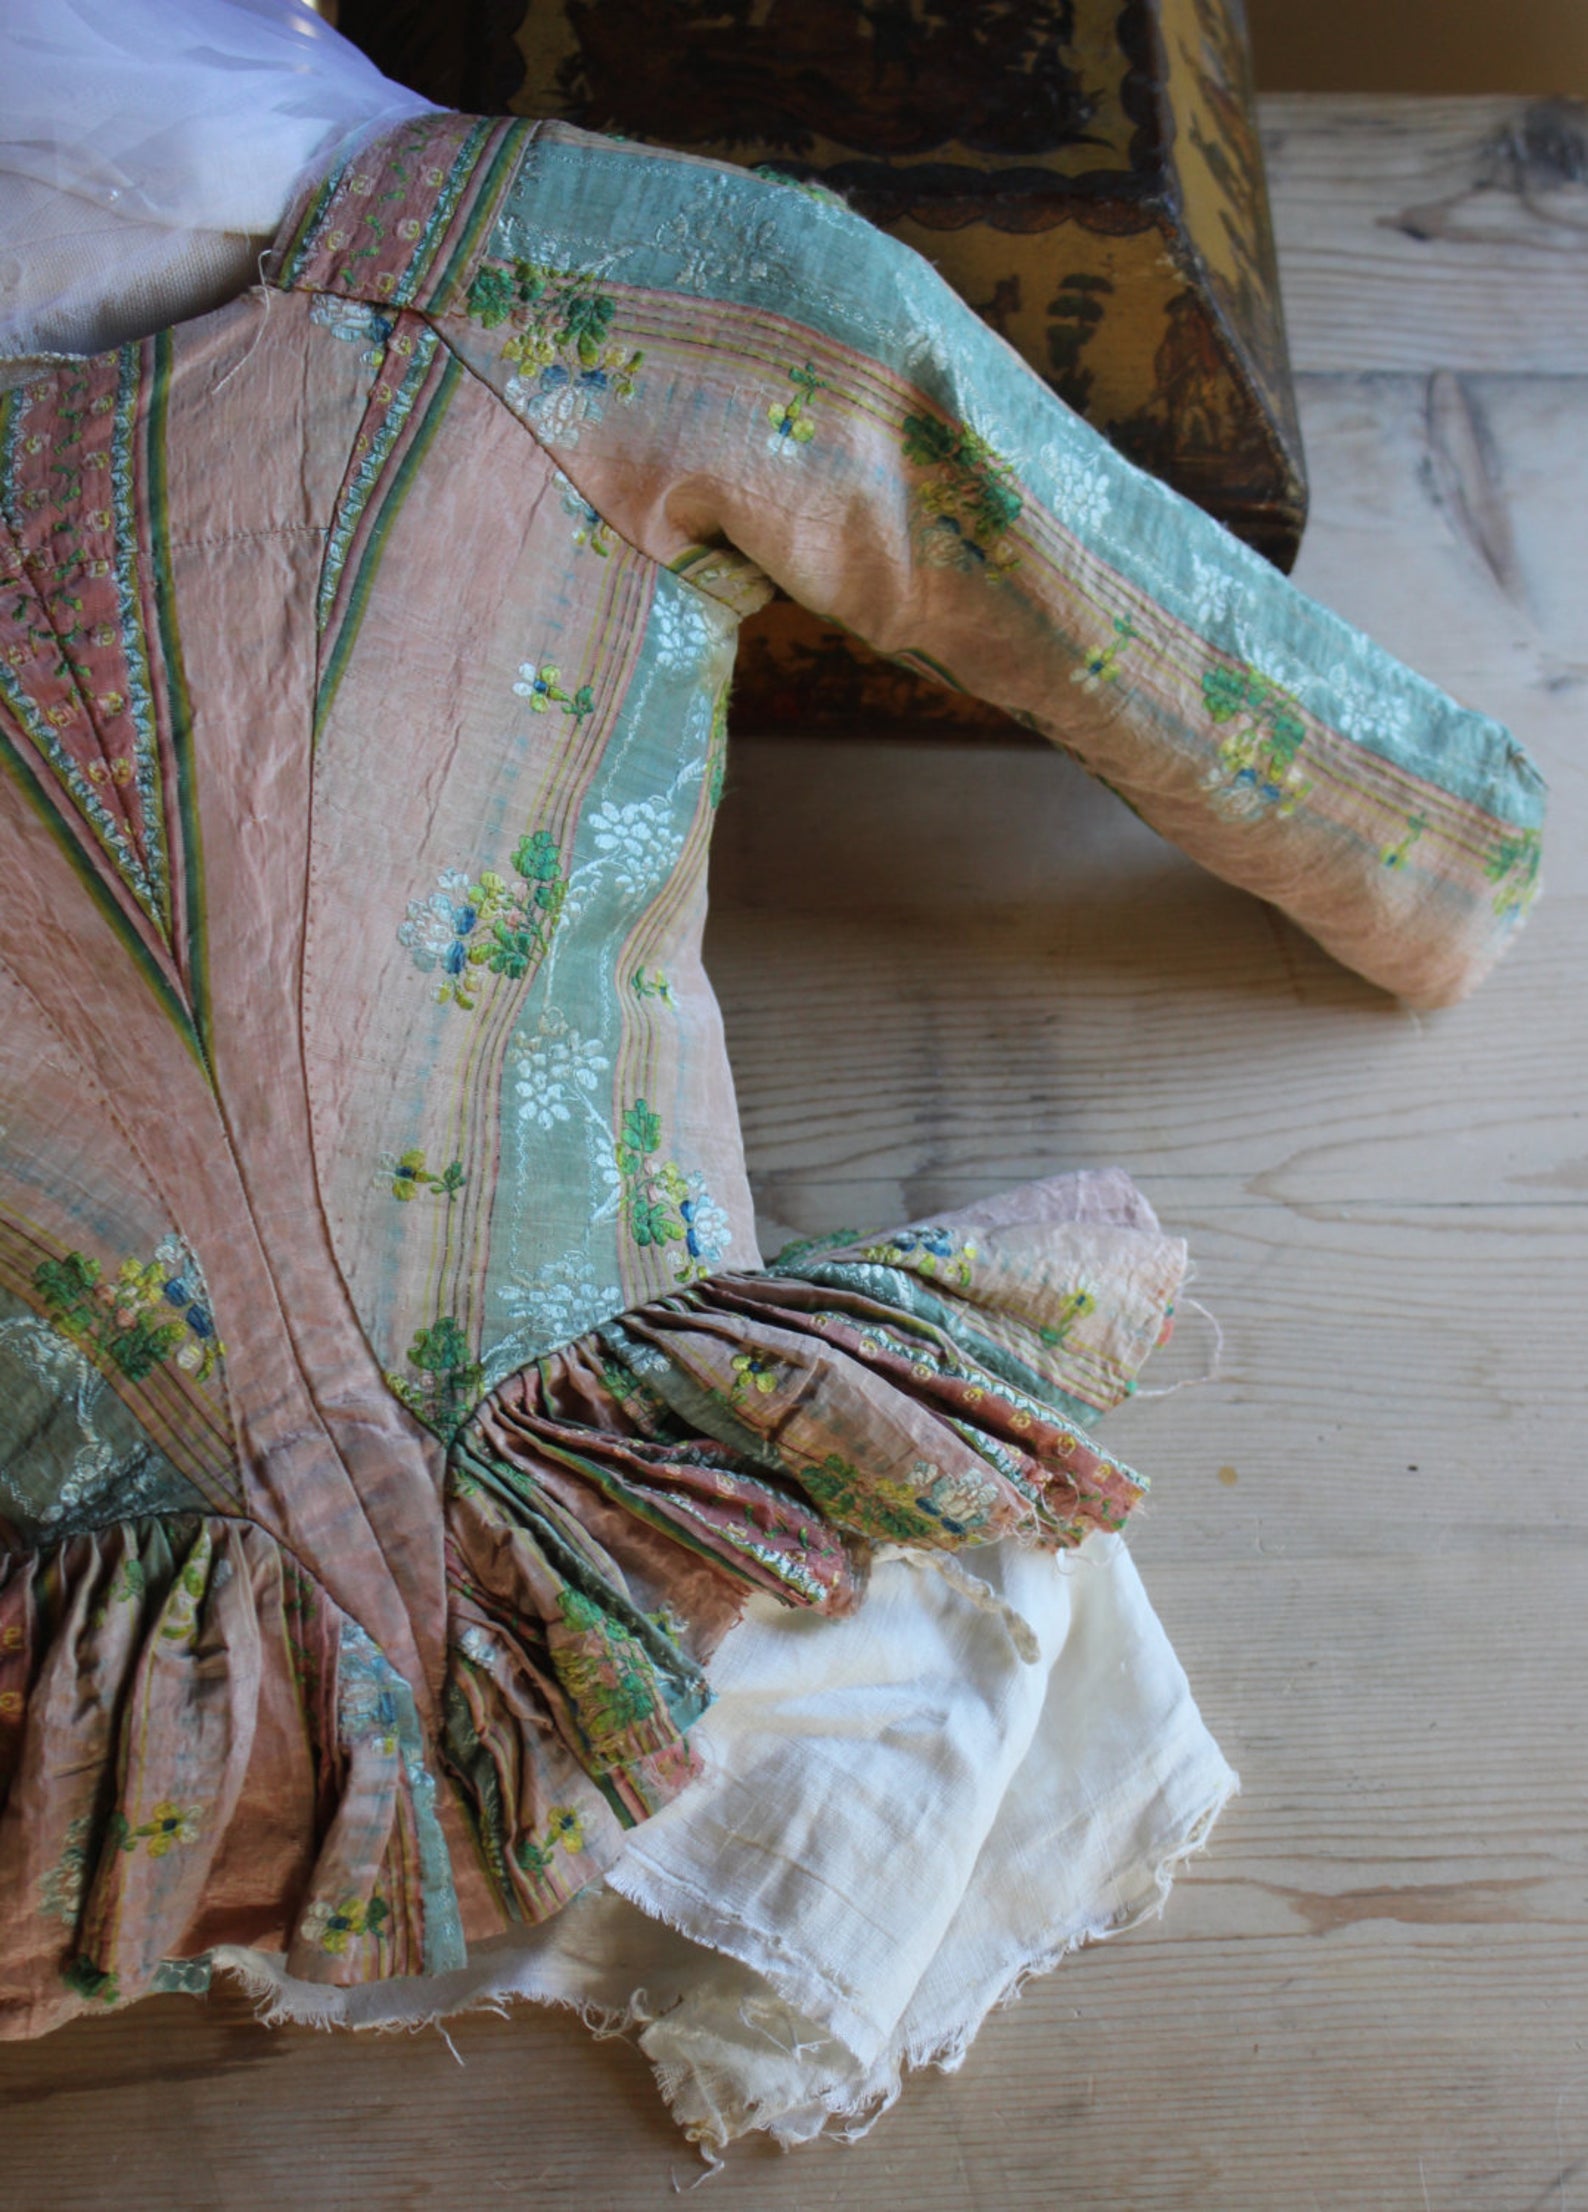
As does this frock, which was one of the main inspirations for the Aidah:
Robe à l’Anglaise, 1785–87, French, silk, Metropolitan Museum of Art, C.I.66.39a, b.jpg
This fanciful creation, on the other hand, sports horizontal sleeve stripes, and a bias back:
Galerie des Modes, 46e Cahier, 5e Figure 1785
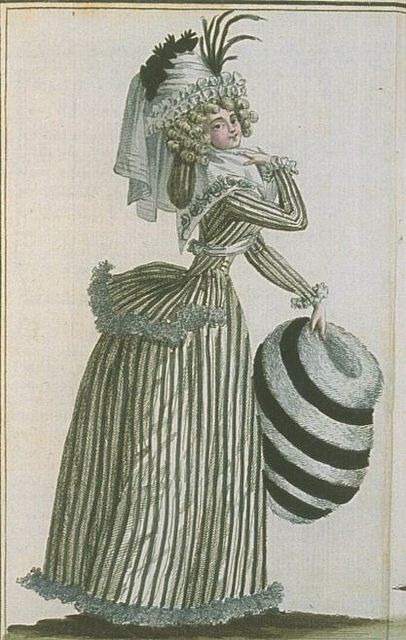
As the 1780s progress vertical sleeve stripes become more and more common:

Redingote ca. 1786 From the Palazzo Mocenigo
Woman’s Dress (Robe à l’anglaise), Unknown, France, 1785-1790, Costumes, Silk twill and silk plain-weave stripes LACMA
18th Century Peach Silk Bodice (actually a dress with the skirts cut off, probably 1780s re-made from earlier silk), sold on etsy
Fashion plate, 1780s
ca 1785
ca 1785

1780s Caraco and Petticoat, Musee Galliera
Jacket, ca. 1785, French, silk, linen, Purchase, Irene Lewisohn Bequest, Isabel Shults Fund and Millia Davenport and Zipporah Fleisher Fund, 1998, Metropolitan Museum of Art, 1998.253.1

Pierrot jacket, 1780s, silk, Kyoto Costume Institute
Jacket, France, 1787-1795, silk, Les Arts Decoratifs 19856
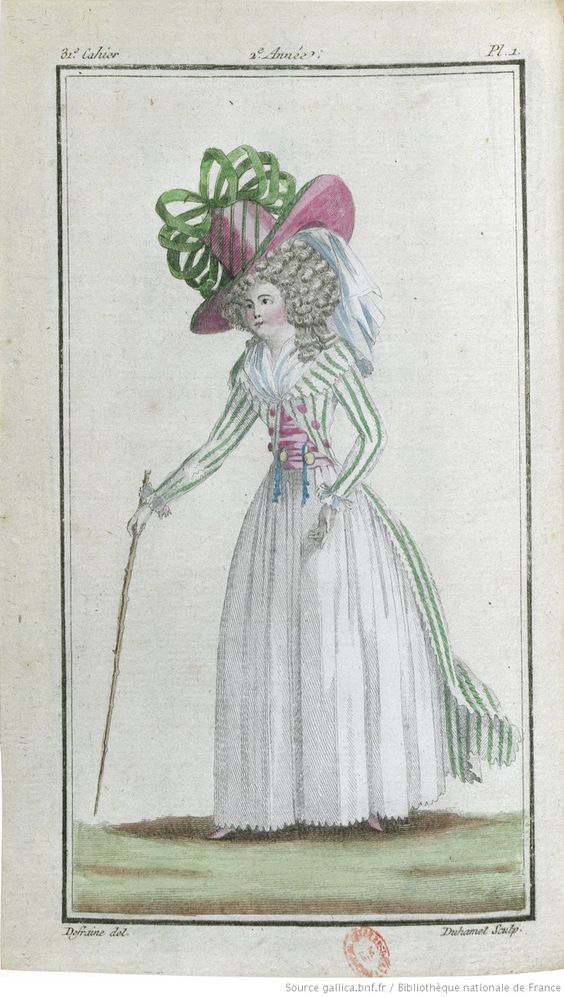
1790s:
But there are examples of 1790s jackets with horizontal stripes:
Bodice, ca 1790, sold at auction
Jacket, cotton, ca 1790
Caraco, late 18th century. Cream and blue striped silk satin, sold by Drout
As well as vertical:
Jacket, late 18th century, French, silk, Purchase, Irene Lewisohn Bequest, 2010, Metropolitan Museum of Art, 2010.151
1790 Striped silk Pierrot jacket, embroidered ‘linon’ petticoat, early 19th century whitework muslin fichu Bust approx 75cm:30in, waist 60 cm:23.5 in, Kerry Taylor Auctions

Robe, 1790s, American, silk, Metropolitan Museum of Art, 1998.269
What can we conclude from this?
- There’s very little evidence for sleeves cut with stripes running vertically down the sleeves before 1778.
- By 1780 sleeves there are numerous examples of sleeves cut with both vertical and horizontal stripes.
- Vertically striped sleeves become more common throughout the 1780s, but there are still enough examples of horizontal stripes to show they remained common.
- Examples of 1780s garments with horizontally striped sleeves include garments that may have been re-made from earlier gowns (so the horizontal stripes were a necessity) and examples of fashion plates (indicating that horizontal stripes were still considered fashionable).
- Examples of sacque gowns (Française) with vertically striped sleeves are extraordinarily rare (Daniel Milco has pointed out there is one early 1770s sacque with vertically striped sleeves. I know of no other examples).
So, if you want to do an accurate a pre-1778 impression, or are making a sacque gown, be sure to cut your sleeves so the stripes run around the arm. For anything after 1778, cut your stripes in either direction – whichever suits your fabric and makes your heart happy!
Whatever you do, remember to cut the mock ups of your 18th c sleeves in the same direction as you intend to cut the final sleeves, so you can check how the different grainlines affect fit.