Latest Posts

Roach’s 40 Orange Glaze Cake – the recipe transcribed

Something that has been bringing me joy in the last few months is Our Flag Means Death: everyone’s favourite instant-cult-classic gay-pirate historical-costume rom-com.

One of the many delightful things about the show is how much the cast and crew have been sharing behind the scenes looks and interacting with the (fast-growing and increasingly obsessed) fan-base.

Samba Schutte, who plays fan favourite* ‘knives are knives’ Roach is, like his character, a baker.  He has the most fantastic IG account where he shared a recipe for the deliciously infamous 40 Orange Glaze Cake that sets off the action in Episode 7.

Image shows an instagram feed with a photograph of a orange topped cake

Obviously I wanted to make it.  I’m not a particularly talented baker, so I asked my friend Nina (who very much is!) if she’d help me make it.  But…it’s a complicated recipe, and on IG in fancy pirate font.  

Image shows a recipe on aging parchment, written in old fashioned script

It’s it a bit tricky to read, especially if you’re getting to the point in life when reading glasses are a fixture.  So I transcribed it, and added notes that made the US terminology make sense.  And then I thought…maybe there are other people who would also find a transcribed version of the recipe helpful?

So I messaged Samba on IG, and he very kindly gave me permission to share my transcribed version. 🧡🍊🧡

(was I very excited that he messaged me back?  Do I like yellow?  Does Felicity like cuddles?  Does Ed hate snakes? Are we excited about Season 2?)

Without further ado, Samba’s version of Roach’s recipe, complete with all his commentary (any mistakes, however, are all mine):

Roach’s 40 Orange Glaze Cake

(recorded by Lucius because Roach can’t write)

(re-recorded by Leimomi, because Lucius can’t type, with minor annotations to assist pirate vessels sailing the southern portions of the seven seas)

First off, no you don’t need 40 oranges for this cake. Any person who uses 40 oranges for anything insane, and that’s coming from me. You’ll need like 8 oranges for this recipe. 10 if you need a snack. (it took us 18, but possibly start-of-winter oranges in NZ are less zesty and juicy?)

You’re about to make an orange syrup infused sponge cake, with orange fruit crème fraîche, orange buttercream frosting and an orange glaze.

It will taste like it has 40 oranges. Just don’t tell Captain, he’ll call it “immoderate” or something.

This recipe will probably take you 3 hours, ’cause there’s quite some waiting time between each element. Keep yourself busy. Swab the deck or check in on Buttons while you wait. I worry for that man.

If any steps confuse you, there’s plenty of videos out there to help you get clarification for textures, techniques and such. You guys are lucky you have YouTube. All we had was Captain. Or Frenchie, he was our Wikipedia. I’ll share some pictures of my steps in-between to help out.

Finally, this is my version of the cake, and you make it at your own risk. But feel free to experiment around and express your creativity. I believe in you. If there’s one thing we learned aboard The Revenge, it’s that everyone’s special in their own special way. Yes, even Black Pete.

So let’s bake this through as a crew!

Ingredients

Shop at the Republic of Pirates, your favorite establishment, or you know, pillage

Sponge Cake:

  • 6 eggs room temp
  • 1 cup white sugar
  • 1 cup flour
  • ½ tsp baking powder
  • pinch of salt
  • 4 tablespoons of orange zest (you’ll need 2 for the sponge, the rest for other elements)

The Filling:

  • 2 cups heavy cream (you’ll save ¼ of it for the topping, you’ll see) (heavy cream is the standard cream sold in NZ, and has a 36-40% fat content)
  • 2 tablespoons powdered sugar (adjust according to your sweet tooth)
  • 1 ½ teaspoon vanilla essence
  • 1 orange

Orange Syrup

  • ½ cup of orange juice (no pulp)
  • ½ cup of cognac (or liqueur of choice, otherwise ¼ cup of water)
  • ¼ cup of sugar

The Orange Glaze

  • 2-2 ½ cups fresh orange juice (about 4-5 oranges)
  • 1 ¼ tablespoons cornstarch (more if you want it really thick) (maize corn flour in NZ)
  • ¼ cup powdered sugar (more if you have a sweet tooth)

Orange Buttercream Frosting

  • 3 sticks softened unsalted butter (3x 8 tablespoons) (340g butter)
  • 1 teaspoon salt
  • 2 cups powdered sugar (more if you want your frosting sweeter)
  • 1 tablespoon heavy cream
  • 1 ½ tablespoons orange essence (more if you want it orangier)

Final Assembly

  • candied orange slices (bought mine, but if you make your own you’re a lunatic and I like it) (we made our own using this recipe, because we’re lunatics by necessity: you can’t buy candied orange slices in Wellington)
  • fresh orange slices
  • sprigs of mint

Step 1: Sponge Cake (aka Genoise)

  • Turn your oven on to 350 degrees Fahrenheit (180c)
  • Zest the skin of 2 oranges (don’t throw out the oranges)
  • Lightly butter two 9 inch baking pans. If you only have one that’s fine, you’ll just cut your sponge in half later to make two halves
  • Line your pan with a sheet of parchment paper and lightly butter the parchment paper
  • In a small bowl, add your flour, baking soda and salt. Stir together
  • In a large mixing bowl add your 6 eggs and whisk on high speed
  • After about 1 minute, add the sugar gradually as you keep mixing on high speed
  • After another minute, add in your orange zest and keep mixing on high speed
  • Mix all together for about 8-10 minutes until the mixture is voluminous and fluffy
  • Then gently sift in the flour mixture 1/3 at a time and fold it into the egg mix with a spatula. Don’t stir.  To keep it airy fold any streaks of flour into the mix by scraping from the bottom to the top. Make sure it’s all well incorporated
  • Gently pour the mixture into your baking pans: half of the mixture in each pan if you have 2, or all if it if you only have one baking pan
  • Smoothen the top of the mixture using a spatula
  • Then place your baking pan(s) into the oven and bake for 25-35 minutes. DO NOT OPEN THE OVEN before the 25 minute mark or your sponge can collapse, like Spanish Jackie’s nose jar
  • If a toothpick comes out clean and your sponge is a nice golden brown color, it’s done
  • Remove the baking pans from the oven, turn your oven off, and gently run a smooth knife around the edges of your sponge
  • Then gently flip the baking pan upside down onto a plate or cooling rack. Your sponge should fall out. Remove the parchment paper
  • Set aside to cool completely for 1 hour

Step 2: The Filling

(the filling has two elements: the whipped cream with oranges, and the orange syrup)

The Whipped Cream (crème fraîche)

Samba aka Roach calls the finished filling crème fraîche. This confused us a bit, as what these instructions produce is not at all the high-fat, slightly tangy, sour-cream-like product we call crème fraîche in NZ, nor is it what’s called crème fraîche in France. We decided not to worry about the name and just followed the instructions for making the filling – ironically, we did end up adding about 1/4 cup of actual crème fraîche to the filling, just to give the flavours a bit more complexity – I’m a tangy fiend, not a sugar fiend.
Steps:

  • Chill a medium mixing bowl in the freezer for 10 minutes (a cold bowl helps cream whip faster)
  • Then pour in the heavy cream, powdered sugar and vanilla
  • Mix on high speed until the cream forms stiff peaks (becomes fluffy and keeps its shape)
  • Add in your orange zest and fold this in the crème fraîche using a spatula
  • Place in the fridge so the crème fraîche can stiffen up some more
  • In the meantime cut 1 peeled orange into tiny chunks

The Orange Syrup

(use any liqueur of preference. I used cognac. But you can also do orange juice without alcohol and use water and sugar instead. The actual alcohol evaporates while cooking) (we used water because I’m strictly non-alcoholic, and it worked fine and tasted delicious)

Steps:

  • In a small saucepan add all the orange juice, liqueur (or water) and sugar
  • On medium-low heat, stir the contents together until the sugar melts and mixture comes to a boil. Keep stirring for about 3-5 minutes
  • Once the mixture has all come together and looks like a very light syrup, remove from the heat and set aside to cool

Put the cognac down Wee John! No the cake’s not done yet. Fine, yes, here – I’ll let you lick the spoon…

Filling the Cake

Steps:

  • Once your sponge cake is cool enough to the touch, you’re ready to start your filling
  • If you used 2 baking pans, flip the sponge that looks the most flat and thick onto a serving plate or cake board. The flat side should be the bottom of your cake
  • If you used one baking pan, now’s the time to cut your sponge in half using a good bread knife. Try your best to keep it even. Think of Jim. Use whichever half is thicker as your base and place the flat side on a serving plate or cake board.
  • Then using a brush or spoon, brush some Orange Syrup on the bottom half of the cake. Make sure you cover it well and don’t be afraid to get it in there. This will keep your cake moist. The more you brush on, the moister your cake. Just save some for the top half!
  • Now place some Crème Fraîche on the bottom half, on top of the layer of syrup. Be generous. Just save about ¼ of the Crème Fraîche for topping your cake later!
  • Place your orange chunks on top of the Crème Fraîche and spread them around evenly
  • Cover the orange chunks with another thin layer of Crème Fraîche (I’m saying this a lot)
  • Now brush Orange Syrup on the top half of your cake. Use the flatter side as the top of the cake. So brush the syrup on the side that will be the inside of your cake. Again, the more you brush on, the moister your cake will be
  • Gently place the top half of your cake on the top of the layer of Crème Fraîche and orange chunks. Smoothen the sides using a spatula
  • Place your cake in the fridge as you work on the final elements

Are you getting all this Lucius?

What are you – no don’t write that down! I said – – ugh, never mind…

Step 3: The Orange Glaze

Steps:

  • Squeeze the oranges to get fresh juice. Pour the juice into a medium sized saucepan
  • Add in the cornstarch and powdered sugar and stir it all together
  • Place the saucepan on medium heat and stir continuously for about 5-8 minutes until the mixture thickens and bubbles burst on top
  • Remove from the heat and strain the mixture into a cup or bowl to get rid of any pulp or blobs so you get a smooth glaze
  • Set aside to cool completely. Place it in the fridge and stir occasionally to cool it faster. It will thicken as it cools

Step 4: Orange Buttercream Frosting

Steps:

  • In a medium mixing bowl, add all your sticks of butter and salt
  • Mix on high speed until the butter is soft and creamy
  • Add in 1 cup of powdered sugar, heavy cream, and orange essence. Mix on medium speed until it all combines. Then add the rest of the powdered sugar and mix until incorporated
  • Taste your frosting to see if you want to add more orange essence or powdered sugar
  • Remove the cake from the fridge and using a spatula, crumb coat your cake with the orange buttercream frosting. This means just putting a thin first layer around the sides and top which might gather some crumbs from the cake
  • Place your cake in the fridge for 15 minutes as your first layer hardens
  • Then remove the cake from the fridge and frost it all generously on the sides and the top. Cover it completely. Smooth it out using a spatula or an icing knife
  • Place the cake in the fridge to let the frosting set for 15-25 minutes

You’re almost there!

Step 5: Cake Assembly

Time to add the finishing touches to your cake and please The Gentleman Pirate!

Express your creativity. This is how I made mine.

Steps:

  • Slice your candied oranges in half and line them around the bottom of your cake
  • Gently our some of the orange glaze on top of the cake, just enough to cover the top fully. Spread it around using a spatula
  • Sprinkle some orange zest on top. Cut some thin slices of candied orange and sprinkle them around as well. This will create a decorative layer inside your glaze.
  • Then our the rest of the glaze on top and spread it around using a spatula. You can let it drop on the sides of the cake for extra effect.
  • Now pipe some of the remaining crème fraîche on top of the glaze using a piping bag and your piping tip of preference. I used the Wilton 1M. Piping continuously in a circle creates a rose like flower and squeezing just once lightly creates a star. Now’s your time to be creative with your piping! Look up some techniques. Just be mindful that the crème fraîche isn’t too close to the edge of the cake or it can slip off the glaze.
  • Place some fresh orange slices and sprigs of mint on top of your piped crème fraîche and sprinkle some remaining zest as you see fit.

And voila! You did it!

You made my version of ‘Roach’s 40 Orange Glaze’ and have probably cured scurvy!

The Swede will be happy. Just be gentle when you tell him teeth don’t go back in.

Keep your cake refrigerated and remove from fridge about 15 minutes before service so it softens. Use a sharp knife when slicing. Ask Ivan or Fang for one if Jim’s busy. Be generous with your portions, like Olowande’s smile, or Wee John’s hugs, or Blackbeard’s beard, or Stede’s closet!

Store leftover cake in the fridge in a tupperware or cake box to preserve freshness and moisture. It can keep about 3 days. If it hardens, you can always toss it at Izzy’s head.

Bon appetit! I’m off to torture some hostages.

~ Roach

And back to Leimomi:

Image shows a round cake decorated with half circles of candied oranges, swirls of cream, slices of orange, and purple pansies

Yes, it tastes as good as it looks!

Many many thanks to Samba Schutte for letting me share the recipe! 🧡

And many thanks to Nina for making my 40 Orange Glaze Cake dreams come true 🧡


*every single OFMD character is a fan favourite, except maybe Calico Jack – and even then we don’t blame the actor!

Meet the Making at the Katherine Mansfield Birthplace Museum thedreamstress.com

Come sew with me at the Katherine Mansfield Birthplace Museum!

This year I had the privilege of curating an exhibition at the Katherine Mansfield Birthplace Museum.

Meet the Making looks at the details of clothing items from the Museum’s collection, and the people and social history behind the clothing trends.  It’s on until 26 June, and you should definitely go see it if you’re in Wellington.

Plus, there are special events to go with it!

Come along on Sunday the 12th of June, from 3-4:30, for a stitching circle.

Image shows a hand holding a yellow and white striped corset, with a length of lace being sewn to it

I’ll show how some of the techniques in the exhibition were done, and bring along one of my own historical sewing projects to show off.  Bring along your own sewing (or not – handwork is not required!) and learn a bit as you meet other Wellington makers.

More information on the KM Birthplace website.  

Meet the Making at the Katherine Mansfield Birthplace Museum thedreamstress.com

And for those of you who can’t make it, I gave a talk to go with the exhibition, and it’s now available online.

I don’t sound too bad in it either, for someone who had just got over a rather nasty bout of covid…

Meet the Making at the Katherine Mansfield Birthplace Museum thedreamstress.com

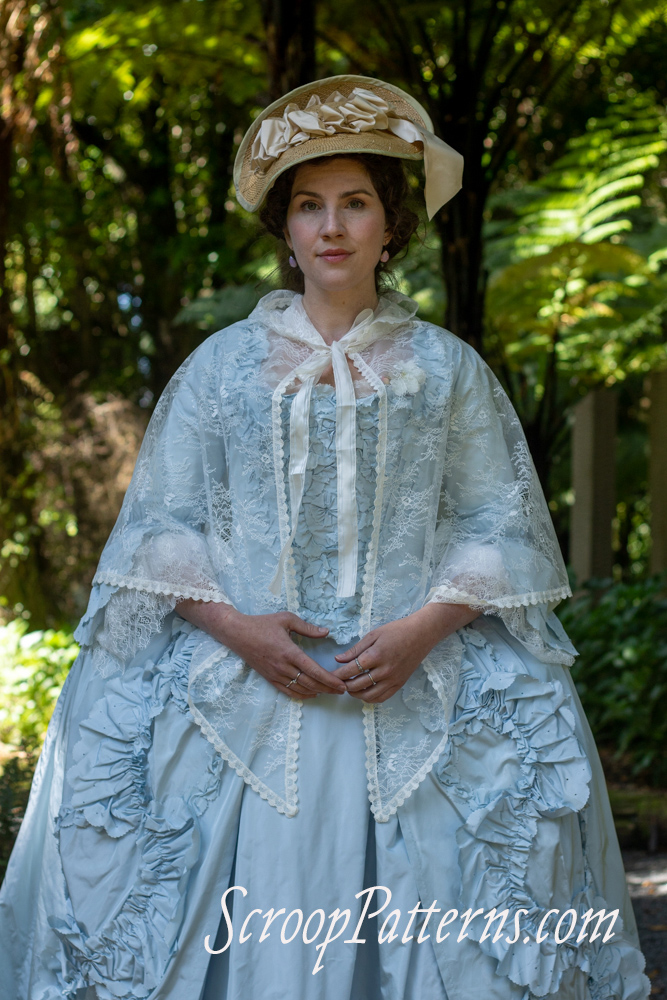
Call for Pattern Testers for a 1770-90 gown!

Amber of Virgil’s Fine Goods and I have an exciting new 18th century pattern almost finished, so we need testers to help us make it as perfect and fabulous as possible!

We’ve already asked a number of testers with specialised skills, so we’re only looking for a few extra testers. If you’d like to be one of them, keep reading to learn more, and how to apply¦

The Pattern:

The pattern is a fashionable ‘Italian’ Gown with two bodice views.  The fronts and backs are interchangeable, and the skirt can be made with or without a train.  View B can made with or without the zig-zag trim.

Image showing line drawings of the front and back view of a 1780s 'Italian' gown in black and white. View A has a plain pointed bodice. View B has serrated trim on the bottom edge of the bodice.

It will be available in the full Scroop + Virgil’s Size Range of 30”/76cm bust to 52”/115cm bust.

Angelica Testers Wanted Sizing Chart scrooppatterns.com

Testers:

This is an advanced pattern, and we’re looking for testers with prior historical sewing experience, OR extensive non-historical sewing experience.

Testers MUST have the correct undergarments already. As part of the application you’ll need to have a photo of yourself in 1770-1790 suitable stays that you can send us a link to.

To be a tester you will need to:

  • Be able to print patterns in A4, A0, US Letter or US full sized Copyshop paper sizes
  • Have the time to sew up the item. You’ll have 10 days to sew a toile and check the initial fit (this can be done by machine, and takes Leimomi less than 90 minutes from fabric to finished), and a further four weeks to make a finished dress, photograph it, and provide feedback (for reference, Leimomi was able to sew View A by hand in 18 hours)
  • Be able to photograph your make being worn, and be willing for us to share your photos on this blog and instagram.
  • Provide clear feedback
  • Agree to a confidentially agreement regarding the pattern

We would hugely appreciate it if testers would share their finished make once the pattern launches, but this is not mandatory.  We’re asking for TESTERS, not marketers.

As always we’re looking for a range of testers. We need a spread of geographical location, body type, sewing experience, and personal style.

The Timeline:

Materials:

If you’re selected to test we’ll let you know and send you the materials requirements, line drawings, and the full pattern description by 6 pm NZ time on Friday the 13th of May.  This is Thur the 12th for most of the rest of the world.

Patterns:

We will send out a digital copy of the pattern to testers before 10pm NZ time on Friday the 20th of May.

Testing & Reviewing:

As this is a pretty time intensive pattern, testing will go for five weeks. We will ask for a toile check in one week in.

Testers will have until 10pm NZ time on Wed the 1st of June to do an initial toile of the dress bodice and respond to the initial set of testing questions.

We’ll need testers to provide final feedback by 10pm NZ time on Wed 22 June, and to be finished with their dress and provide photos by 10pm on Wed the 29th of June.

What you get:

Pattern testers will get a digital copy of all sizes of the final pattern, lots of thanks, and features on my blog and our IGs.

Testing also offers testers an opportunity to get group and 1-1 feedback, assistance, and sewing tutorials from Amber and I – similarly to what you’d get in an online sewing workshop.  We’re modelling our testing process after an online class, albeit one you don’t pay for, because you’re letting us beta test the pattern on you.  There’s an online group that testers can join as they wish, and we’ll be running a couple of live zoom events.  We’re committed to making testing as beneficial to testers as it is to us, and improve our testing process with every pattern we do.

Testers chosen from this open call are not paid, but we have asked a couple of testers who fit a very specific sizing/sewing niche that we want covered to test, and these testers will receive a small honorarium.

Hope to hear from you!

To Apply:

Follow this link and fill out the form!