Hurrah! I have made it through the Historical Sew Fortnightly! I’ve managed to make at least one item for all 26 challenges! Some were late, some took some time, but I did it!
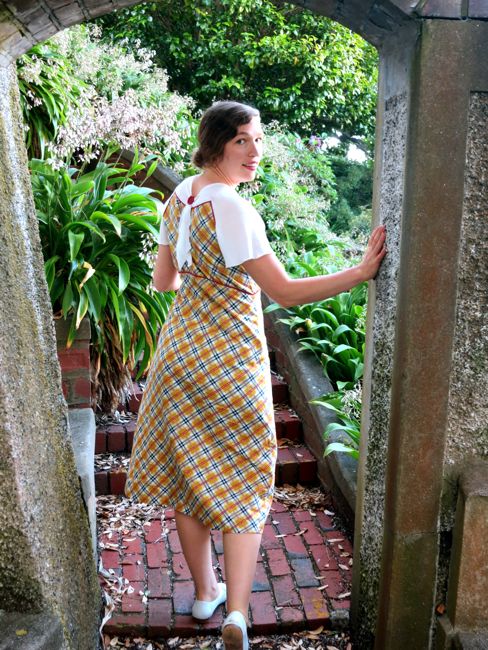
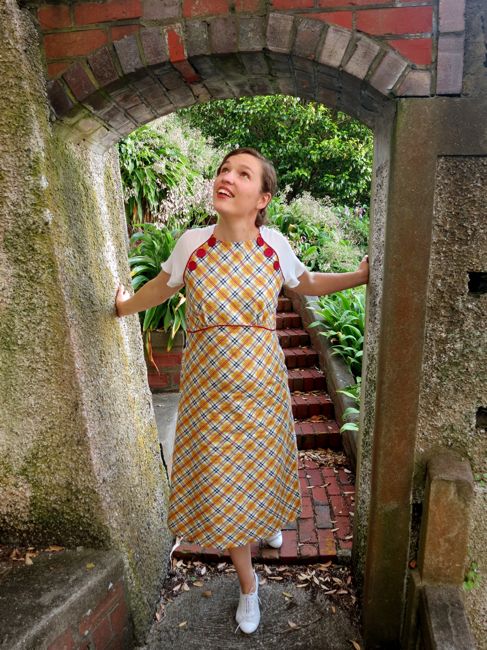
And here, of course, is my item for Challenge #26: Celebration:
I’m calling it the ‘Bad Plaid’ dress, because the fabric is so awful it’s awesome, and because, well… I whinged about the pattern a lot as I sewed it up.
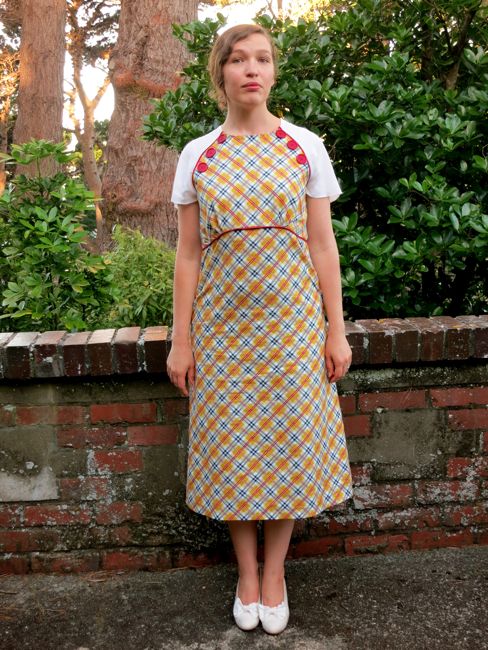
The pattern is Decades of Style #3007: The 1930s Button Dress.
Now, I’ll admit right away that half of the problems with the dress were my fault, at least in that I knew going in that the pattern wasn’t the most flattering style for my shape, and that I wasn’t using the best fabric for the pattern.
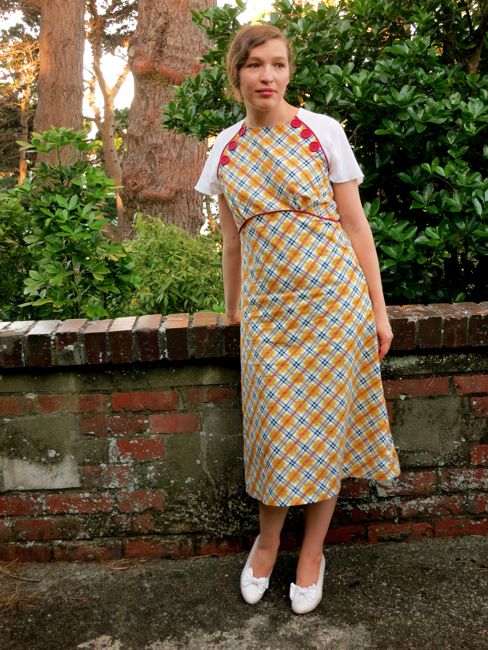
I’m small busted, with a largish-rectangular ribcage, a sway back, and a full bottom. I look great in empire waistlines, regular waistlines, and dropped waist – but the 1930s halfway-down-the-ribcage waistline? Not my friend. So that was the pattern problem.
And this dress needs a draping fabric – not a craft cotton (no matter how cute and reproduction 1930s the print, craft/quilting cottons are not accurate ’30s fabric!) to fall nicely.
But…I found this fabric on sale a year or more ago ($4pm thank you very much!) and I fell in love with it and immediately envisioned this dress made up in it, exactly as it is. And when a dress just comes to you, you have to go with it.
The initial planning came together perfectly – I bought all of the fabric that was left on the bolt (167cm worth at 112cm wide), and it turned out to be exactly enough, to the centimetre, to cut the dress out of, even matching the front plaid (though I didn’t manage to pattern match the back). I had the white chiffon (the nicest poly-chiffon I’ve ever encountered, by a mile) in stash from the $5-a-piece bin at Fabric Warehouse (and I still have more than a metre left). Plus, I turned out to have a 20cm scrap of a raspberry pink linen tucked in my pink bin, and since I NEVER buy raspberry pink, and it matched the stripes of the plaid perfectly, it seemed such a happy omen. I did spent the whole cutting-out process muttering “dash dot dot” to myself so that I remembered what size I was cutting, as the sizing wasn’t labelled on each pattern piece (scroll down three photos and you’ll see what I mean).
I feel I should point out that the dress is NOT cut on the bias – the fabric is a bias printed plaid. The pattern is also not intended to be cut on the bias, so the pattern illustration showing a bias tartan is a bit naughty (imho), as most people will assume the pattern is cut on the bias unless the read the fine print.
I altered the pattern slightly as I cut: I knew from friends who had made the dress that the back yoke-tie was extremely fiddly to construct, and that you ended up re-tying it every five minutes anyway, so I shortened it 10cm, with the intention of sewing it into a flat back-swag, rather than tying it into a bow. Much simpler!
And then things started to go just a wee bit wrong. First, I read the instructions for the pattern (I’m one of those sewing nerds who reads instructions end-to-end before even cutting the fabric) and was confused, and miffed. It turns out Decades of Style re-wrote the original vintage sewing instructions to use modern sewing techniques, instead of vintage techniques. The invisible zip called for in the pattern notions should have been a clue, but I hadn’t expected a complete re-write of the instructions.
Now, modern sewing methods are what most sewers are used to, and they are great when they make things simpler and easier. Sometimes though, vintage seamstresses used certain techniques for a reason, and that’s simply because they are more suited to the pattern, and easier to use. Replacing those techniques with modern ones is just silly (imho). Instead, I think patterns should teach people how to use the vintage techniques where they work better.

Case in point with this pattern: in every original 1930s pattern I’ve seen (a lot) the pattern calls for lapped seams to join the shaping and panelling of the garments. When you are working with the square corners where the bodice back joins the yoke, a lapped seam is going to be significantly easier to manipulate. #3007 had you join the panels with right-sides-together seams, which is tricky and annoying.
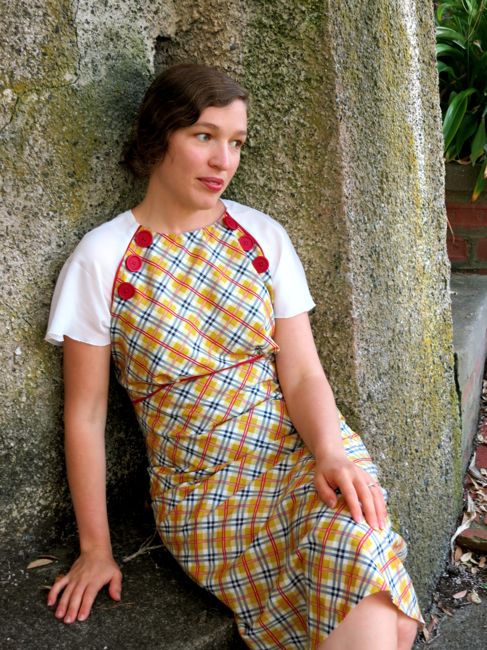
So, basically I (grumbled a lot and then) tossed the instructions and made the dress up as I would any 1930s dress. Easy-peasy. Except for the raspberry un-piping (there is no cord in it), which always adds a nice extra layer of fiddly. And there was some confusion figuring out what button placement went to what size, and which notch was for which size, because when they were really close together it was really hard to tell!
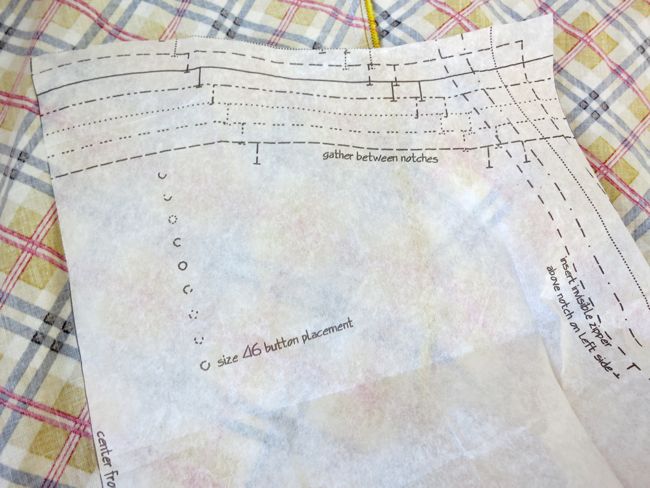 Seriously. Why couldn’t each dot be labelled with a size?
Then I actually got the dress sewn together and tried it on. I’d cut a size 36″ (I have a 37″ bust). It was too big. I took it in. I took it in some more. It ended up smaller than a size 34, and it’s still got more ease than I’d like in the bust. On the plus side, that means I managed skip the period-accurate lapped opening with domes and hooks that I was going to do: the frock just pulls on over my head.
Now, don’t get me wrong about the pattern. I found it frustrating and annoying, but on a different body type it would be quite flattering (rather than reasonably OK), and if historical accuracy isn’t your aim, the modern instead of historical instructions mostly won’t matter, and you might even prefer them (though lapped seams would make it easier, and I never did understand how they were telling me to put the sleeves together at the bottom 2cm).
My final alteration to the pattern was to skip the belt/sash detail. I’d already planned to turn the tie-belt into a flat buttoning sash (because really, all crisp and tailored in front and TWO bows in back makes no design sense, though it is period accurate). I made the belt up in both pink and white, and in both colours it just turned into two giant arrows pointing to “Stomach here!” and “Giant ribcage here!”. So I tried in plaid, and it just interrupted the pattern and looked stupid (even with a pink trim). So no belt.
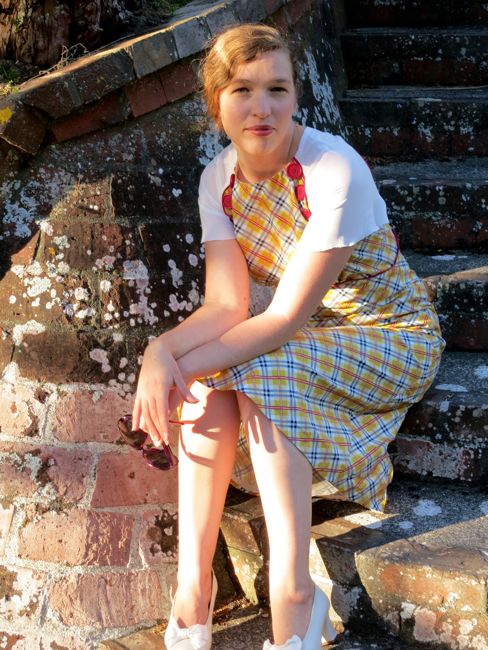
For the photoshoot we went to the Sir Truby King gardens, which I don’t know how I’d never been to before. Brickwork! Arches! Cunning little winding stairs everywhere! I was in love! (and then I came home and read up on Sir Truby King, and was disturbed, and read some of his original writings, and was horrified. Plunket may be a wonderful organisation now, but it was founded on eugenics & ideas of race superiority and the premise that education for women should be avoided as educated women made bad mothers. SCARY!).
I wore the Shona of In the Heyday gift shoes, because I realised that while they have early 18th century potential, they also have definite 1930s vibes exactly as they are.
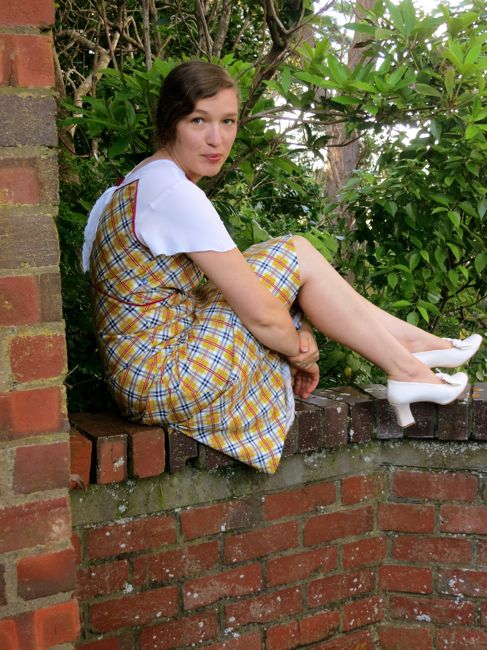
Also, how often do you get to wear white silk shoes with bows on the toe? Wearing them with the dress made it feel like a celebration, rather than “well, this is going to be an OK frock to wear when I just want to pull something loose over my head and feel reasonably polished” that it is going to be. When the ground was too rough I did take them off and skip around in little lace-up flats.
The Challenge: #26: Celebration
Fabric: 1.7m bias printed quilting/craft cotton ($4pm), 30cm poly chiffon ($1), raspberry linen (free)
Pattern: Decades of Style #3007 1930s button dress
Year: ca. 1935
Notions: 7 large raspberry pink buttons ($1.30 each), thread (stash), bias hem tape.
How historically accurate is it? The cut of the pattern is perfectly accurate, and I re-did the instructions to sew it in a period accurate manner, but my fabrics are completely inaccurate (ironically, the poly-chiffon is the only thing that might pass the ‘would a seamstress in period recognise this as a suitable fabric for this garment’ test), and after taking it in more than 2cm on each seam, I couldn’t do period accurate seam finishes like french seams (OK, I guess I could have pinked them or hand finished them) so I just overlocked the sucker. So 40% at best.
Hours to complete: 5
First worn: Sat Dec 14, for a Craft Crawl around the CBD with the girls from the Wellington Sewing Bloggers.
Total cost: $17.10 (and more than half of that was on buttons!)
And I’m done! (OK, actually, no, there are still a few things I want to finish!)
UPDATE: I’d like to add that despite my initial misgivings, I’ve ended up loving this dress, and I wore it as often as I could wash and dry it all summer. And I got tons of compliments every time I wore it.