Latest Posts

Announcing: Polly / Oliver!

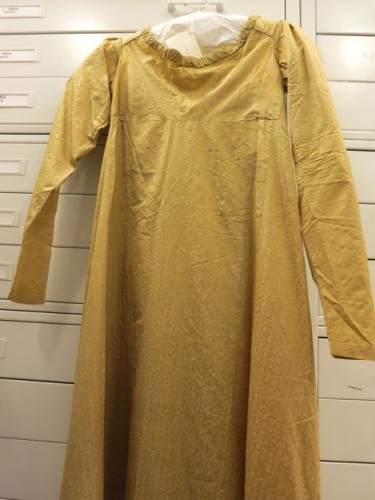
Well, it’s been five years, a lot of fabric, a lot of thread, a lot of buttons, a lot of gold braid, and a bit of moaning and swearing and threatening the garment with dire consequences (“I will DYE you blue.  I’ll do it!  I swear!  You’ll be an abomination unto Nuggan from head to toe.  Behave or dye!”) but I have finally finished the whole Polly / Oliver Perks ensemble, and Polly is ready to stand for Borogravia and women’s rights and well-maintained pubs and clean socks everywhere.

The ca. 1885 'Polly / Oliver Perks' Terry Pratchett inspired ensemble

(well, not quite everywhere, but not just on feet and in the sock drawer and other places you might normally expect to find them).

The ca. 1885 'Polly / Oliver Perks' Terry Pratchett inspired ensemble

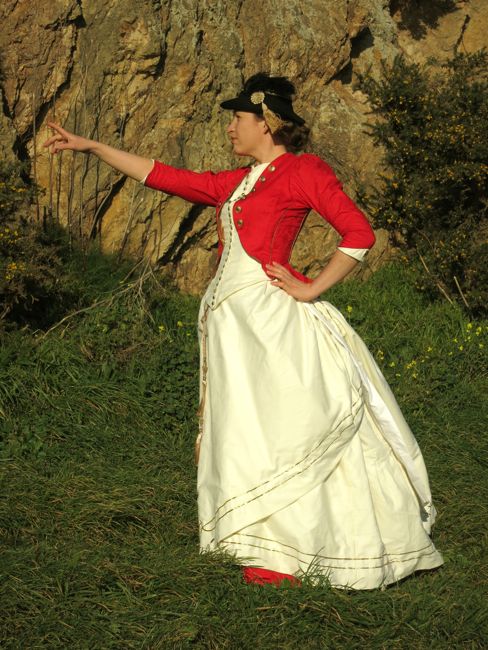
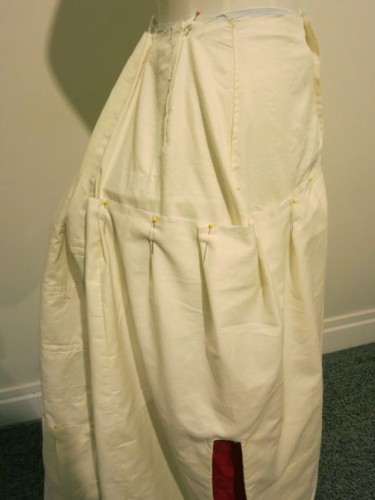
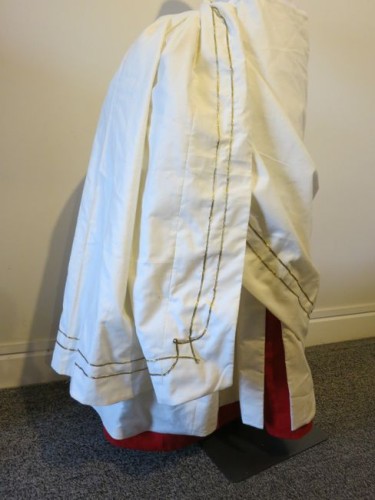
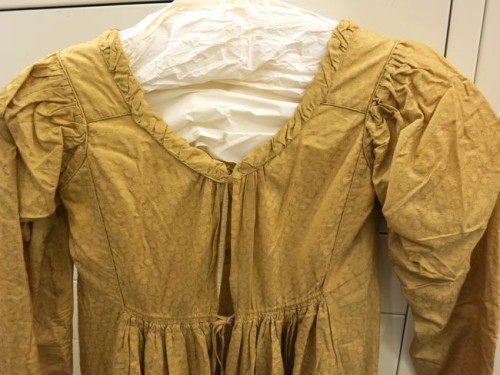
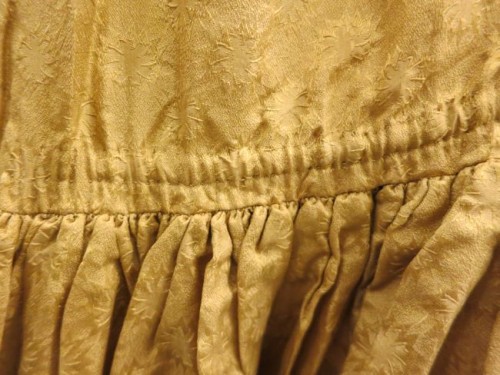
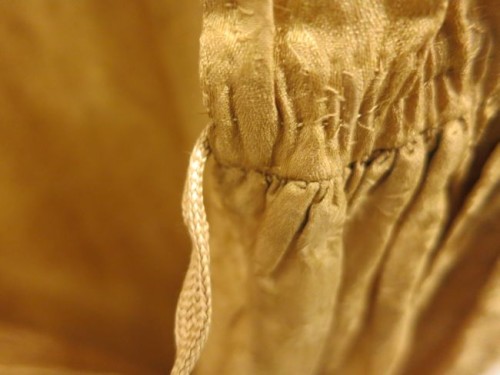
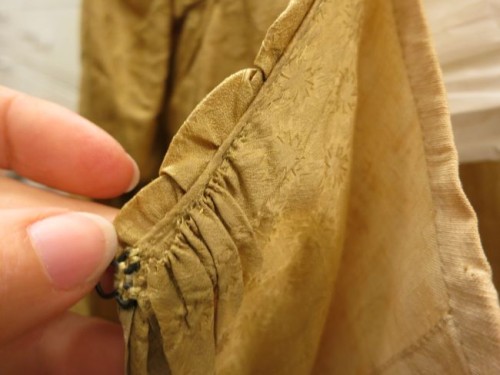
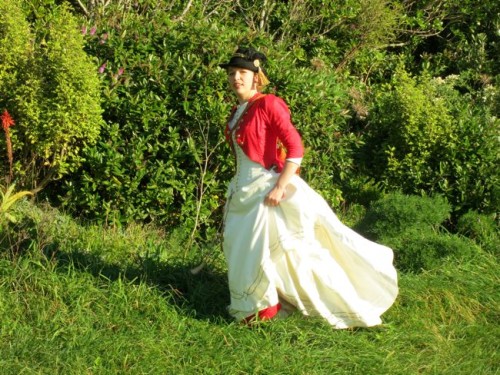
This dress and I have done battle, I lost some skirmishes, but I’ve come out the winner in the end, and I’m rather pleased with it.  It’s Borogravia does girlie-military, with lots of gold braid and fitting, meets historically plausible 1880s fancy dress.  After seeing the photoshoot images, there are a few places where I need to tack the skirt panels into place. and a few other teeny tweeks that need doing.  It’s rather like working out a military victory: you don’t just win, you have to negotiate and discuss terms for a while!

The ca. 1885 'Polly / Oliver Perks' Terry Pratchett inspired ensemble

Also, it’s rather good for marching purposefully in.  I know this because I did a LOT of purposeful marching during the photoshoot with Sarah.  I marched purposefully towards the camera, and then past the camera.  Then I marched purposefully back in the other direction.  And then I marched purposefully back.  Then we marched off to another location, and I did it all over again.  The dress looked fabulous.  I, on the other hand, was doing this repetitively, in long grass, and 3 kilos of skirt and a corset.  It was hard work!

The ca. 1885 'Polly / Oliver Perks' Terry Pratchett inspired ensemble

These photos are just a taster of the photoshoot – Sarah took most of the photos on her camera and they will be up on her livejournal soon (I hope), and the ones I’m showing are the ones she took on my camera (so any imperfections in the images are thanks to my crappy camera, not Sarah’s skill!).

The only regret I have about the photoshoot is that I don’t have a sword.  But then, Polly did her best work without a sword, and you always have a good knee handy when you need it!

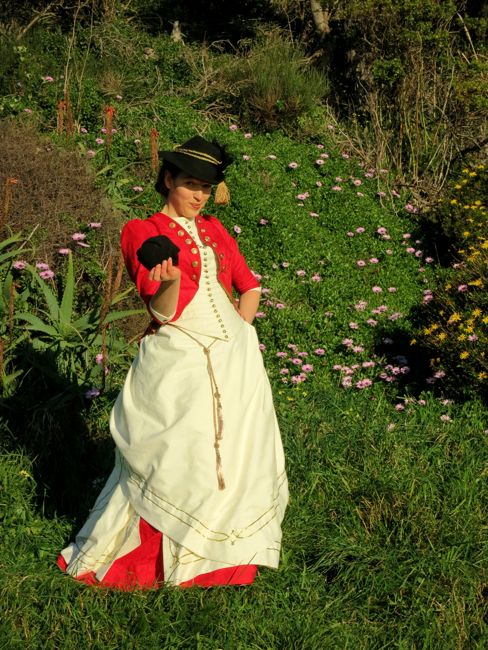
I did remember Polly’s most important accessory though.

The ca. 1885 'Polly / Oliver Perks' Terry Pratchett inspired ensemble

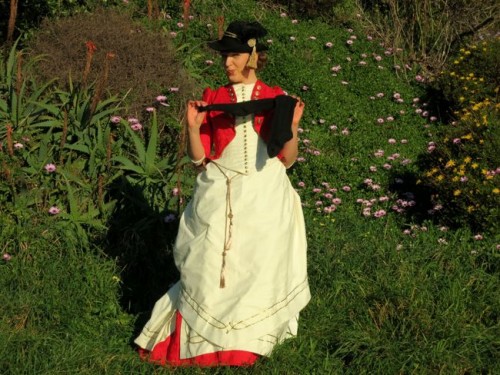
Oh yes.  A good pair of socks is most important for…marching.

The ca. 1885 'Polly / Oliver Perks' Terry Pratchett inspired ensemble

The Challenge:  #15  ‘White’

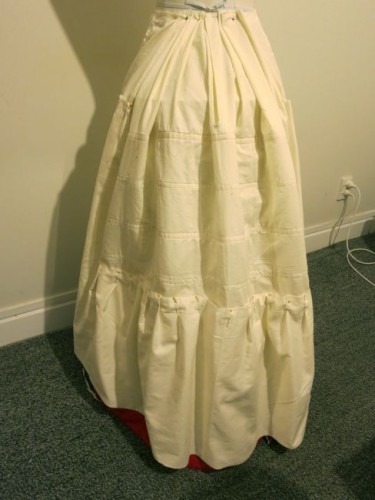
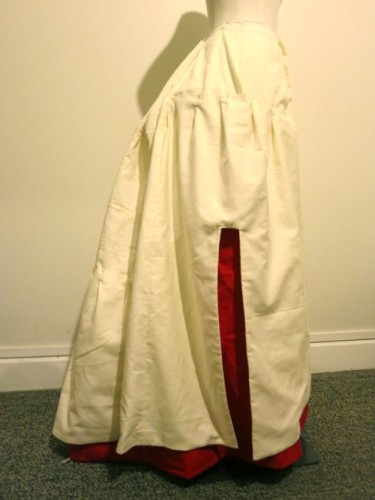
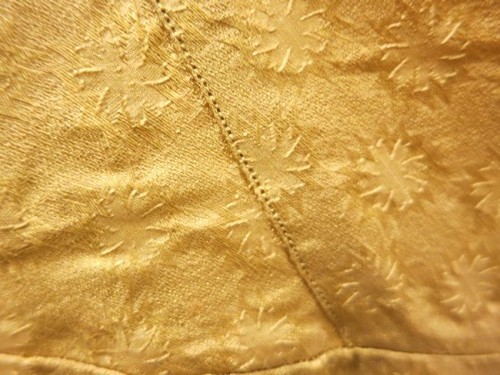
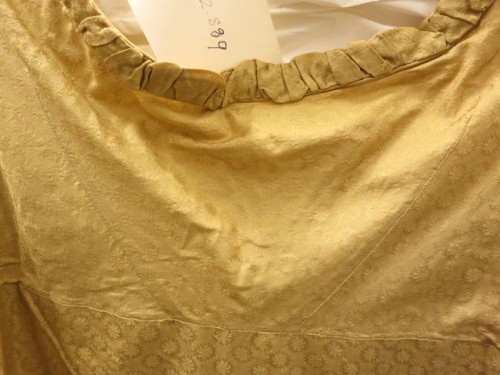
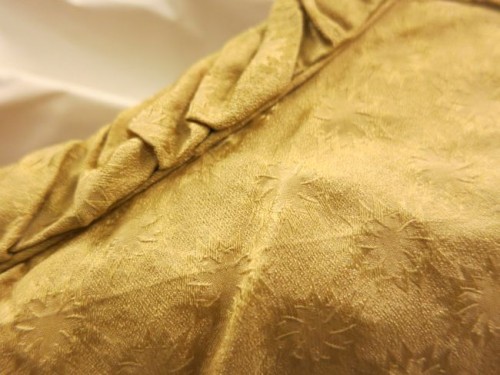
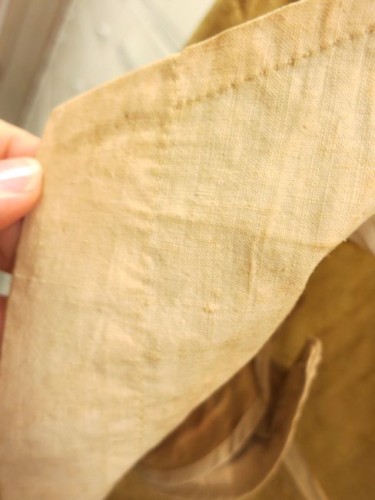
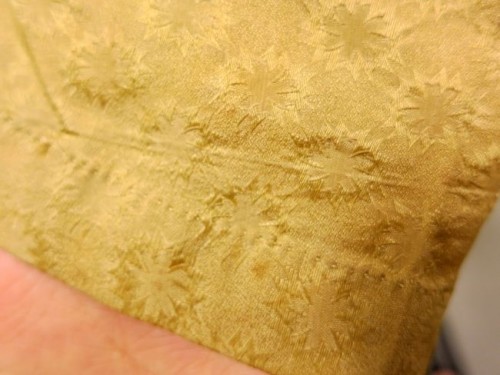
Fabric:  5 metres of ivory cotton sateen (a gift),  3.5 metres of white cotton (can’t remember if I was given it or bought it, but if I did it cost less than $5), scrap of linen for the hem (free), red cotton jacquard (free, and leftover from the jacket).

Pattern:  My own, based on the 1887-9 day dress from the collection of the V&A pattern in Janet Arnold’s Patterns of Fashion 2.

Year: ca. 1885

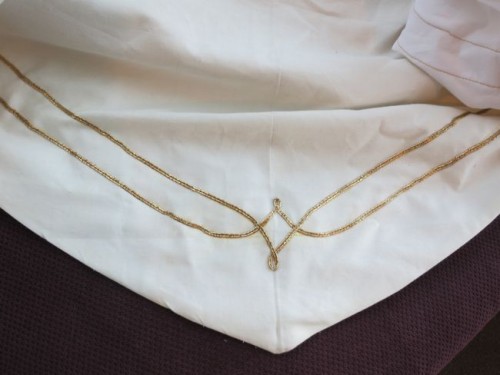
Notions:  21 metres of gold braid for the cornelli work ($21).

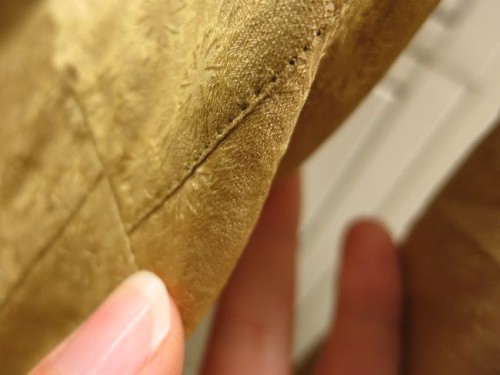
How historically accurate is it? As a fancy dress?  Pretty close!  The construction is a teeny bit modern in places, but not too bad.  As a real garment, perhaps something for the seaside?  A bit costume-y for my standards, but after 5 years I’ll take any form of it that is finished!.

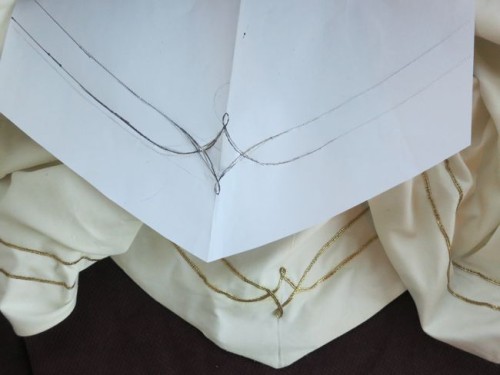
Hours to complete: 15.  I budgeted 10, but then I decided the skirt needed the cornelli work, and that took some time to design and sew.  So just over an hour a day for the fortnight (though really, I did it in 3 x 5 hour chunks).

First worn: Sunday 28 July, for the photoshoot (immediately after sewing the last bit of trim on the hat).

Total cost:  NZ$21-$26  It would have been practically free if it hadn’t needed that trim!  Darn.

Skirts, scrambled eggs and sewing cats

I had an afternoon tea this Saturday, and hoped to debut Polly Oliver at it.

On Friday, I was doing great: ahead of schedule even.  Felicity was helping.

Polly / Oliver skirt construction

Polly / Oliver skirt construction

You didn’t need to cut where my paw is, right?  

I had all my pieces cut: apron, over-train, bottom pleat/over layer (not sure how to describe it).  I lined them, finished them, and had them all ready to attach to the skirt and assemble.

I started by pinning the bottom pleat/over layer on.  It’s quite short in the back, over the skirt hoops, where it will be covered by the long over/train, and longer in the front where the apron will sweep up and reveal bits of the under skirt.

Polly / Oliver skirt construction

As with the 1886 dress in Janet Arnold, there is a part layer of good fabric over the original support layer.  Based on my inspiration images, mine has a  slit showing the red under-fabric.  I’m not entirely pleased with how the part layer is hanging at the moment, but I’m hoping that the buttons can be used to hold everything neatly in place.

Polly / Oliver skirt construction

It took a LOT of pinning, and re-pinning, and re-adjusting to get everything to hang as well as it is!

Polly / Oliver skirt construction

I finished up Friday evening by sewing the pinned over-layer on to the skirt base, and re-inserting my hoop bones.  Then I pinned the skirt and all the layers on to the dress form just to see how it looked.

I didn’t take a photo of that, so here is another one of Felicity hogging the fabric:

Polly / Oliver skirt construction

As it happened, Felicity hogging the fabric is a lot cuter than the pinned together skirt was.  And the burn-out photo shows just as much definition and detail as the pinned together skirt did.  All the layers just merged together into one white blob, without the distinct layers that I wanted.

Ergh.  What’s a girl to do?

Scramble some eggs!

Polly / Oliver skirt construction

I bought all this gold trim for the Polly / Oliver jacket, but it just didn’t look right when I tried it.  However, on the white, in a large expanse of space, a trim of it was just the thing to provide the detail and definition I wanted.

My trim is a little more omelet than scrambled eggs: I kept it quite simple other than a bit of curves at the front of the apron, and the corners of the over-train.

Polly / Oliver skirt construction

To make my trimming, I drew a scroll pattern as a pattern, and used transfer paper to mark it on to the apron front.

Polly / Oliver skirt construction

Then I drew on the rest of the lines with a chalk pen and a ruler, while trying to keep Felicity amused/out of the way.

Polly / Oliver skirt construction

Then there was some 17+ metres of gold trim to stitch on, and the 5 hours that I had allocated to finishing the skirt were passed, and it was time to get dresses for my afternoon tea, and clearly I wasn’t wearing Polly / Oliver.  So I debuted the 1903 Chinoiserie skirt, and I’m finishing Polly Sat eve/Sunday morning, aiming for a Sun afternoon photo shoot.

But I’m glad I took the time to do the skirt right, because it looks so much better, even just pinned together.

Polly / Oliver skirt construction

But maybe it needs more scrambled eggs….

Just a little…

An early-19th century gown at the Honolulu Museum of Art

Over the last year I’ve been gradually showing you images that I took when I was last in Hawaii  of some of the beautiful historical garments at the Honolulu Museum of Art. You’ve seen the amazing embroidered cisele velvet 18th century man’s suit, a late 19th century Turkish tea robe that had been altered for wear by a Western woman, and a teaser-taster of all the textiles.

Today I’m showing you what was possibly my favourite of all the things I photographed:

Dress, 1st quarter of the 19th century (with alterations), Honolulu Museum of Art

Dress, circa 1810 (with alterations), Honolulu Museum of Art

Can you guess why?  Yep -it’s totally swoon-worthy, angels sing, yellow gold silk!

And the fabric itself is just amazing:

Dress, 1st quarter of the 19th century (with alterations), detail of fabric, Honolulu Museum of Art

Dress, circa 1810 (with alterations), detail of fabric, Honolulu Museum of Art

Dress, 1st quarter of the 19th century (with alterations), detail of fabric, Honolulu Museum of Art

Dress, circa 1810 (with alterations), detail of fabric, Honolulu Museum of Art

I’m not even sure how to describe the fabric – it’s a quite soft, lightweight silk, in a sort of brocade weave, but with the floating wefts reversed to the front of the fabric.  Very unusual, and not something I think I’ve ever seen before.  The small overall pattern, however, is quite common in early 19th century gowns.

Those of you who have looked closely at the photo above will have noticed something odd.  That isn’t hand-stitching on the bodice front!

Dress, 1st quarter of the 19th century (with alterations), Honolulu Museum of Art

Dress, circa 1810 (with alterations), Honolulu Museum of Art

No, it’s not.  There are some weird, slightly inexplicable, alterations to the bodice front.  I think originally it may have looked a bit more like this 1810s gown from Abiti Antichi, with a shaped bodice front, but at some point after the introduction of sewing machines the front was altered to be completely flat, with no room for a bust curve.  The rest of the dress still has the original hand stitching.

Dress, circa 1810 (with alterations), Honolulu Museum of Art

Dress, circa 1810 (with alterations), Honolulu Museum of Art

Dress, 1st quarter of the 19th century (with alterations), Honolulu Museum of Art

Dress, circa 1810 (with alterations), Honolulu Museum of Art

The alterations make me wonder about the ruched trim around the neck.  How much of it is original, and what did the neckline look like before the alterations?  Unfortunately, in the short amount of time I had at the HMA I wasn’t able to inspect the dress in enough detail to determine how much of the trim was altered, though its definitely hand-sewn around the back edge.

Dress, 1st quarter of the 19th century (with alterations), Honolulu Museum of Art

Dress, 1st quarter of the 19th century (with alterations), Honolulu Museum of Art

The bodice back, and the rest of the dress construction, is entirely hand-sewn, and quite typical of the early 19th century, with armscythes that are set well back, seams defined by narrow piping, fullness only at the centre back, and back ties to fasten.

Dress, 1st quarter of the 19th century (with alterations), Honolulu Museum of Art

Dress, 1st quarter of the 19th century (with alterations), Honolulu Museum of Art

The bodice of the dress is lined with linen, with a seperate piece of linen at the bodice back that fastens independently underneath the outer silk (the image two up, and the final image in this post, both show this detail).

Dress, 1st quarter of the 19th century (with alterations), Honolulu Museum of Art

Dress, 1st quarter of the 19th century (with alterations), Honolulu Museum of Art

The handstitching on the dress is beautifully done, and very even throughout, but not tiny: there are 10-12 stitches per inch.

Dress, circa 1810 (with alterations), Honolulu Museum of Art

Dress, circa 1810 (with alterations), Honolulu Museum of Art

The original construction details are also beautifully done: fine, even back gathers whipstitched into the centre back:

Dress, circa 1810 (with alterations), Honolulu Museum of Art

Dress, circa 1810 (with alterations), Honolulu Museum of Art

A discreet drawstring runs through the high waist, to snug it in under the bust (unfortunately I didn’t note if the drawstring was an original silk piece, or a later replacement):

Dress, circa 1810 (with alterations), Honolulu Museum of Art

Dress, circa 1810 (with alterations), Honolulu Museum of Art

The drawstring fastens the dress at the back waist, and the linen under bodice also fastens with a tie at the back, with the outer bodice hooking over it. The thread that is holding the hook on is not the same as the rest of the thread, so I wasn’t able to determine if it was a later addition, or if it has simply been re-sewn on after coming loose (as often seems to happen with hooks).

Dress, circa 1810 (with alterations), Honolulu Museum of Art

Dress, circa 1810 (with alterations), Honolulu Museum of Art

The images I’ve shown you are every single one I took of this dress.  I wish I’d taken more!  Even with the alterations, it’s such a fantastic garment, with such beautiful details of construction techniques circa 1810.  I’m so grateful for the HMA for allowing me to explore their collections, and for being such gracious hosts.  Next time I go home I’m going to try to schedule a couple of days in Honolulu so that I can examine it, and some of the other treasures in the HMA, in more detail.

Maybe Mr D wants to spend Christmas in Hawaii this year so I can go to the Sheer Delight exhibition…