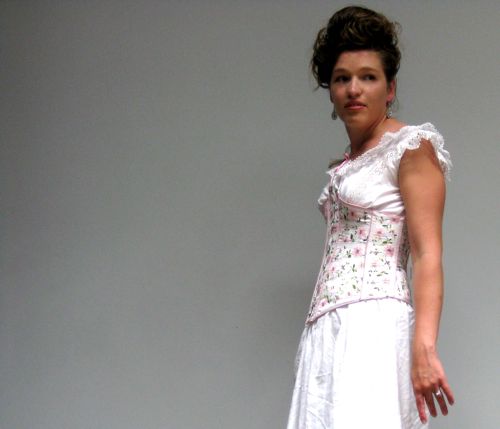
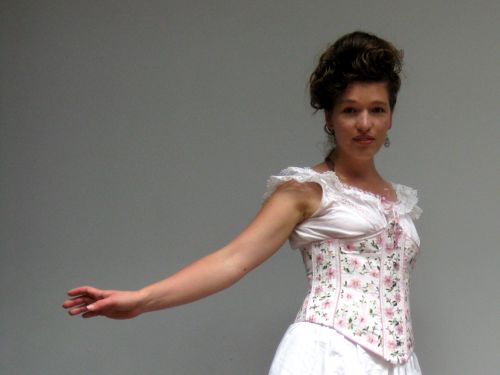
This is a review of the fit, comfort, and wearability of the 1900 ribbon corset pattern from Jill Salen’s Corsets: Historical Patterns and Techniques, and of the pattern itself.
First, the pattern:
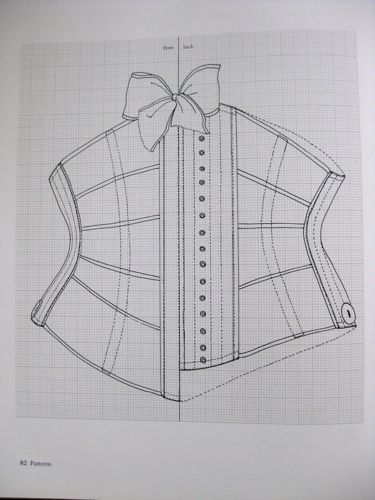
The pattern, when you first confront it, looks ridiculously hard and completely incomprehensible. This is true of all ribbon corset patterns in my experience. As soon as you put a prototype together and figure out how it works, the logic of it all comes together in your mind (or at least it did in my mind!) and the whole thing makes perfect sense.
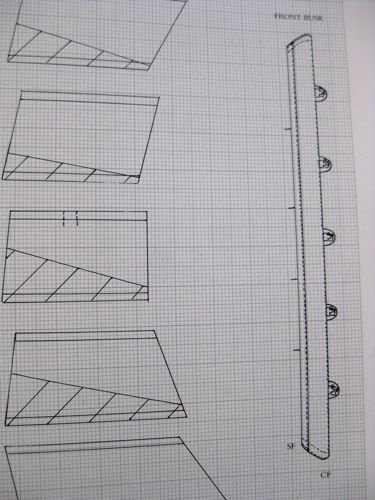
There are some very interesting things about this pattern. Because the side, back, and front pieces are perfectly straight, the seams that meet them are very curved, to give the corset its curving and shape. The front and back seams are particularly curved. I’m not used to sewing two very curved seams at the centre front and back, modern seamstresses are generally taught to keep both of these seams perfectly straight, so it did take a little mind-readjustment.
Flaws/problems in the pattern.
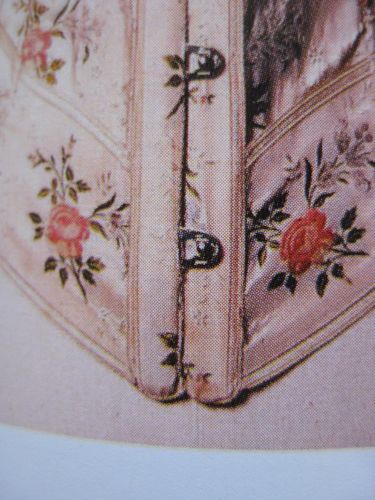
- The busk ends: Jill Salen has drawn the busk pieces with pointed tops and bottoms, following the deep points of the corset. I got all worked up trying to find a way to cut/sand the tips of my busk pieces into matching points, and then I took a really close look at the image of the original corset, and realised that it has normal, slightly rounded busk ends, just like modern busks. So ignore the busks in the drawing, they aren’t accurate.
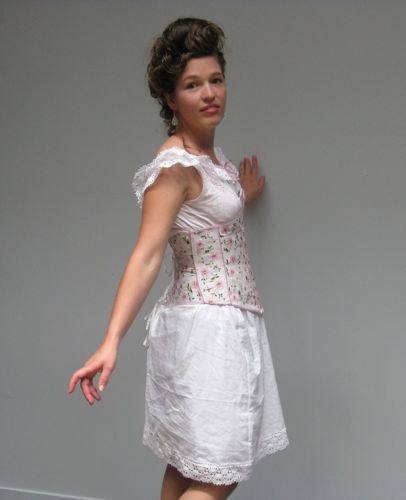
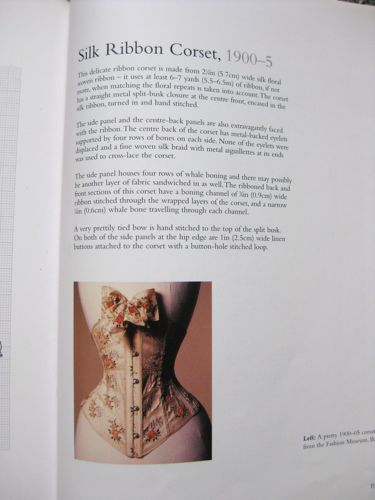
- The bust/waist/hip ratio: In the image of the original corset, it is shown on a mannequin with extreme, Camille Clifford style, curves. I did an exact replica of the originals measurements, based on the pattern, for my first prototype, and it just doesn’t have that kind of curves. Yes, it has a 21″ waist, but the hips and bust to go with it are only 30″/32″ respectively. When I sized up the pattern to fit me, if it fits my bust and hips properly it doesn’t reduce my waist at all, and I’m not a curvy girl. So I can only assume that either 1) the corset, as it is shown on the mannequin, is clipped in back to make it look curvier, or 2) Salen has nicely, but irritatingly, pre-altered the pattern to suit a modern figure. I expect the first is more likely. Luckily it is very easy to alter the pattern (just make your side, front, and back seams curvier!), so a more extreme figure is easy to achieve.
- Matching of seam measures: Some of the simple, straight, ribbon seams/overlaps that are supposed to match up don’t. They are simply different lengths. It only the difference of 1/4 of an inch in the book, but this turns out to be quite a lot once you size the pattern up! So I definitely recommend making a prototype out of strips of cheap fabric before you cut into your ribbon.
- Pattern shapes: When you assemble the horizontal ribbons for side front and side back panels it quickly becomes clear that some of the ribbon pieces actually have should actually be cut in curve ( or V < shape at their ends, rather than the simple slope angles that the pattern shows. This is another flaw/problem that will become apparent during your mock-up prototype. Use the prototype to determine if you need to add a bit of ( to the end of a / to make sure that your corset doesn’t come out too small.
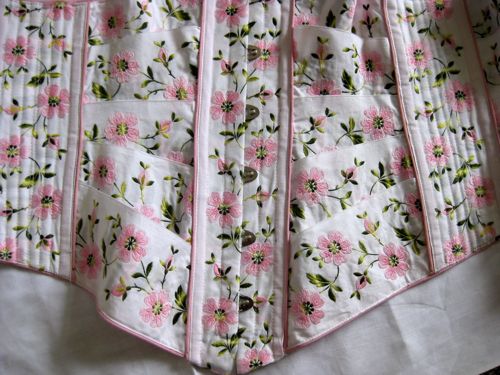
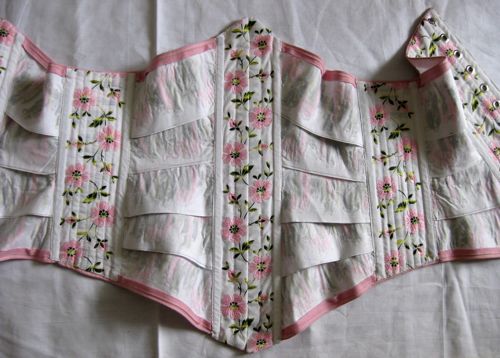
- Horizontal seaming?: Salen’s descriptions and pattern don’t make it at all clear if each piece of horizontal ribbon should be sewed to each other along the horizontal edges to make solid side front and side back pieces. I did a bit of sleuthing on the internet and looked at every single ribbon corset I could find. Whenever it was possible to tell if the ribbons were sewn together or not, they weren’t, so I assumed that this one would be the same, and didn’t. I don’t know if that is how the original is constructed, but I do know that it is how other ribbon corsets were constructed, and that it works. The extra bones on the side front and side back pieces (which I didn’t bother to include on my corset, as it was sturdy and shaping enough without them), would hold these pieces together a great deal more than with most ribbon corsets, and makes it possible that the side front and side back ribbon pieces are actually sewn into solid pieces.
- Lining: Salen describes the front, back, and side vertical patterns as being lined in the same ribbon as the outside. However, she doesn’t mention how the horizontal side-front and side-back panels are finished, and if they are lined, and there were no images to refer to. It’s entirely possible that the original ribbon used was woven tightly enough to not need a lining. Unfortunately, the design in my ribbon had lots of loose threads on the back, and these would need a lining for protection. I looked at cutting strips of a plain fabric, folding both edges, and sewing them down to the ribbon, but was afraid this would make it too bulky. I finally did something that I am sure isn’t historically accurate, and used iron on interfacing to line and cover the back of each piece of ribbon. Naughty me! I’m making this corset again and trying the fabric lining option with a thin, crisp, silk taffeta to see if that is a more elegant, but equally suitable, lining option. I’ll keep you updated. Of course, if you use a plain and sturdy ribbon than lining won’t be a problem at all.
Great things about the pattern:
- Resizing: The pattern is super easy to resize to practically any waist measurement. Just figure out how much you need to add to the total circumference of the waist, divide that by 4, and add 1/4 of the total to both the front and back set of horizontal ribbons, being careful to keep the end angles the same. Easy peasy! Vertical alterations are a little trickier. If you are a lot taller than the original wearer, I recommend simply using a wider ribbon (which is what I did), to increase vertical height.
- Alterations: In addition to sizing the pattern up and down with the same hip/waist/bust proportions, it is very easy to alter any of these proportions to suit a figure with more or less hips, bust, or all-round curves. Just reduce or add to the curves at front, back, and sides. All in all, this is one of the easiest patterns I have ever worked with in terms of resizing and alterations.
- Easy: as mentioned above, it looks tricky, but as soon as you figure it out, the corset is super easy to put together, very logical, and very quick to make. Oh, and it fits a lot of figures without any alteration. You can’t ask for more than that!
Wearing the corset:
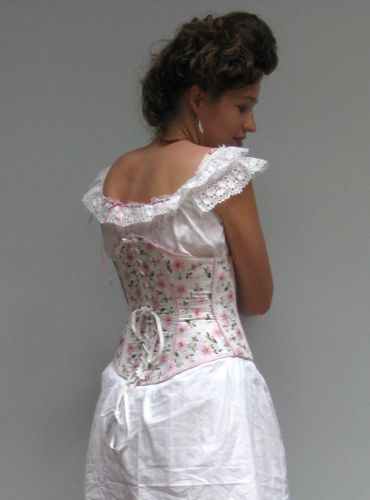
Is fabulous. Really. It’s so comfortable, adapts and fits to so many body shapes, is so light, and so un-restrictive. It won’t be quite as comfortable and unrestrictive once I adapt the pattern to encourage serious curves, but even so I suspect this is going to be one of the most comfortable corsets going for the effect it give.
The one drawback to the corset is that it is an underbust corset, so unless your bust is exceptionally well formed and your chemise gives it enough support and shape for you to feel comfortable without anything else, you are going to want to wear a bra or historical bust supporter/enhancer with it. This, unfortunately, tends to decrease comfort levels. And you have to go to the trouble of making another piece. All of this is making me think that I really want to develop a ribbon corset pattern which has a bust built in. No, it won’t be entirely historical, but I can guarantee it will be pretty!
The overall verdict:
The pattern has some issues with clarity, but once you work through those, it is super easy, super pretty, and well worth the effort.




Awesome review, Dreamstress. I just got this book as well and I thought those ribbon corsets looked INSANE. I don’t know if I’ll try one yet, but this review definitely helps. Thank you!
I was very intimidated by the pattern for a long time too, but they really aren’t that hard.
I’m tempted to test your assertions of scalability, and ask you to help me make one. 🙂
LOL – I’m really going to have to start charging for my services!
Interesting hypothesis, Miss Sarah. I imagine that a small alteration such as an extra vertical panel at each of the middle sides, even only on the interior, would increase the possibility of scaling up. But what would you do with your (ahem) magnificents???
Always amazed at your sewing skills. The corset pattern looks to me like a complicated and confusing jigsaw puzzle. It did turn out beautifully.
I just made this corset and encountered all the problems you mentioned! What actually bothered me the most was that the strongest curves of the side back and side front panels sat next to the busk and the lacing panels, instead of at the waist where it would have promoted the kind of curve we see in the picture. The fact that the side panel and back panel curve is at the front and back instead of at the sides means that the curve has to be “translated” to the sides via the straightness of the bones in the front and the back. I think some of the curve actually gets lost that way. (It is also possible that what I just said made no sense at all…)
I did some very careful mathematics, but still managed to scale the pattern up waaay to big. I was aiming for a 26 inch waist, and ended up with a 31 inch waist. I’m still not sure what I did wrong there, but I don’t think it was the pattern’s fault!
On a different note, I made a pair of 18th century stays form Norah Waugh’s Corset’s and Crinolines to great effect. I messed around with the pattern a bit and everything came out perfectly the first time. It can be seen here: http://ladywilhelmine.wordpress.com/2011/01/30/the-shweshwe-corset/
I’ll be posting the ribbon corset here as well, if you want to have a look at / sympathise with how that turned out.
Keep up the good work, so professional and so neat!
The corset is gorgeous! so are you! ive got that book but im not experienced enough to make anything.
I tried it out using your review as a guide and I have to say, it turned out absolutely gorgeous. I didn’t have wide enough ribbon, so I followed your example of using fabric bound with narrow ribbon (which was hell to do…) But besides all that, it was quite easy to put together and sew… It’s just the scaling and the pattern that put me off at first, because it looks so difficult.
Your measurements of the unaltered upscaled version were a great help! ^_^
Oh, I’m very glad it was helpful! I hope you enjoy your corset!
I found your website browsing for ribbon corset construction tips. You write so clearly and knowledgeably and I know I’m going to learn a lot from your posts. Thank you!
I’d just seen a ribbon corset that seems period to me and is an overbust. It seems to have pleats in the ribbon at the top to make a cup like support. No idea if it’s authentic but I thought you might be interested. http://florialparis.livejournal.com/6023.html