
Welcome back to the Panier-Along (look, there is a button! And it links to a Panier-Along page!). Yesterday we cut out our panier pattern pieces – today let’s start sewing!
The first sewing step it an optional one. Some historical paniers have slits at the top so that you can use the paniers as pockets (since wearing paniers and pockets can get a bit tricky). If you don’t want pocket slits, you can skip this step and move halfway down the post to the next step.
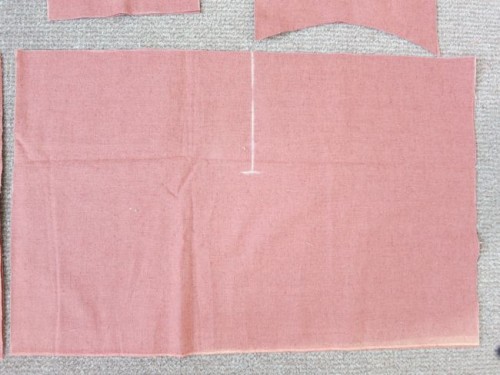
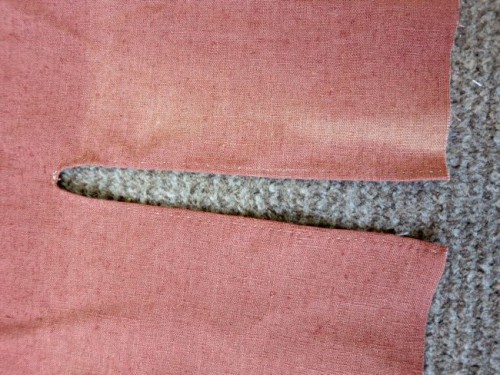
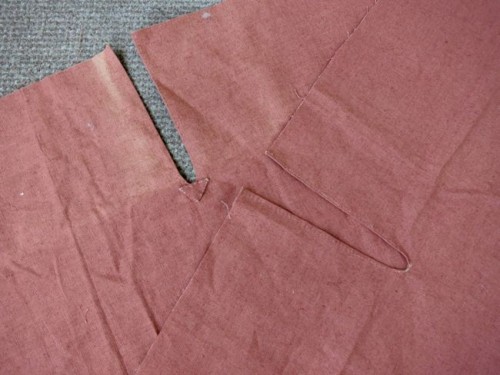
First, mark a line 6″ down from the centre top of your 25″ wide panier outside piece. This will be your slit to reach through.
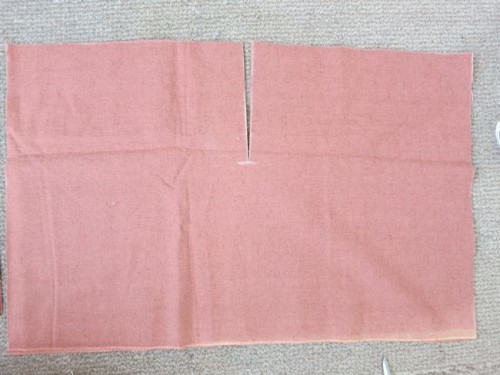
Cut down this line:
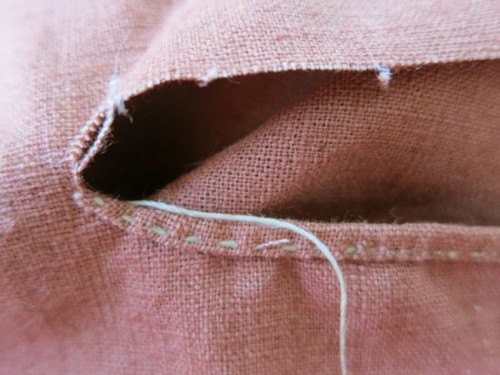
Now, you need to finish the raw edges of the pocket slits. My way of finishing pocket slits is based on historical examples, but if this method is too complicated you could just widen your slits a little so that they form narrow U shapes and bind the edges with bias tape.
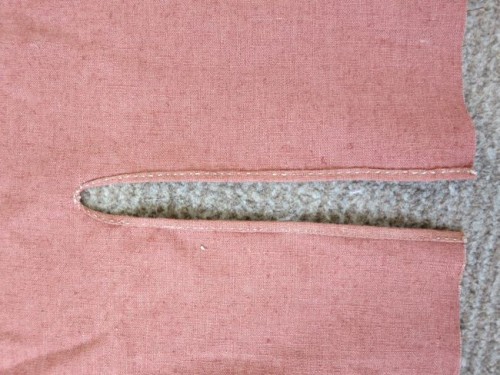
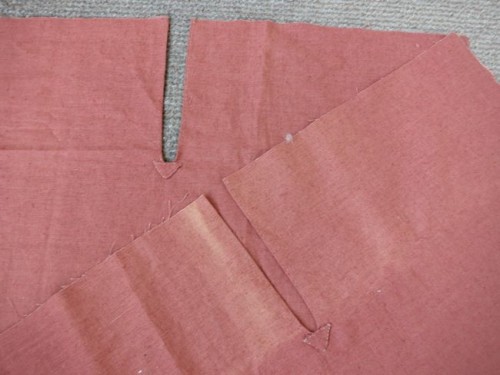
To do it historically, make a narrow hem down one side of the slit, tapering to nothing at the bottom of the slit. I’ve done it by hand, but this can be done by machine as well.

A detail of the bottom:
Do the same to the other side of the slit, and sew back and forth a couple of times at the bottom of the slit to strengthen it:

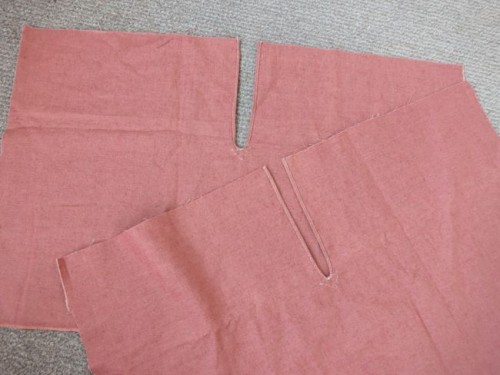
Your finished slit will look like this:
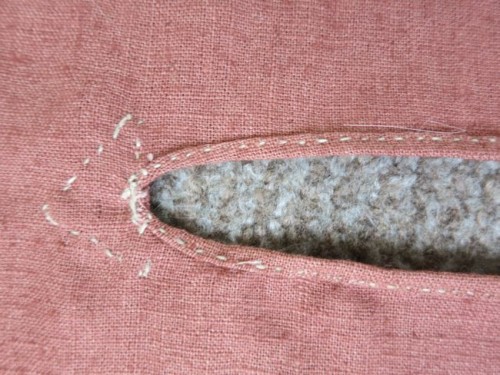
Front:
Back:
Then do the same to your other slit.
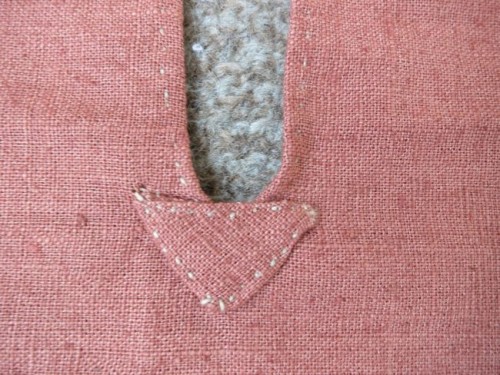
Now we need to re-inforce the bottom of the slit so that it doesn’t rip with wear and use. First, cut a 1 1/4″ square from your scrap fabric:

Fold the square in half diagonally, forming a triangle:

Press the raw edges of the triangle under it, and place the folded edge of the triangle along the bottom of your slit. Sew it in place. (and I’ll show you how-unbeautiful mine looks, so that you don’t feel bad about how yours looks, however it comes out).
Do the same thing to the other slit:
Yay! You now have two strong, historically accurate, functional pocket slits. Or not, if you chose to skip this step.
Right, now let’s get to the sewing that isn’t optional: your hoop channels.
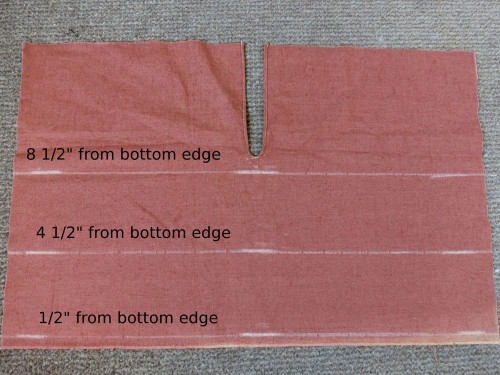
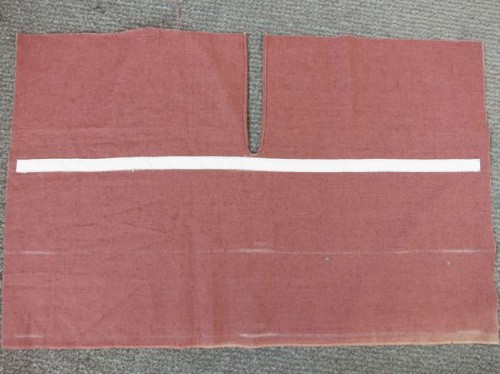
On the backs of the panier side pieces (the 25″ wide ones) mark points at half an inch from the hem, 4 1/2″ from the hem, and 8 1/2″ from the hem.
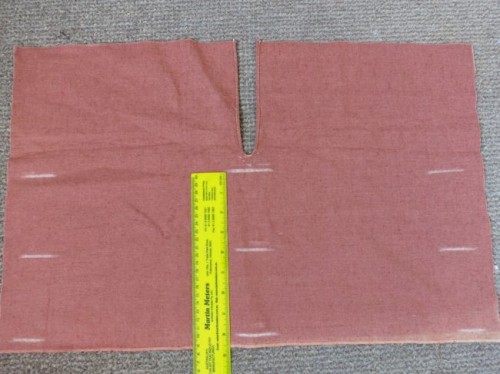
Draw lines with chalk across your piece, connecting these points from edge to edge. These will be the lines that your hoops will run along.
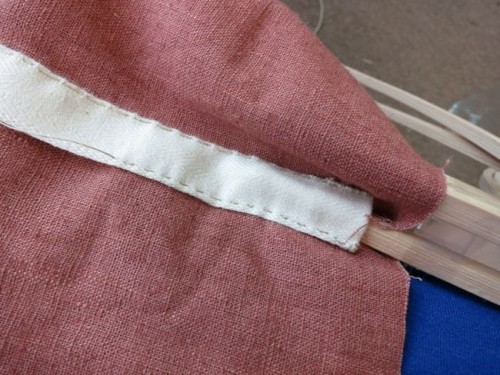
Using your twill tape, or strips of fabric with their edges turned under (making sure that either is wide enough to sew down and snugly slip your hooping/cane etc through, lay the a 26″ length of tape with it’s bottom edge along the top line and pin it down:
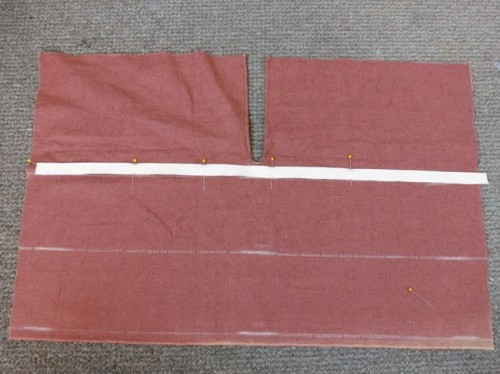
Turn the edges of the tape under at each end so that they are 1/2″ away from the cut edges:
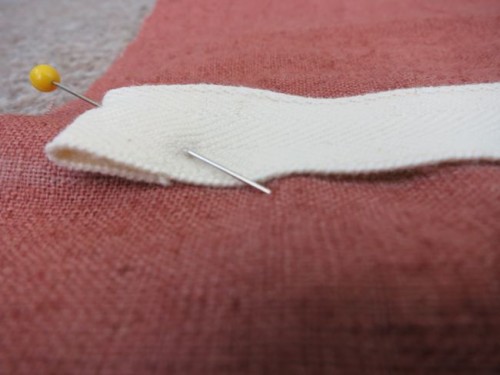
Sew your tape down along the line by hand or machine, taking care to make sure the ends are well tacked down:
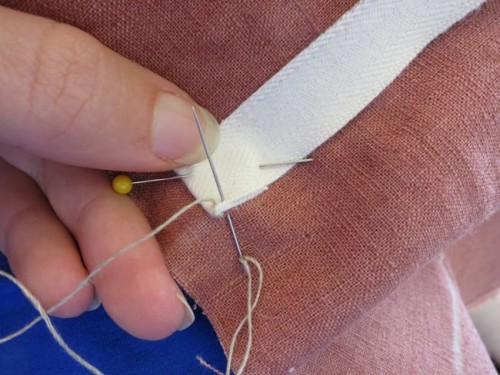
I like to do a bit of a Hudson Bay start and sew in a few inches on the top and bottom of the tape and then double check that my hooping fits in snugly, without being too tight and hard to insert:
If that is all in order, continue sewing your entire length of tape on:
Repeat with the middle tape, making sure the bottom edge of the tape is along the top of your chalk line:
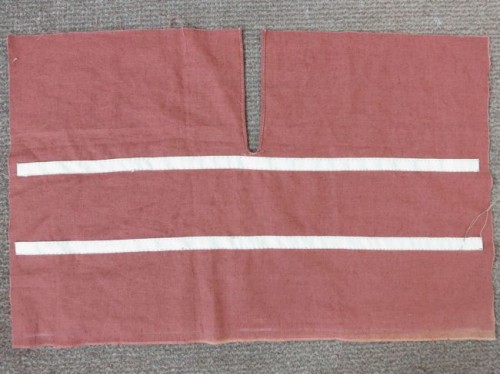
Do the same with the bottom length of tape, making sure to leave a 1/2″ seam allowance below it. And then do the same thing for the other panier side piece!

Tomorrow I’m going to take a little break from the Panier-Along, and post some pretty, pretty inspiration for an upcoming Historical Sew-Fortnightly challenge, and then I’ll be back on Saturday with your next step.
Wow, this post was written over nine hours after this comment, your time zone is in the future!
These instructions are very clear and easy to follow.
I’m having a bit of trouble locating my pieces of cane but I am definitely doing this sew along. The lure of gigantic pockets is too great.
Hey! It’s 8:30 pm on Wednesday here, why does the comment say 1:24 am on Thursday? It lies, I would never be on the computer at that hour.
Oops, pm not am, now I feel even more ridiculous. Sorry for cluttering up the comments thread like this, I’ll stop now.
Is it necessary to tack down the edges of the boning channels? Will the boning be added after the entire panier is completed?
Loving this Panier-Along! Thanks!
Hi Adi,
The boning is added about halfway through. I’m not sure what you mean about tacking down the edges – we are sewing down the twill tape along the edge. What would tacking look like?
By tacking I meant sewing it down.
Thanks!