

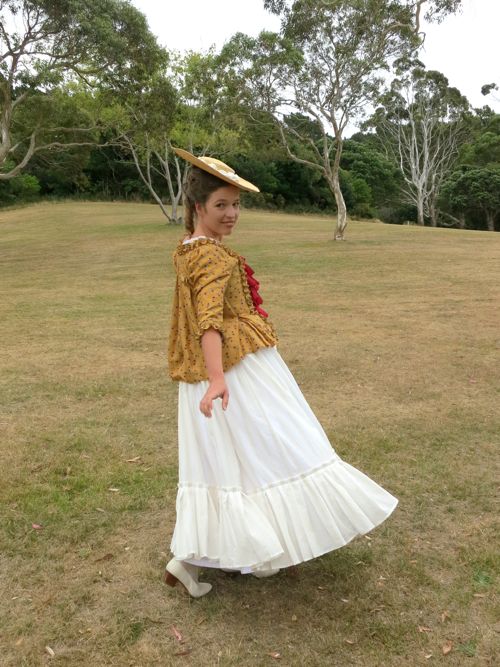
1780s pet-en-l’aire and pleated petticoat
I’ve already shown you all the glamour shots of my new subtly-striped 1780s petticoat, but I thought some of you might be interested in the construction details.
For the overall look of my petticoat I was inspired by fashion plates like this one from 1778:

Gallerie des Modes et Costumes Francais. “Femme en Caraco plisse de taffetas changeant gorge de pigeon..” 1778, MFA Boston
Obviously my petticoat doesn’t match my pet-en-l’aire, and I’ve made my ruffle a little narrower – less than 1/3 of the petticoat length, rather than almost 1/2 of the length, but I’m comfortable with the overall look.
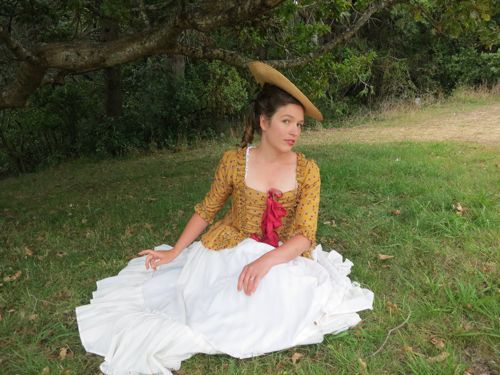
1780s pet-en-l’aire and pleated petticoat
The skirt is made from three 36″ long widths of 45″ wide cotton muslin with a subtle self-stripe in bamboo. The widths are sewn together with a 10″ long gap for the skirt opening left unstitched at the top of one seam.
Sewn together, I had 132″ of skirt to gather in to my waistband. This is a little too much width for an 18th century petticoat – most examples that I can find are no more than 112″ wide, and if I did it again I’d probably omit that extra 20″.
To gather the skirt into my waistband I used cord gathering, folding a bit of my fabric over the top of the cord and stitching it in. I gathered the skirt widths so that the centre front width goes almost all the way to both my sides, and a full two widths are gathered on to the back, so there is more fullness at the back of the skirt to go over a bum-rump.
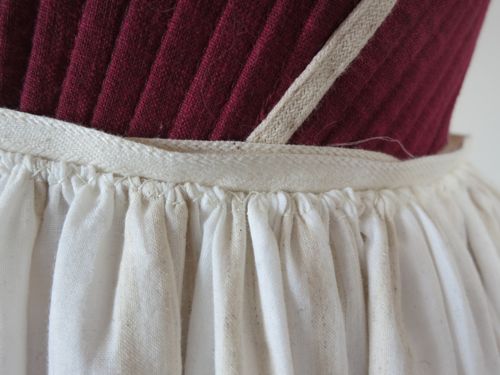
Cord-gathers
I attached the gathered widths to a simple twill-tape waistband which wraps around my waist twice and ties with zig-zag stitches. Quick and dirty, but surprisingly effective.

The zig-zagging on the back of the twill tape waistband
Zig-zag stitches don’t pull and squash the gathers like straight stitching would, and while it appears weak, I actually find this method to be stronger than straight stitching.

The petticoat gathered on to the waistband
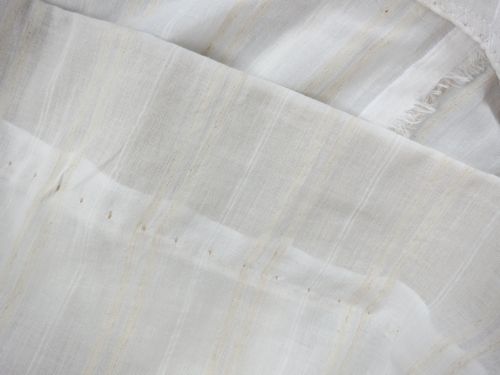
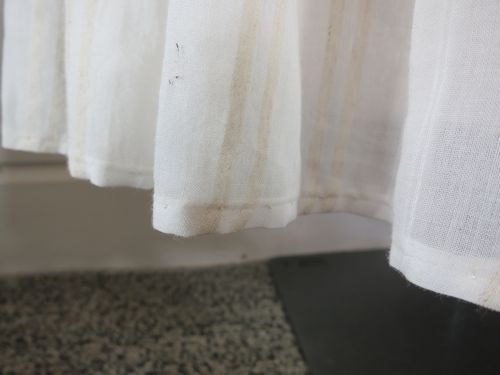
To give the petticoat body and support the hem and ruffles I cut a 132″ long x 4″ wide strip of stiff linen (it actually came out of a vintage obi, and was used to stiffen and support the obi) and folded the hem over it and sewed it in.

The stiff brown linen hem support seen through the sheer muslin on the interior of the skirt
All of the hems are done with a machine blind-hem stitch – totally cheating, but looks reasonably like hand-sewing from the outside.
The stiffened hem and blind hem stitching seen from the right side
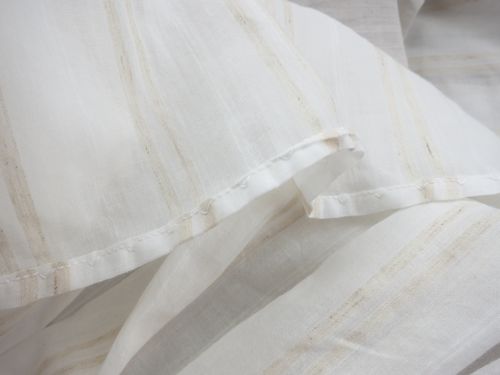
The hem stiffener shows through the skirt fabric slightly, but this isn’t a problem as the ruffle hides it. The ruffle is made from 12″ long widths of the fabric – 9 in total (3 per each skirt width) as box pleats pleat up at a 3:1 ratio. Making box pleats in striped fabric is so wonderfully easy, though time consuming, and I was even able to match the stripes.
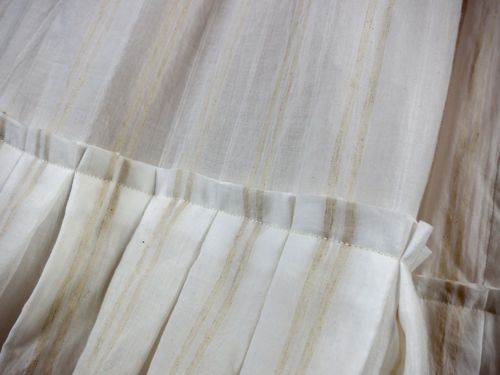
Box pleats and matched stripes
Gathering might have been more period accurate than pleating, but then I wouldn’t have been able to match the stripes, and obviously I’m not focused on historical accuracy with this petticoat. Besides, I wouldn’t have been hand-gathering, and neither cord nor machine gathering would look right on the exposed ruffle.
Like the petticoat itself, the pleated border is hemmed with machine blind-hem-stitch, just a much smaller version.
The blind-hem stitched hem
The wrong side of the blind-hem stitched ruffle
And there is my petticoat! Next time I’ll do it ‘properly’, with less width of skirt, a longer hem ruffle, period appropriate fabric, and hand stitching. You know what though? I still love this version!
1780s pet-en-l’aire and pleated petticoat
The Challenge: Stripes
Fabric: 5 metres of bamboo-cotton blend with a self stripe
Pattern: none, based on historical examples (only I made the petticoat fuller than any historical examples, and now I’m regretting it)
Year: ca. 1785
Notions: cotton thread, cotton waist tape, linen hem stiffener.
How historically accurate is it? OK, so this was a quickie rather than a super-accurate project. It’s completely machine sewn and the stripes are bamboo (granted, machine processed bamboo rather than chemically processed bamboo, so more like linen than viscose). 50% maybe.
Hours to complete: 6. Even machine sewn, all those metres of hemming and pleating take time.
First worn: for a photoshoot with my 1780s pet-en-l’aire
Total cost: I bought the fabric so long ago I can’t remember how much I paid, but I think it was $4 a metre, so $20 for the skirt.
It’s such a cute petticoat! I also find zigzag can be stronger than straight stitch. I think it’s because zigzag has a bit of stretch in it, making the seam more resilient.
I think it’s also about the strength difference between a vertical line with pressure hanging off of it, and a horizontal line with pressure hanging off of it. You need a stronger line horizontally to support the same amount of weight.
You’re probably right there.
I was intrigued to see the way you attached the gathers to the tape – very effective and very simple. The stiffening under the pleats is also a great idea – they sit beautifully.
Yeah, it works really well for this type of petticoat. And thank you!