
Polly / Oliver is almost finished, I’m just stuck on it because I need to try it on to check the fit, and my cold has gone to my lungs and I can’t breath with a corset on…so….
While you wait to see the finished jacket, here is a clever tutorial with a technique that I developed to solve the problem of matching the super shiny cheap-gold looking jacket buttons to the beautiful dull gold buttons on my waistcoat.
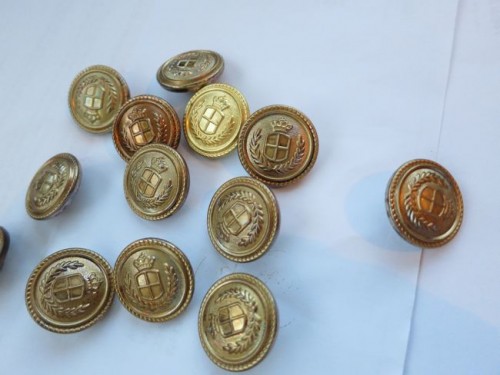
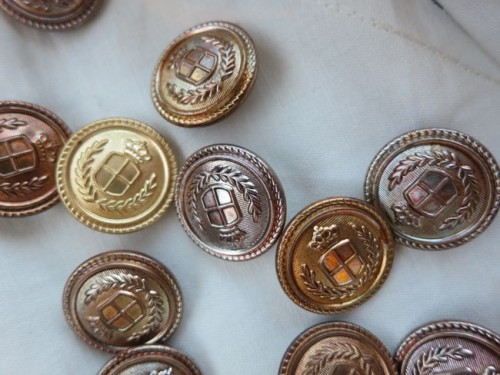
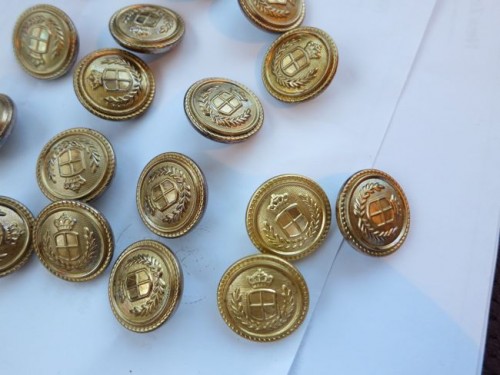
In this tutorial we’ll take super bright, shiny, cheap gold buttons (or jewellery bits, or anything else that is all metal and cheap gold-colour) like the one in the upper-centre, and turn them into the copper ‘penny’ colour of the one to the left of it, and turn those into the lovely antique gold colour of the rest of the buttons.
I can’t take full credit for the tutorial – I owe the first half of it to Mrs C, who learned it from the amazing Nini of Things Unseen. Their technique got me most of the way to what I wanted, but not all the way, so I tested and experimented until I got exactly what I wanted.
Right, so what do you need to do your own jewellery or button antiquing?
- Cheap gold metal jewellery or buttons (this has worked with all the bits of gold coloured metal I have tried it on, but I can’t guarantee it will work on all gold coloured metal).
- A flame – the hotter the better. I’m using the burner on my gas stove, but a candle will also work.
- A heat resistant surface to put your metal bits on. I’m using a stainless steel countertop, but a plate would work just fine.
- A bowl of water – just in case!
- Tongs or a fork
- Elmers ‘Painters’ Metallic Opaque Paint Marker – gold
- Paper towels/newspaper/general stuff to make a mess on without making a mess

Gold buttons, matches, a stainless steel worktop, bowl of water, tongs

Copper and gold buttons, Elmers ‘Painters’ Metallic Opaque Paint Marker
Ok, here is the big note/disclaimer: This tutorial involves and element of fire and heat, and is DANGEROUS. Please BE FIRE SAFE, take care of yourself, and kids, don’t do this without adult supervision!
Basically you heat your metal, and then let it cool, and then paint it roughly with the paint markers.
First, we’re going to turn our buttons/jewellery from gold to copper / penny colour.

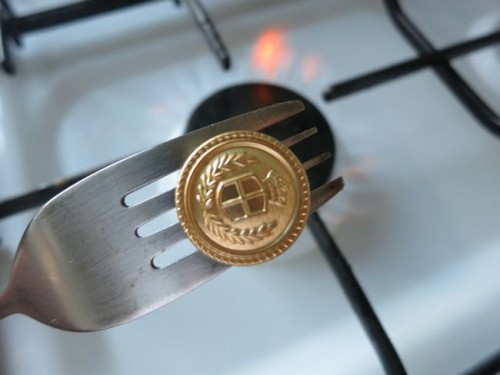
Using your flame source and tongs or a fork, heat your buttons over the flame.
Depending on your button/metal piece, you can slip one of the tines of the fork through the shaft of the button, and use that to hold your button/metal piece over the flame:

Alternatively, use a pair of tongs to hold your button/metal piece just above the flame:
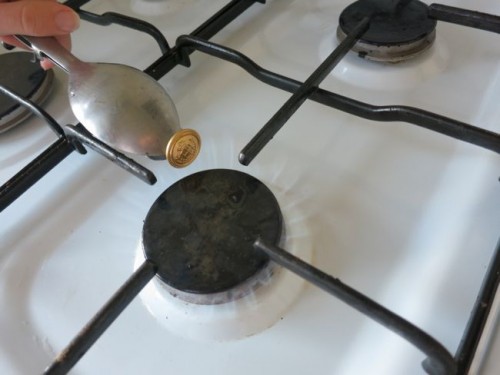
Depending on the size of your metal piece, and the heat of the flame, after about 20 seconds your metal will begin to darken and change colour ever so slightly:
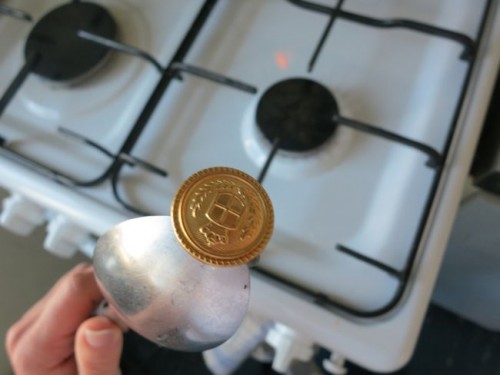
In another 10 seconds or so it will begin to smoke, and will have changed colour from bright gold to copper/penny colour. The longer you leave it, the darker it will be:
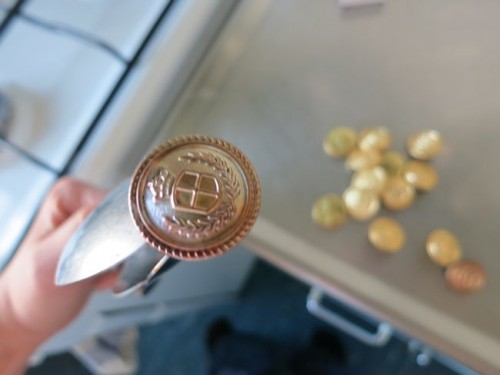
Put your button/jewellery bit to cool down on your heat-safe surface. DO NOT TOUCH IT (just in case the smoke coming off it isn’t enough of a warning).
In this photo the hot, smoking button is on the lower right, the upper two are still to be done, and the button in the lower left has cooled:
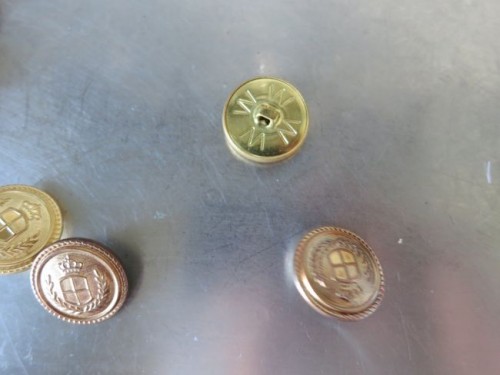
When all your bits have been heated and cooled the difference between the original gold and the new antiqued copper colour will be quite distinct.
You could stop at this point, if copper is what you wanted, or you could keep going.
Copper wasn’t what I was going for, so here is my twist to the technique. Using your Metallic Painters pen, roughly paint the top surface of your button/jewellery piece.
Let the paint dry for 10 seconds, and the rub a paper towel across any raised surfaces on your piece, to lift a bit of paint and add dimensionality to your piece.
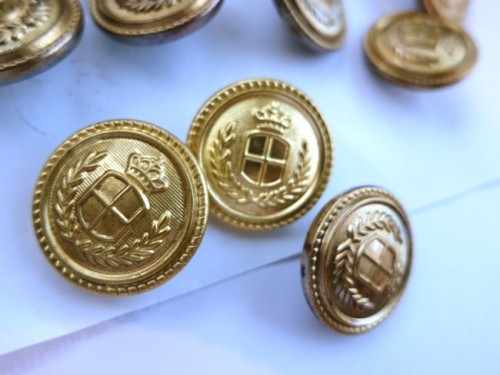
Then set your button aside and let it dry for another 5 minutes. After this the paint should be completely dry, and your piece can withstand quite a bit of wear (I scrubbed a button with a green scrubby for a minute and didn’t damage it, and rubbed and rubbed it on a piece of fabric without any loss of paint)- if the paint ever does rub off, you can just re-touch it up!
And there you go! Muted antique gold buttons or jewellery findings from bright cheap-gold originals!
And tomorrow I’ll show you what they look like on my jacket!
This is really clever. I must try it sometime.
good to know!
Very cool tutorial, Leimomi!
Genius!
Looks good! I’m not sure what marker I would use around here, but I think I will get to use this tutorial one day… Thank you!
Awesome information. Good to know and share.
Awesome! I have a project to redesign some fashion jewelry and didn’t know how to get the bright gold to match the older rubbed gold look. Can’t wait to try this! Thank you so much for sharing your knowledge and experiment.
Do you have a tip on how to use this technique on snap on buttons (which are already on my jacket!) Hopefully you do! Thanks, Rose
I wish I could do this to the zippers on my new boots–the effect you got is perfect!
Sounds fab, but tricky because of the flame factor! There are metallic finished you can rub on things. Not sure how long they would last on zips though…
Hi
Thanks for sharing this with us. It helped me alot. My gold jewelry was too golden and my dress was dull, they arent going together, jewelry design was so beautiful I wanted to wear that, so I did this, warm the tip of scissors on candle and put that on jewelry, did it on difeerent parts several time, got results 🙂
Thank u so much for sharing this great technique. I used it on a designer inspired ring n it looks beautiful. I may not be able to afford the actual piece but I’m no longer ashamed to use the ex-gaudy n shiny knock off. Once again thanks