
I’ve been working on the Queen Charlotte petticoat steadily, while tackling Lace & Lacing projects, and modern sewing, and client sewing. There is a limit to how much QC sewing I can do a day, as the taffeta is so stiff that after a few hours my hands start cramping.
The last I left you, I was rescuing my “Ooop! Cut it too short” disaster.
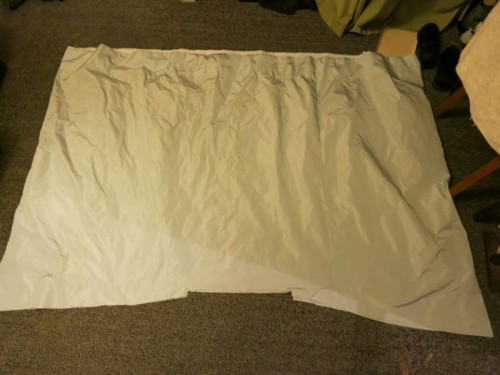
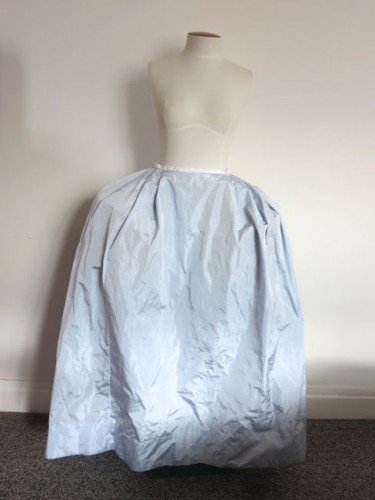
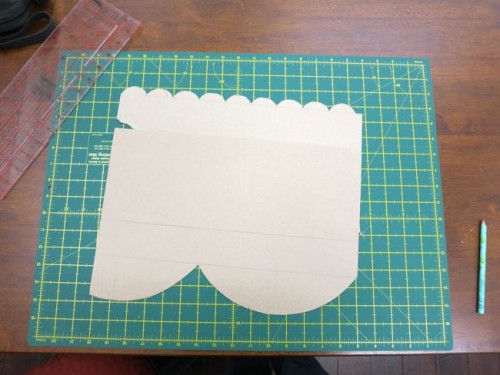
I sewed the extensions on to the top of the petticoat, and was ready to pleat:
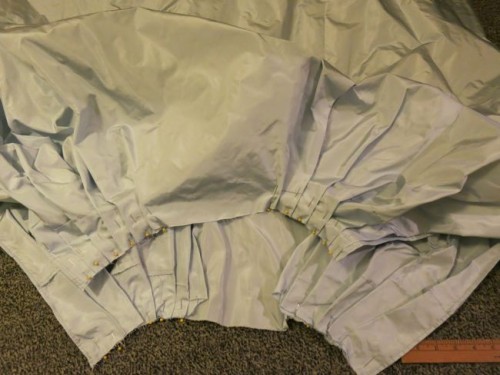
I pleated each side of each half down with 6 pleats, each 2″ deep, and spaced 1″ apart, taking the full 175cm width of each half of the skirt down to 17.5″ – enough to wrap a little on each side over stays and paniers (I know, I used both cm and inches as I sew, sorry if it is confusing).
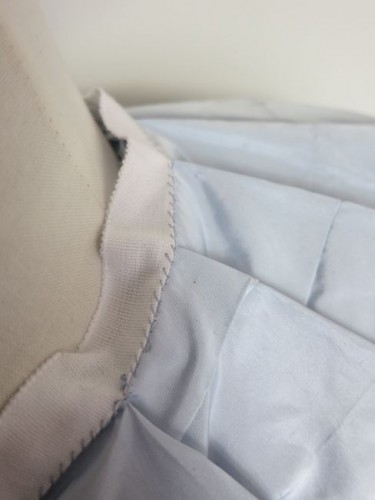
Once I was happy with the pleating, I folded the top of the petticoat down slightly, checked the hem length, and then whipstitched the top of the skirt to cotton tape (I can’t get linen tape in NZ, and can’t justify ordering it from overseas when I own so much cotton tape).
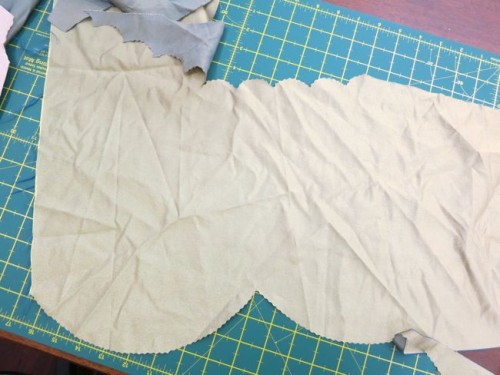
You can see the piecing of my top extension very slightly in the pleats, but it’s pretty subtle, and will be completely hidden by the robe à la française, or any but the shortest over-jacket
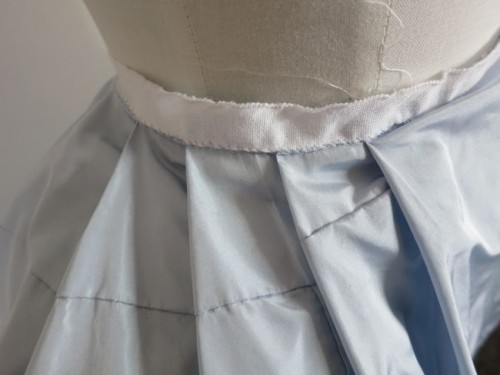
Looks rather nice:
And, in other happy news, I have managed to replicate the lovely lacey punched pattern on Queen Charlotte’s ruffle:
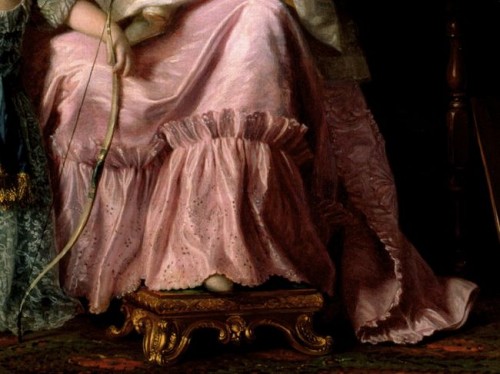
Charlotte of Mecklenburg-Strelitz by Ramsay, 1765 (detail)
OK, not replicate exactly, as my pattern isn’t nearly as delicate or elaborate, but I used Charlotte’s ruffle as inspiration:
After squinting at Charlotte’s portrait and every extent example of an 1760s robe à la française with punched ruffles that could find, I came to the conclusion that the punched patterns were rarely as elaborate as those shown on Charlotte’s petticoat. I borrowed the distinctive wreath/crescent moon shapes at the hem of the ruffles, the star/flower shapes that reoccur just above halfway up, and the holes in each small scallop at the top.
So how did I do it?
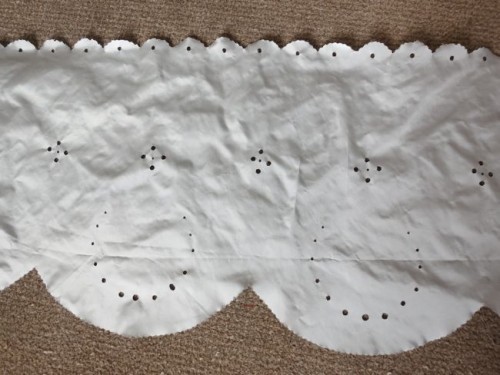
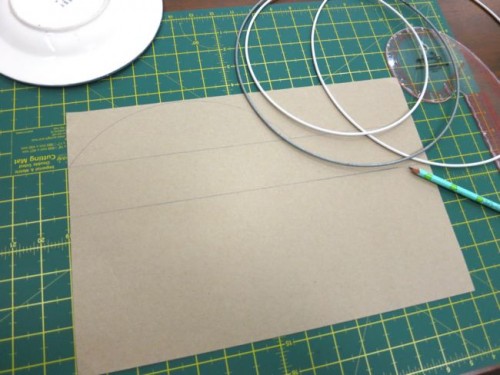
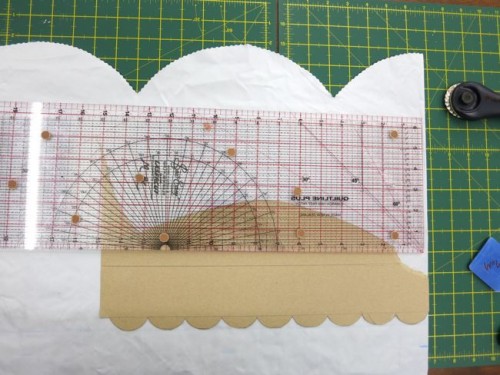
First I had to figure out and cut the scalloped scallops. I used a variety of circle sizes to create a cardstock template with a large scallop depth and size that I was happy with.
Then I did the same for the little scallops on the top of the ruffle.
Then there was a lot of squinting at Charlotte’s petticoat to figure out how deep her ruffle is. Based on the painting, it is half the length from the floor to her knee. The problem with this is that 18th century paintings often shorten the length of the shin. Luckily, this doesn’t seem to be happening in Ramsay’s painting. I decided that my ruffle would be 12″ long – just over half the length from the floor to my knee.
I trialled my ruffle on some stunt fabric, just to make sure that it looked good, and worked:
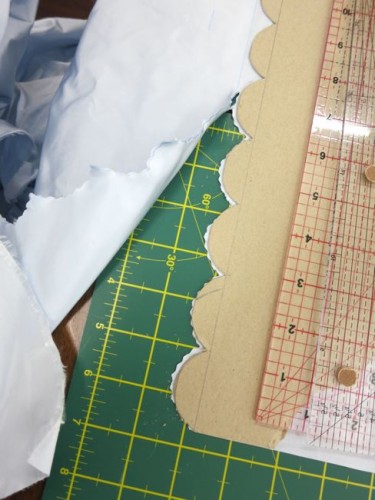
I’m cutting the ruffles with a Fiskars scalloped rotary cutter. Running the rotary cutter around my big scallops was easy.
Cutting the little scallops? Evil. So hard!
Once my ruffle was cut I was really tempted to call it good, but it just didn’t have enough dimensionality. I needed to find a way to create the beautiful punched pattern on Charlotte’s ruffle. So how did I do it?
This:
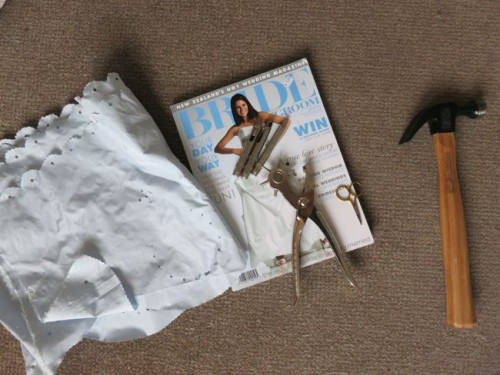
Nine different hole punch sizes, a teeny pair of scissors, a hammer, and a sacrificial magazine (which I actually had to buy from my local op-shop, because I didn’t have anything around the house that I was OK with ruining!).
I drew out my punch pattern on graph paper, and figured out which punch I would use for each hole. Then I punched holes in my graph paper template, and used it to mark all the hole placements on the taffeta with a pencil.

The biggest holes are done with single leather punches and a hammer, with the magazine as a buffer. The littler holes are done with my 6 in 1 turning punch thingee that I inherited from Nana.
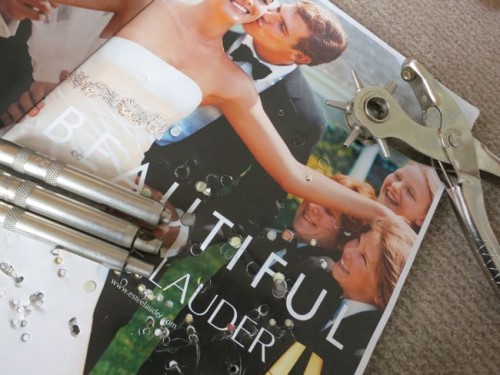
The problem with all of these tools is that they are meant for leather, and weren’t really sharp enough for the thin taffeta, so I often had to finish cutting the holes with my little scissors.
The smaller punches got so bad, and my hand got so tired from squeezing it, that by the end I was putting the taffeta between the punch, putting the other punch holers against the magazine to protect them, and hammering down. Other than being time consuming and fussy, it worked a treat, until I accidentally got the end of my taffeta caught between the loose punch holers and the magazine and ended up with a few extra holes:
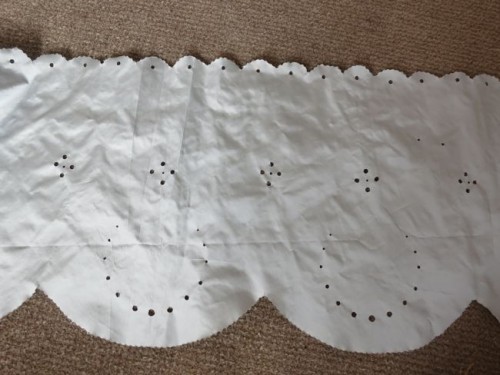
Oops!
At least they are at the very end of my ruffle so won’t be too noticeable.
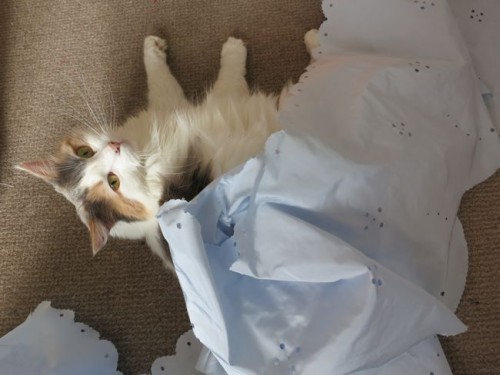
I still need to figure out how to punch the holes that should be centred on the join in the ruffle, and sew the ruffle to the petticoat, and then I’ll be done (hurrah!). In the meantime, Fiss is demonstrating that the ruffle is just the right length to be a kitty-petticoat, but she still prefers her own pretty fur coat:
Nice work!
Thank you!
Very cool, and so unusual! I’d love to try that sometime.
Thank you Cassidy!
It’s not a thing I’ve seen often in reproduction garments, but it seems to have been reasonably common in the 1750s and 60s based on period portraiture.
Brava! This will be neat once its complete. I know that 30s dresses were known for their teeny cut-outs and punches like you petticoat ruffle. How did they do it then? I know that they used a laser for The Green Dress in that James McAvoy film. (Cannot remember, no spell the female ladies’ parts)
You know, they did that with the infamous green dress, but as far as I can tell it was actually really, really, really uncommon in the 1930s – even among extremely high end gowns. It doesn’t make sense: it’s not suited to the fashionable fabrics of the time as they would fray. It works with laser cutting, as that seals the edges to some extent, but wouldn’t have worked with most techniques available in the ’30s. Certainly it wasn’t a characteristic 1930s design treatment, unlike, say, applique, piecing, soutache work, beading, picot hems, bias cut, elaborate seaming, etc, etc. I wonder what Jacqueline Durran was using as a source.
Thanks for clearing it up. I’m trying to remember where I read/what I saw, too, now. Maybe it was to help the character look extra naked and exposed. Oh well, fuzzy brain. Can’t wait to see the finished look! Brava!
I am so impressed! What a beautiful job! You hands must be screaming for mercy, though. Huge amount of work.
Oh thank you!
They are a bit sore – I’m taking a few days off 18th century handsewing to focus on 1890s and 1950s and give myself a break.
It may help to place a thin piece of leather behind the fabric when you make the punch. The punch gets to pass through the fabric on its way to cut the leather!
Oh, what a clever idea! I can’t believe I didn’t think of that – I tried all sorts of other things (felt, cardboard, other fabric), and had a bag of leather scraps that I completely missed. Thank you!
Wow, that really turned out well. You might try sharpening the punches with some jewelers rouge on denim, or crocus cloth to get those holes to come out more easily.
I love the look of this punched lace. I was dubious when you first mentioned trying it, but you made it work! Awesome. I’m looking forward to seeing the completed petticoat.
Thanks Kathy! I was wondering how to sharpen the punches – thanks for the tips.
I am pleased the punched taffeta meets with your approval!
Bravo, bravo! It’s so good to see punched trim, and you were very clever in how you did it. Despite the pain, it turned out so well. I predict there’ll be more of this trim around the Web now that you’ve lighted the way.
Say, how easy did you find the Fiskars scalloper to go through the taffeta? I tried a scalloped punch made for paper (from Martha Stewart) recently on some 18th c trim, and it failed miserably: it just couldn’t hack silk.
Very best,
Natalie
Thank you! I’m tickled you approved!
The Fiskars scalloped rotary cutter was a dream – it’s designed for fabric so cut very easily. I had to trim a little at some scallop valleys, but that wasn’t a problem.
I’ve tried to use scrapbookers paper punches in the past to punch taffeta, and they just didn’t work. Pity, because they come in so many pretty pre-designed patterns. It would save a lot of work!
That’s lovely, I definitely want to give it a go later! I love all the 1700’s outfits I’ve seen you make so far, my husband wants me to make one but I have no idea where I’d wear it. I’m not aware of any opportunities here in Christchurch. Regency I think I could get away with in summer though.
Oh I think that you should start a Salon, as they started in the 17th century. You can be Mme de Scudery! Invite all of your sewing friends, or invite giant nerdy friends who would enjoy a guest speaker!
They aren’t quite salons, but for the most part I have had to make my own events, and gather people who are interested. At the very least, make an 18th century ensemble and come up and visit us!
Goodness! Looks lovely and will be quite unique, but just thinking about all those holes makes my hands hurt! I’m sending you empathetic hand-calming-thoughts from afar!
Best,
Quinn
Thanks Quinn! For the compliments, and the nice thoughts!
I’m very impressed. There’s just no way I’d have the patience for making one of these.
Thank you! I think it’s just a matter of doing a little bit at a time – that, and my love of inane, boring, extremely detailed and repetitive tasks.