
One of my favourite sewing techniques is flat lining.
Flat lining is used extensively in historical (particularly 19th century) sewing and couture sewing, but it’s a technique that is not frequently taught or used in modern sewing books or patterns, which is a pity, because it’s awesome, and opens up many possibilities for design techniques and fabric use. I used it to make thin, flimsy fabrics strong enough to make corsets and jackets out of, and to make bodices that shape and hide squish without adding bulk and weight.
Though the terms are sometimes used interchangeably, flat lining is not quite the same thing as interlining. These days (according to Shaeffer’s Sewing for the Apparel Industry) interlining is used to mean the same thing to as interfacing, whereas flat lining is an underlining, and is never fused. According to the Singer Sewing Book interlining is meant to add warmth and bulk, while flat lining or interfacings adds strength and support, but bulk and warmth should be avoided.
When picking a flat lining fabric, pick a fabric that, when it is combined with your outer fabric, will have all the qualities that you want the finished piece to have. The best flat lining fabrics are very strong for their weight/bulk, and very stable.
If you want a to add strength to a thin silk for a summer wedding dress, while keeping it light and cool, flat line with silk organza. If you need to stabilise a ‘squidgy’ and moveable piece of fabric (one with a high sheer rate) pick a very stable, but thin fabric. Coutil can be used as the flat lining to an attractive but not-strong-enough-for-corsetmaking fashion fabric, so that you can make a corset out of the fashion fabric. If your outer fabric is strong and stable on its own, but you still want a layer of fabric between your outer and you without a traditional lining, a soft, fine muslin/calico is ideal
Victorian bodices, from Worth creations to those made by humble local dresmakers, are almost always flat lined. One of the most common flat-lining materials seen in Victorian bodices is a thin crisp-but-soft polished cotton, often in an unbleached brown:
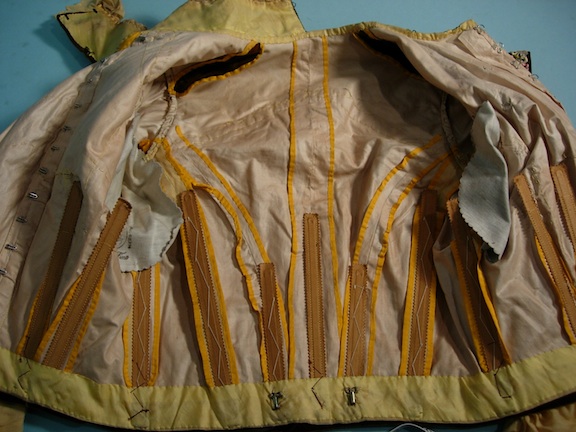
Bodice of Yellow Silk Crepe and Brown Velvet with Embroidery, 1897-8, Antique Textile
There are also many examples flat lined in what is essentially a fine, soft cotton muslin, and many examples flat-lined in silk – usually a thin taffeta.
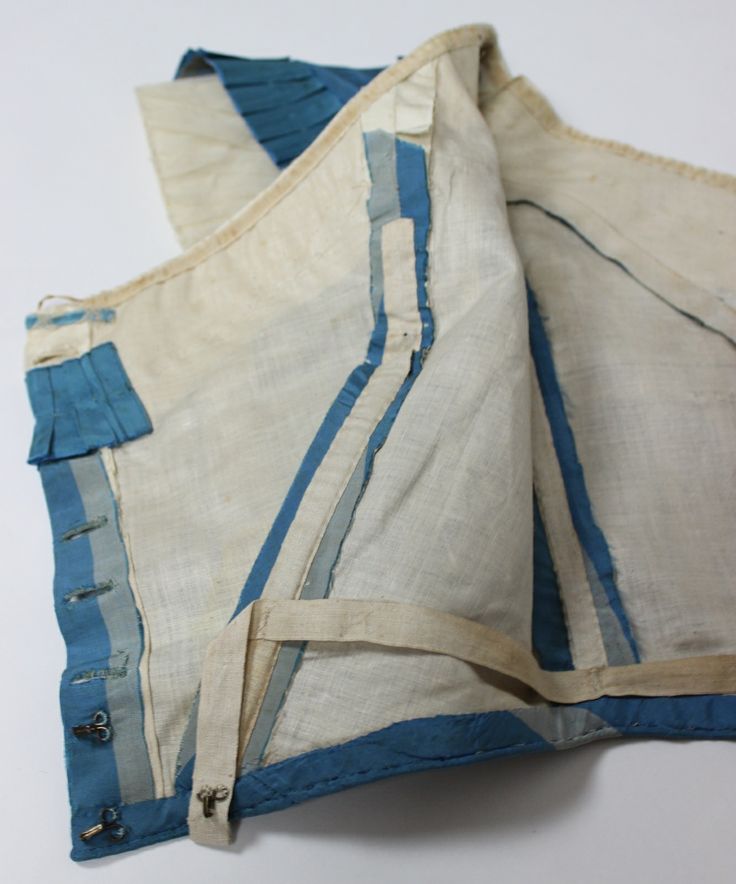
Dress of French Blue with Wide Gray Stripes Silk Taffeta with Two Bodices C 1860, via eBay
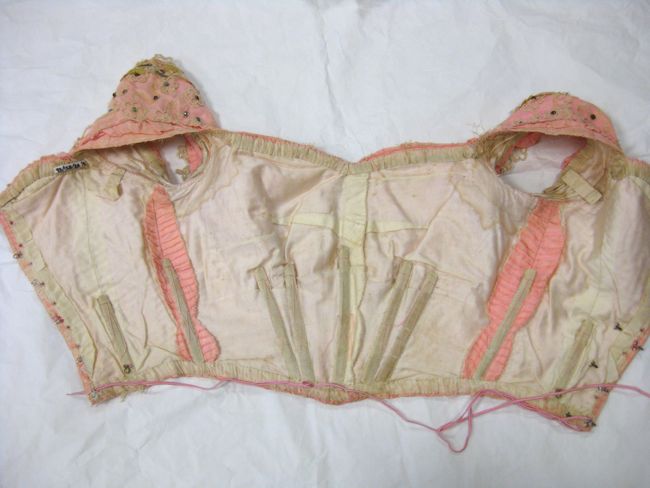
Emily’s dress (bodice detail), silk with cotton lining, 1903, Te Manawa Arts & Cultural Centre
For my example of how to flat-line, I’ll be flat lining the bodice of Rowena’s 1840s evening gown. Because Rowena needed to wear the bodice without a corset, I used a very strong, very stiff flat lining of cotton, to add as much shape and support as possible to the silk of the gown.
So how do you flat line? It’s really simple. Basically you are just sewing your outer fashion fabric to your flat lining pieces, so that they become one piece of fabric.
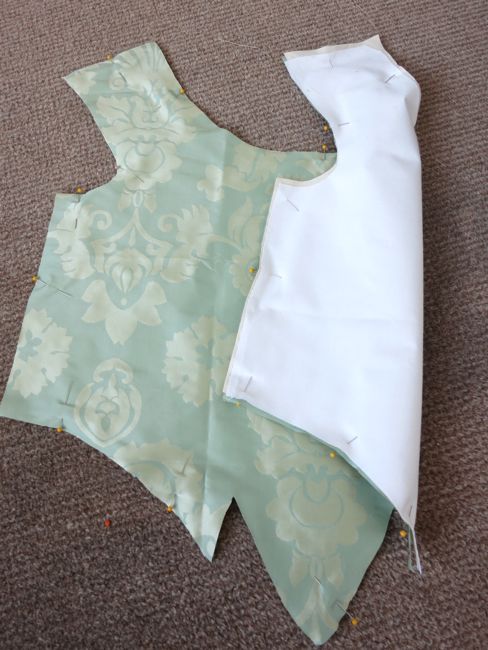
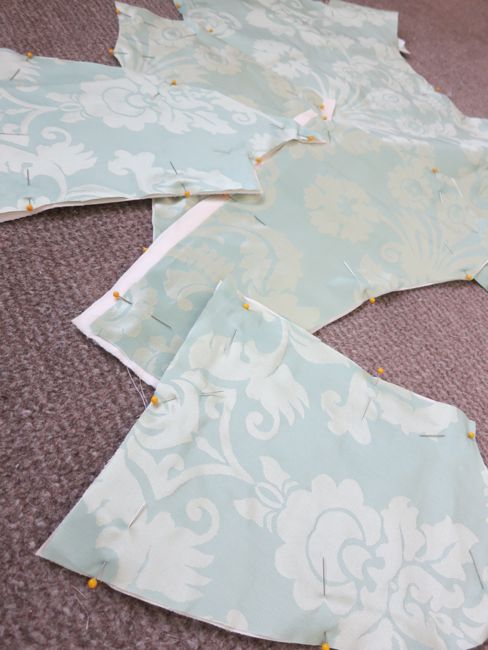
First, cut out your flat lining pieces the same as your outer pieces.

Pin each piece of your flat lining to the corresponding piece of your fashion fabric, WRONG sides together:
You want to smooth out your pieces and make sure that they fit exactly, with no possible folds or bubbles. Sometimes I iron the pieces and pin as I iron to ensure that they match perfectly.
Once you are pinned, sew around all of the outsides of your pinned together flat lining and pattern pieces. I use a slightly-longer-than-normal stitch (3 rather than 2.2-2.5), and a 1cm seam allowance.
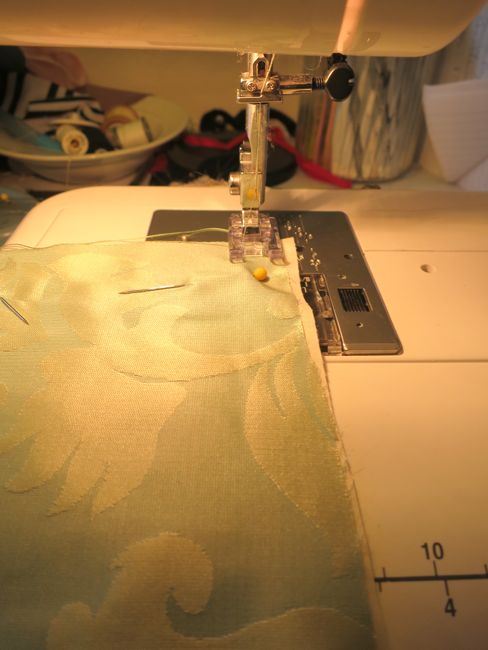
When I come to corners, I just sink my needle, lift the foot, turn, put the foot down again and keep sewing.
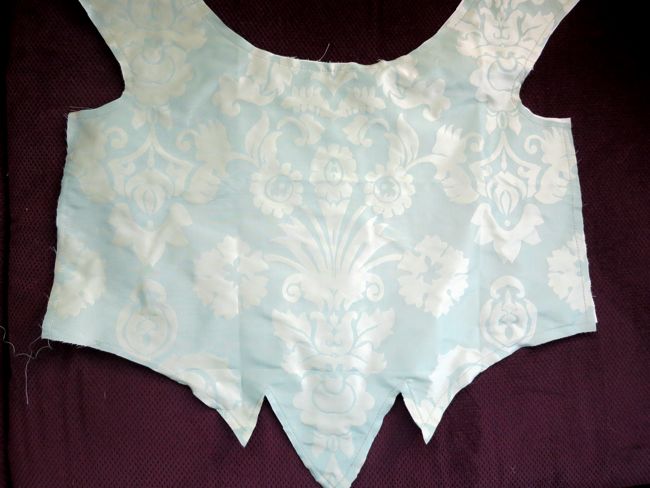
Here is my front bodice piece, with the silk now firmly sewed to the flat-lining.
Of course, my bodice front has darts in it. How do I manage to catch both layers of fabric when I sew those in?
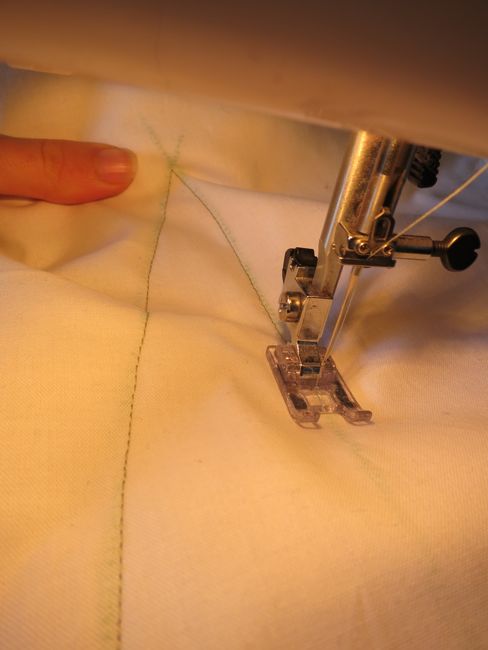
First, mark your dart placement. I’ve used green transfer paper and and a rolling maker to mark it into my flat-lining:

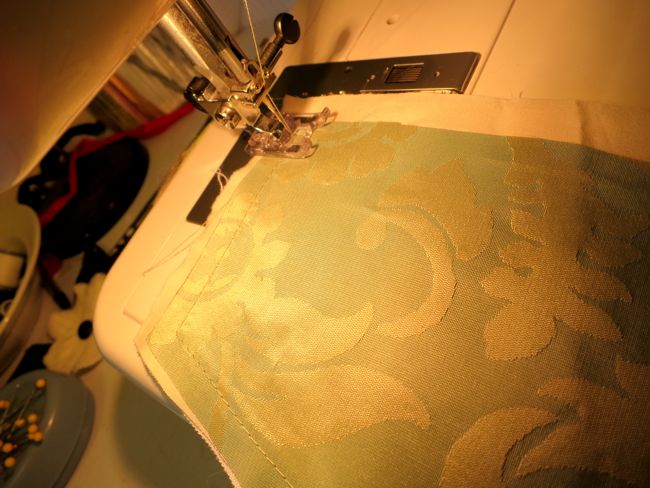
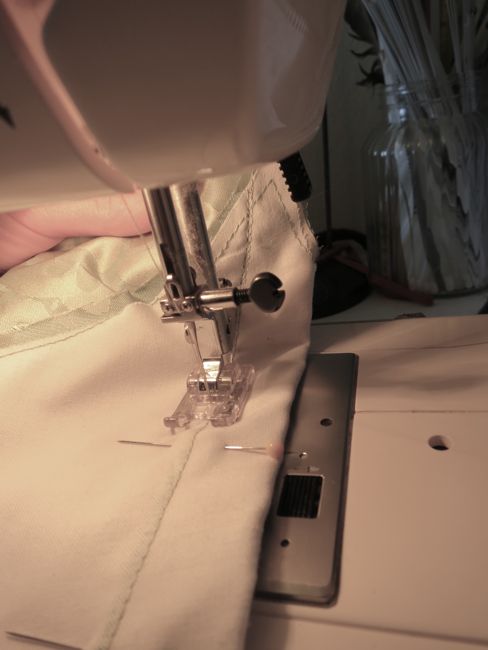
Then, using your slight-longer-than-normal stitch length, sew a line of stitching just inside the line of your dart, through both layers of fabric. At the top point, sink your needle, lift your foot, and pivot the fabric, so that you can sew back down the other side of the dart.
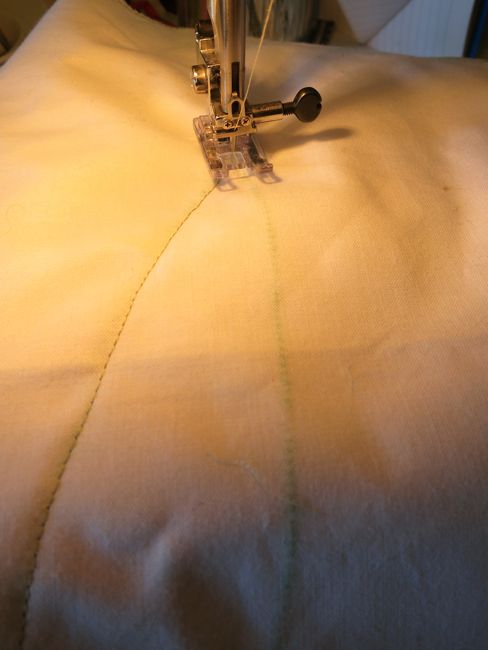
You can see clearly in this photo how the line of my stitch is just inside the marked line of the dart:
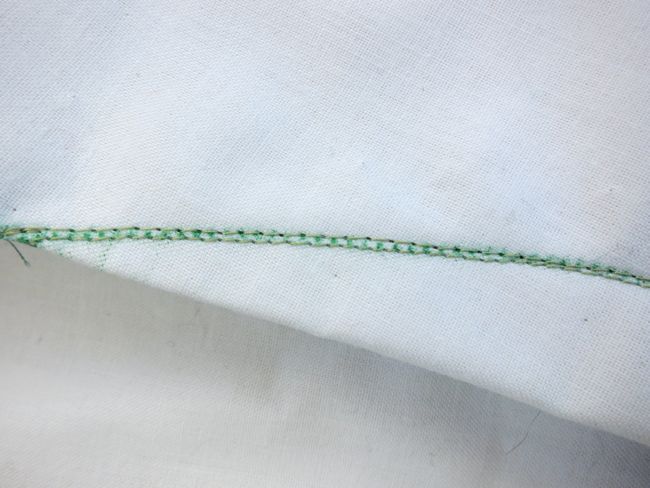
And here is what the sewn-in lines of stitching that mark the dart and hold the two layers of fabric together look like from the outside:
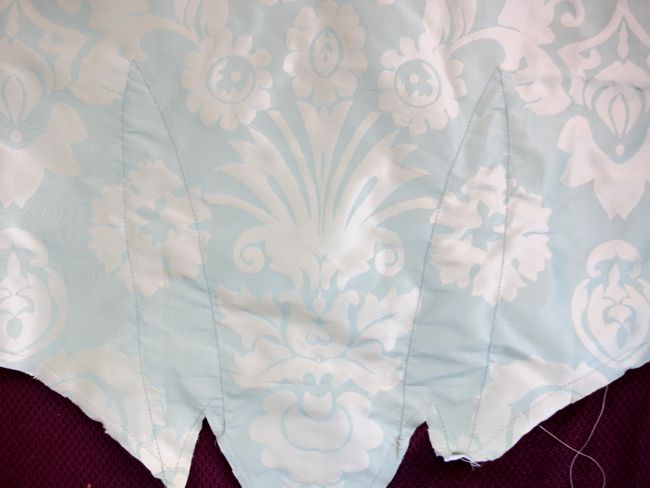
And the inside:

Now, carefully matching both sides of the dart, pin your dart together:
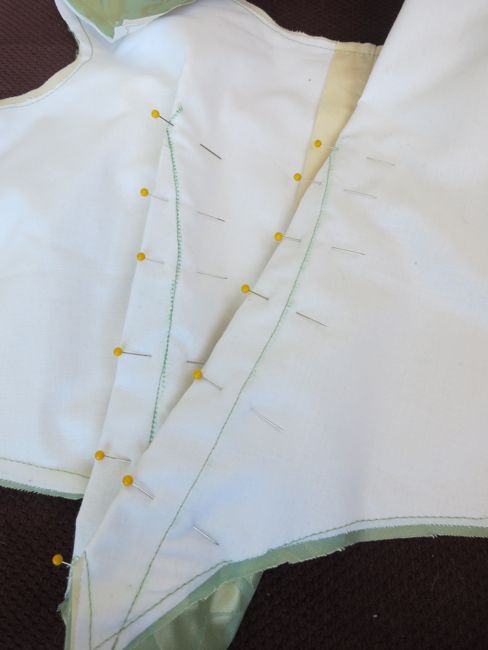
Using a normal (2.2-2.5) stitch length, stitch your dart, stitching directly on to your marked-on dart line, which will be just to the outside of the line you sewed around the dart.
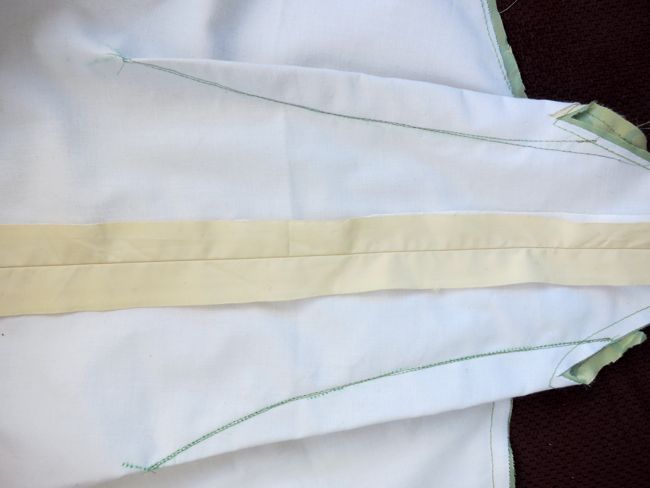
Here are the two lines of stitching – the lower one is the initial stitching line around the outline of the dart, the upper one is the actual stitching line that holds the dart together.
And here is what the dart looks like from the outside. Both layers of fabric caught perfectly, no lines of stitching visible!

And here are the darts from the inside:
The rest of the flat-lined pieces were then stitched together, just as if they were only the outer piece of fabric.
With modern sewing, the raw edges visible on the inside can be finished in any way you want: hong-kong seams, overlocking, zig-zag stitching, pinking, etc. In 19th century sewing, I’ve seen examples of hong-kong seams (though I’m sure they weren’t called that in-period!), pinked seams, seams that were left raw, and, most frequently, seams neatened with hand-stitching.
Emily’s dress (bodice detail of hand-stitched seam neatening), 1903, Te Manawa Arts & Cultural Centre
And here is the finished project:
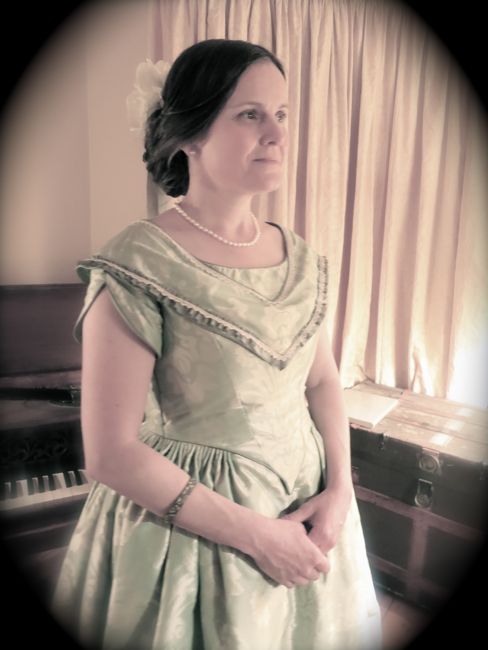
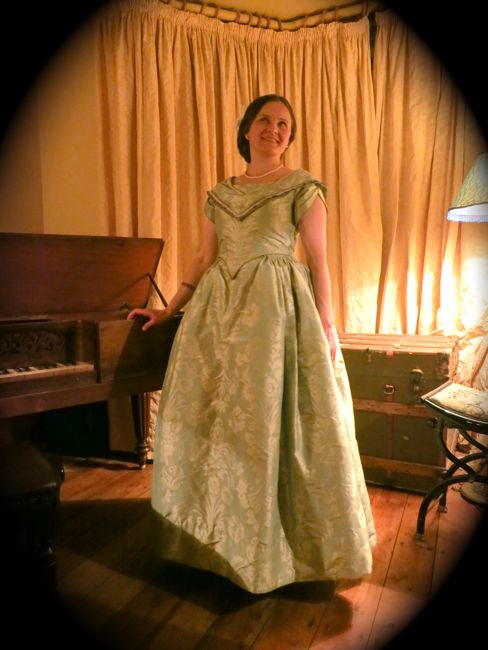
It’s not the same as wearing a bodice over a corset, but the flat lining does help to add support and structure. If I were making a more period-accurate 1840s bodice, I’d still use a flat lining, but I’d use a much lighter, softer flat lining, as the corset would provide a shape for it to sit over.
I hope that was understandable, and useful!
Thanks for that tutorial. I was actually looking at a flat lined dress project last night. My question is, how do you add the boning channel so it is invisible on the outside? Do you only sew it to the inner seam allowance?
Yes, that’s exactly it, and that is why I have a seam to the flat lining at the centre front of my front bodice piece, when there is no seam to the outer fashion fabric: this will allow me to sew a bone at the CF without it showing on the outer.
Loved the tutorial, even though I can’t sew. You make things so interesting!
Just one typo: “it’s a technique that is [NOT] frequently taught or used in modern sewing books or patterns, which is a pity, because it’s awesome”
Hehe. Thanks for catching that!
This is an excellent technique for all the reasons you mention. We do seem to do it rather differently, though. As taught by my mother, who was my sewing mentor, I make the darts in the fabric and the lining before putting the pieces together. It makes for a flatter and less bulky dart, all folds nicely hidden when the pieces come together. I don’t sew round the edges of the pieces to hold them together – I would see a risk of puckering here. Instead, I pin, and tack. First a line through on the diagonal, carefully holding the two pieces over the back of the non-sewing hand, then sew parallel lines no more than a couple of inches apart all over the fabric. Then you can see if there is any unevenness or bubble. It takes a bit of time, but makes for a great result, particularly for wool.
I think you are describing a slightly different technique – interlining with pad-stitching. It is what is used in tailoring (particularly, as you say, wool) but isn’t the technique that is seen on Victorian bodices, nor is it suitable for strengthening a light fabric to make it work for a corset, etc.
Since flat-lining is often used to make light fabrics stronger, you often can’t sew the darts individually and hide them between the layers, because the bulk of the dart would show through the outer fabric. If I had done that with Rowena’s bodice, the dart in the stiff interlining fabric would be very obvious from the outside, even though the silk I used for the outer was quite heavy. Plus, sewing the dart together through two layers allows you to use it to anchor a bone, without the bone showing through the outside. Most Victorian bodices are constructed the way I describe, with the darts sewn together through the lining.
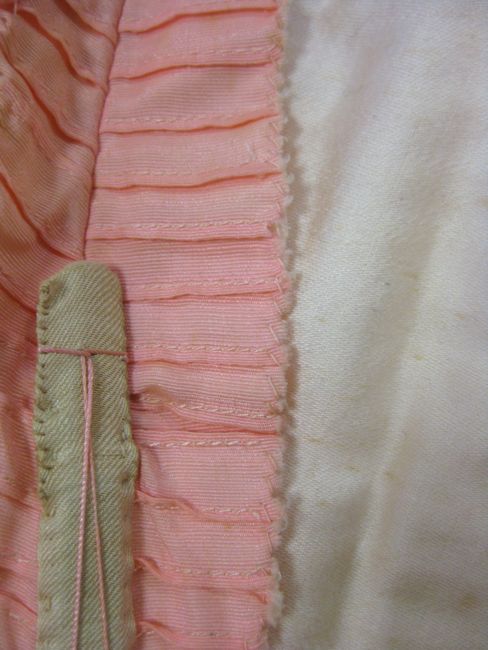
It’s interesting to look at Emily’s bodice, because the horizontal darts on the bust do face outwards, towards the pink outer fabric. However, there are no corresponding darts on the outer fabric – the fabric is pleated in at the waist and ‘poofs’ out in a pigeon breast, hiding any lines from the outward facing darts.
Ah! That all makes sense. I was thinking that my version would not work as well for a silk you were wanting to create a boning effect for – my version would be much softer, less rigid.
In my version, you do pull the tacking stitches out when the garment is finished because they go through both layers. I’ve seen long tack stitching of linings in woollen fabric where the stitches stay in the finished garment – they do not show on the right side of the wool – would this be pad-stitching?
Emily’s bodice is most interesting – having the darts when the top fabric does not. It almost combines lining techniques. We do what works.
This is a good tutorial, one of my friends is a talented seamstress and she did just that sort of flat lining on my coat. She also overlocked the seams at the edges, which prevented that material from fraying. It wasn’t as historically correct of course, but it means I will get good wear out of it, and I don’t mind at all.
This is the technique I use for tutu bodices, although I cut the fashion fabric a little bigger than the flat-lining fabric and trim off later. I normally use 10 ounce cotton drill although some tutuists will use soft coutil. It was funny to see boning attached in a Victorian gown the same I way it is attached in modern tutu bodices! Thanks for the pictures
I love flat lining too!
I found it most useful for my jacket sleeves, but I lined and turned the two halves before whip-stitching them together so I wouldn’t have the seam allowances to deal with afterward. I think I read about it on an Elizabethan costuming site.
I have yet to try this method. Thanks for the tutorial! This post will surely save a lot of bumbling when I eventually get around to sewing Victorian things.
Thanks Leimomi. I’ve done this before, but thought it was called interlining (as opposed to just plain lining, which is supposed to hang free in two layers). So then what is different in interlining? Maybe that’s a whole other post…
I do this a lot but I call it underlining! I like your term better.
Though I’ve done my darts differently (since I just figured it out myself). Instead of sewing just inside the lines of the darts, I run a straight line right up the middle of the dart – where it’s supposed to fold.
I think your way sounds better so I’m going to give that a shot next time!
And I dont attach the two fabrics at all edges – just enough to keep things stable – eg, curved seams and the vertical ones.This is to prevent puckering but that could be avoided if I was more careful! Ha!
So yes – I love flat lining! It really helped me with my tropical blue & green wrap dress. The rayon is really fine and lightweight – a quality I wanted to keep – but I also wanted to make sure that the bodice would be sturdy enough not to sag out of shape. I flat lined with a light cotton gauze, which is enough to hold everything together. The skirt and sleeves are not flat lined.
Another great thing! Since the fabric for flat lining is usually a solid, its also MUCH easier to mark with chalk – and I can mark everything on what I know will be the interior and won’t show through on my fashion fabric. I cut the flat lining fabric first and use that as a pattern for the fashion fabric – makes it sooo much easier to cut if the fabric is slippery and you can cut on a single layer.
There are so many benefits!! 😀
I MUCH prefer this over making a lining. I dont line anything if I dont have to. And when I get round to finishing off my coats, I’ll be flat lining the slippery (pain in the ass!) lining fabrics too!
Woo what an essay!
I’m giving you a heads up that I’m adding a link to your flat lining definition on my blog… if this isn’t ok I’ll remove it. 🙂
I’m flat lining with 3 layers. How do I do the zipper?
I usually do Renaissance era sewing, and I’ve always known that seam finishing technique as “bound seams.” I think modern sewers are making some distinction between binding the two seam allowances together in one piece of fabric tape versus separately with seam allowances pressed open, but I also think that’s a modern distinction.
I usually do Renaissance era sewing, and I’ve always known that seam finishing technique as “bound seams.” I think modern sewers are making some distinction between binding the two seam allowances together in one piece of fabric tape versus separately with seam allowances pressed open, but I also think that’s a modern distinction.
This Google hit has been unfruitful for me, though, as I was looking for hand sewing techniques to attach a lining to a bodice with its interlining in between them. Herringbone, slip stitch, hem stitch, etc.
Like Esz, I have always been taught that this a technique called “underlining”. I have never heard it called “flat lining”. There are some wonderful references regarding this subject to be found in Threads magazine if anyone cares for more research. I learned from Threads approximately 20 years ago a technique called “flat lining” which I use extensively in my sewing. It enables you to have a beautifully bound seam edge and a lined garment all in one procedure. You can find a tutorial here: http://lasewist.blogspot.com/2011/03/flat-lining-part-one.html and part two here: http://lasewist.blogspot.com/2011/03/flat-lining-part-two-fly-front-pockets.html
As in all things sewing there is more than one way to accomplish a task and it’s important to find what works for you and stick with it. The names of techniques can be confusing as well. Kenneth King has a more recent article in Threads magazine that discusses the differences in the terms “lining”, “interlining” and “underlining” which is quite interesting. He never included flat lining in the discussion, however.
You have a lovely blog with some wonderful inspiration and techniques.
I am at the flat line part. Should I put in a waist tape like I did in my corset?
Whether or not you want a waist tape depends on the garment – it’s up to you.