Making a mid 17th century dress is interesting – the bodice is fully boned, so it’s basically a corset with sleeves. I guess it saves making a corset to go under the outfit 😀
Anyway, this means I had to make an inner boning layer, and figure out a boning pattern to present the right 17th century torso silhouette.
For my inner boning layers, I used a fairly rough unbleached linen that I found 4 metres of at an op shop for $5. This really has been a fortunate dress!
For boning, I’m using 3/8″ black plastic cable ties. Not exactly whalebone, but no-one is offering me a piece of the poor whale that beached itself locally over the weekend (not that I’m really sure I’d take it if they did! And do humpback whales even have the right kind of baleen for boning?)
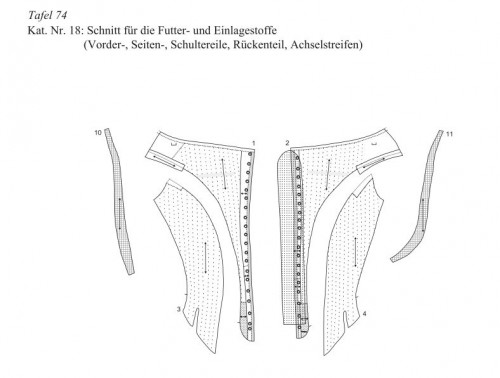
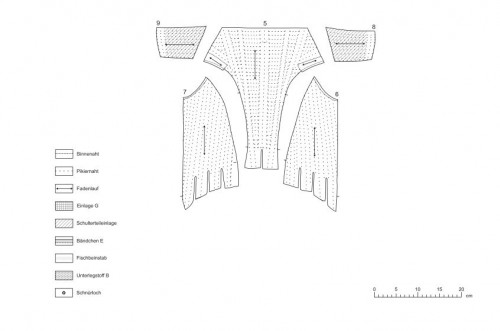
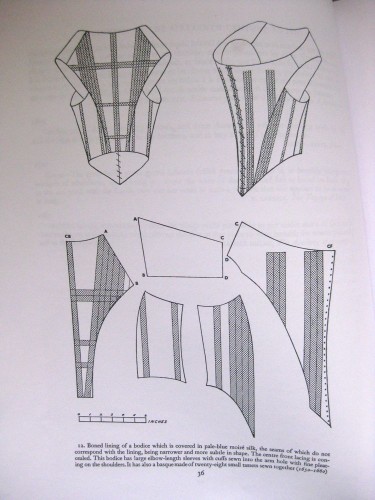
I started researching my boning patterns using two sources: the German bodice, and Norah Waughs 1660s jacket bodice. Unfortunately, neither was a completely satisfactory guide.
The German bodice pattern was very detailed, but I couldn’t tell if the horizontal lines on the back pattern were horizontal bones, or just sewn channels. And I also wondered if the bones ran from one piece to the next, or if each piece is individually boned.
Waugh gave a bit of guidance with the issue of horizontal boning. Her bodice back clearly has bones that run across the back. And it looks like the boning doesn’t run from one piece to the next, which makes sense – that’s how 18th century stays are constructed.
However, Waugh’s pattern is the under support for a fairly informal jacket, and formal bodices seem to have been much more heavily boned so I couldn’t use it as a basis. So back to the German bodice as my main resource.
The problem with the German bodice (and Waugh’s pattern), is that they both lace up the front. I want to make a back lacing bodice, because I’m pretty sure that is what is going on in my inspiration image.
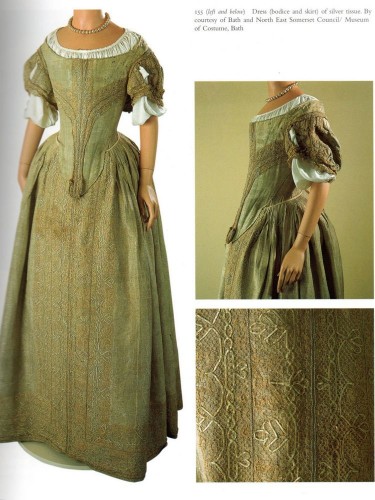
I peered at the images of the Bath Dress, and of the V&A bodice shown in Corsets & Crinolines, and of a few paintings that show the boning of 17th century guess, and came up with what I hope is a reasonably accurate pattern based on a combination of all of those.
You can see the bones going straight up and down the centre front, and then how some are arranged in a diagonal out to the side seams in the Bath dress.
The V&A bodice clearly shows that the bones run down into the tabs, rather than ending before the tabs.
Metsu’s portrait of a Lady is fabulous because its a rare example of a period portrait that clearly shows the boning channels sewn on the outside of the garment (like the pink corset bodice in the V&A). While I’m not showing my boning channels, being able to reference the heavily boned side pieces, and the angle at which the bones lay, was very helpful.
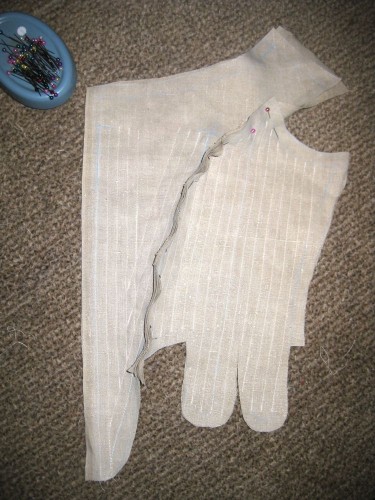
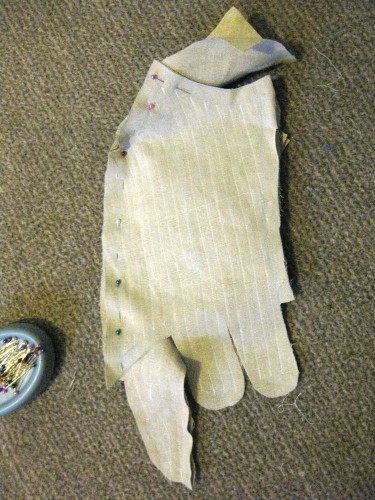
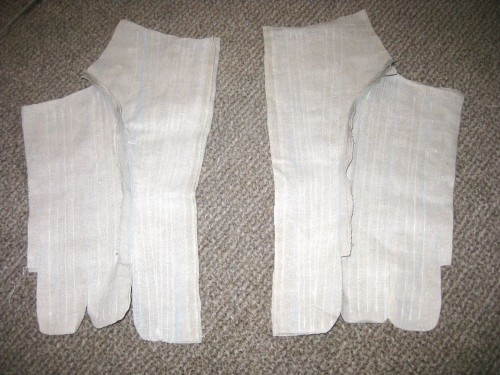
So, with all these sources in mind, I drew up my boning channels. I sewed all my channels into each pattern piece first, and then assemble the pattern pieces and sewed the seams.
For my front piece, I sewed one boning channel straight down the centre front, and one at a diagonal following the side seam, and then alternated them up. The combination of straight and diagonal is based on the Bath dress.
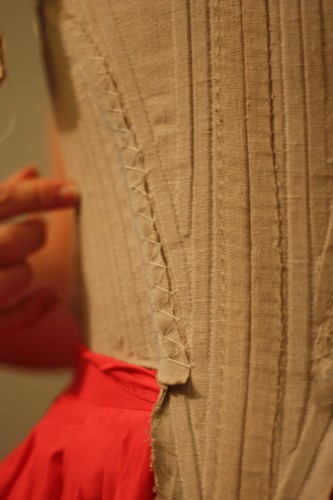
My side piece is fully boned, with each boning channel following the grain of the fabric (exactly as shown in the Metsu painting and the German bodice) and the bones running down into the tabs.
My side back pieces are a compromise between Waugh two bones, and the fully boned German bodice. I did two sets of three bones, with a gap in the middle, and based the placement on the placement of Waugh’s two single bones. I figured if they didn’t give me enough support when I tried them on, I could always sew more channels and fully bone them.
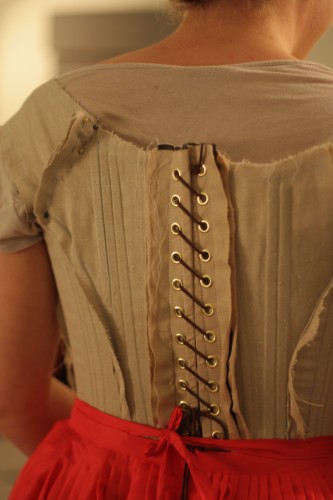
My back pieces take inspiration from Waugh and the German bodice, in that the bones fan out from the narrow bottom towards the top, but mostly I just guessed at what the boning pattern for a back-lacing bodice would be. I skipped the horizontal bones because I figured that the lacing would hold the back taut, and horizontal bones sound uncomfortable. If I did it again I think I would include them, just in case they keep the back from collapsing where your spine curves in to your neck.
With all the boning channels sewed (and then sewed again, because I made them too narrow – apparently the angels aren’t interested in stuff that doesn’t include golden yellow duchess satin) I sewed on a stunt eyelet lacer.
The stunt lacer is the best thing ever. It’s just cheap and dirty, with eyelets that I would never use on a proper garment. I quickly baste it on to the back of a corset or bodice, and it allows me to do a really good fitting.
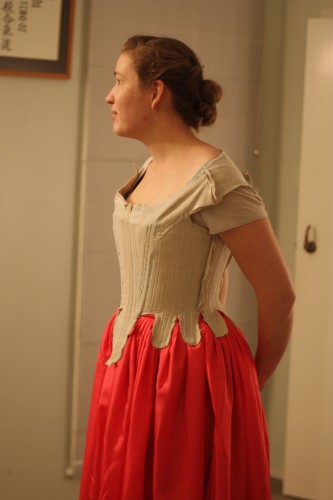
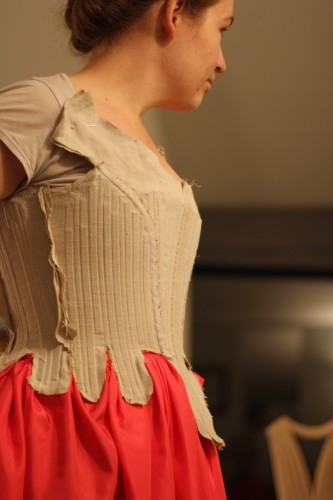
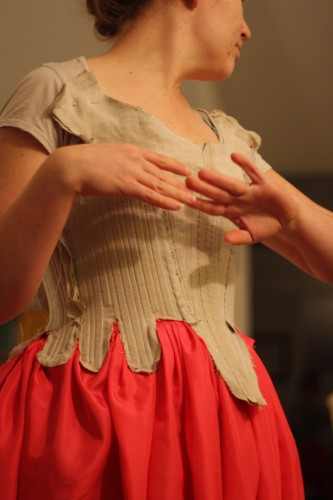
A sewing night with Madame O and Sarah of Diane Villiers allowed me to do a really good fitting (so much better than lacing myself up!) and Sarah got some good photos of the fitting. Sewing friends are the best.
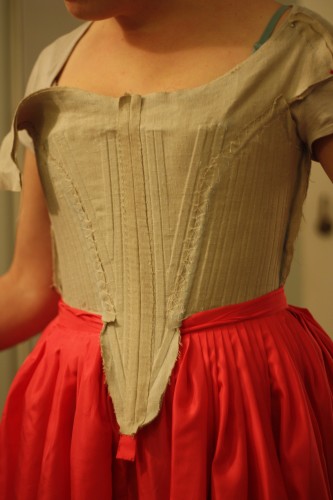
The bodice sticks out from the front, but once I trim it down that should sort itself.
The final fitting revealed one tiny adjustment that needed doing – the sleeves straps have been taken in a tiny bit at the back. Other than that I’m super pleased with the fit.
I’d already taken in the waist a little based on a previous (painful, lace myself up the front, wriggle the bodice round, squeeze on the sleeve straps and tighten without being able to see) fitting, and it worked beautifully.
In preparation for putting on the duchesse silk satin over-layer, I’ve been sewing down the seam allowances of the boned layer so that everything lays flat and smooth and beautiful. The seam allowances of the boned layer actually face out in 17th c bodices.
If you are wondering about the petticoat, it’s Madame Ornata’s, and will be the petticoat for a polonaised robe a la anglaise she is working on. It’s actually dark pink, not orangish.
While the actual fit of the bodice went really well. I did notice something I wasn’t happy with. The centre front point was, well, really dorky.
I think I need to work on that. I guess it will be tomorrow’s post.




This is coming along so very great! But I can’t wait to see it covered in that lovely silk. Hurry, hurry, I’m off to the country soon!
There will be coverage of the coverage tomorrow 😀
Ever since finding your blog I have slowly worked myself through your posts. Even though “worked” might be the wrong term here. It’s more like took the time to enjoy. So now that I have found this post I have to ask: Did your problems with the German bodice diagram result from the German? If so I could translete the diagram and any text that went with it for you. If you ever need this pattern again that is.
After finding your blog I have slowly, but surely worked my way through your posts. Now that I have found this on I have to ask: Do your problems with understanding the German bodice result from the German diagram. If so I could surely translate the diagram and any text that goes with it for you. If you do wat or need help just drop a comment on my blog or write a mail.