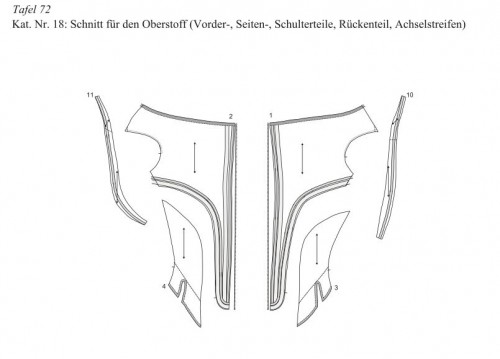
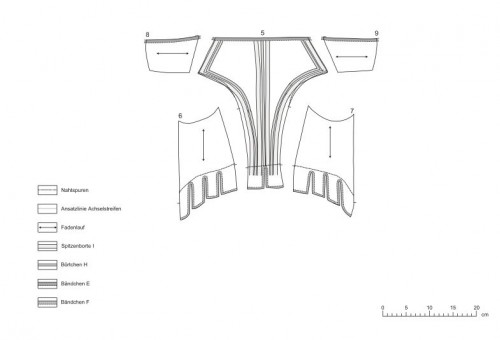
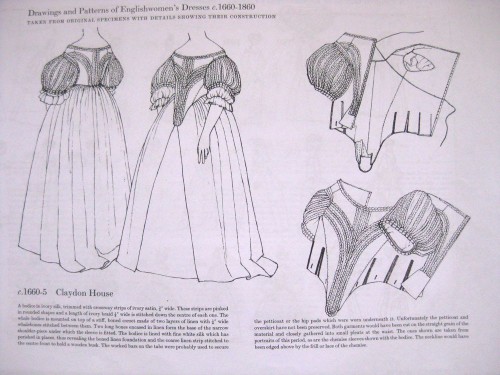
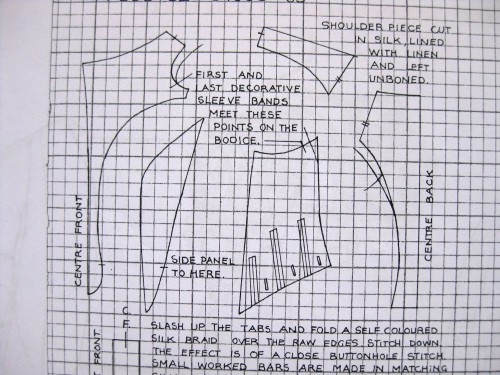
I used three main sources to drape and bone the under-bodice for my 1660’s gown: the patterns for the 1660’s bodice in the downloadable book on 17th fashion (in German, which I don’t read, but ‘pattern’ is a universal language!), Janet Arnold’s 1660 bodice pattern, and the under-bodice pattern in Corsets and Crinolines.
The German bodice was the most helpful, as it is almost exactly like the bodice I want to make, and it has the boning patterns. If you do download the book for yourself, I believe the pattern is on page 232.
Janet Arnold’s pattern was also helpful in the initial drafting, because her scale is so easy to use.
Unfortunately, it’s only easy in some ways – Arnold notes that the bodice pattern drapes over a fully boned foundation, but doesn’t provide a boning layout or tell you if the under-bodice has the same seams as the over bodice. Grrrr!
Anyway, using a combination of Arnold and the German pattern, I draped a pattern. I was very daring and did it straight on Isabelle, without even my stays to help with the shaping.
I figured I would have to do bust adjustments in the fitting no matter what I did, and a big pleat is as easy to take in as a little
I was very pleased with the drape – my pattern pieces were all very close to the German bodice and Arnold’s pattern in their measure.
I turned my drape into a pattern, and into a toile, and Madame Ornata came over and helped me to fit it. I did the fitting over my 18th century stays, just to give me some idea of how it would fit with a boned support.
I was thrilled with the fitting. My pattern needed barely any adjustments – just a tiny tuck at the curved side bodice seam, and a slight readjustment of the back shoulder seam, plus cutting down the bodice front curve.
So, with a pattern drafted, now I can get to the fun stuff – sewing the actual bodice!
Of course, before I can cut any fun golden yellow loveliness out, I have to plan and sew all those boning channels. Ewww. Grrrr. I do not love sewing boning channels.

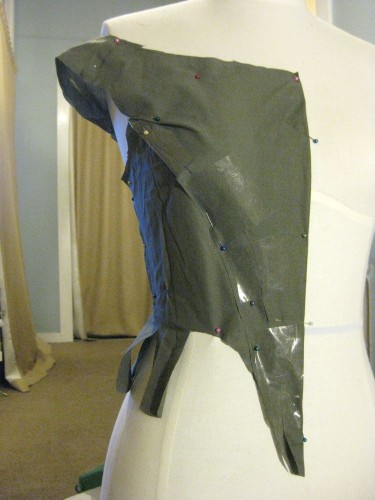
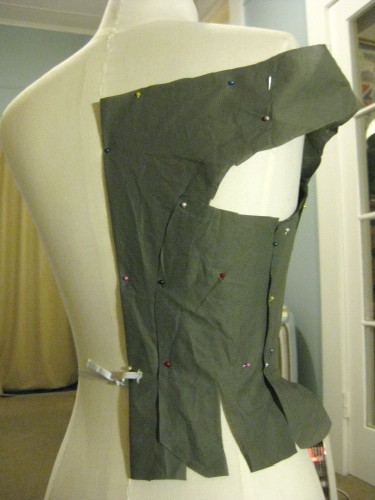

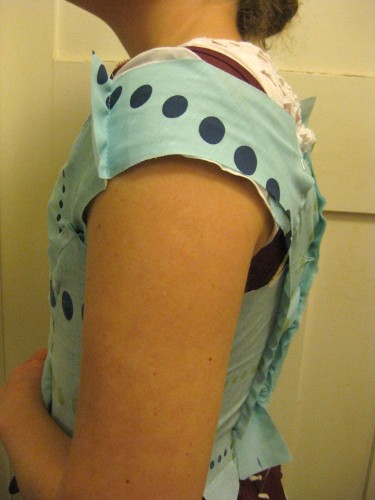
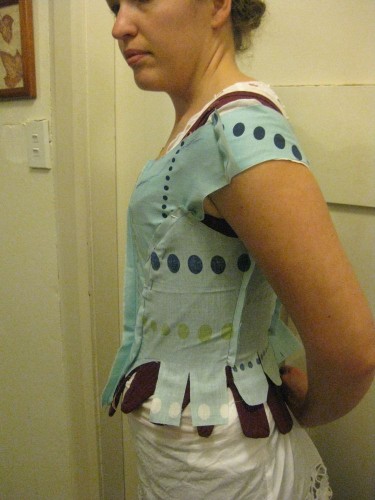
I absolutely love the shaping; I can’t wait to see it in that beautiful silk. Should the bottom point on the front stick out from the waist that far to stretch over the large skirt, or should it be fitted more closely to the waist for the real gown?
It will curve out over the skirt and stomach. Scroll down and look at the paintings in the previous post, and you can see how the bodice doesn’t have a ‘flat’ front.
I see; unfortunately, the seventeenth century isn’t my forte. How do you plan on decorating it?
I haven’t gotten to that part yet 😉 Being me, I’ll probably wear it once or twice very plain, or with the bows shown on the silver dress of van der Helt’s The Couple, and then add metallic lace later, to switch the look. And when I can afford it!
Cool shape, I’m enjoying the progress posts.
I do read German! Sort of. Thanks for the link! On page 232, there’s the outer fabric patter, on page 233 there’s the sleeves and on 234 there’s the pattern for the boned underbodice – but I guess you figured that out already. I’m trying to figure out the notes at the patterns, but my German isn’t that good after all. 🙁 “Futter” or “Futterstoff” is lining, that much I know.
It’s turning out beautifully – the shaping on these bodices is really pretty. And the armhole is cool!
Yep – I figured all that out! And about 10 pages further there are lots of images of the jacket.
The quilted jacket is awesome, but the document is full of fabulous patterns I want to try. Oh, for worlds enough and time!
P.S. And wams – on another place of the document – is a quilted jacket.
So did angels sing? YOU DIDN’T MENTION ANGELS SINGING!
You are a better seamstress than I could ever hope to be!
I can’t wait to see the end result! 🙂
I think angels only sing when I use the gold fabric 😉
I find the arm holes tricky with this style- I haven’t finished tweaking that yet…
What an amazing artist you are! Thanks for showing us your progress.