
 When I last left you in the Panier-Along we were all sewing on our hoop channels on the panier outside. Here are mine all hand-sewn on with linen thread:

The panier outsides with the hoop channels sewn on
Today, we’re going to assemble our panier bags, which is the point where your paniers really start to look like something. First, mark the centre point of the bottom of your panier outside piece (straight down from the pocket slit), and the centre point of the panier bottom piece.

Marking the centre points of the panier bottom and panier outside pieces
Matching these points, pin the bottom edge of the panier outside piece and the large outside curve of the panier bottom piece together:
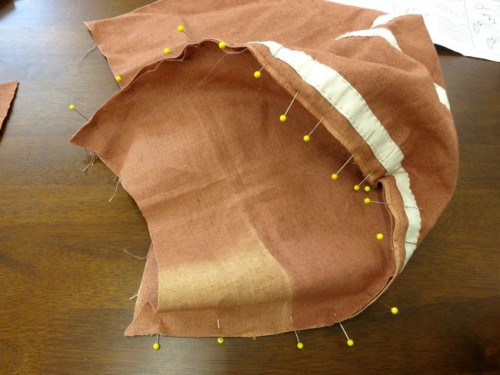
Panier outside pinned to panier bottom
Sew that curve 1/2″ from the edge, just below your first hoop channel. Start your line of stitching 1/2″ from the short vertical edge, at the same point where the hoop channel starts:

Start your sewing 1/2″ from the edge

With the bottom completely sewn on
There is your bottom sewn on! Time to sew on the panier inside piece. Pin the bottom edge of the panier inside piece to the shallow curve of the panier bottom piece.
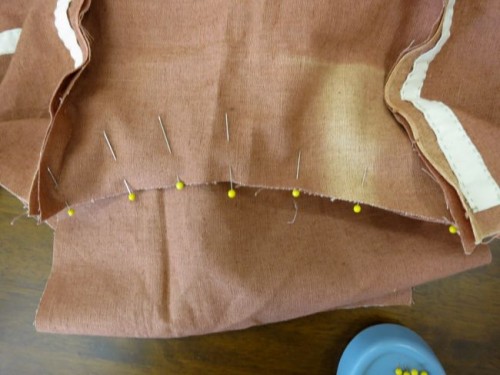
The panier inside pinned to the panier bottom
Beginning at the point where you began sewing the large outside panier bottom piece curve to the panier side piece , sew (by hand or machine) the panier bottom piece to the panier inside piece.

Sewing from the point of the panier side to panier bottom seam

Sewing the curve
When you get to the far corner, stop your stitching just where it meets the line of stitching from the panier bottom large curve and the panier side piece.

The stitching ending where it meets the other panier bottom to panier side point
I’m going to stop here, because the next two steps have optional components, where you have to make decisions about how you want your paniers to look, and what is best for your particular fabric, and this post would take too long to discuss them. I’ll be back with that discussion tomorrow. Hope your paniers are going well!