One of the most wonderful sewing innovations of the last decade or so is the print-at-home pattern. It’s allowed boutique, niche pattern companies (many of which make significantly better patterns than the Big 4 pattern companies) to start up with little capital investment, and it allows seamstresses to think of a project, find a pattern that they like online, and have it instantly – without having to go out to a store, and hope the store has it in stock.
The printable pattern is a particular boon to those of us on the far flung reaches of the globe: not all patterns are available in NZ, and ordering from overseas can take a week or more. I often sew with very specialised patterns for vintage and historical garments, and these patterns simply can’t be bought in NZ. Being able to purchase a pattern online, print it myself, tape it out and begin cutting that very same day is AMAZING for me. I’m so excited that more and more of my favourite pattern companies are releasing print-at-home patterns!
Print-at-home patterns are also awesome because you can print them as many times as you like. Printing extra copies and giving them to your friends is unethical (and sometimes downright illegal) and takes income away from the pattern makers, making it harder for them to make more awesome patterns, so please don’t do that! However, it is perfectly legal and ethical to print a copy of the pattern in View A, and then print another one for View B, and another for View C – so that you can easily cut the precise view you want, without having to mark through the patterns. You can make any mark, alteration and notation you want on each different printed copy, and still know you’ll be able to have a pristine, unaltered copy of the pattern should you need it.
The one drawback to print-at-home patterns is the printing and taping together – it it can be fiddly, and it is time consuming, but when the alternative is waiting weeks for a pattern, it’s well worth it. A good system for assembling your pattern can make it go much faster, and will result in a precise pattern, which is quite important for a perfect finished garment.
Here is my system. It’s pretty self explanatory, but students have told me it helps to see someone assemble a print-at-home pattern before you attempt it yourself.
For this tutorial I’ll be using Wearing History’s Smooth Sailing trouser print-at-home pattern, but the method works for all print-at-home patterns (if it isn’t working, you’ve either scaled your pattern when printing it, or the pattern has flaws – which does happen occasionally).
You will need:
- Your printed pattern pieces – most print at home patterns will accommodate either A4 or 8 1/2 x 11 pages.
- Cellotape (Scotch tape)
- Paper scissors
- A large flat working area
First, print your pattern. Super easy, but with one tiny, super important thing that you MUST DO. When you print the pattern make sure you do not fit to page, and do not scale it in any way – it needs to print at 100% with no alterations. If you fit it to page/scale it the pieces may not match up, and it certainly won’t be the right size!
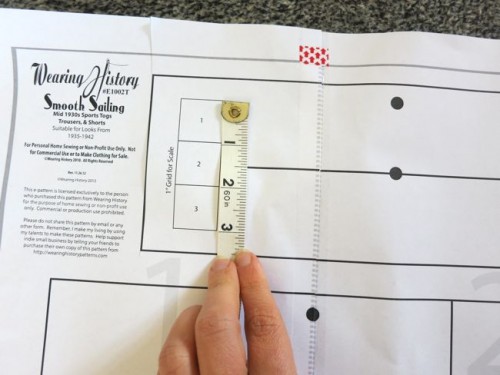
Once you’ve printed it the first thing you should do is find the scale marker on the pattern – on Wearing History patterns they are shown as three squares, each an inch square. Make certain your pattern printed at the correct scale – if it didn’t, it won’t fit you correctly!
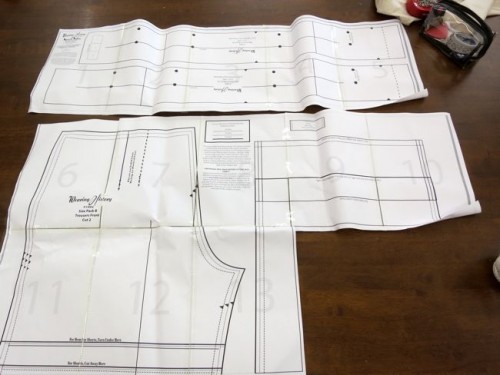
Now you’re ready to cut and tape your pattern. I recommend laying out all the pieces of paper, following the number guides and the diagram (if there is one) before you begin to cut and tape, so that you can see the whole pattern before you begin assembling.
With all the pages laid out, you may find that there are some pattern pieces that do no overlap on different pieces of paper, so you don’t have to tape all the pages together. In the Smooth Sailing Trousers the waistband pieces (pages 1-5, shown at the top of the image below) have no overlaps with the trouser body pieces (pages 6 – onwards), so you don’t have to tape the joins between 1 & 6, 2 & 7 etc..
Start with page #1 (the top left hand piece). Page #1 stays whole, with no cutting.
I recommend cutting off the ‘selvedges’ rather than just folding them, because it results in a less bulky pattern, and it’s much easier to perfectly match the lines if you cut. And the more perfect your line matching is, the more accurate your finished pattern.
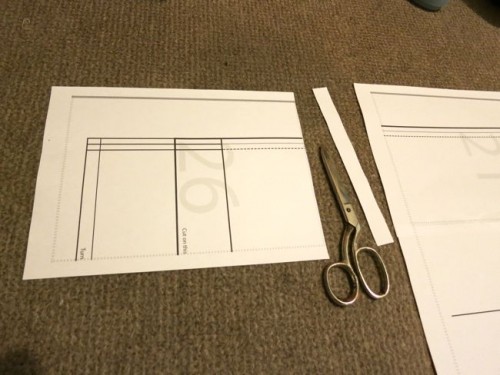
Cut off the left-hand ‘selvedge’ (the part beyond the printing) of page #2, lay it next to page #1, overlapping the cut edge of page #2 on to the ‘selvedge’ of page #1, and carefully match all of the lines in the pattern. Tape it down, using small pieces of tape to hold it while you make sure everything lines up, and then long pieces to tape the entire edge.
Do the same with page #3:
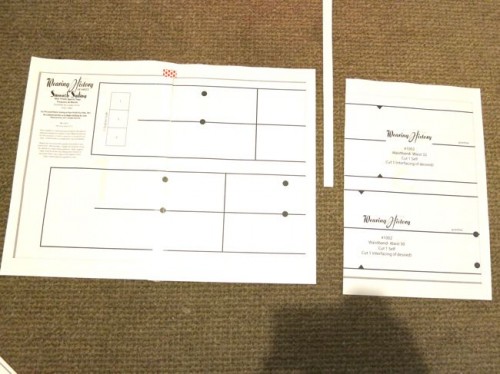
Pages #1 & #2 are taped together, and the left-hand selvedge has been cut off page #3
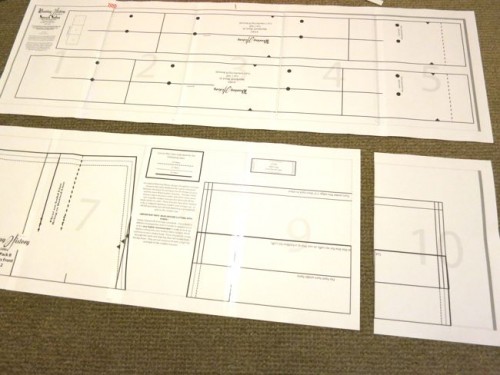
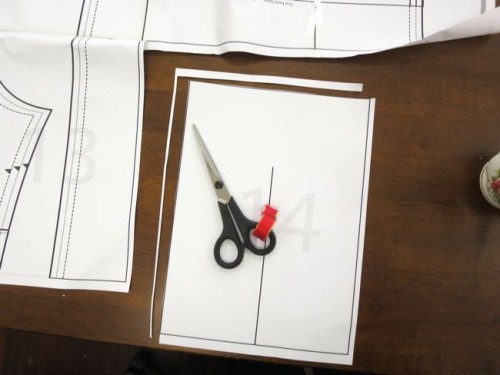
Because no pattern pieces extend from pages 1/2/3/4/5 to pages 6/7/8/9/10 with the Smooth Sailing Trousers, I’m starting the row for 6/7/8/9/10 as a new row, and assembling it just as I did for row 1/2/3/4/5, cutting off only the left hand ‘selvedges’ and taping my row together:
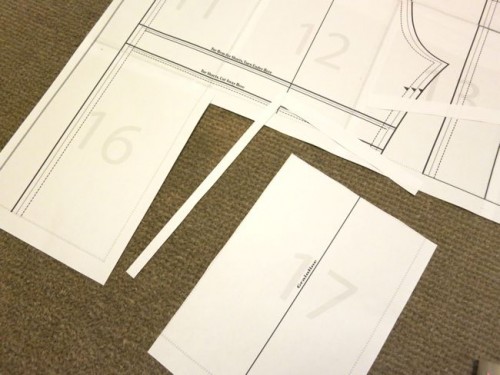
When you get to the rows that join to other rows both at the top edge, and at the sides, cut only the top selvedge off on the most left-hand pieces:
Tape the pages, continuing to carefully match all the pattern markings, and using short pieces of tape to hold things while you maneuver them, and then longer pieces to firmly secure them once everything is perfectly matched:
Only the top ‘selvedge’ was cut off pieces 11 & 16, and they were taped to 6 & 11, respectively.
For the all the other pieces, you will have to cut off both the top and left-hand ‘selvedges’:
Tape these pieces at top and sides, continuing to carefully match all the pattern markings.
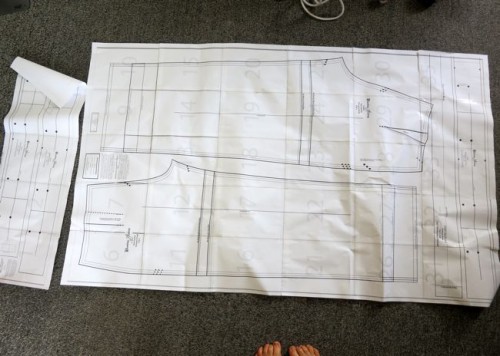
Do this until you come to the end of the pattern, and then stand back and admire your pattern pieces (and my bonus toes):
Hurrah! All the lines and markings match perfectly, so you know that the pattern will fit just as it is meant to. And the pattern is cuttable, foldable, and durable, with every seam securely taped.
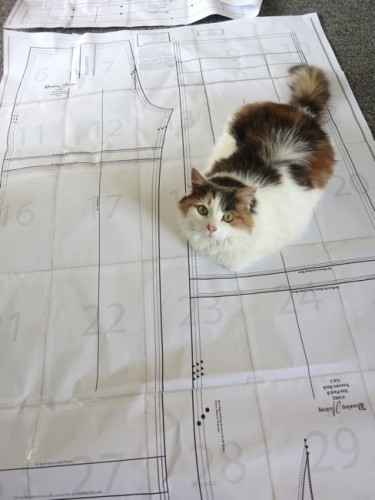
You can now cut it out and start sewing (well, be a good seamstress and read all the instructions first!) or, y’know, just let your cat sleep on it:
What do you mean you didn’t assemble this for my benefit?


Great tutorial! I’ve held off the home printing because I was worried about getting them just right, but now I may have to give one a try for a future challenge. 🙂
It looks lovely and it is so interesting to see this amazing pattern in its pattern form, having only seen amazing examples made up! 🙂
I have taken to tracing the pattern off the paper using the fine tracing tissue stuff, so I don’t have to cut it up. It’s one more thing to do but then it’s not necessary to tape the pieces together fully, and you can trace another size or view off it later. 🙂
Interesting, and such a good idea. I’ve never used a print at home pattern (haven’t actually used any commercial pattern since I was about 13), but would definitely prefer the convenience of something I can print and assemble myself. The selection of patterns available in NZ is pretty shocking, and like you I can’t be bothered waiting weeks to order one in.
That’s very useful, thanks, as I’m consider buying the Sophie jacket as a download. Love your cat, that is such typical cat behaviour 🙂 oh, you’re paying attention to this paper instead of me? Well, that can’t be right! I’d better insert myself into your line of vision to get your attention 😉
Thanks for this..I also have not used this way to purchase a pattern as I was unsure of how it would turn out. I feel more confident now after reading your instructions.
You lucky things, you modern sewing people! I missed out on this wonder – it would have been so useful.
Do you think you could do a tutorial on an efficient way to scale up patterns from books (Janet Arnold, Tudor Tailor etc.)?
I’ll try, but the big problem is that I HAVEN’T really come up with an efficient way! Just a lot of not-entirely-inefficient ways! I do have an efficient method for the corsets from Salen’s book, and a good way to do large simple pieces, like skirts, from Arnold. But the bodice pieces in Arnold are still fussy to do.
That’s exactly how I do it – but I had to read your post in full to check I’m doing it right! There’s one other step I do first though which is to print out just the page which has the scale marker on it and check that it measures up correctly. If not I know I’ve got to review my print settings and test again before printing the full set of pages.
Okaay, thank you for posting this. Now I won’t be so persnickity about trying this versus waiting for mail like I’ve been doing.
Cheers,
Lyric
I’m on the same page with you New Zealanders – Czech Republic runs on Burda, and anything else is far away… More or less. PDF patterns are a great alternative. I actually got to them through Burda first (BurdaStyle, which started out with free PDF patterns), but there’s no denying that smaller pattern companies / makers can use this to get their patterns out into the world easily, and I love that. And hopefully one day when I have more spending money, I’ll also buy more of those – the Wearing History patterns certainly look good. 😉
Miss Fissy is as gorgeous as ever. I don’t have any digital patterns but it will certainly help avoid prohibitively expensive postage costs (especially from the USA). I find myself longing to buy patterns from websites only to find that postage costs more than the items I want to purchase so I don’t bother.
This is a great post. With your permission I would love to “reblog” it and add a permanent link to it on my facebook page. Please get in touch to discuss.
I cut my pieces and as I’m taping them together they aren’t fitting well and now I have a ¼ inch gap. Do I untap everything and start over?
I was curious if you ever have trouble American letter size to with A4 conversion -e.g. printing the patterns from ‘retailers’ based in the States (Wearing History, Decades of Style, some etsy retailers)? I have always had their paper patterns sent to an American address, rather than trusting that I can print out their patterns on my European printer. Any suggestions?
I print Wearing History patterns on A4 all the time with no problem. They are formatted to print on either A4 or US Letter. You just have to be sure not to scale them.
I don’t believe Decades of Style does print at home patterns.