In preparation for the upcoming High Tea charity fundraiser for Ronald McDonald House I’m trimming my Indienne chintz pet-en-l’aire.
I’ve dyed pretty new rayon and cotton ribbons (the closest I could get to silk) to replace the nasty synthetic ones on the front, and am figuring out how to do the ruffled trim.
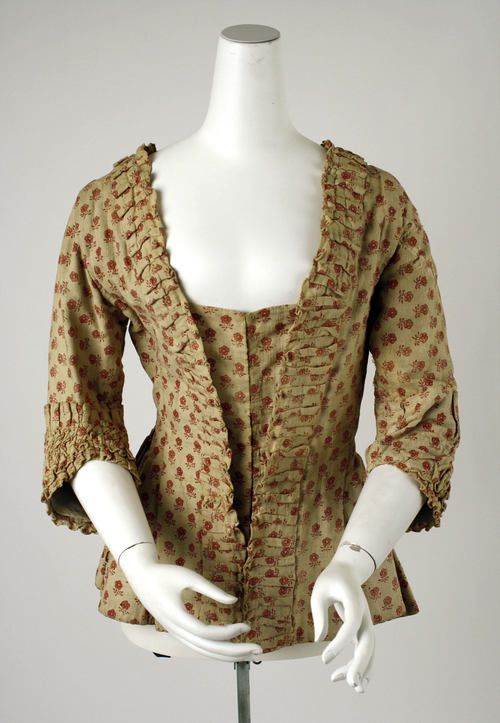
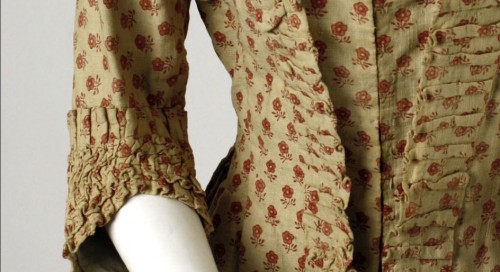
Earlier mid-18th century pet-en-l’aires, like this yellow example, have pinked ruffle trim:
But later 18th century examples, the era I am aiming for, have flatter trim that is finished or turned on the edges:

Pet-en-l’aire, 1770-90, Manchester City Galleries

Pet-enl’aire, 18th century, cotton, Belgium, Metropolitan Museum of Art
I’m trying to figure out exactly how the ruffles are made. I have 3.5 options to make the ruffles shown in the examples above:
- Option 1: The ruffles are cut in strips more than 2x the width of the ruffles, the sides are folded back and overlapped in the middle, and then the ruffles are sewn down, with the raw edges hidden on the middle underside of the ruffles.
- Option 2: The ruffles are cut in strips the width of the ruffles, plus turning allowance, and then the sides are turned and hemmed, and the ruffles are sewn down.
- Option 3: The ruffles are cut in strips the width of the ruffles, plus seam allowances, and sewn in a tube with a backing of another, cheaper fabric, turned, and then sewn down.
- Option 3.1: The ruffles are cut in strips the width of the ruffles, plus seam allowances, and a backing of another, cheaper fabric is applied, with the edges turned in on each side and sewn down in a tube sewn from the outside. The ruffles are then sewn down.
The extremely sewn-down nature of the ruffles on the MCG pet-en-l’aire, and the Metropolitan pet, makes Option 1 very plausible.
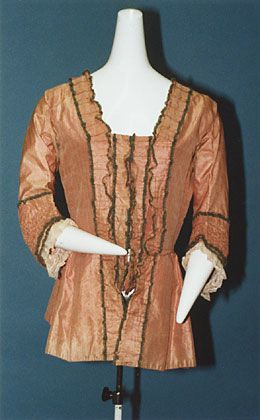
The peep of a ruffle lining on this jacket from just a few years later than my inspiration pets indicates that in at least some cases, Option 3 or 3.1 was used:
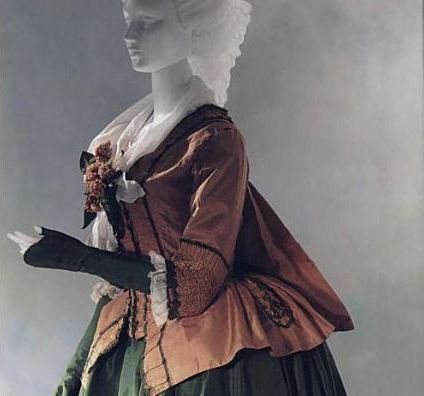
However, there is yet another thing to consider with my ruffles. There are a few examples of pet-en-l’aires and other late 18th century jackets with contrast trim on the edges of the ruffles.
(are those the same jacket btw? If so – what a difference display makes!)
I could use a contrast trim on my ruffles – I’ve got narrow red and cream cotton satin ribbon, both of which would look beautiful with the flowered silk of my pet. But the fabric is already quite busy, would that be too much? And if I do do contrast trim, what is the correct way to do it?
So, aesthetically, and historically-accurately, how shall I tackle this? What technique should I use? And what should my ruffle placement look like?


We did a similar style of trimming when I was on internship at Colonial Williamsburg, I believe we did “option 2” 🙂
Thank you Amber! That’s the one I haven’t been able to find any visual evidence for, but if they are doing it at CW, I’m sure they have actual garments constructed that way. Dang though – it’s by far the most labour intensive!
Please forgive me if this comes off as know-it-all-y, it’s just rather serendipitous timing. I’m currently in London for several months doing research for my PhD. A main part of which is trying to go through ALL the Museum of London’s 18th century women’s clothing (V&A collection is closed right now, not my fave place for research anyway) examining each piece up close and personal. And I recently finished going through the jackets! Most often I observed “option 2” and passementarie trimming on the edges. Now, when I say “option 2” I think I mean it a little differently than you do. What I saw were raw edges turned under and then tacked to the garment close to the folded edge. No separate hemming of the trimming before applying it to the garment. Thus, I think it will actually be the least labour intensive option. Edges trimmed with passementarie were folded under and stitching the passementarie acted also as hemming. The edges are not turned under twice, but left raw on the underside whether the edge would be free from the garment or not (does that make sense?) Now, with regard to this latter case, there are a lot of raw edges in 18th century garments (by modern standards) in general. This is ok because the textiles are better quality/more tightly woven than most of today’s (I’m including a lot of the 20th century here too). It’s really quite impressive just how little fraying there is on surviving 18th century textiles, even those you *know* got worn. So you may have to take your particular fabric into consideration when choosing the particular logisitics of this.
So looking forward to seeing what you do with it!
Oh no, not know it all at all! I was particularly hoping you would pipe in, as I knew you would know, and have done research on actual garments! There just isn’t enough 18th century costume in NZ for me to do that kind of research when I need to.
Balancing historically accurate techniques with the realities of modern fabrics is one of the things I always struggle with. It’s part of my ongoing consideration of what is accurate and best practice in recreation.
I think it’s fascinating, and I’m not near where you guys are in skills. Thank you so much for the input!
Or cut a strip the width of the ruffle plus seam allowance all of the main fabric, make a tube, turn, carefully press the seam flat (one seam folded back each way) in the middle. There looks to be one central stitching-down seam running down the middle of the Metropolitan and Manchester ones but there looks to be a more solid bit on either side of the centre seam, which might be the fold-back bits providing structure. Some serious peering going on here – is there one stitch-down seam or more?
If you backed the ruffles with another fabric, wouldn’t it make the edges of the ruffles too solid?
I know these weren’t washed every five minutes, but some sort of finished seam would allow for a very fiddly wash job. Pinked edges are impossible to wash – or does it depend on the fabric?
facebook.comI haven’t handled a ton of 18c garments, but I know the ones I’ve seen have had pinked or hemmed ruffles, or in some cases bound. I’ve never seen a period example of Options 1, 3, or 3.5 that I can recall. My friend Samantha interned at the Margaret Hunter Shop at Colonial Williamsburg this summer, and having seen the beautiful tiny hems she can do now, that seems to match best what I’ve seen in period examples…so tiny you can hardly see them! Here is her blog page:
http://couturecourtesan.blogspot.com/
There are several photos of reproductions made by the shop at CW on their facebook page, if you’re interested, also.
https://www.facebook.com/pages/The-Margaret-Hunter-Shop-Milliners-and-Mantuamakers/121002921252887
Yes, those are the same jacket.
I think red contrast trim on the edges of the ruffles would look splendid, particularly with the fabric you used for the pet.
I think so, too. Are you using the pet fabric for the ruffles, or another fabric? If the pet fabric, then trim would look great–if a different fabric, then no trim.
Part of the reason I’m cheering on trim is that it will help illustrate and highlight the pieces of the jacket, and make it more visible to audience members seated in the back.
Also…I think it would look great. What goes underneath?
Have you tried fork pleating yet? I found a tutorial on a wonderful blog–maybe even yours!
The light blue “Spencer” jacket seems to illustrate option #3 with a muslin or thinner fabric on the inside lining. There’s one little bit of the trim folded back and it seems to reveal the same underlining as the inner bodice.
I’ve used option #2 for modern clothing and the appearance is much lighter/less full than the structured pleats detailing you’ve collected, but maybe I didn’t sew it down in four different places. 😉
And, I think they’re using option #1 for the Met’s pet example.
I think your best bet (for making pleats for your pet) is making a few sample tests swatches with your final fabric, and see which looks the best/most authentic with the fashion fabric.
From my own experience, I think it’s most likely that the trim is the width of the ruffle plus turning allowance, and they’re either hemmed before being sewn down, or are turned under and sewn down. Like Katie, I’ve never seen a period one (besides that spencer) that had a backing or was folded in all the way. I’m sure it’ll look great no matter what, though!
I am wondering whether that “spencer” IS a spencer – looks more like a pierrot jacket apart from lacking the back peplum flare.