Latest Posts

Making a 1360s gown thedreamstress.com

Making a 1360s Medieval gown

I’ve been in love with second-half-of-the-14th century fashion ever since 2015, when I made my first 1360s gown.

Between life in general, the demands of my job, and Scroop Patterns, I’ve never managed to make another one, until now!

A woman is wearing a yellow kirtle and blue linen surcoat. Her red-blond hair is mostly covered by a white wimple and veil. She looks to the right.

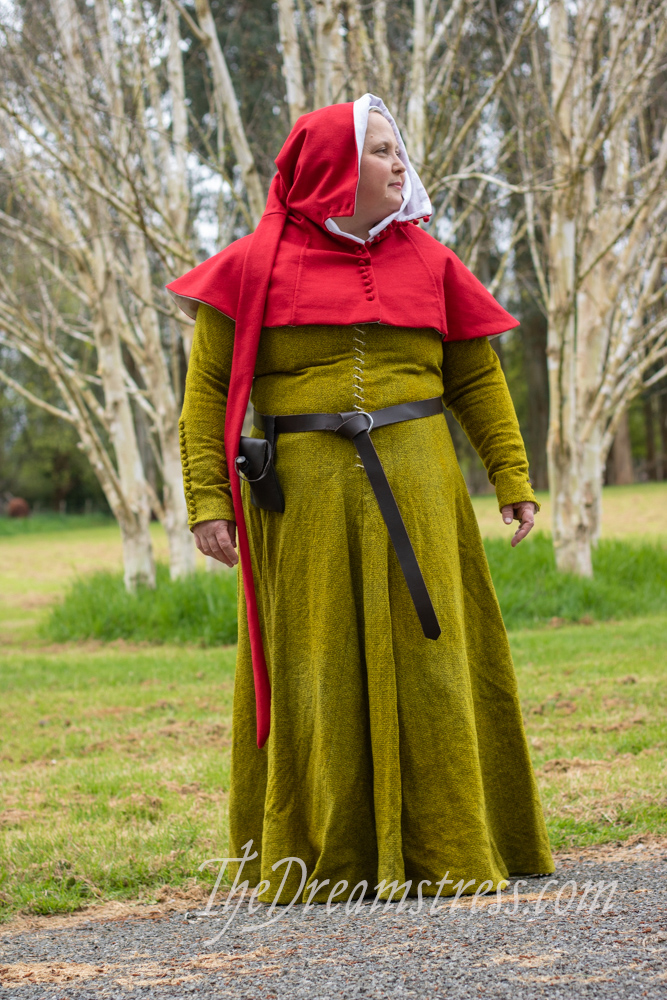
I bought some beautiful vintage yellow wool at Fabric-a-Brac in Wellington back in 2017, and knew it would be perfect for a 1360s gown, and that there was exactly enough.

Back in 2020 my local costuming friend group decided to do Medieval, so I helped a bunch of them make custom patterns based on the techniques I used for my original gown, and I started one of my own.  I got it done as far as sleeves, and wore it sleeveless for an event at Zealandia, but only managed to finish it in October this year, just in time for our annual historical retreat.

Here’s a quick photo essay of the making process.  I used all the same resources I used for my first dress.

The back panels, with the back gusset set in:

Making a 1360s gown thedreamstress.com

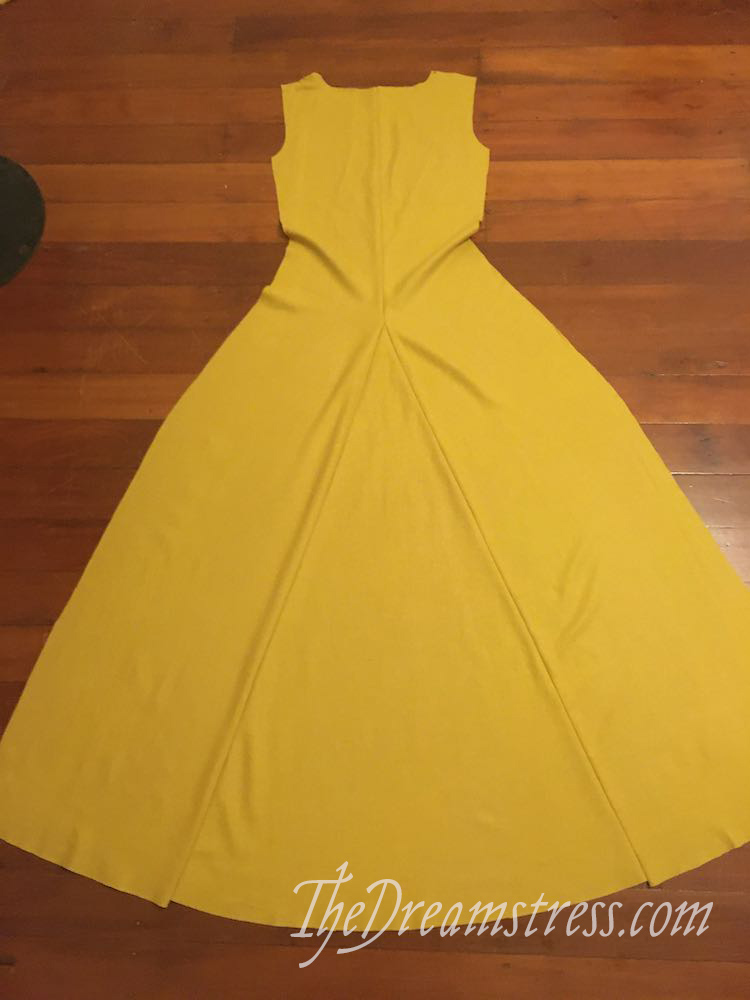
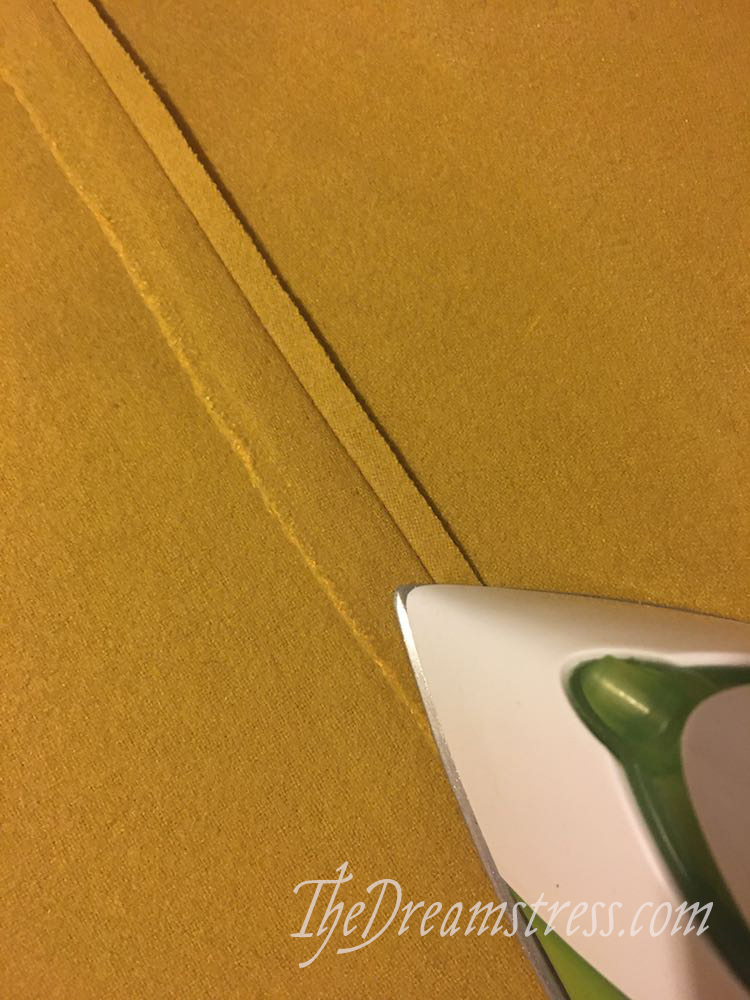
And from the wrong side:

Pressing your seams is very important for a good result!  My main seams are machine sewn.  My work is so demanding of my hands that I have to be careful about how much handsewing and machine work I do.

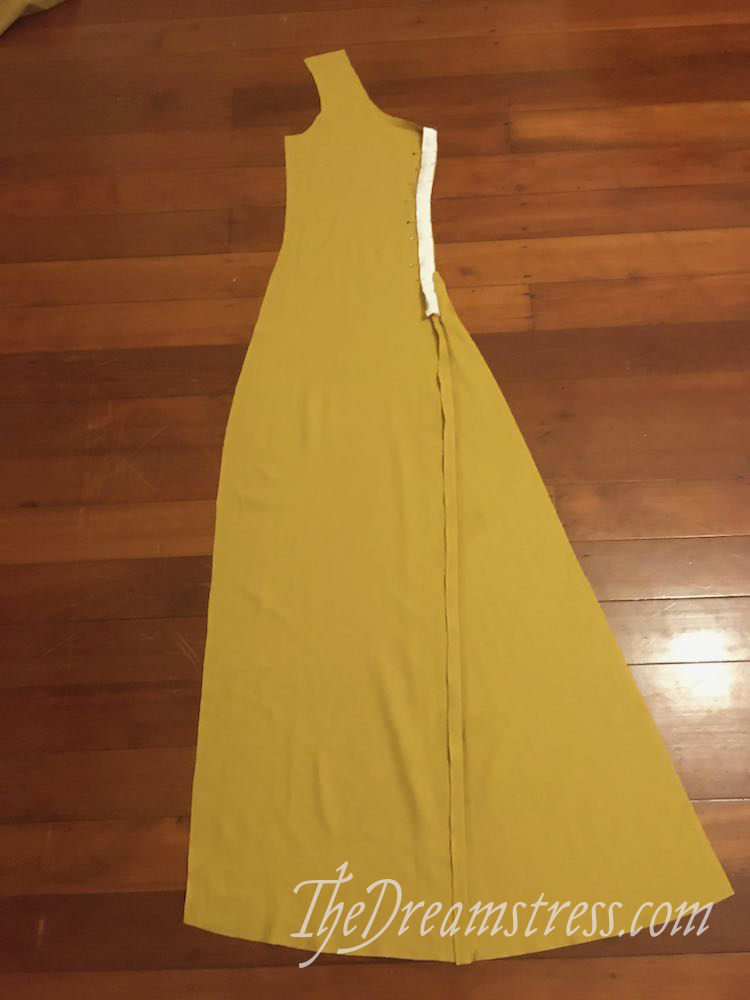
And here’s the back with the side gores attached:

Making a 1360s gown thedreamstress.com

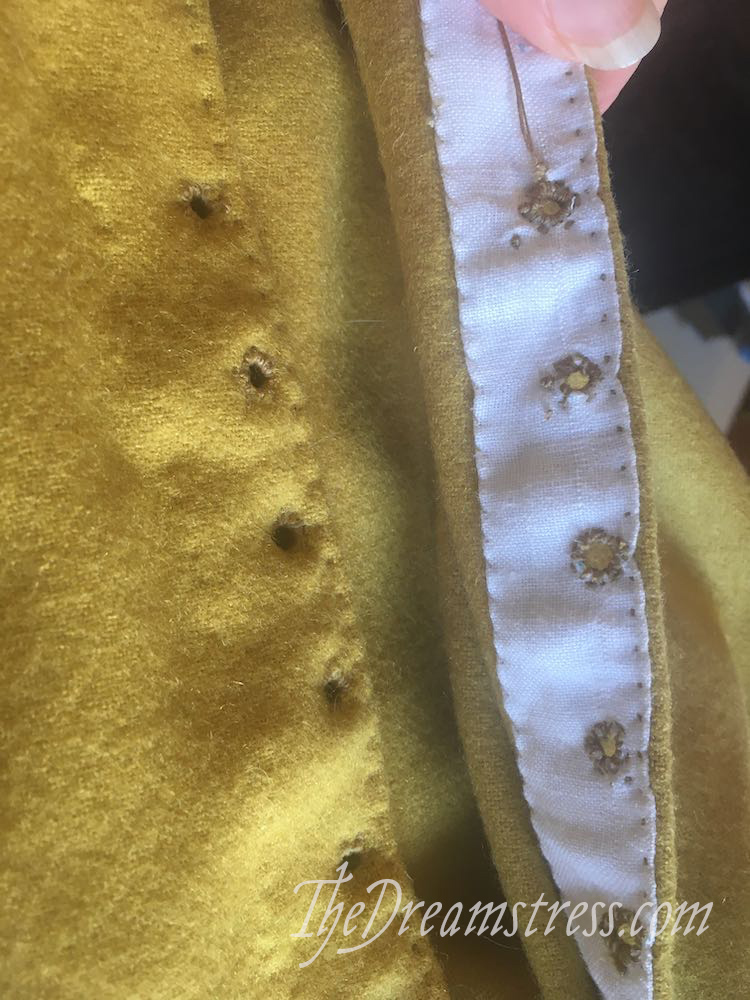
And the front, with half of the front gore attached, and a strip of linen reinforcing for the front lacing pinned in:

Making a 1360s gown thedreamstress.com

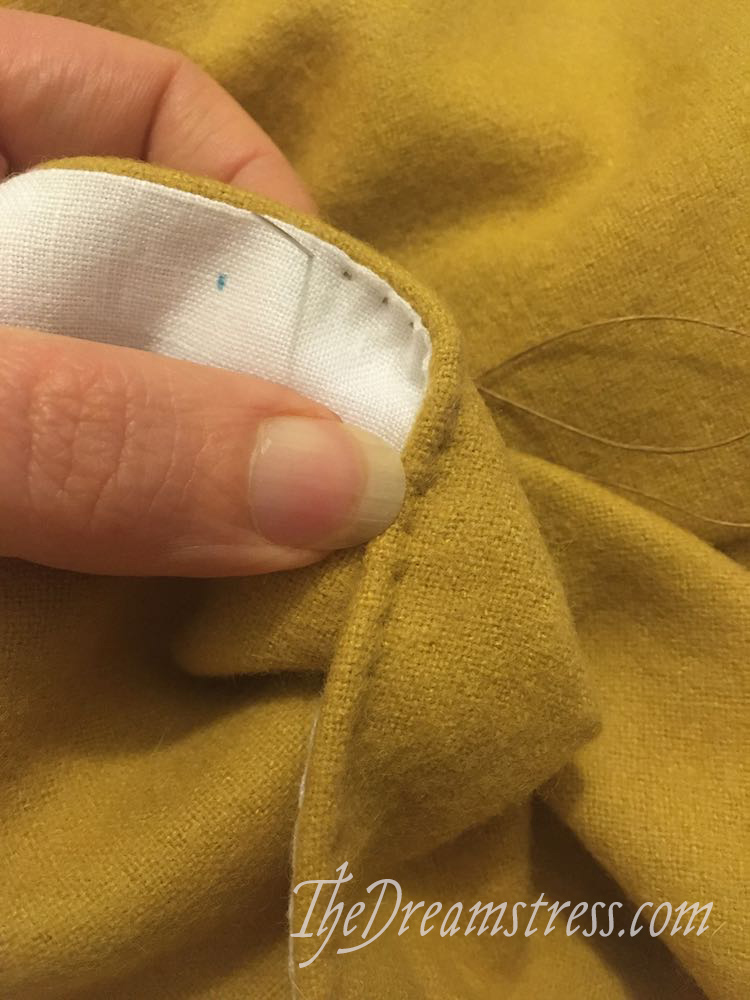
Catching down the front reinforcing:

Making a 1360s gown thedreamstress.com

Please note that I an NOT an expert in Medieval garment construction, and did not do the research to make sure that every stitch I used was documented for the places and ways in which I used them.

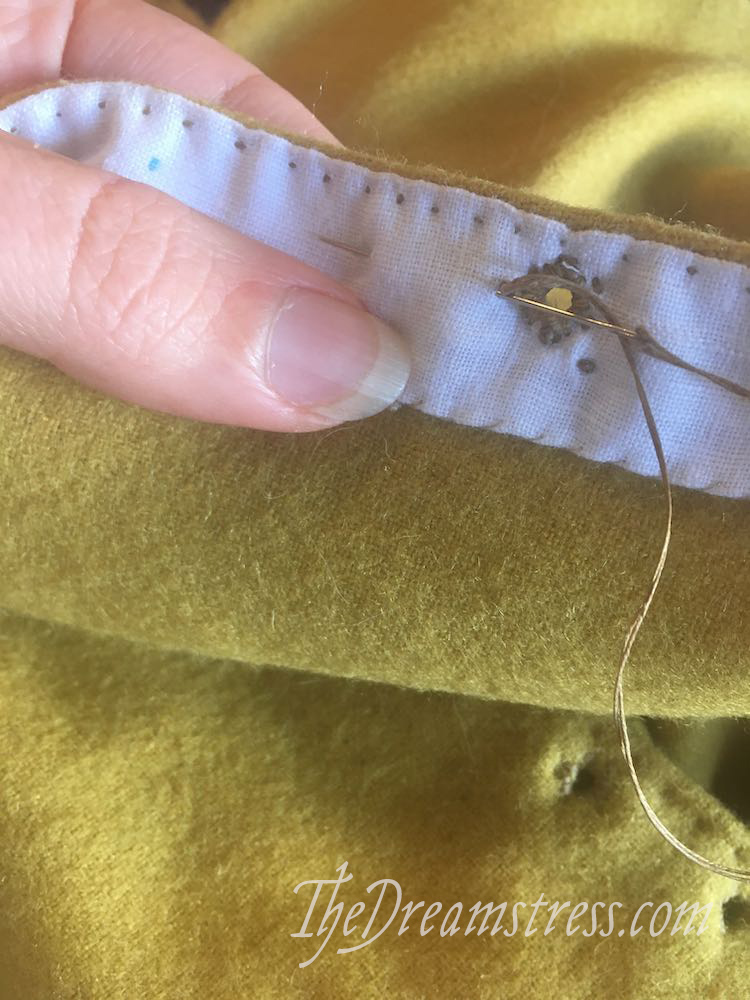
More reinforcing of the front strip.  There’s a narrow cord run down the front edge and held in with prickstitches to support the front lacing.

Making a 1360s gown thedreamstress.com

Making a 1360s gown thedreamstress.com

Making a 1360s gown thedreamstress.com

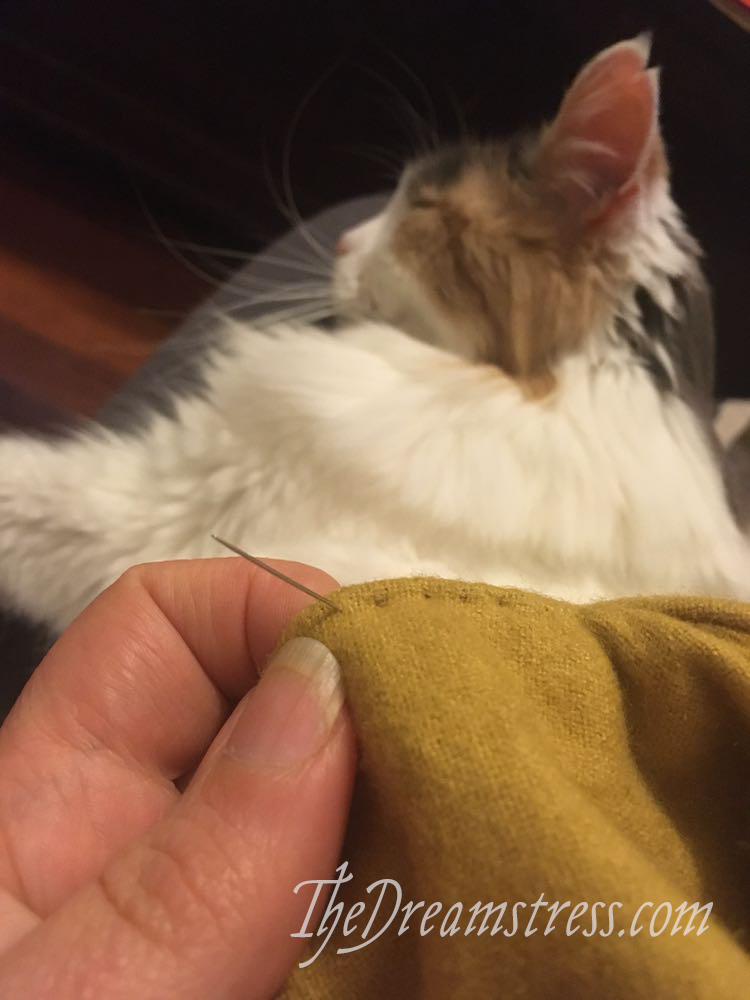
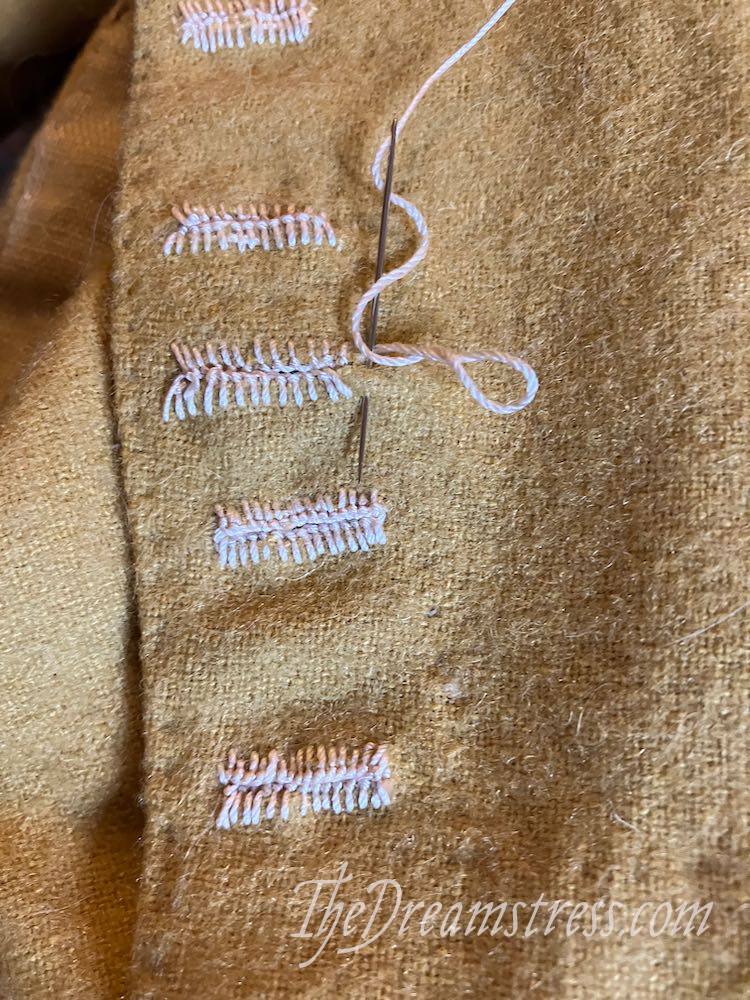
Working on my lacing holes:

Making a 1360s gown thedreamstress.com

Making a 1360s gown thedreamstress.com

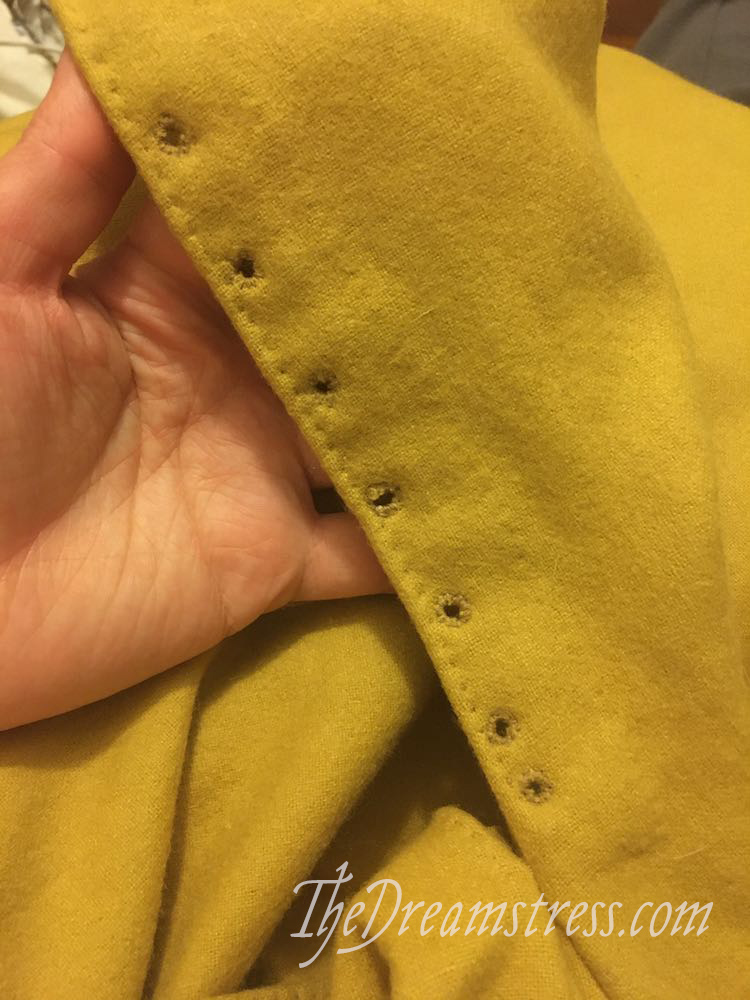
I’ve done a little series of knots around each lacing hole before moving on to the next one, so that if the thread wears out and breaks, the stitching is still secured.

Making a 1360s gown thedreamstress.com

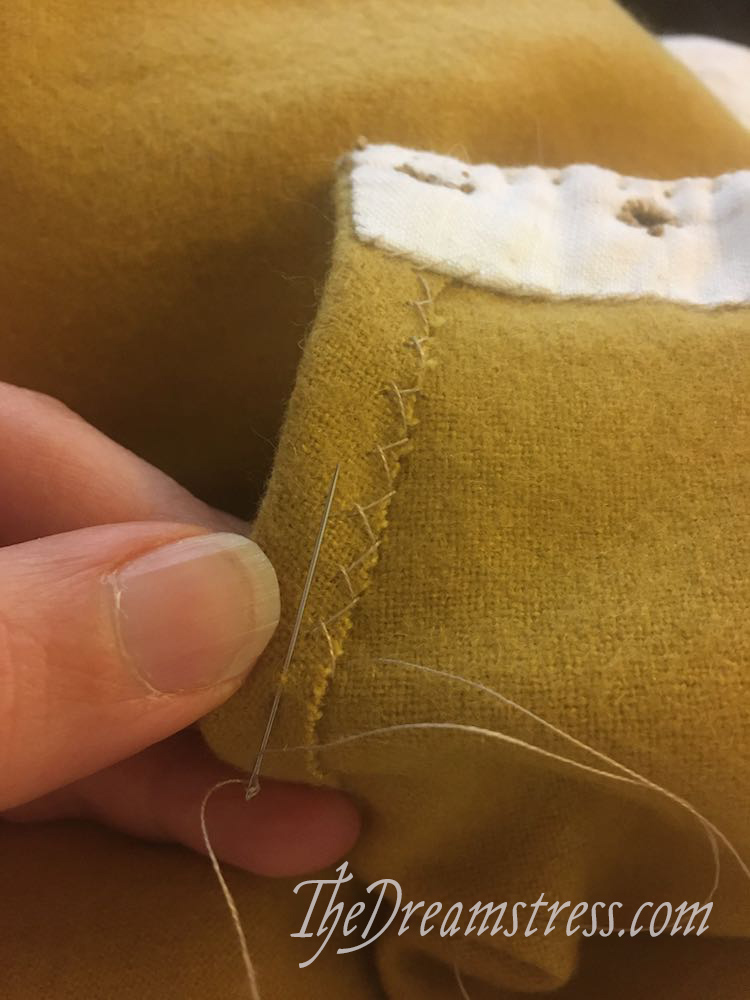
Stitching down the neckline.  I’m really not sure if a herringbone stitch is accurate here, so do not imitate it without doing your own research if you care about accuracy!

Making a 1360s gown thedreamstress.com

And that’s the point at which the gown stalled, because I misplaced my medieval sleeve pattern (I’m convinced I lent it to a friend), and did not have the energy to re-draft another one at that moment.

Finally in August of this year I decided I really needed to finish this gown because we were having a Medieval day at this years historical retreat, and my original Medieval dress is…snug.

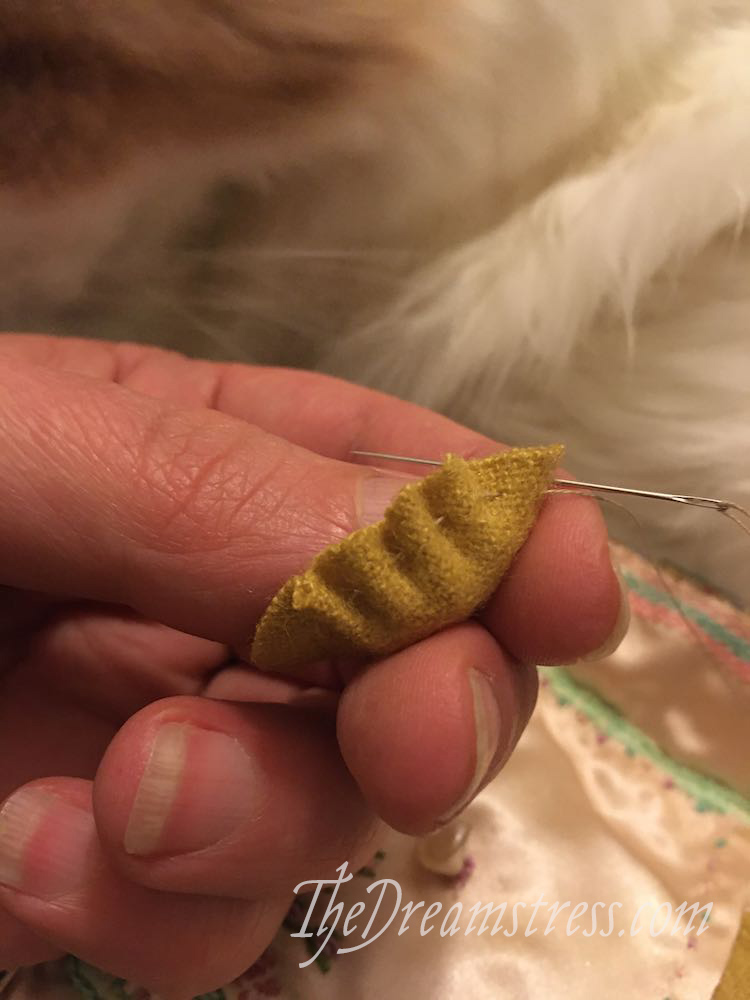
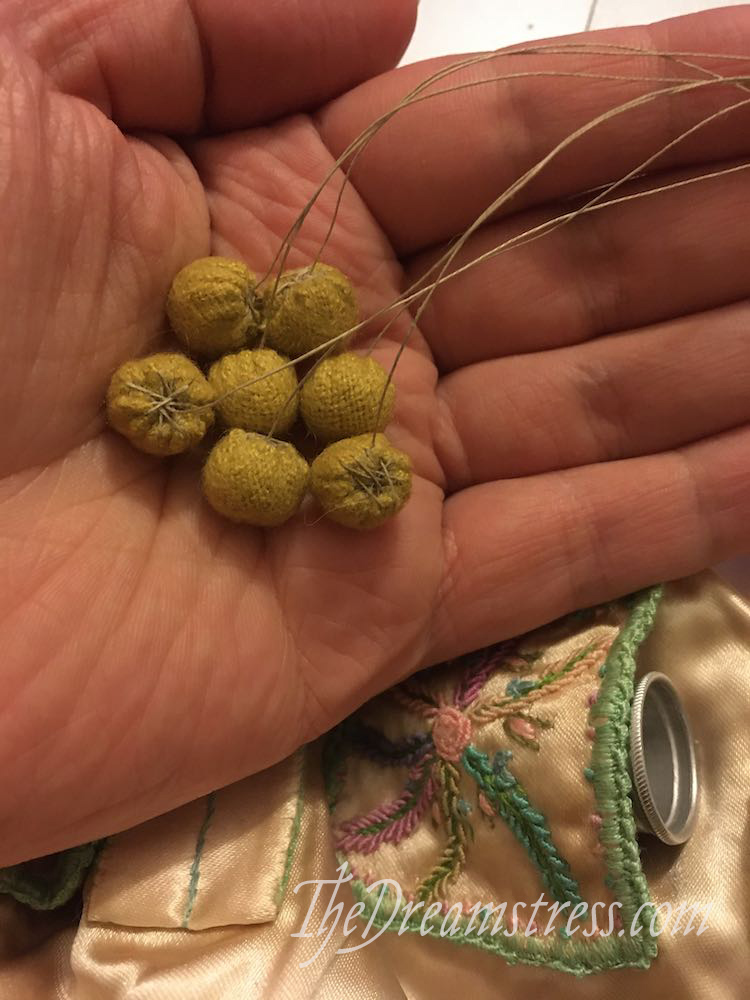
So, I made lots and lots of buttons using the same cloth button making technique I used for my first dress.

Making a 1360s gown thedreamstress.com

Making a 1360s gown thedreamstress.com

Making a 1360s gown thedreamstress.com

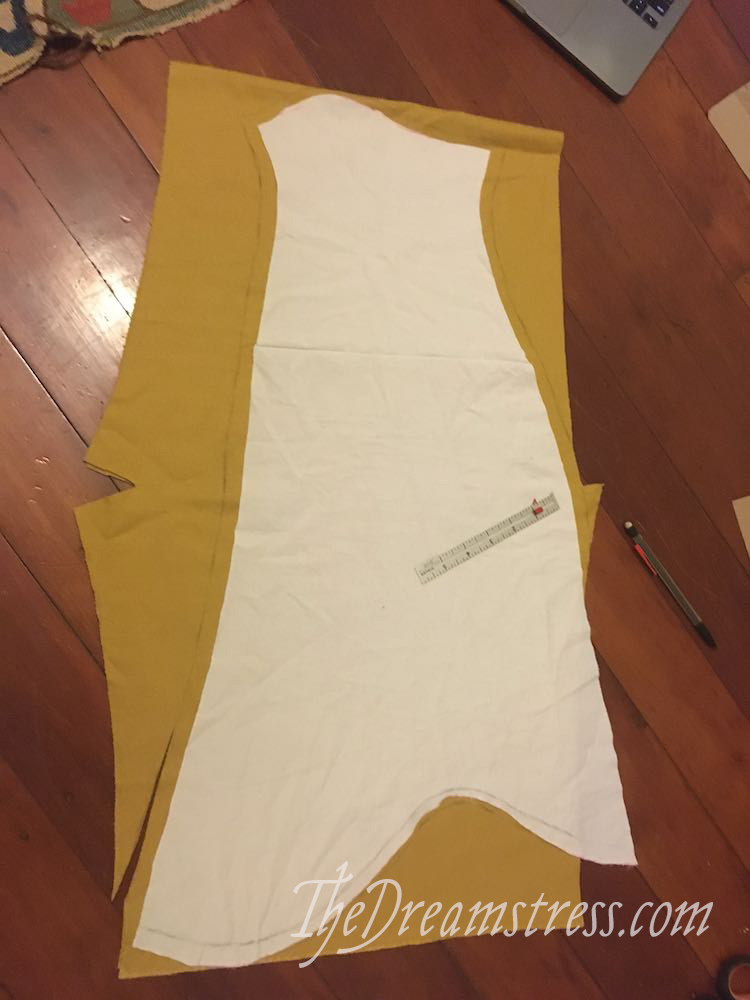
And then braved another bout of sleeve patterning.

I cheated.  I took the photograph of my old sleeve pattern, scaled it based on the width of my floorboards, traced it off, and made a toile based on that.

Five toiles later, I had a workable sleeve that juuuuuuuust fit on my remaining fabric, with a little piecing (piecing is period!).

Making a 1360s gown thedreamstress.com

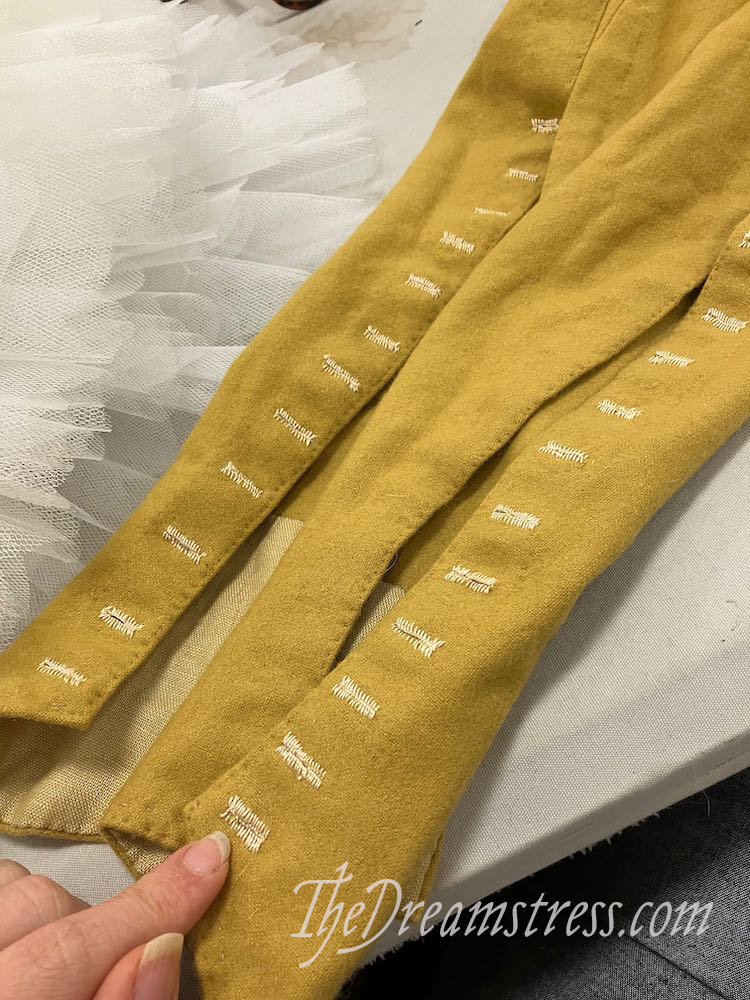
Sewed that up, and reinforced the sleeves openings with linen strips:

Making a 1360s gown thedreamstress.com

Making a 1360s gown thedreamstress.com

Making a 1360s gown thedreamstress.com

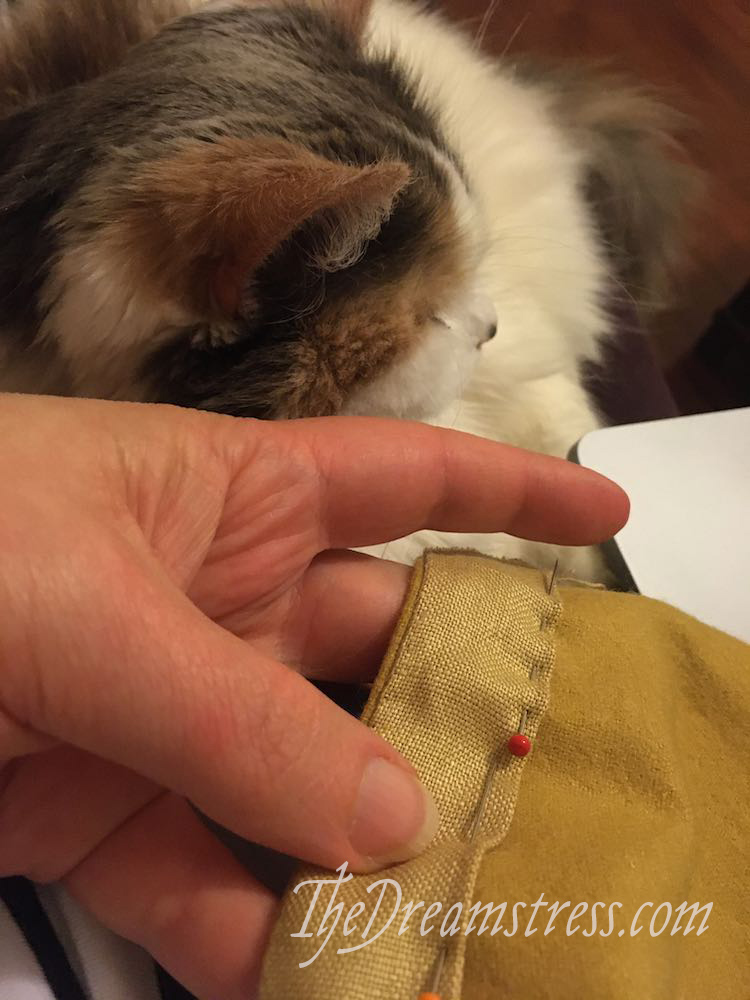
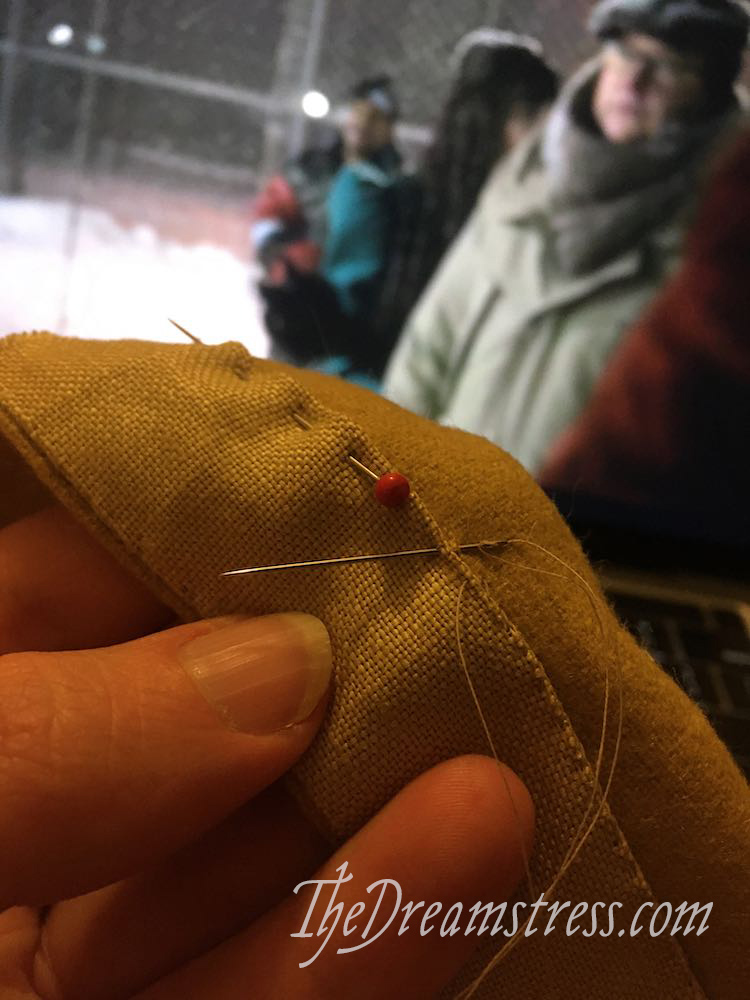
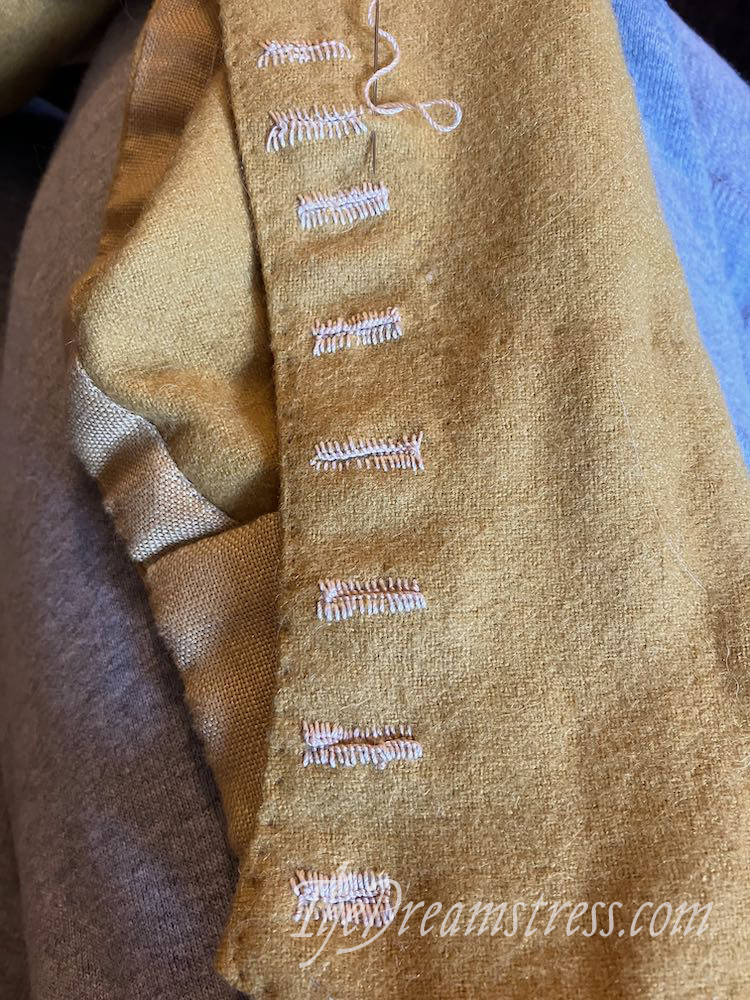
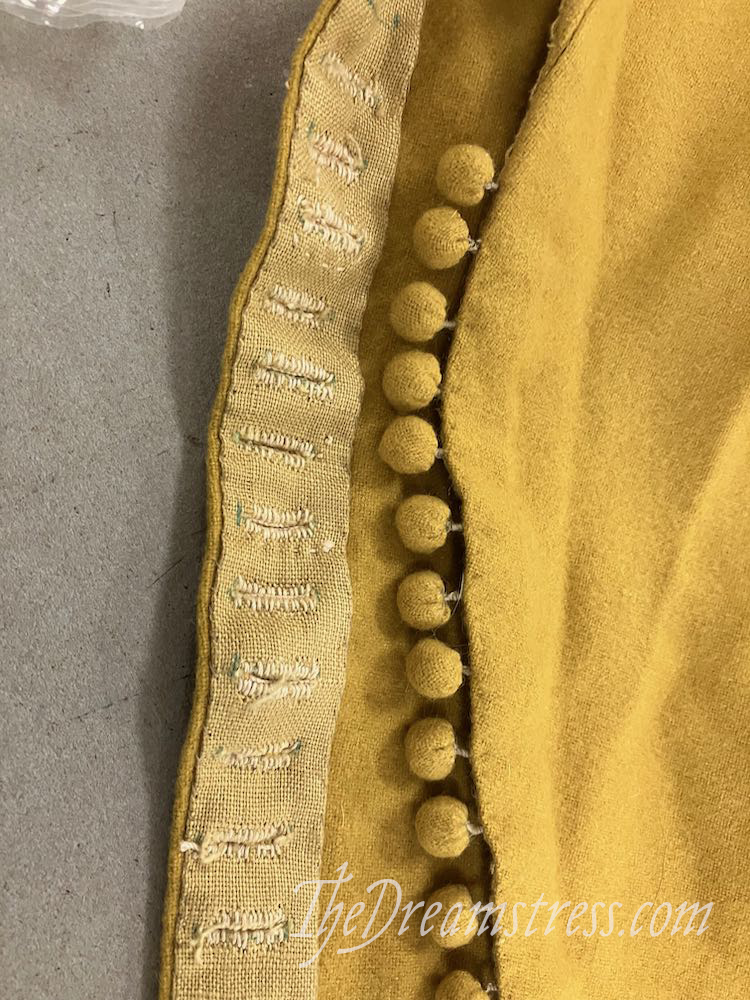
Then it was on to buttonholes.

Making a 1360s gown thedreamstress.com

This is where I made a mistake.  I started my buttonholes on the flight back from Hawai’i to NZ after a family trip home.  I just guestimated at buttonhole spacing.  I got it wrong, and had to add back in other buttonholes, so my spacing varies, and I ended up with two more buttons on one sleeve.

Making a 1360s gown thedreamstress.com

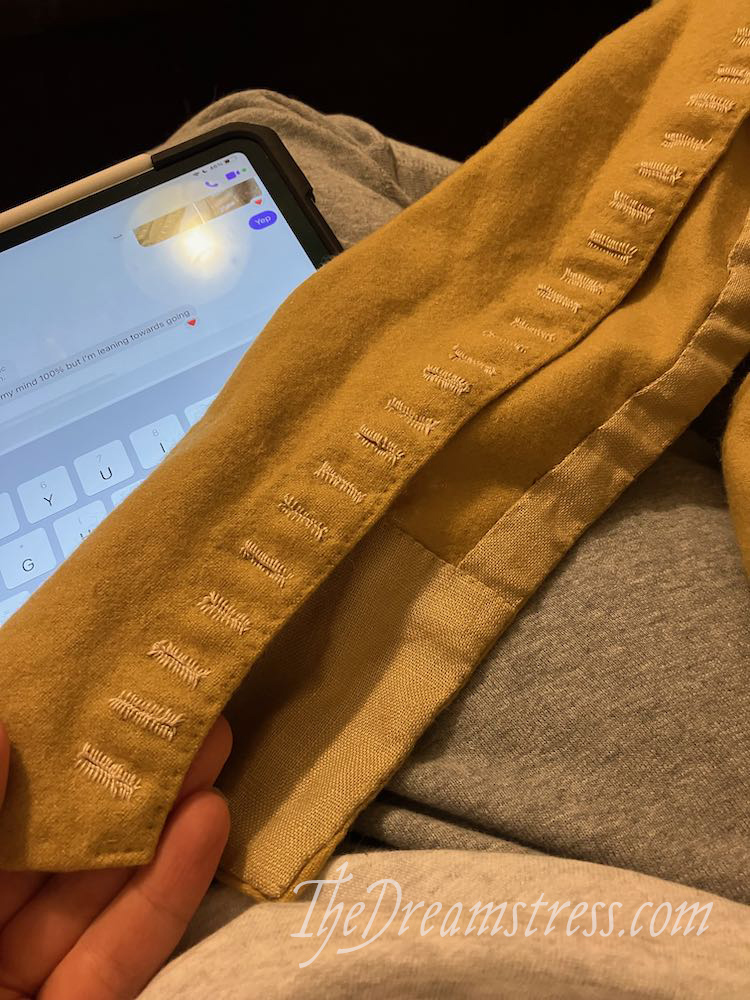
I mostly used La Cotte Simple’s tutorial.  Matsukaze Workshop has two great blog posts on different buttonhole techniques through the ages (second one here) that are super helpful for understanding how they change over time.

Making a 1360s gown thedreamstress.com

I’m working with vintage silk buttonhole twist.  The number of buttons and buttons ended up being determined by how much thread I had!

Making a 1360s gown thedreamstress.com

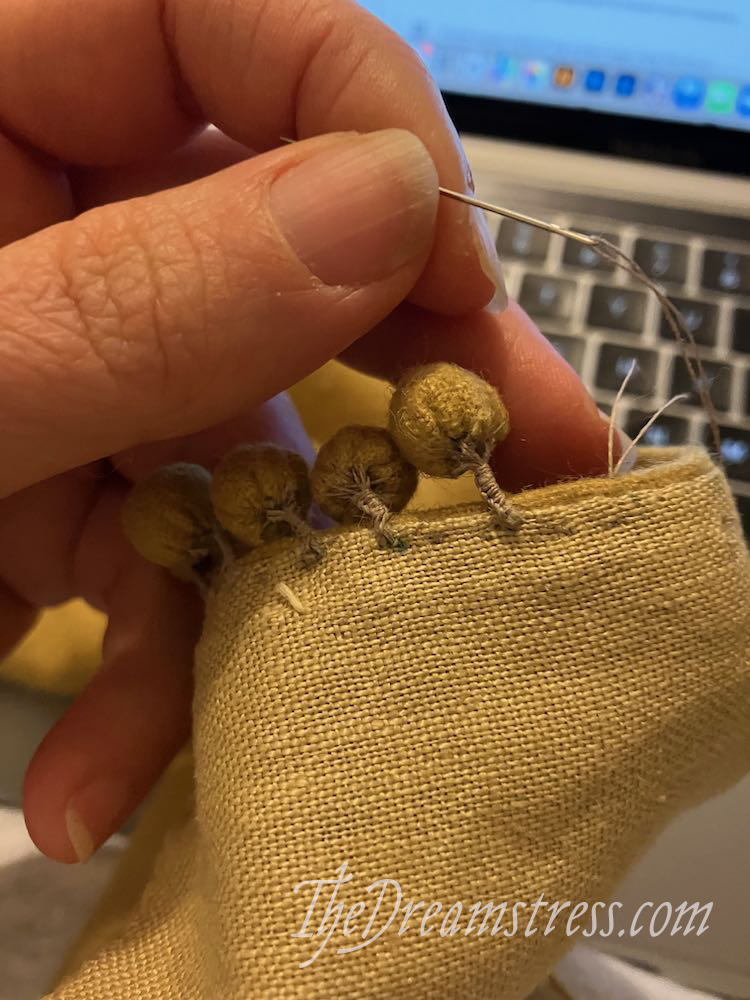
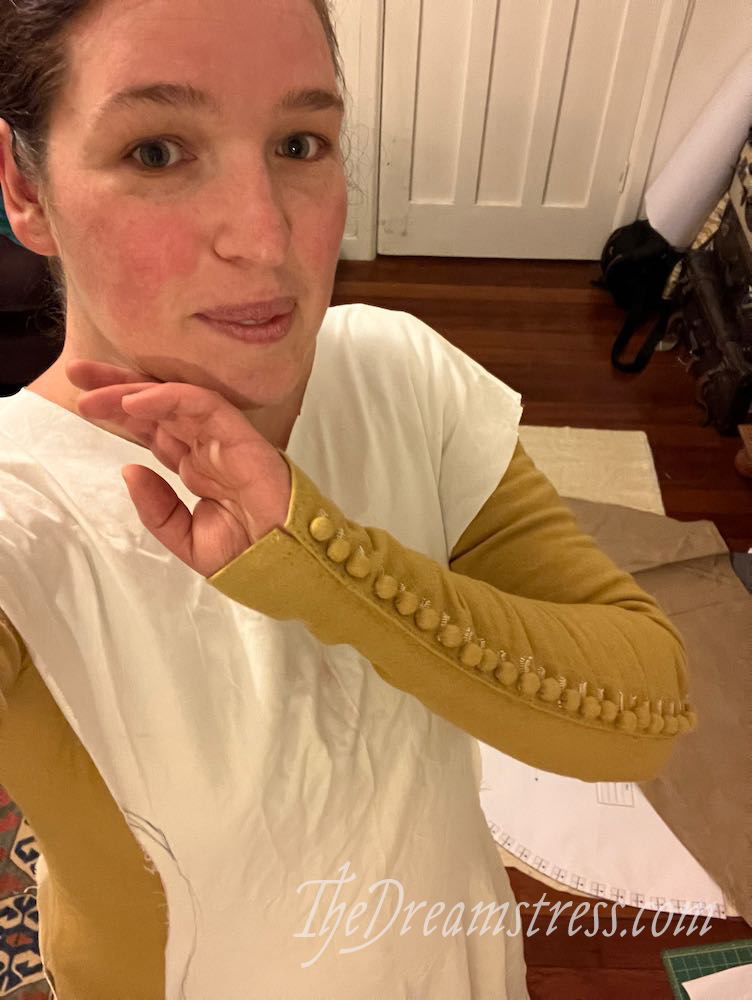
Then it was time to sew on the buttons.

Making a 1360s gown thedreamstress.com

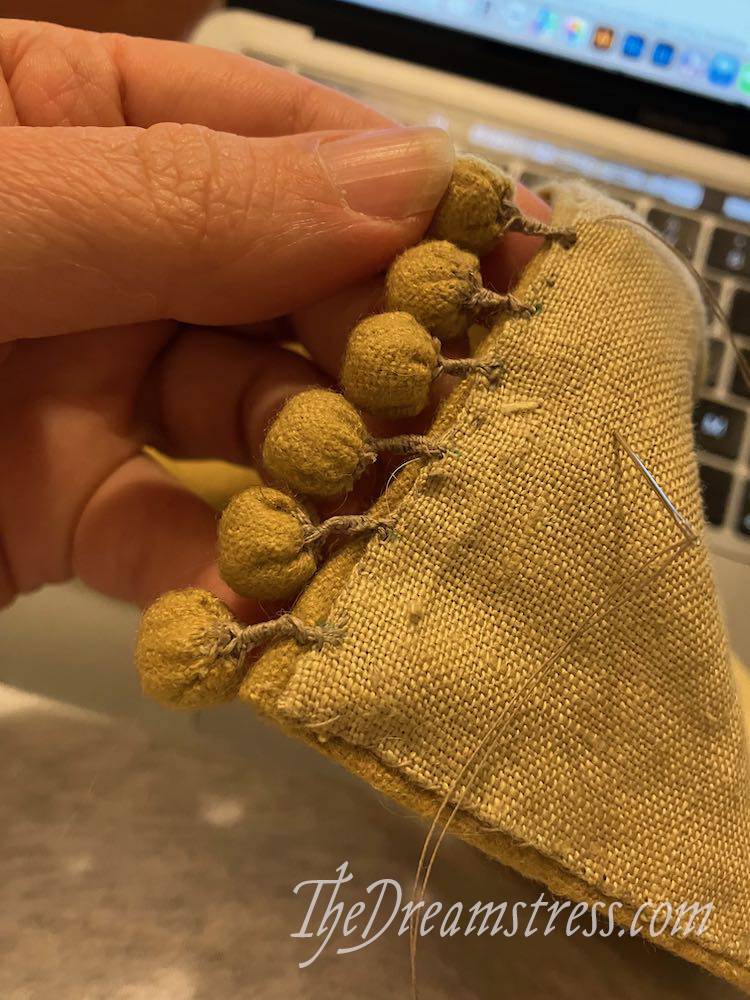
I just love making their little stems.  There’s something so satisfying about turning the buttons into little cartoon trees attached to the dress!

Making a 1360s gown thedreamstress.com

Making a 1360s gown thedreamstress.com

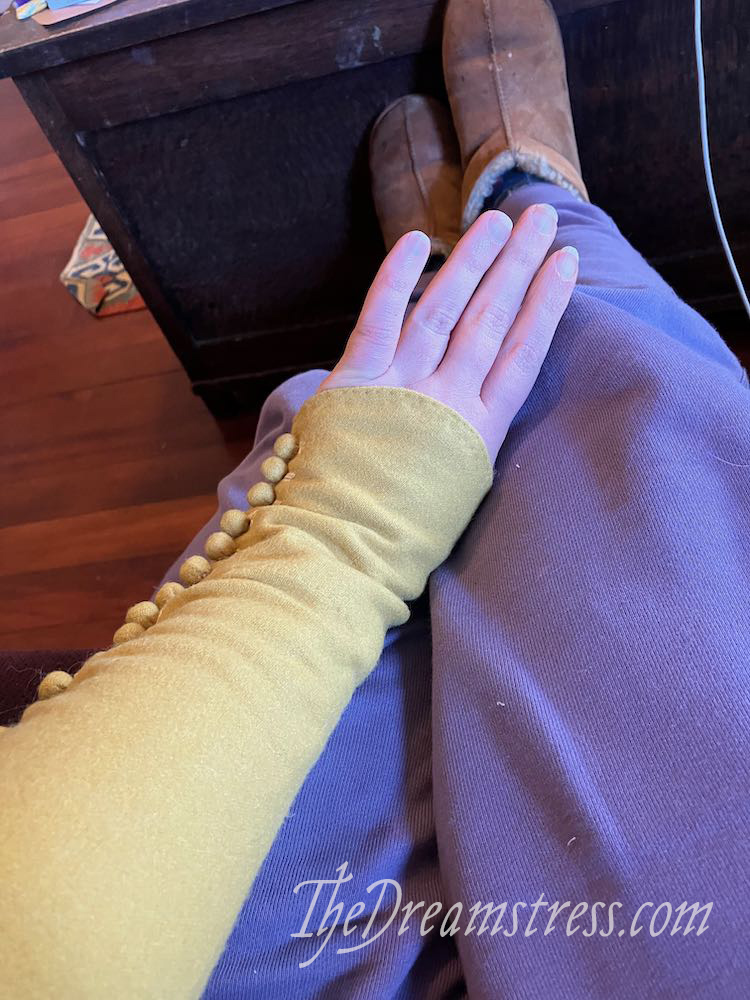
And we have sleeves!
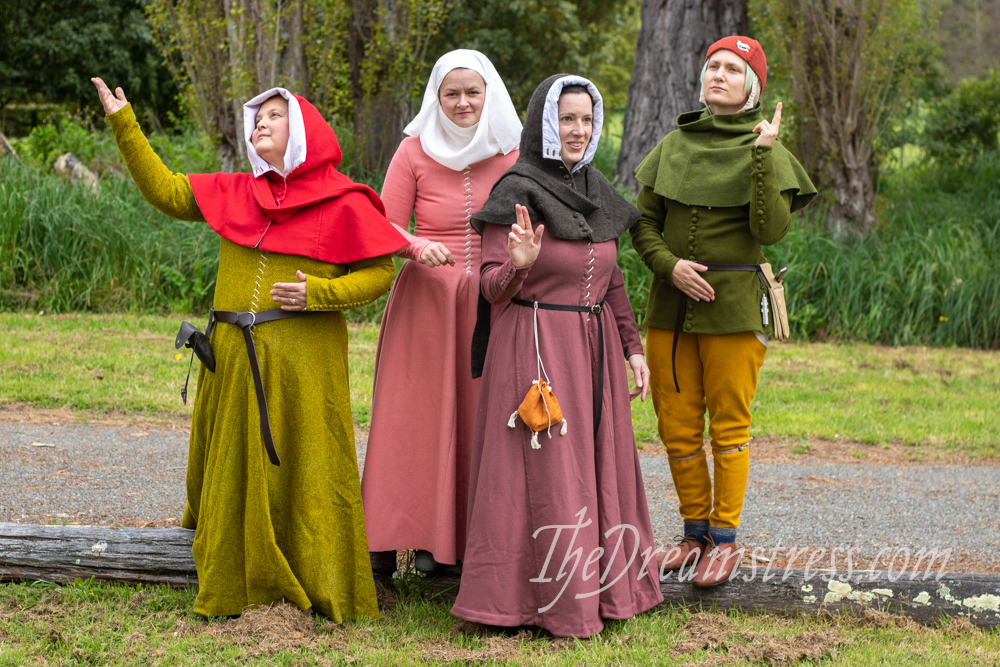
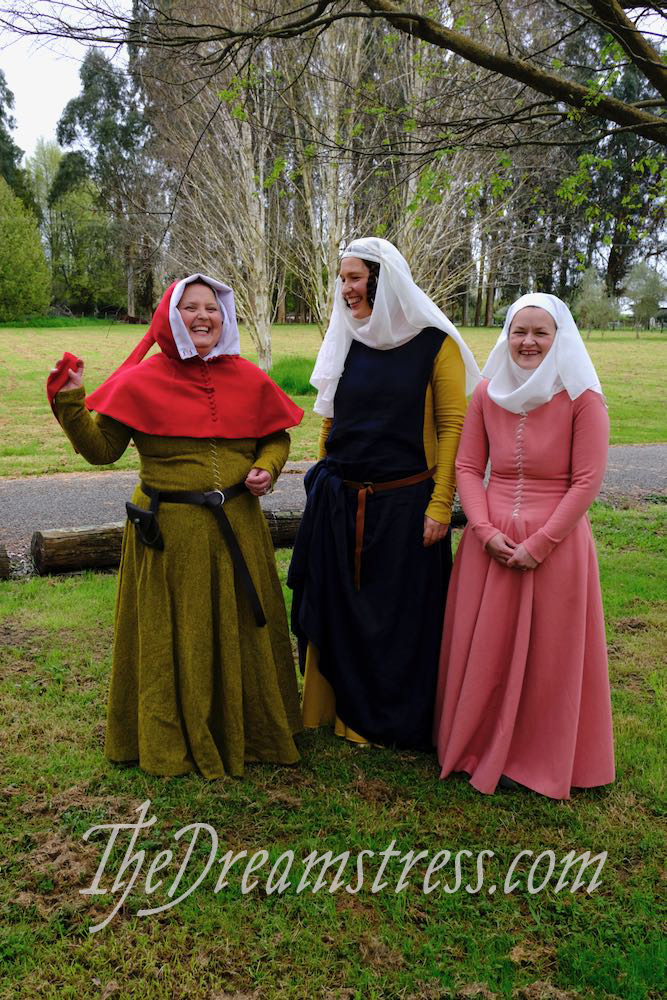
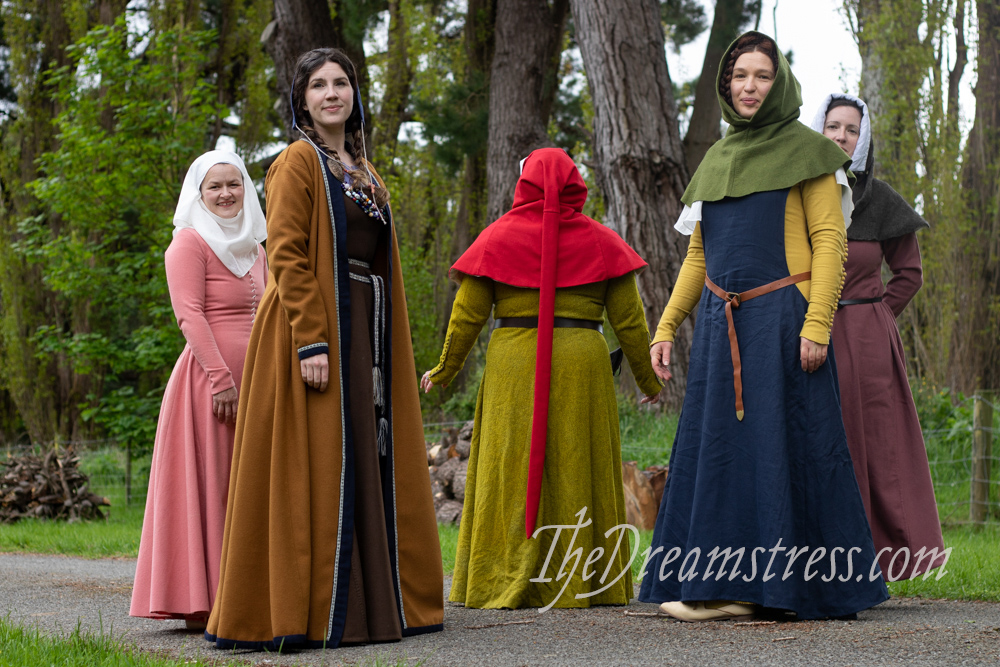
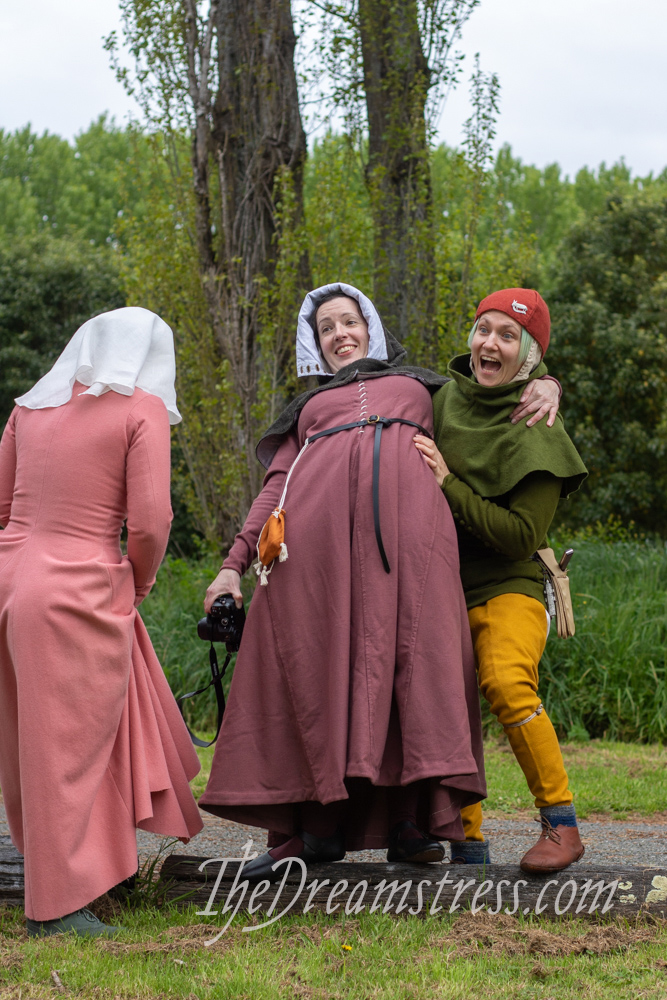
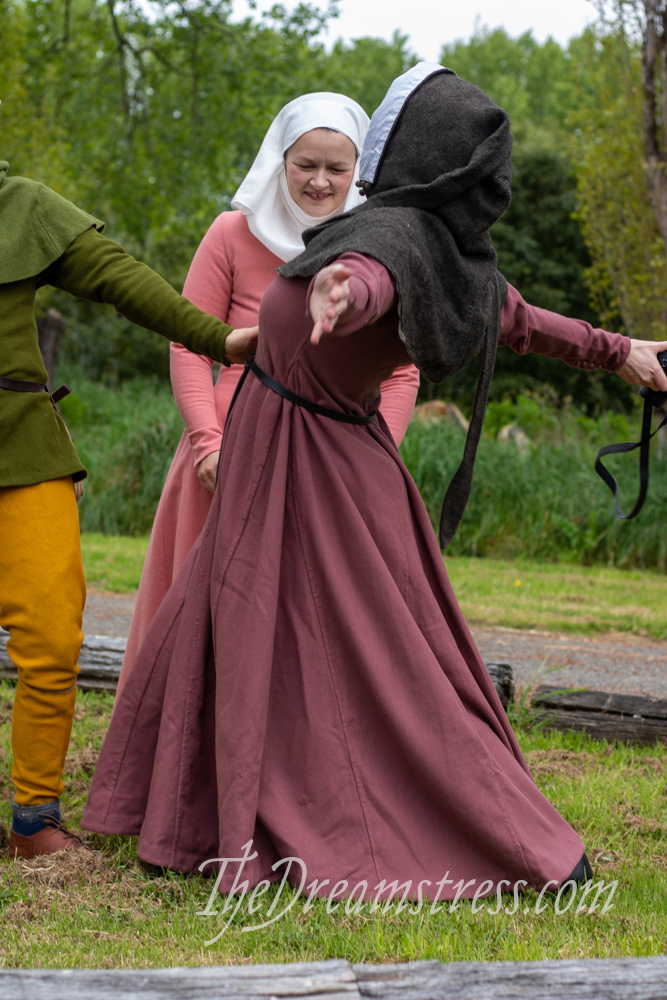
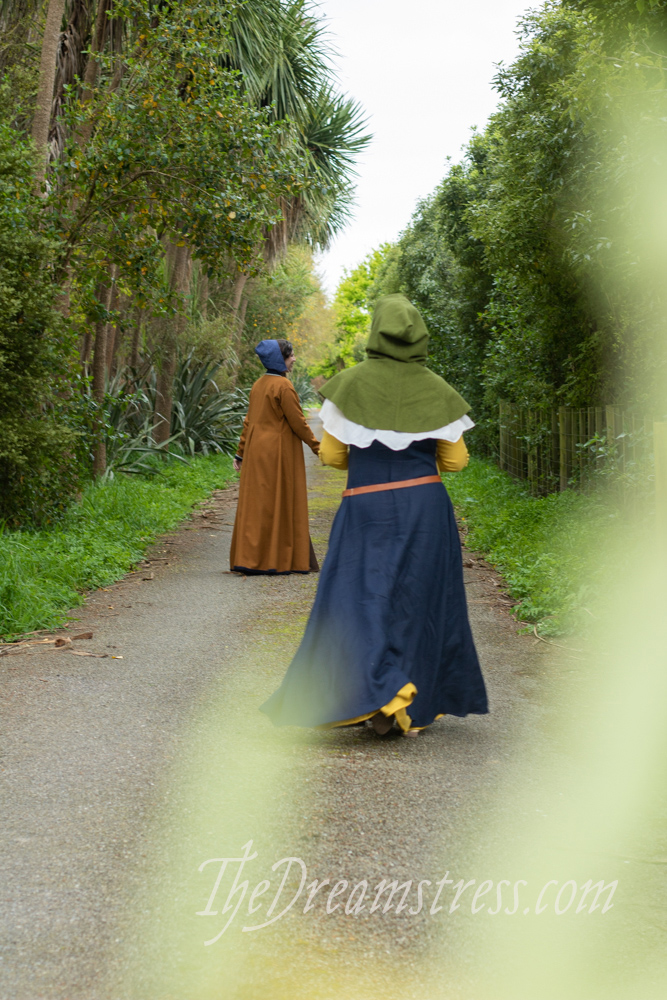
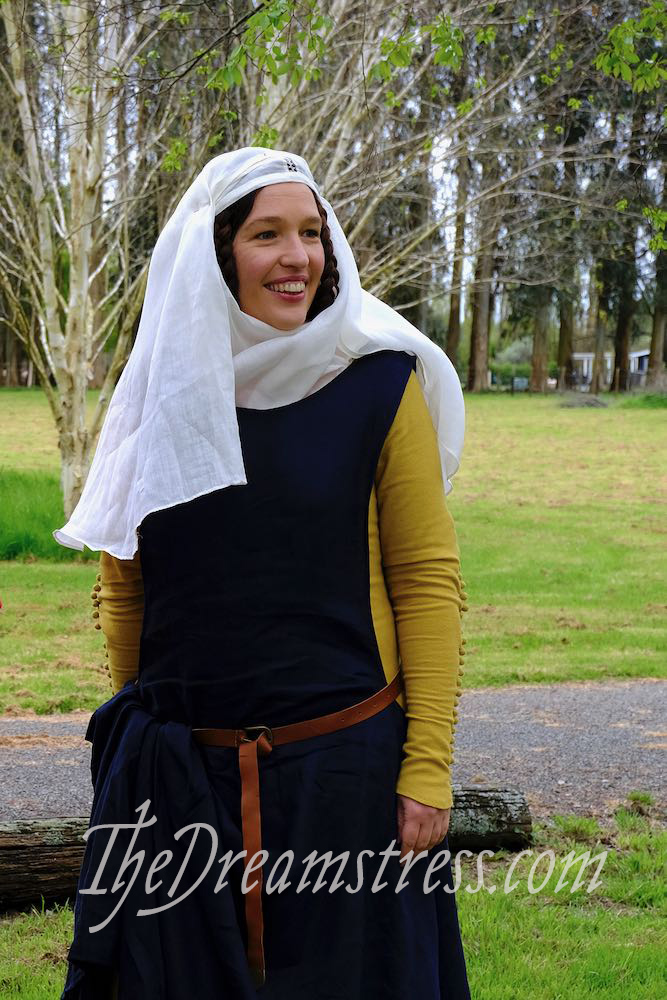
Making a 1360s gown thedreamstress.com

Making a 1360s gown thedreamstress.com

And a full dress!

Medieval mischief thedreamstress.com

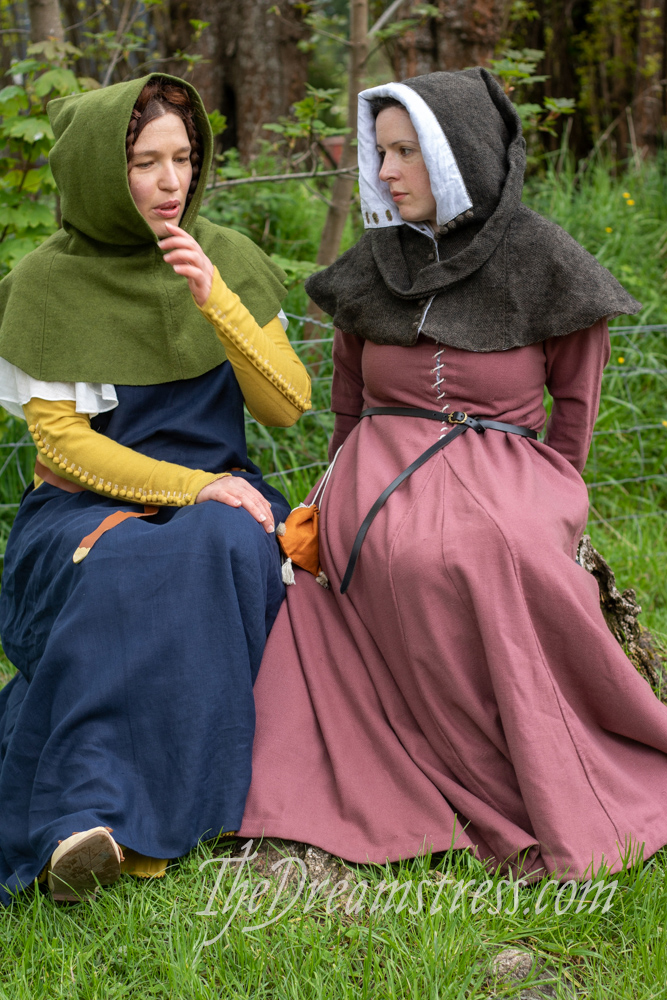
I still need to take photos of the dress without my surcote on.  I’ll do that once I’ve had time to walk off the post holiday midriff snuggness!  (and also once it stops being so hot.  It’s a little muggy at the moment for a wool dress…)

A woman is wearing a yellow kirtle and blue linen surcoat. Her red-blond hair is mostly covered by a white wimple and veil. She looks to the right.

I also feel that the sleeves may be a tiny bit long from the upper arm to the elbow, so I may see if I can remove them from the dress and shorten them at the armscythe.  Maybe…


Four people in Medieval costume imitate poses from illuminated manuscripts. On the left a woman in a red hood and green-yellow gown raises her arm. Next to her a woman in a pink dress and white wimple holds her hands demurely in front of her. In front of her a woman in a pink-purple dress and grey hood gestures. On the far right a man in a green tunic and yellow leggings raises a hand.

A bit of Medieval Mischief

We had a mixed-up Historical Sew and Eat Retreat this year, with a day of 18th century, and a day of Medieval.

18th century was our outing day, with a relaxed (yet historical) lunch and breakfast.  Medieval was our big feast day, with an extravagant Ottoman Empire inspired meal.

Because we were doing a bunch of cooking, and because the weather was sadly wet and chilly, we didn’t venture far from our house.

Enjoy a bunch of photos of costumers of varying levels of expertise in 14th century English, French and Swedish fashions, and their time-travelling Viking friend!

Medieval mischief thedreamstress.com

I started out looking quite reasonable in my just-finished yellow gown and blue linen surcoat (more about those in another post), with my St Birgitta’s cap and very best veil and wimple (mostly because I’d lent the simpler one to Kez).

A woman is wearing a yellow kirtle and blue linen surcoat. Her red-blond hair is mostly covered by a white wimple and veil. She looks to the right.

But I was cold, so Fil was a gentleman and lent me his hood, which is how I learned why women’s hoods have buttons up the front.  Getting the hood on completely dislodged my cap, wimple and veil, and made a mess of my hair.  So I’m decidedly rumpled in most of the photos…

Medieval mischief thedreamstress.com

But I was warm! (which is the important thing)

And green is a very good colour with my outfits, so now I really want a green hood…

Medieval mischief thedreamstress.com

But one with buttons!  And a looooooong liripipe!

A woman wears a yellow-green kirtle and red hood lined with white. She looks to the right.

Costuming goals…

Medieval mischief thedreamstress.com

We tried our hand at posing like illuminated manuscripts:

Four people in Medieval costume imitate poses from illuminated manuscripts. On the left a woman in a red hood and green-yellow gown raises her arm. Next to her a woman in a pink dress and white wimple holds her hands demurely in front of her. In front of her a woman in a pink-purple dress and grey hood gestures. On the far right a man in a green tunic and yellow leggings raises a hand.

Medieval mischief thedreamstress.com

Medieval mischief thedreamstress.com

And got a little carried away with our posing:

Medieval mischief thedreamstress.com

Medieval mischief thedreamstress.com

We also tried our hand at posing like Disney Princesses:

Medieval mischief thedreamstress.com

And the ugly stepsisters:

Medieval mischief thedreamstress.com

Medieval mischief thedreamstress.com

And went for a walk:

Medieval mischief thedreamstress.com

Medieval mischief thedreamstress.com

Medieval mischief thedreamstress.com

Fun times!

Medieval mischief thedreamstress.com

The gorgeous Sophia tester makes!

Final hours: the Marie, Charlotte, and Sophia patterns, and the combined pack with all three, are on sale until 11:59pm tonight, NZ Time – don’t miss out!

It’s the third and final of the three posts full of stunning test makes that I’m writing for each of the three 18th century mantle patterns.  Today’s feature: The Sophia Mantle!

Scroop + Virgils Fine Goods 18th C Mantle Patterns scrooppatterns.com

The Sophia testers were just as fantastic and helpful as the Marie and Charlotte test groups.  In some ways they had the biggest job: the biggest mantles, and a bunch of techniques that aren’t in the other two patterns, because the Sophia is the most unique in construction.

@sewlateadoe

Sewlateadoe said that she wanted to make a Sophia with fur trim when she applied to test the mantle patterns, and I was so excited by the idea!  As you can see, her version does not disappoint!

The Scroop + Virgil's Fine Goods Sophia Mantle by @sewlateadoe scrooppatterns.com

That pink lining!!!  The contrast of the white fur and black outer!  The way it all falls and hangs!

The Scroop + Virgil's Fine Goods Sophia Mantle by @sewlateadoe scrooppatterns.com

It’s utterly, delightfully decadent.

Sewlateadoe made her Sophia in Small.

Loran Watkins of @loranwatkins

For a quite different, but equally gorgeous, take on the Sophia, we have Loran’s modern and minimalist (if it’s remotely possible for the Sophia to be minimalist!) version in the most gorgeous peacock blue taffeta, with a lining in black.

The Scroop + Virgil's Fine Goods Sophia Mantle by @loranwatkins scrooppatterns.com

It’s so dramatic!  It’s so divine!

The Scroop + Virgil's Fine Goods Sophia Mantle by @loranwatkins scrooppatterns.com

Her daughter calls this her ‘magic fairy cape’, and she is not wrong!

Loran made a Large.

Kate Motz of @katestangledstring

As we saw from the mantle inspiration posts, there are a lot of examples 18th century mantles in silks with small scattered floral patterns.  Kate chose a similar fabric for her mantle lining, and it just makes this mantle so special!

The Scroop + Virgil's Fine Goods Sophia Mantle by @katestangledstring, pattern available at scrooppatterns.com

Her outer is a fine worsted wool, interlined with a midweight woollen wool (the pattern includes instructions on an optional interlining, for maximum coziness), and then lined with her beautiful silk.

The Scroop + Virgil's Fine Goods Sophia Mantle by @katestangledstring, pattern available at scrooppatterns.com

The effect is both lush and restrained.  So beautiful!  I can absolutely imagine this in a film!

The Scroop + Virgil's Fine Goods Sophia Mantle by @katestangledstring, pattern available at scrooppatterns.com

Kate made a Medium

Emily of @historicthimble

I’m not sure I need to say anything at all about Emily’s beautiful Sophia, because her photos do all the talking:

The Scroop + Virgil's Fine Goods Sophia Mantle by @historicthimble, pattern available at scrooppatterns.com

Is that not late 18th century winter wear personified!  The classic red with black lining is just so iconic!  And so delightfully cheerful!

The Scroop + Virgil's Fine Goods Sophia Mantle by @historicthimble, pattern available at scrooppatterns.com

She says “The mantle will keep you warm and dry, plus the hood is ample enough for your hair to be full of secrets.” 🤣  Love it!

Emily made her Sophia in Extra Large.

A huge, huge thank you to all the testers!  You really helped make these awesome patterns, and you were awesome to work with 💛

More about the mantles: