
When I starting doing research on a medieval gown one of the things I really knew I wanted was buttoned sleeves.
But the buttons? Those terrified me. Obviously they were little circles with the raw edges tucked inside, but I was sure making them would be a bit of a nightmare: very fiddly, and impossible to get even and solid.
But when I mentioned that I was worried about buttons, Sarah directed me to her tutorial on Som Når Det Begav Sig. It’s in Swedish, but there are photos which make it self explanatory (and Google translate when it isn’t), and links to sources and other tutorials at the bottom.
I ended up using a mix of Sarah’s tutorial and The Medieval Tailors tutorial. My buttons don’t look as exquisitely tidy as Sarah’s as I make them, but my fabric is much thicker than the fabric the Medieval tailor is using, and I found that using a strict interpretation of his tutorial only worked if I was making much bigger buttons. And I want really little buttons!
So here is what I did:
Caveat: this is not, strictly speaking, a tutorial, because I am not an expert at medieval sewing, and I really don’t like it when sewing bloggers without a lot of experience write tutorials on a technique they have just learned. So this is just a little photo essay of how I have learned to make medieval buttons based on the various tutorials available on the internet. I may have gotten some things wrong, and my end result may not be entirely historically accurate.
For the buttons, I’m using linen thread. Black linen thread is almost certainly period inaccurate (linen is pretty hard to dye, and black was a very expensive dye), but I’d misplaced my natural linen thread, and I have a number of spools of lovely vintage linen thread inherited from Nana.
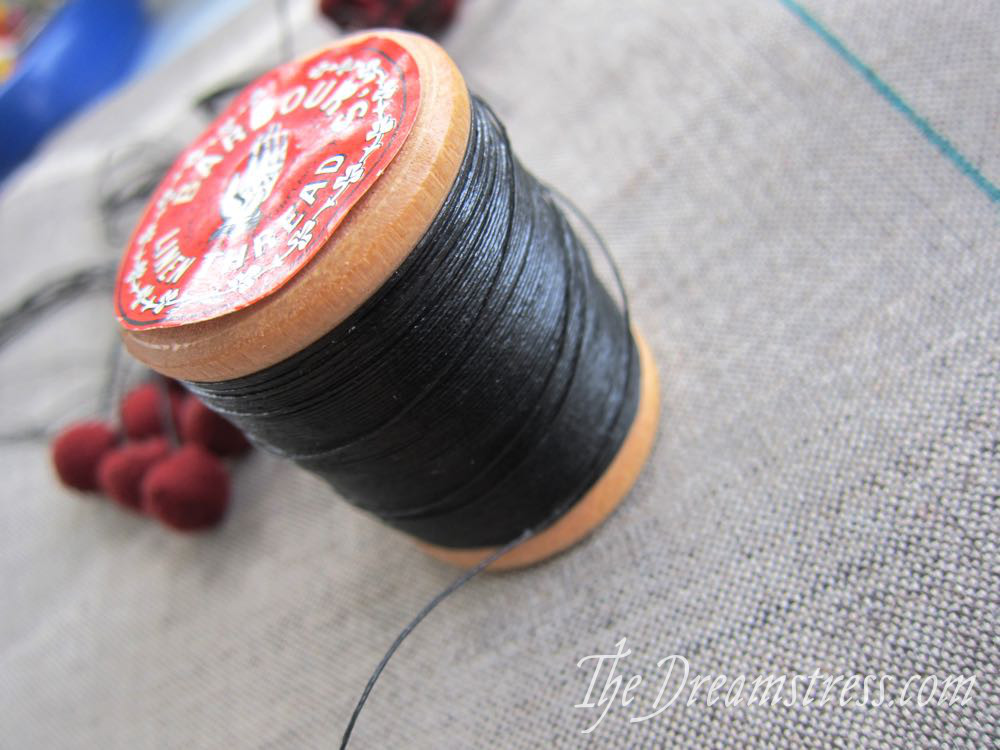
Having made a few buttons, I can definitely say that using linen thread is very important. I’m really, really pulling on the thread at points, and any cotton thread weaker than buttonhole twist just wouldn’t be able to withstand the stress.
Right! On to the actual making. For my buttons I cut a 1″ square of my wool:
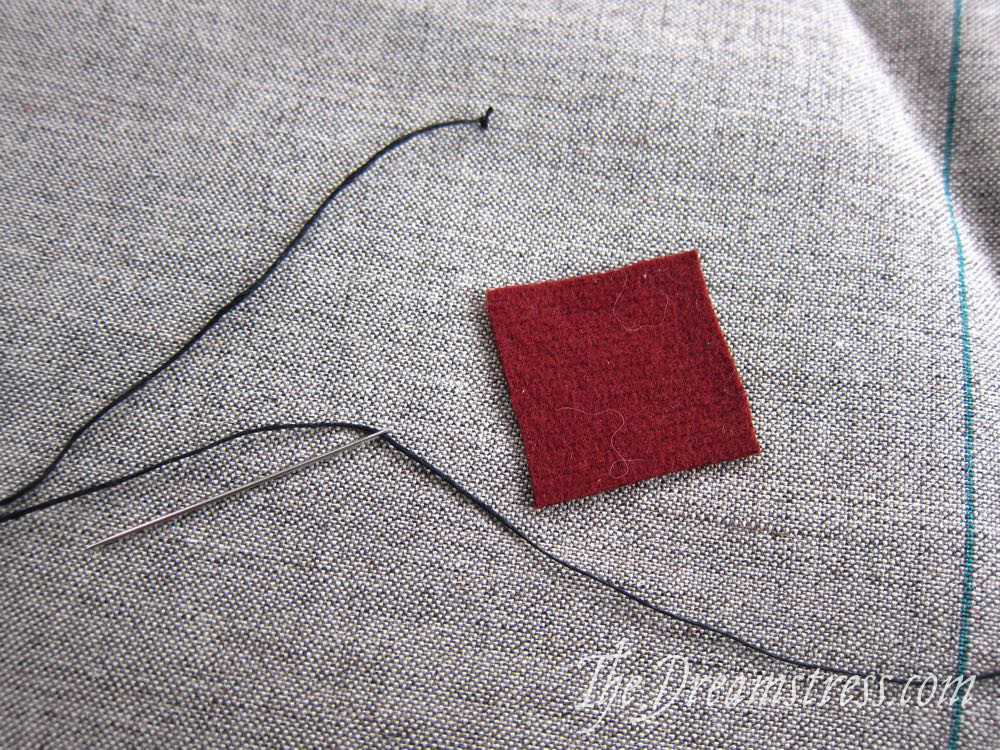
Then I trim off the corners, to form a 1″ circle:
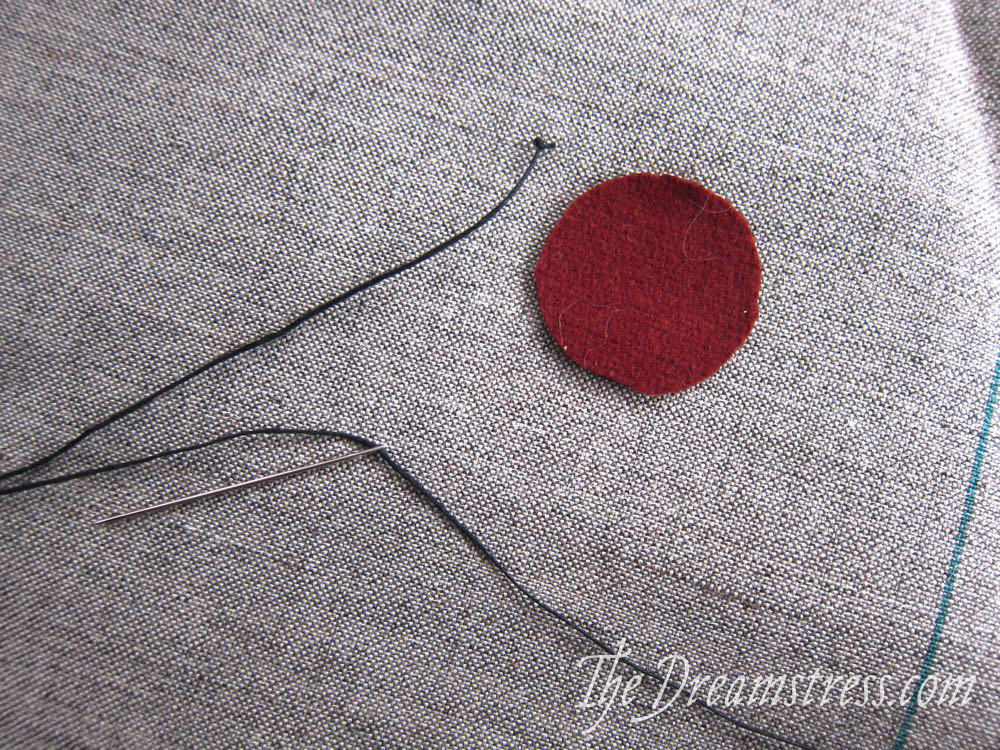
Then I sew running stitches around the outside of the circle, about 5mm/1/4″ from the edge.

I pay careful attention as I sew the running stitches, to make certain that my needle will end up on the outside of the circle after the last stitch:
With the first set of running stitches sewn, I pull smoothly to gather the circle into a little cup:

Then I use my finger to fold/press the outer cut edges into the middle of the circle. My edges don’t tuck in as neatly and tidily as Sarah’s, but they are more tucked in than the Medieval Tailors:
With my finger on the nascent button, I start pulling on the linen thread, which pulls the button up on itself. I can still see a bit of raw edges in the middle, but the shape of the button is starting to emerge:
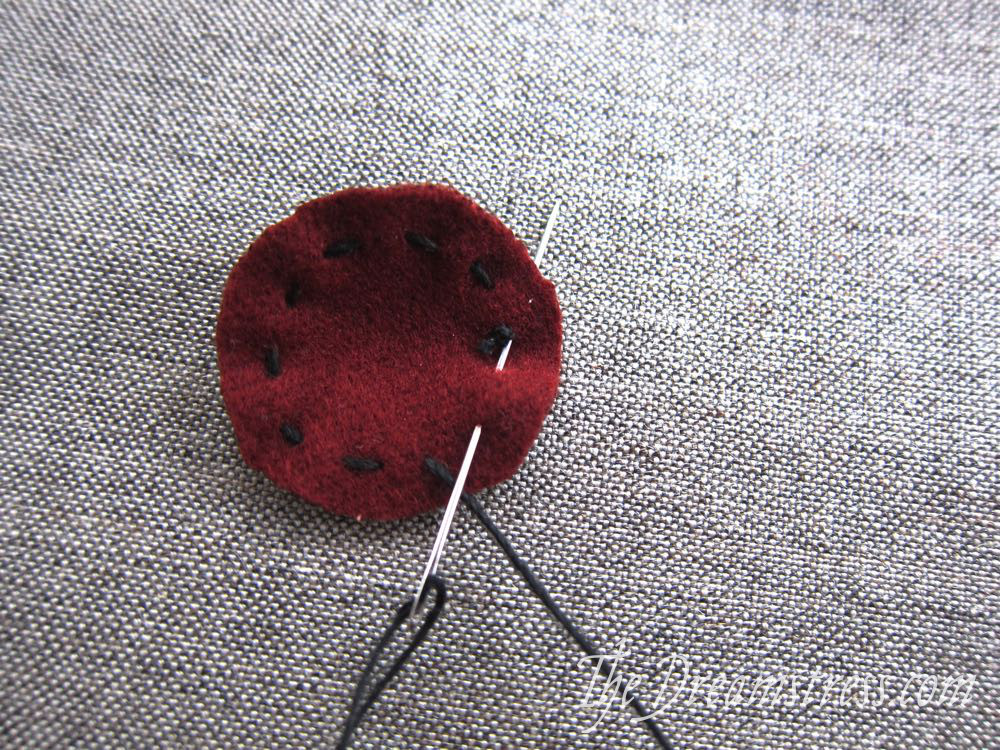
Then I sew another line of stitches around the button, going in and out of each ridge/gather formed by the first line of stitching:
When I get around in a circle I keep sewing in and out, so that each ridge has a stitch under it and a stitch over it. Sometimes I have to ‘cheat’ and sew halfway through one ridge as I come to the start of the 3rd circle of stitching, to make each stitch neatly go over/under a ridge as I sew around (hard to explain, but if you go to do one yourself you’ll quickly figure out what I mean – it has to do with whether I started with an even or odd number of stitches, to make an even or odd number of ridges):
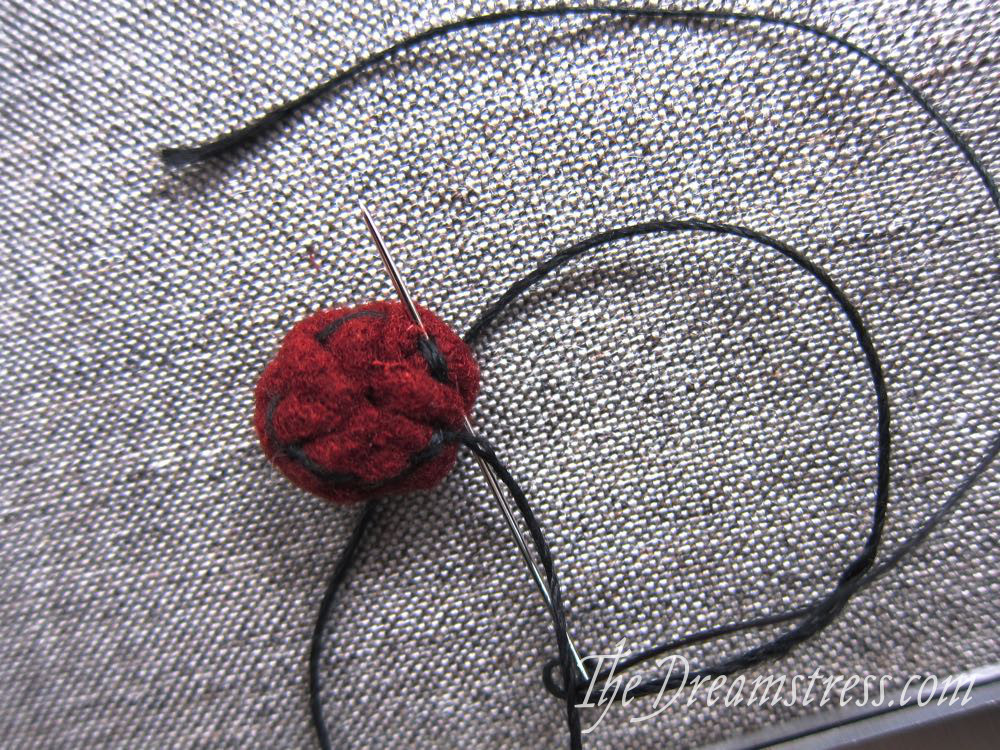
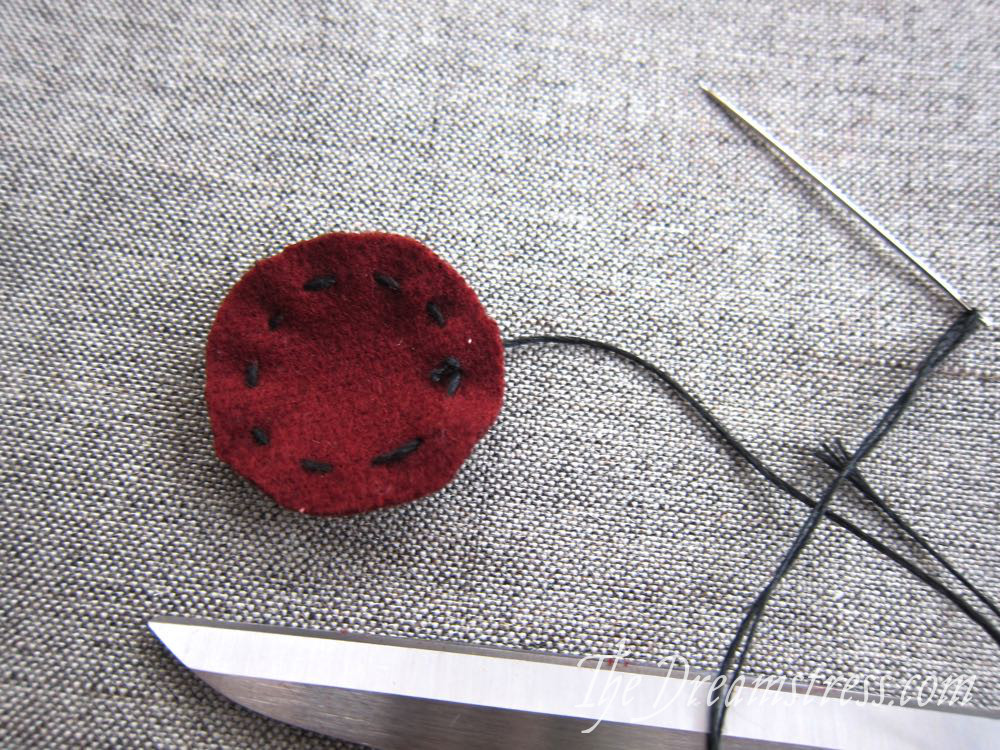
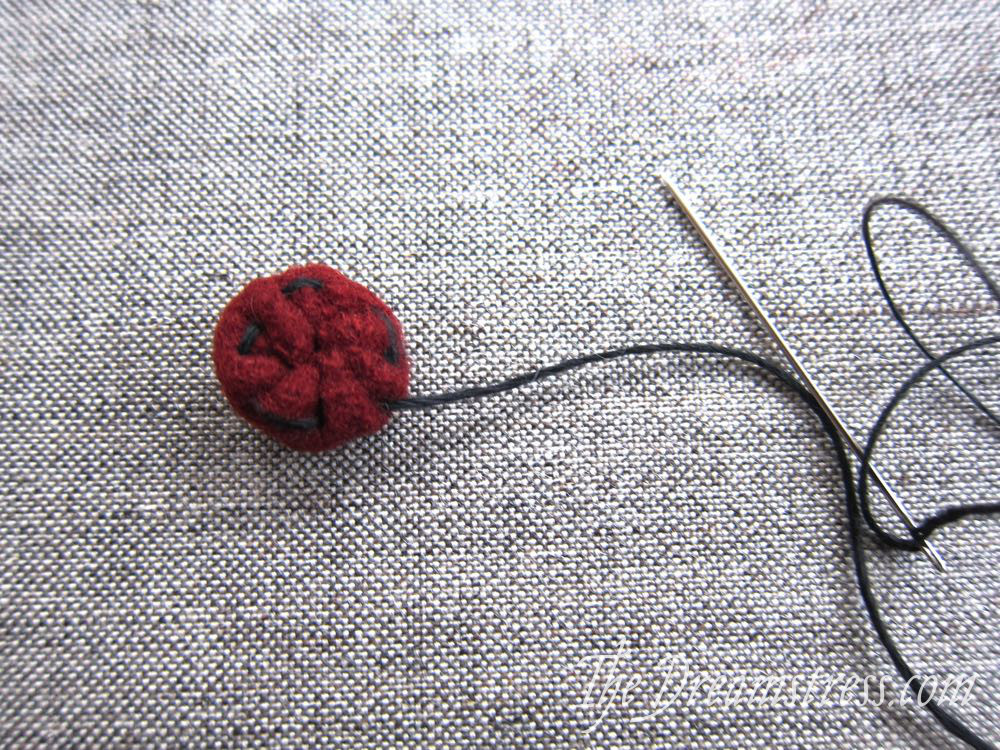
Once I have sewed around so there are stitches over & under every ridge/gather I pull the thread, firmly but smoothly. I’m pulling really hard as I do this, and while I’ve never managed to break the thread, I am trying very hard to keep the pull quite smoothly, so there are no sharp tugs that would break the thread, or tear through the wool fabric:
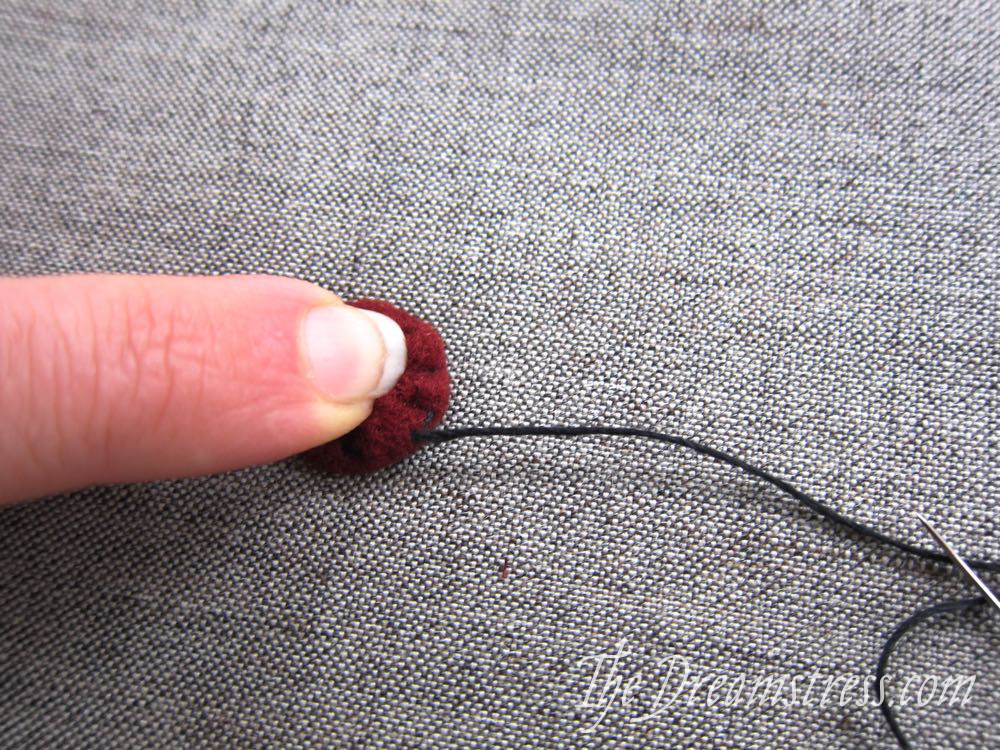
As I pull the edges of the button are being pulled inwards, and the raw edges are completely hidden from view on the inside of the button. The threads themselves are pulled into a tiny circle in the centre of the button.
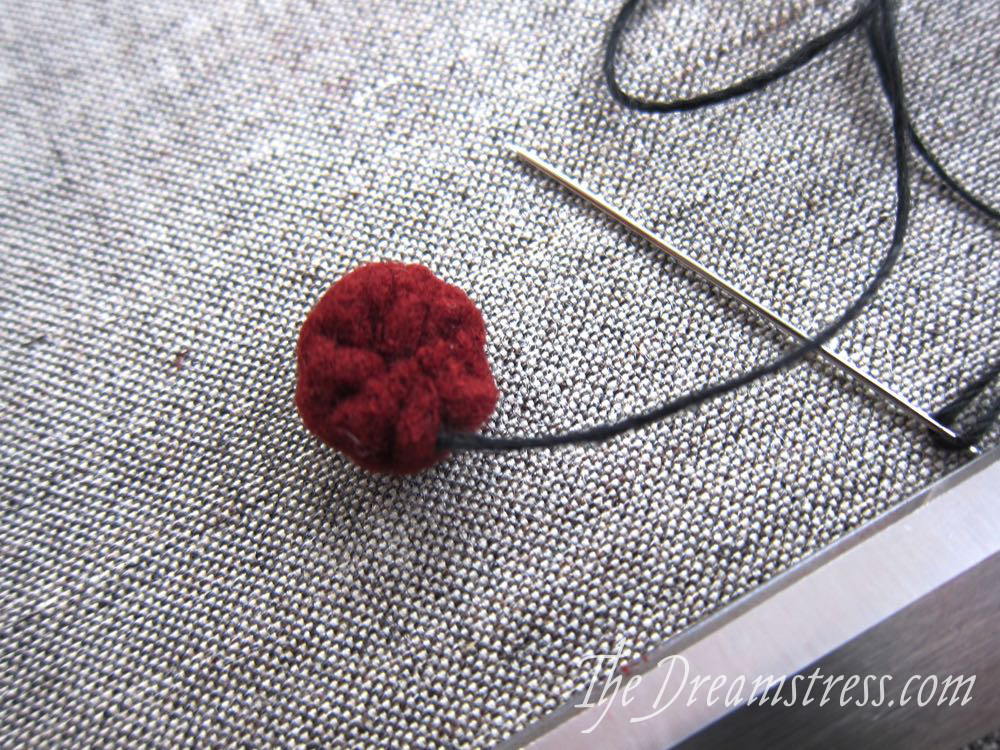
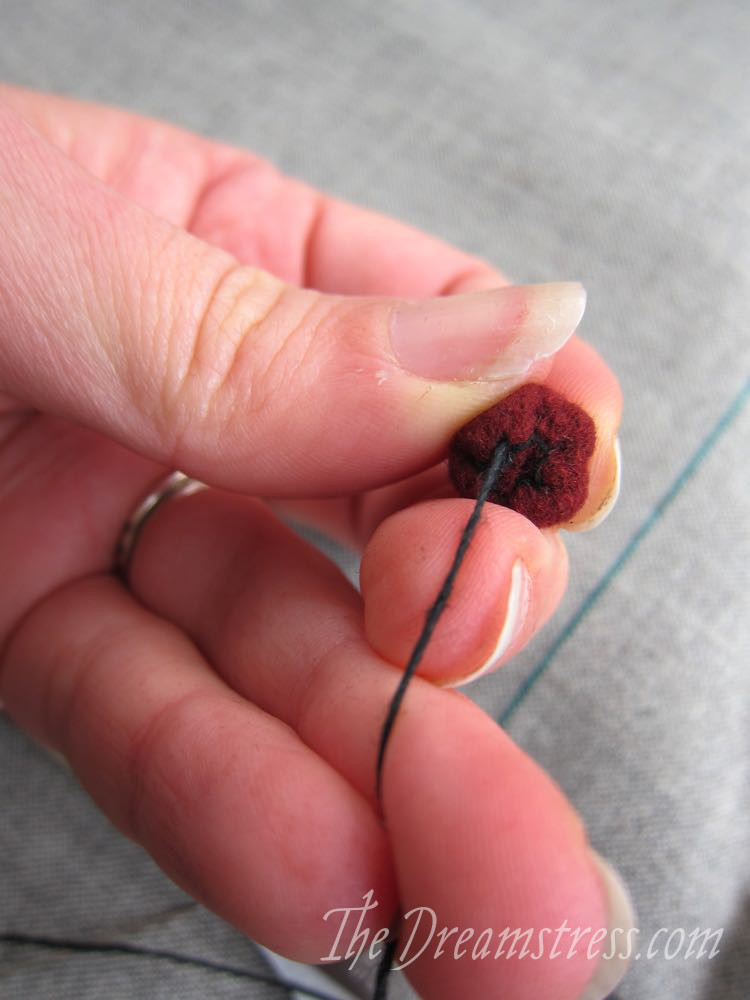
When I’ve pulled as much as I can, I like to sew a couple of stitches from one side of the button to the other, to pull each side together even more tightly. I make sure to catch the linen threads sewn around the button as I do this, as they are stronger than the wool fabric, and since they are sewn round in a circle, tightening them tightens the whole button, whereas the wool is pretty weak, and only catching the wool can rip through it:
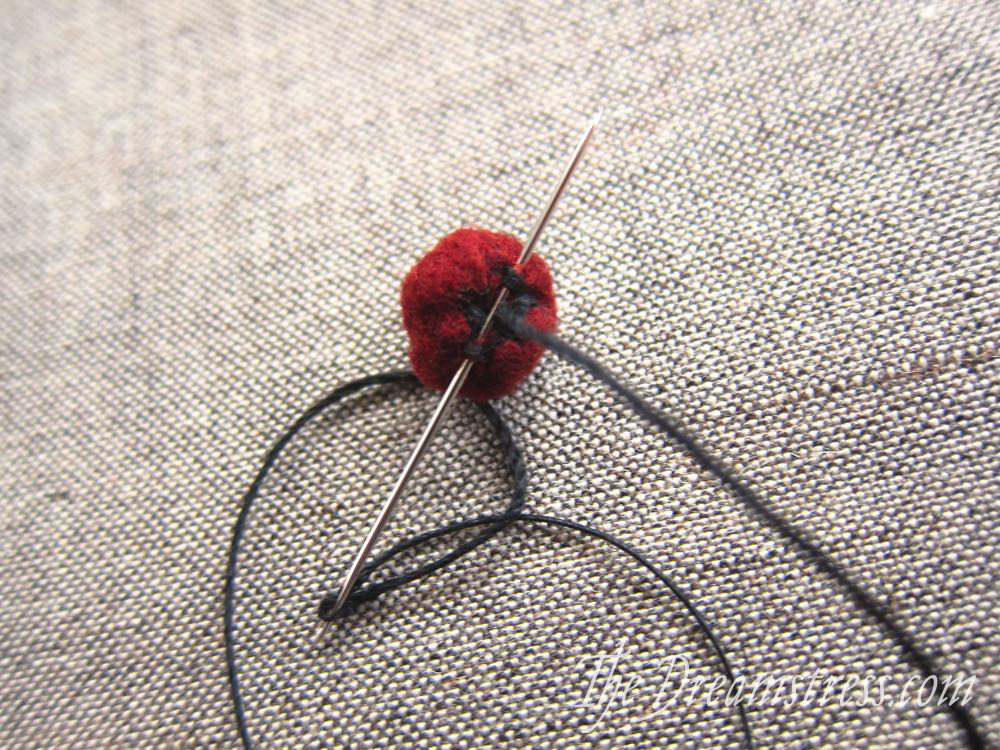
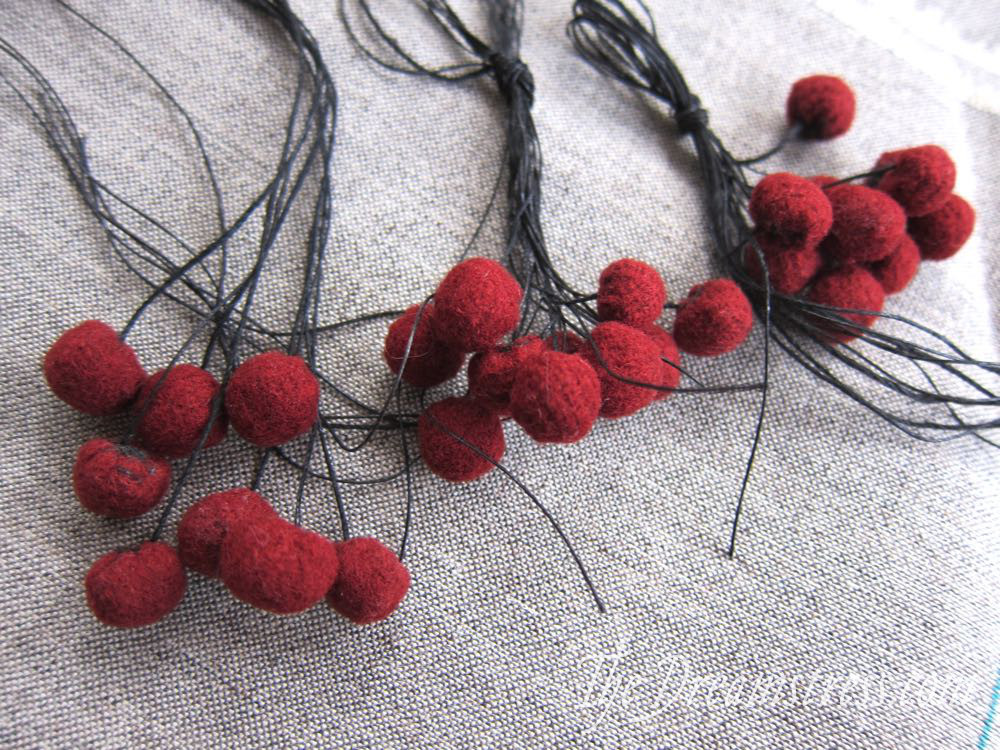
And that’s it! I leave long tails (about 30cm) at the end, because I’m going to use them to sew the buttons on to the sleeves. I hope 30cm is enough, because I haven’t tried that part yet!
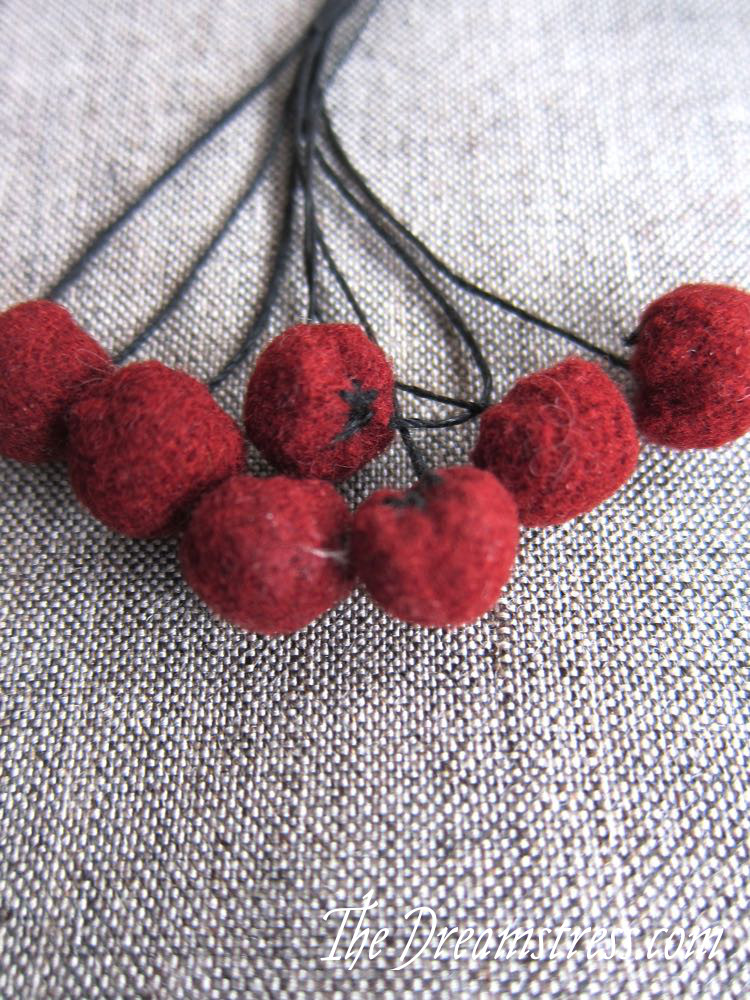
I was really worried about these, but I actually love making them. They are very easy, and very addictive. Every time I finish one I tell myself “OK, just one more, and then I’ll quit for the day…” And then I sew one more, and then start another one, and tell myself “Just one more…”
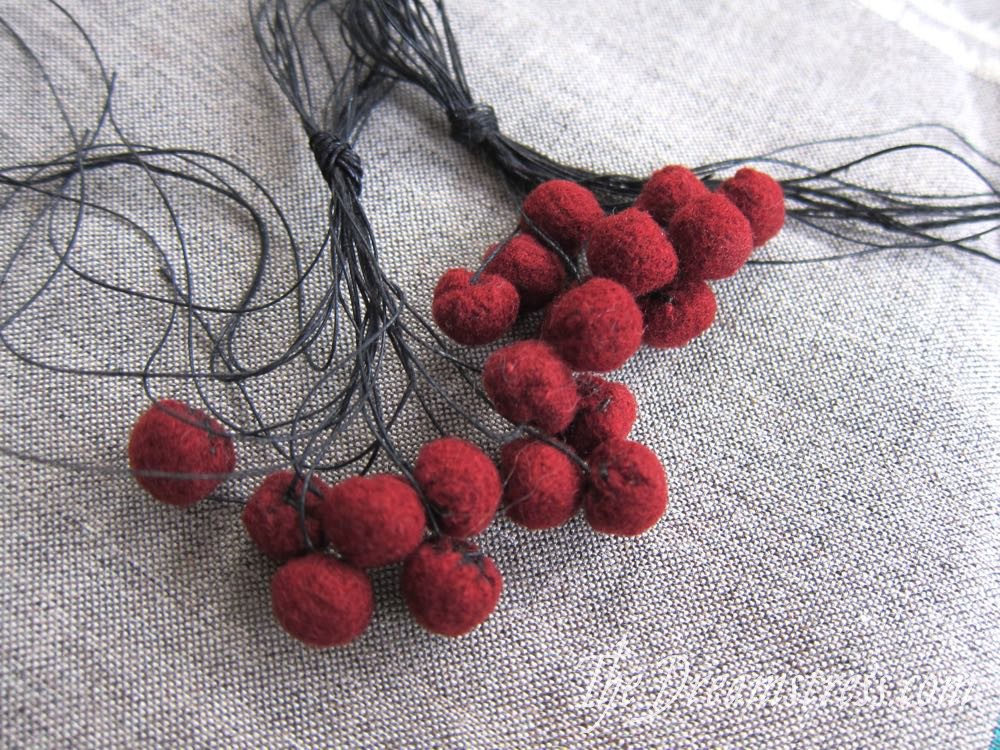
So far I’ve sewn 28 buttons. I’ve (preliminarily) decided on 19 buttons per sleeve, so I’ve just got 10 more buttons to go. When I’ve made 10 I am looping them together into bundles, to keep track of how many I’ve made (and to keep then from disappearing under the furniture and into the dark corners of the room, because Felicity thinks these are the best thing ever)
Now here’s hoping that I find sewing buttonholes as easy, fun, and addictive as buttons!
Oh, and guess what? These aren’t a garment, but they are a fully done thing, so they count for the HSF:
The Challenge: #6 Out of Your Comfort Zone
Fabric: Scraps of 70% wool, 30% viscose plain weave with fulled surface in dark red-brown.
Pattern: Based on Sarah’s and The Medieval Tailors tutorials
Year: 14th century (as I understand buttons like these were probably used from the 12th through to the 15th centuries)
Notions: linen thread
How historically accurate is it?: Obviously the fibre makeup isn’t quite accurate, and I suspect the colour of my thread isn’t accurate, but other than that the weave, fibre makeup, colour and techniques are probably pretty good.
Hours to complete: about 15 minutes per button.
First worn: Not yet, they will be used on a ca. 1370s gown I hope to have done by the end of the month.
Total cost: As a percentage of the dress, the buttons are going to be about $10 worth, or less.
Cloth are def best, I have an old dress with metal buttons and they’re so heavy!
I must admit when I make cloth ones I sew them on as I go along, I’m always worried my idiot cat will steal them if I don’t.
It doesn’t even take a cat to lose the buttons. I am making a burgundy & red parti-colour cote-hardie, and I very carefully made 24 buttons for each sleeve (red for the burgundy and vice versa) which I carefully put in a container and quite promptly lost somewhere in the house. I had resolved to use black velvet buttons (which are made up, but lack the impact of the parti-coloured buttons. Recently I found a small stash of the left over fabric, enough to make the buttons again.
“Nascent button” is a fine phrase! And the final results are to die for!
Pretty! 🙂 They would totally work for modern clothing, too. I mean… they ought to. Just because.
I think the only linen thread I have is rather thick, heavy-duty thread – this is just normal thread, isn’t it? (I also think I know a place that sells such around here. I’m just… sort of making a mental catalogue of things.)
I might have to try them on a modern garment some time 😉
The thread is definitely heavier than regular thread. I have to use needles with bigger eyes, and sort of squash the thread to get it through. I’ve never seen a linen thread that was as fine as a regular cotton or poly thread. I do have finer, more even linen threads, and really rough, course ones.
BTW, this was your 1001st comment on my blog! And every one has been appreciated!
sici-centrum.czsartor.czsici-centrum.czsartor.czIt counts that sort of thing? That’s funny. I think I should retort that every comment has been appreciative. 🙂
The ones I have are like this, if that gives an idea: http://www.sici-centrum.cz/nit-lnena-rezna-texlen-42×3-50m#popis More an upholstery, bags etc. kind of thing.
Whereas I guess what you have is more like what Sartor sells: http://www.sartor.cz/19-nite-snury-a-nakonci
Yup, those are some pretty impressive cat toys! I advise regular head-counts when deploying them on a garment 🙂
Haha, so true (and I love the way you put it)!
Those kind of buttons were still used at least through the early 17th century as well.
Best,
Quinn
Oooh these are quite fun looking!
They’ll be really lovely along your sleeves.
Those are delightful! I remember going to a class on making these at a costuming workshop, but I’d mislaid the handout–so embarrassing! The pictorial walk though is very clear.
It occurs to me that this technique would make great cherries and so on for millinery projects.
I also saw the fruit-potential and other sundry decorating ideas, too! (Garland on a Christmas tree! Berries for projects! Sew many together and make your own pin cushion!) I much prefer these to pom-poms. I’m silly.
-Elise
Maybe you should make Felicity a “button” of her own after you get the 38 buttons finished. A bit larger, and without the long, potentially hazardous string tail.
I love this post because I agree with this on so many levels! I made buttons very much like these a few years ago when my teenage son wanted a gambeson to portray a longbow man. I did lots of research, all of which I inadvertentlt lost =/. I have no idea how accurate my buttons are…but they are very, very similar to these so I’m encouraged! =)
I also left long strings on mine…
I also couldn’t stop…
Laurie
[…] Wollquadrate/Kreise zusammengezogen. Das kann auch viel besser und fester aussehen, wie bei diesen Mittelalter-Stoffknöpfen. […]
[WORDPRESS HASHCASH] The comment’s server IP (192.0.80.43) doesn’t match the comment’s URL host IP (192.0.78.24) and so is spam.
Thank you, I am researching to make the Moy bog gown and needed to know how to make the buttons. Funny aside, I follow you on Facebook but found this link through a Google search for medieval buttons 😉
I am terrified to start my first truly historically accurate costume, ahhhhhhh!
Good luck! Glad the tutorial was helpful!