A part of my Jane-Austen sewing-a-thon* I decided it was finally time I made a proper set of Regency petticoats, and stopped just using my 1910s petticoats, pulled up to the underbust and pinned in place!
The first dress that needed a petticoat was the ca. 1800 Madame Recamier gown. It’s sheer, so it definitely needs a petticoat. It’s also flat fronted, so the petticoat can’t have any front gathers, or it won’t sit smoothly over it. The Madame Recamier gown is based on the ca 1800 bib-front dress in Janet Arnold, and the skirt panels are rectangles – no angles at all.
I went looking for extant examples, period mentions, and period images, and quickly ran into a problem. There aren’t many of any of those.
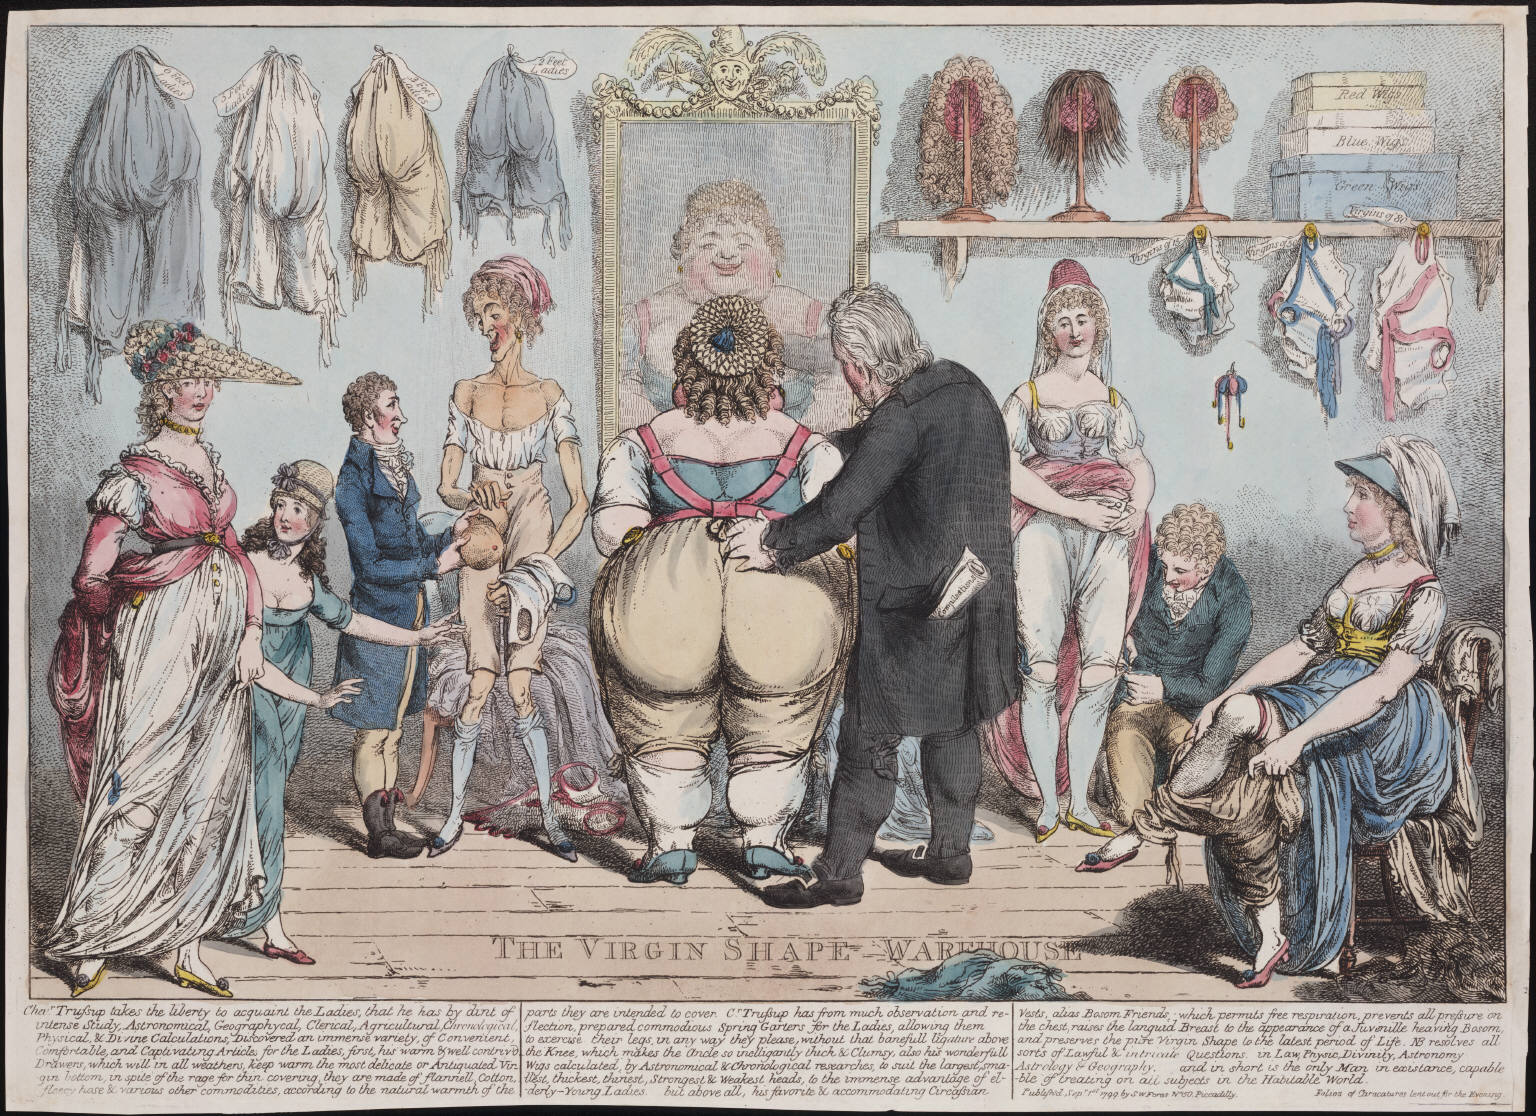
There is this 1799 caricature, which mostly shows drawers worn without petticoats, though the woman having her stockings pinned up appears to be holding up a pink petticoat with no bodice, and the woman at the far right appears to be wearing a blue un-bodiced petticoat. Neither tells us much about construction, and both are clearly gathered across the front.
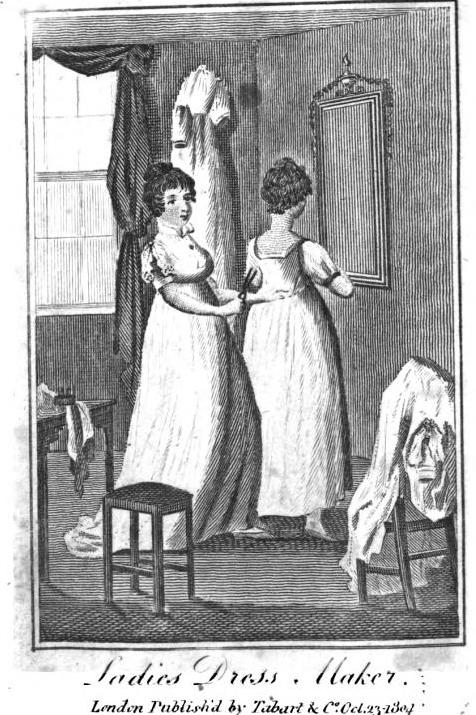
This image from 1807 shows a dressmaker drafting a pattern which will become the lining of the dress. My guess would be that the client is wearing her shift, stays and petticoat, and that is her dress which is discarded over the chair, but she may be being fitted over the dress, and in any case, the image doesn’t provide enough petticoat information to help me much:
The image in the 1811-18 editions of The Book of Trades shows a clearer view of stays, and what appears to be petticoat with a tucked hem under her stays, but could be a chemise, but which doesn’t provide much construction information in any case:
There is this 1813 fashion plate, which also either shows a long chemise, or a petticoat worn under her stays:
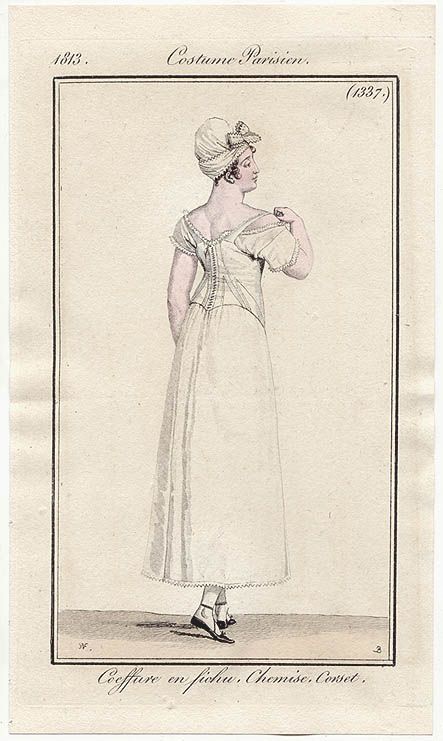
Stays, 1813
The lack of mention of a petticoat, when all other garments are listed, and the matching trim on chemise and hem, would indicate they were the same garment. It probably looked a bit like this one, and won’t work for me, because the stays would show under the sheer gown.
This image seems to indicate that sometimes petticoats weren’t worn at all, though perhaps the subject matter was too distracting for strict accuracy of dress, as surely even a chemise would have to show somewhere if she was doing that with her skirt!
There is this bodiced petticoat, but it’s a bit late, and once again, has the problem of gathers:
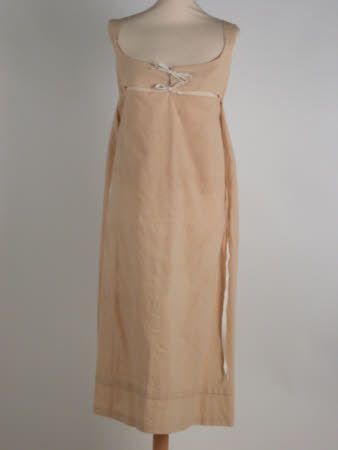
There is this petticoat, which does have a flat front. However, the lowered waistline and A-line skirt make me suspect a date much closer to 1820 than 1800:
There are a few extent petticoats like this one, that seem to be over-petticoats, intended to be seen, possibly as the outermost skirt layer, and worn over an under-layer of their own:

Regency petticoat on a waistband with arm straps
(the above image is via the Oregon Regency Society webpage, and appears in numerous other places, but I cannot find a citation of its original source anywhere).
And another one with elaborate hem embroidery that indicates that may have been intended to be seen:
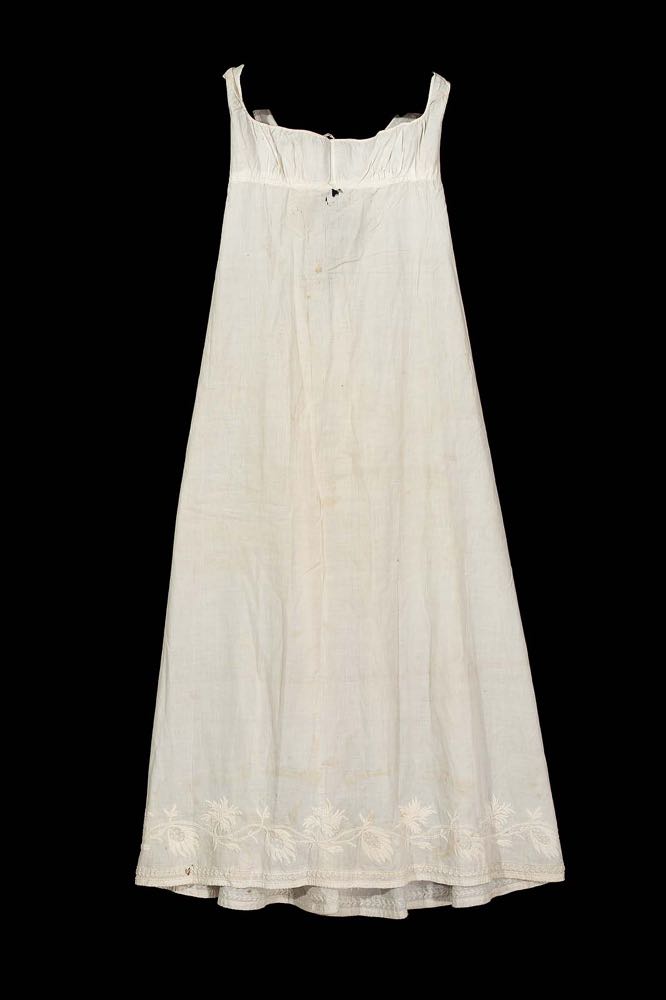
Petticoat, American, early 19th century, Worn by Mehetable Stoddard Sumner (Welles) (American, 1784—1826), Boston, Massachusetts, United States, Cotton plain weave, cotton embroidery, cotton twill tape, linen plain weave tape, MFA Boston, 49.876
These last three seem to form the primary basis for the kind of Regency petticoats that most reenactors make: either simple skirts gathered to straps, or to fitted or gathered bodices.
However, there is one other extent garment that is probably from the early 1800s (rather than the 1820s) that is definitely an under-petticoat, and this one intrigued me the most:
Not only does it have a flat front, which I need, but it appears to have very similar construction to a bib-front dress. Since the other known petticoats have distinct similarities to the patterning and construction of dresses, it makes sense to me that a petticoat could also share a lot of construction ideas with a bib front dress.
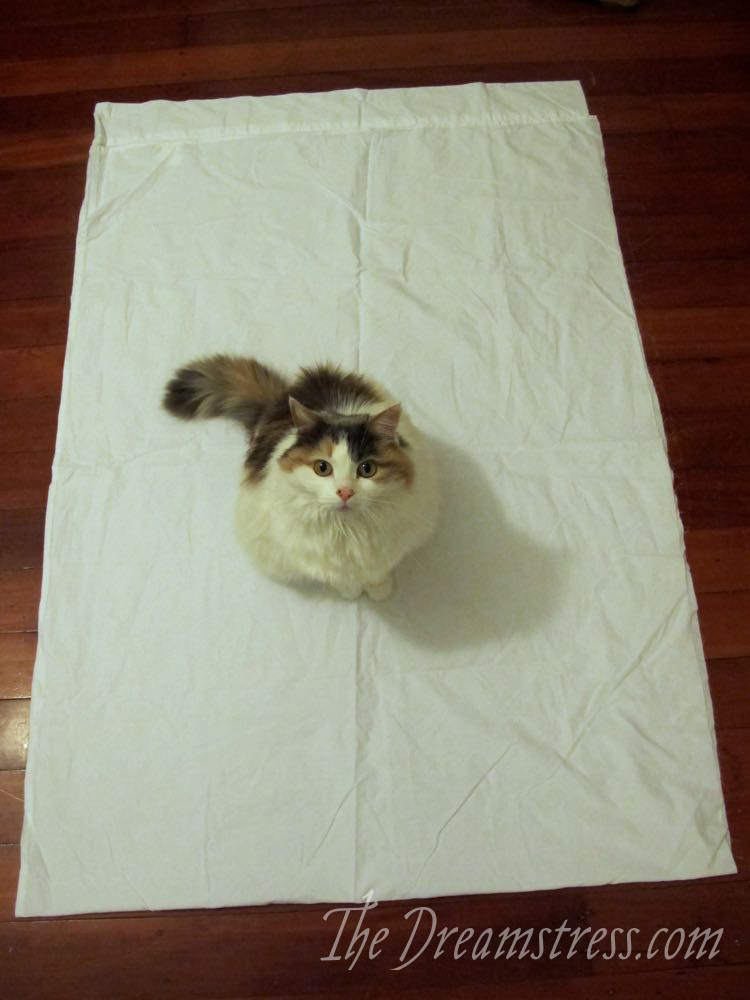
So, using Arnolds pattern and the petticoat above, I came up with a theoretical petticoat inspired by bib-front dress construction, but without a bodice.
Here is my rough pattern:

It was partly based on the fact that I had half a sheet in just those dimensions in my stash!
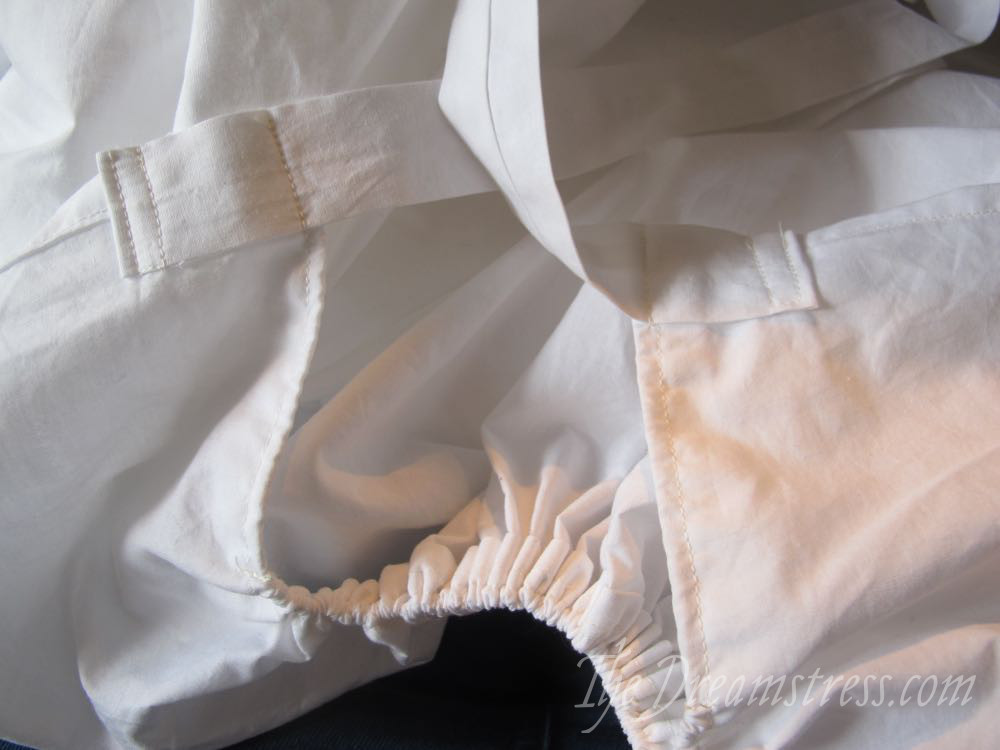
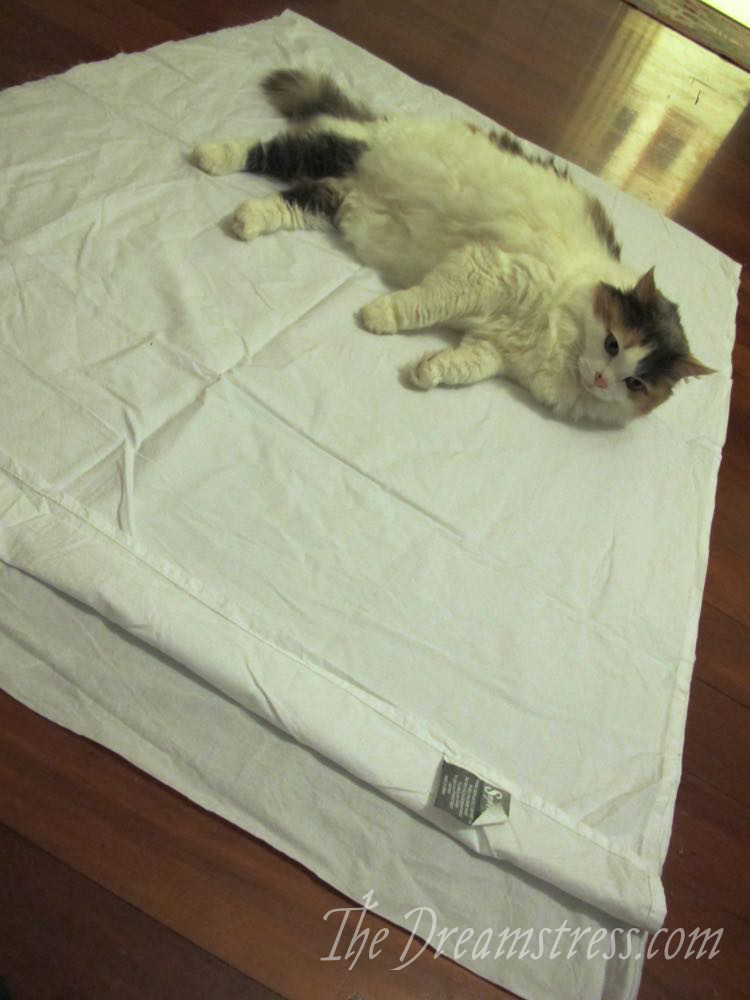
Before hemming, and the straps and ties were put on:
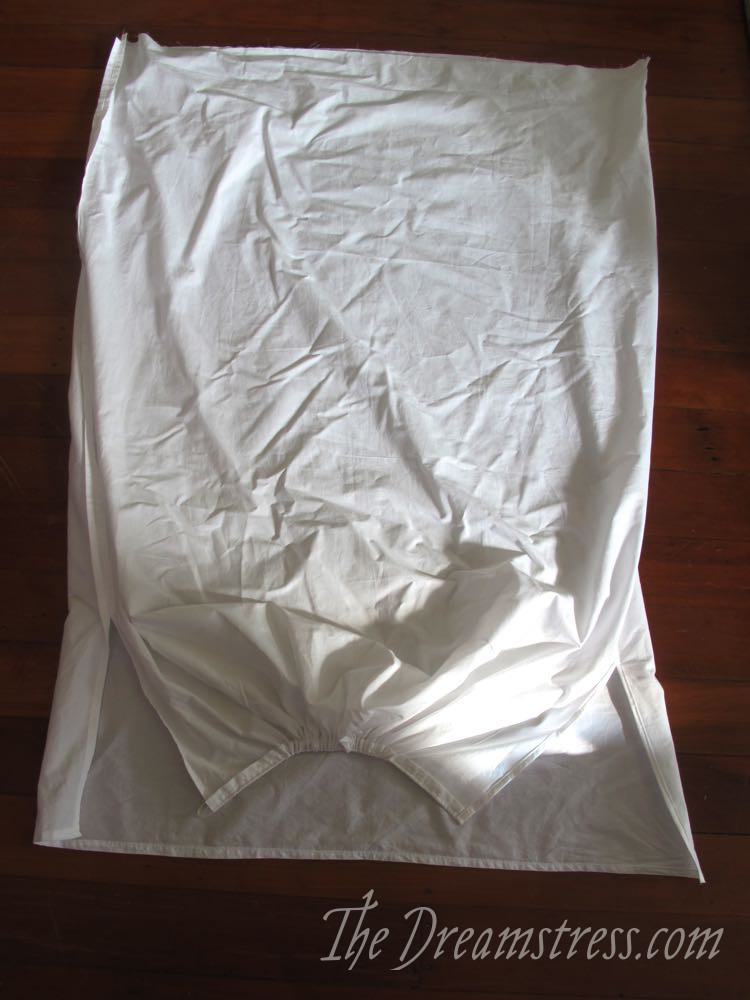
The back straps form loops that the front ties thread through, after wrapping around the front once:
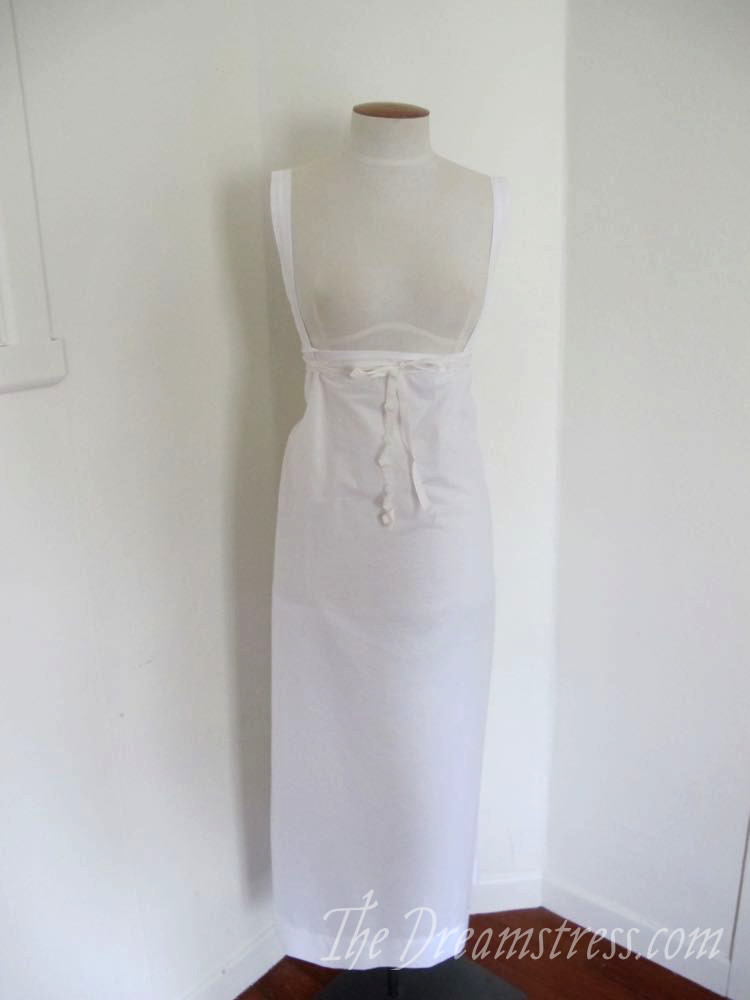
And the finished petticoat from the front:
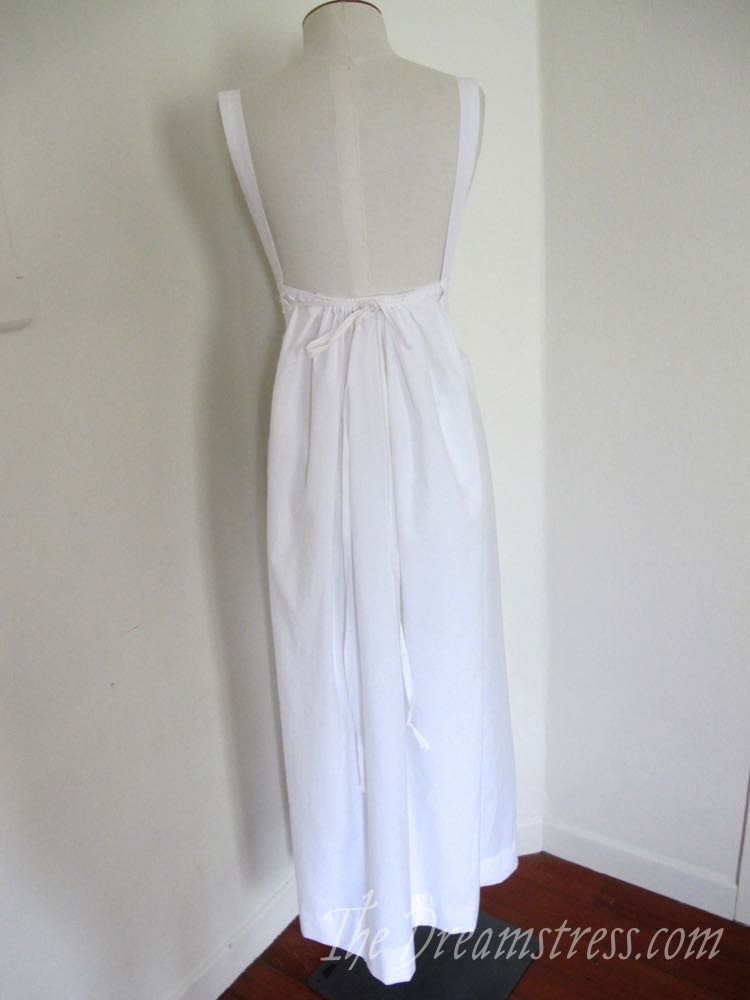
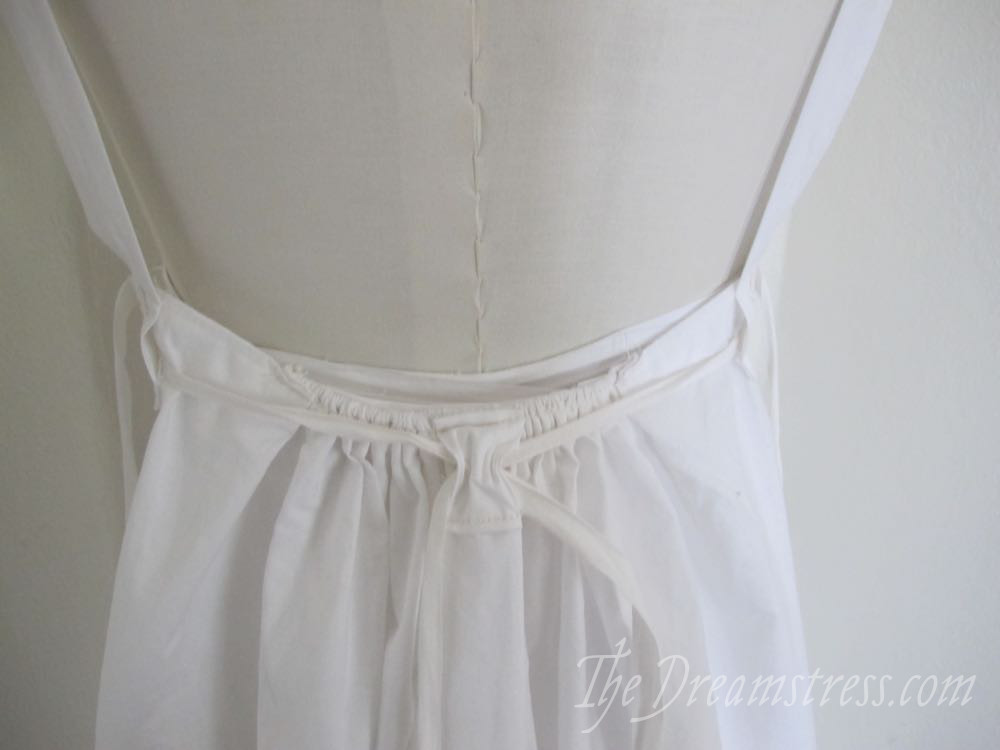
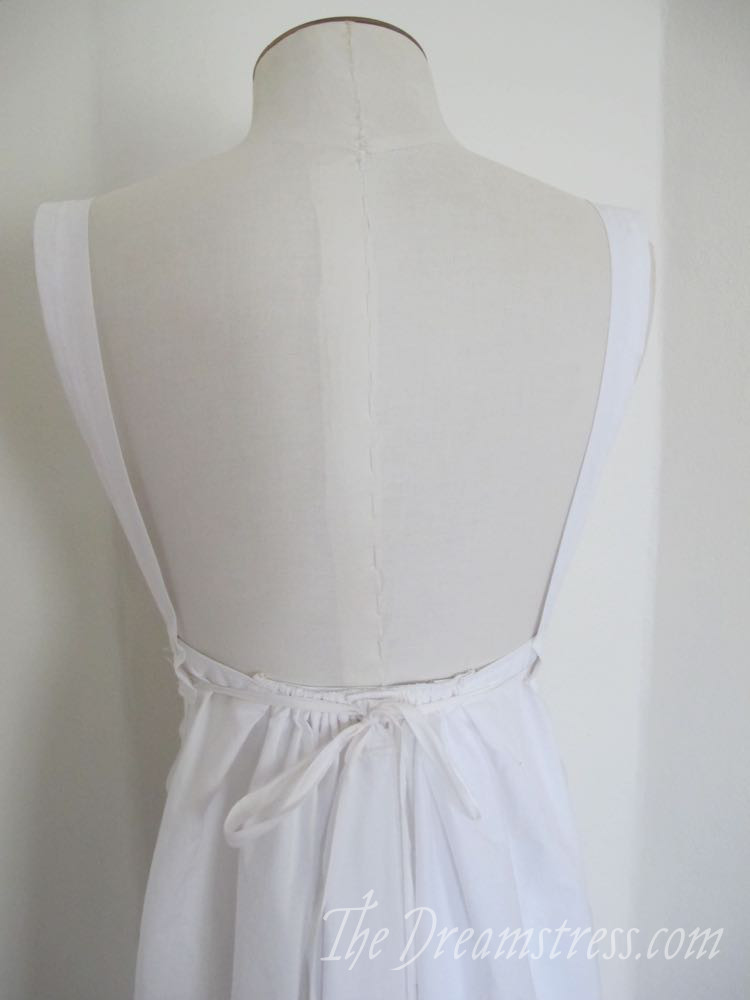
And the back:
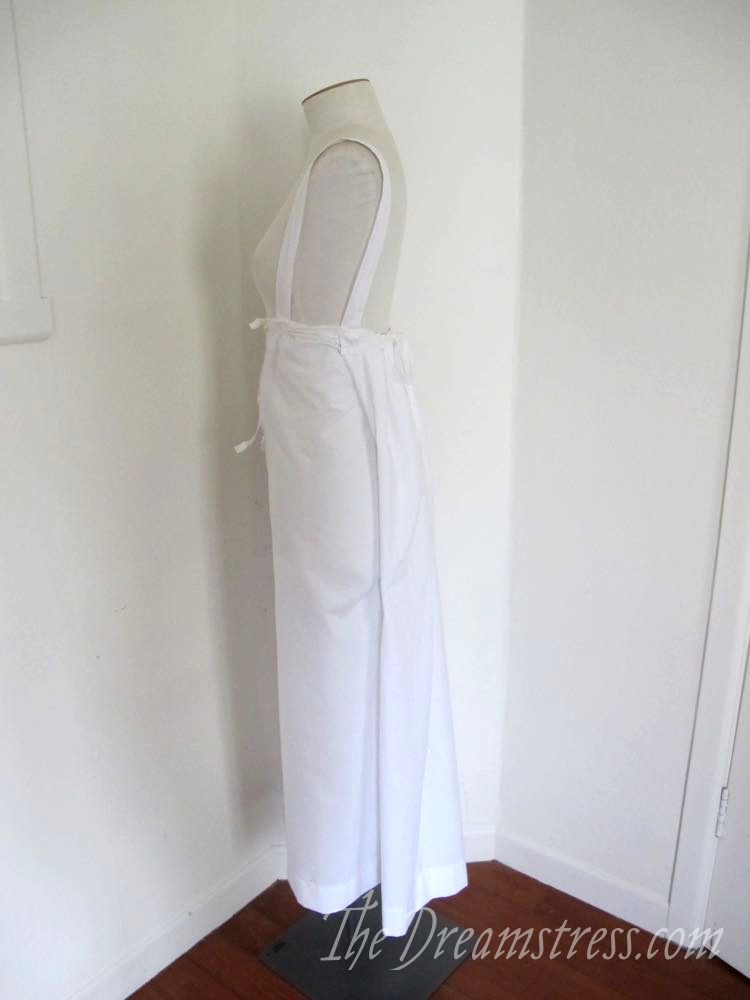
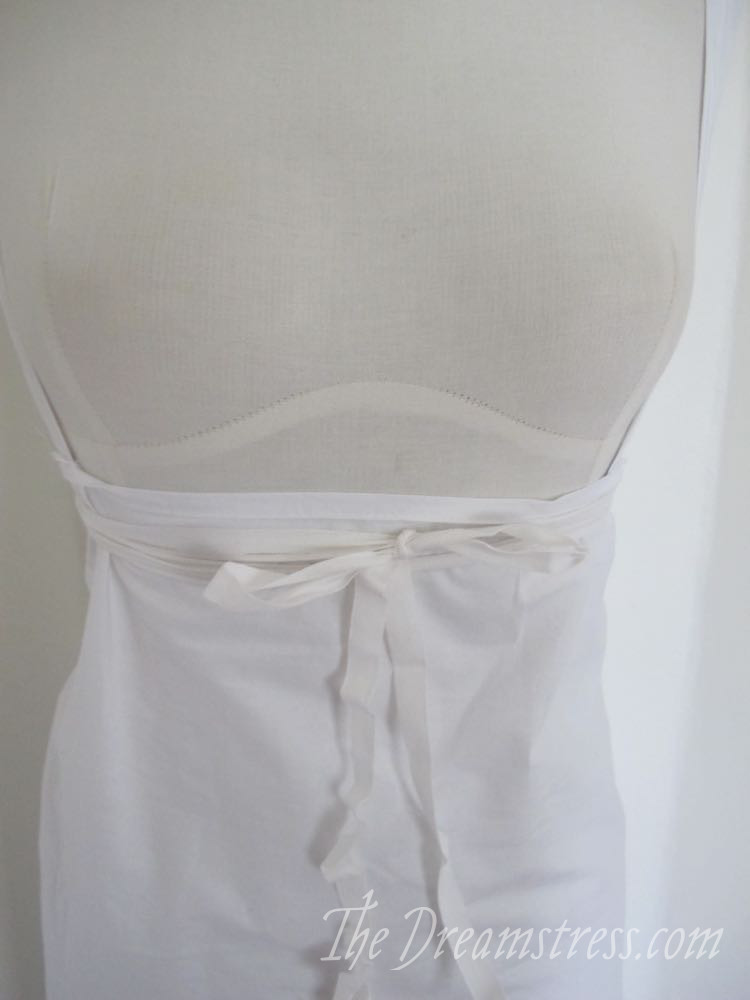
And the side:
The front wraps round to the back (it doesn’t overlaps on me, by Isabelle is a bit smaller):
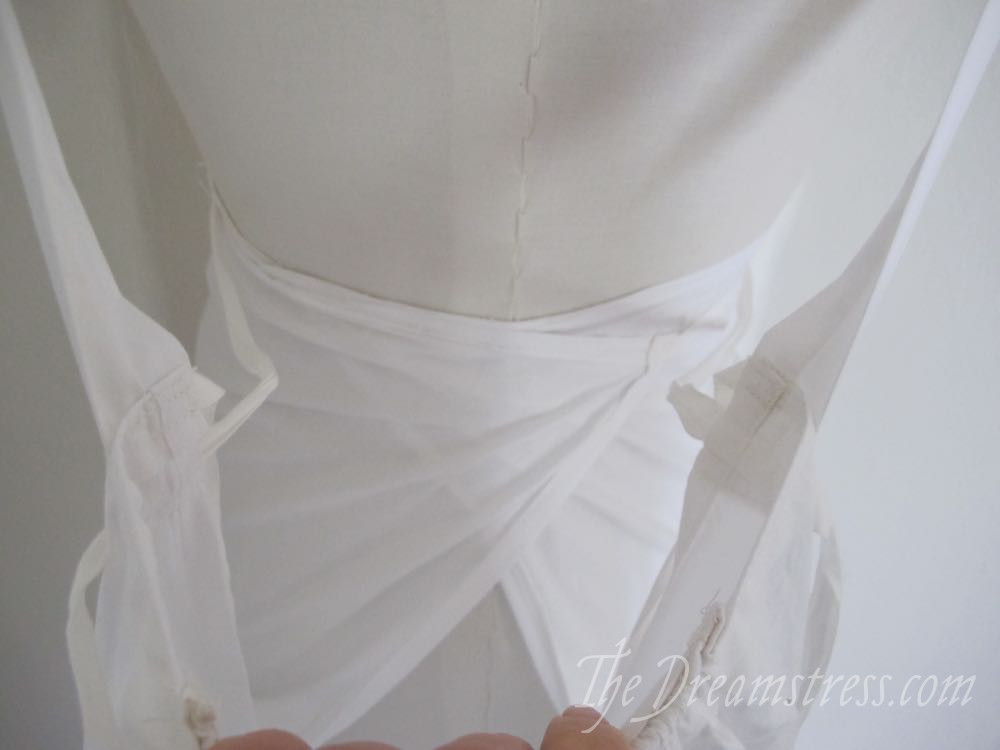
And then the ties wrap round the front, and to the back again, where they thread through the loops on the back piece:
And then tie:
And then the back ties wrap round to the front and tie:
I’m calling this ‘plausible, but far from perfect’. The overall pattern/construction is based on general principles seen in extent garments, but there is no extant bodice-less wrap petticoat of two rectangles of this era that I know of. The petticoat works exactly as it should, but is fussy to get on and off (although, unlike a back-buttoning petticoat, it’s not too hard to do by yourself).
It was an interesting experiment, but I think my next Regency petticoat is going to be much more along the lines of what most reenactors make, and much less experimental!
I didn’t even realise it until I was most of the way through construction, but this is entirely of rectangles, so works for the April HSM Challenge #4: Circles, Squares, Rectangles. I’m posting two days early, due to scheduling issues later this week:
What the item is: A theoretical petticoat based on bib front dress construction.
The Challenge: #4 Circles, Squares & Rectangles
Fabric/Materials: 1/2 of a twin sheet.
Pattern: My own
Year: 1800-05
Notions: cotton thread, cotton tape.
How historically accurate is it? Purely theoretical, and I used a sewing machine for everything, because I just wanted to see how/if it would work. 50%
Hours to complete: Around 3
First worn: Not yet
* which has actually been cancelled, for reasons outside of my control – (much sadness, but it does give me more time for exciting Scroop things, so all is not lost)