Latest Posts

The Augusta Stays scrooppatterns.com

How to add more bust space in the Augusta Stays

When Amber & I created the Augusta Stays pattern we decided to have two different fit blocks, to make fit easier straight off the pattern.

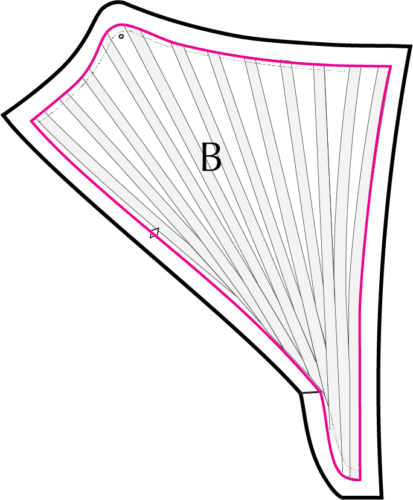
The ‘Straight’ fit has a 10” difference between un-corseted bust and corseted waist, and is best for those with less bust-to-waist difference, or those desiring less waist compression. The ‘Curvy’ fit has a 12” difference between un-corseted bust and corseted waist, and is best for those with more bust-to-waist difference, or those desiring more waist compression.  

However, we know that isn’t going to accomodate everyone: the body comes in an infinite variety of fits!

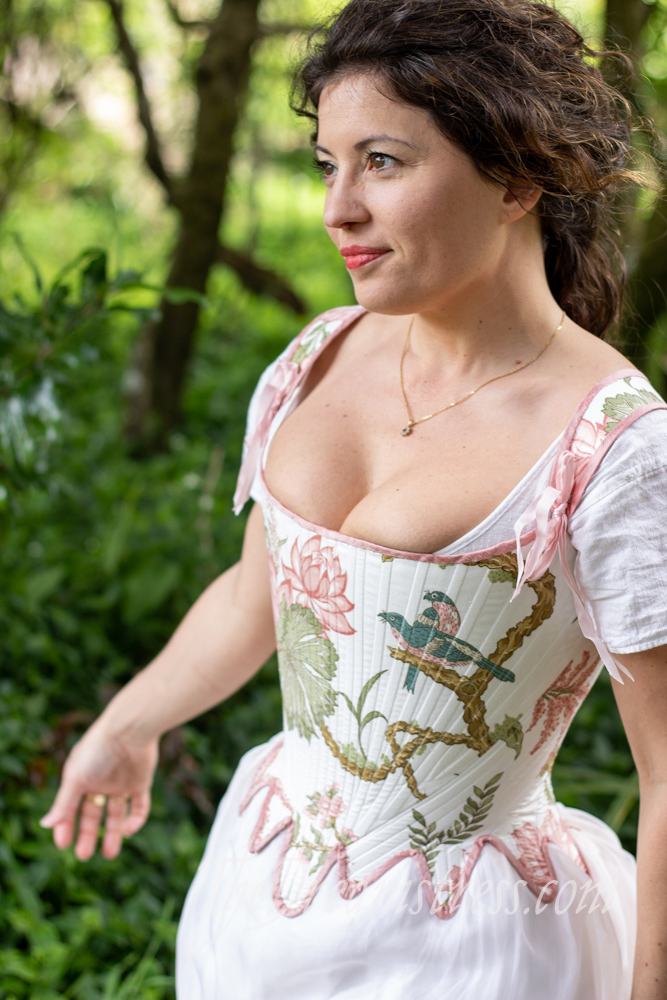
Take Priscilla: she’s wearing the Theatrical Augusta Stays in size 38 Curvy. As you can see, Priscilla has a tiny waist and a lot of bust, and the stays aren’t quite accomodating that bust. (note: these stays were not made for her – dressing up in them and the photos was a spontaneous event during a costume weekend)

Augusta Stays thedreamstress.com

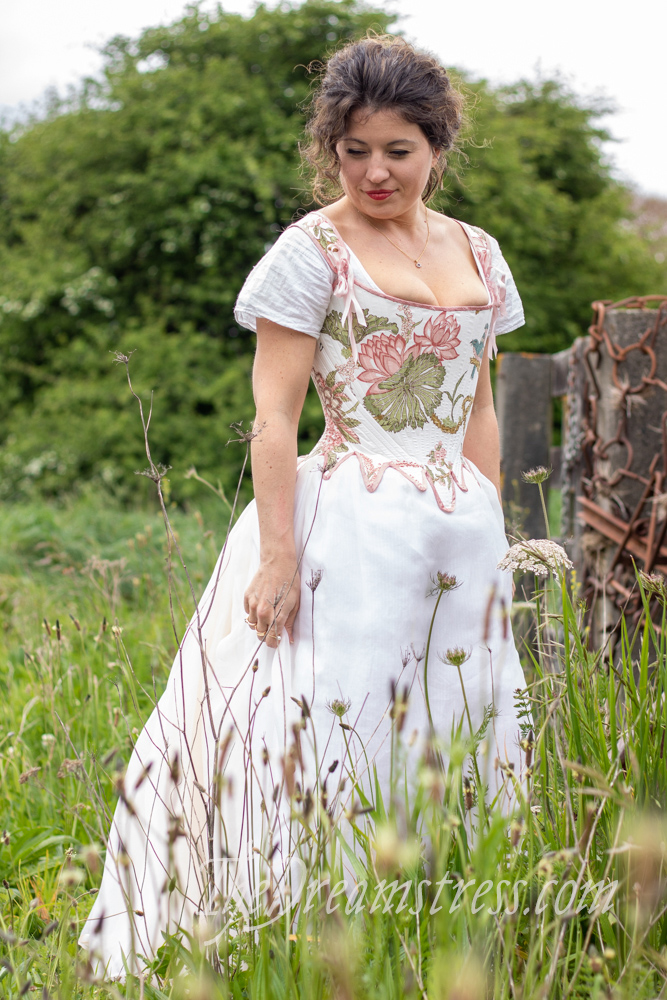
If she were wearing the Historical Augusta stays we could loosen the lacings to provide space, but even that might not be enough for a really curvy woman.

Luckily there is a 100% historically accurate way to give yourself more bust space in your Augusta stays.

It will help prevent boob squish and an unattractive dent, as well as that problem when you have a little ribcage and a full bust, and your boobs try to slide down into the stays because of the gap between your ribs and the stays meeting your bust (a problem that I of the massive ribcage will never experience in person!)

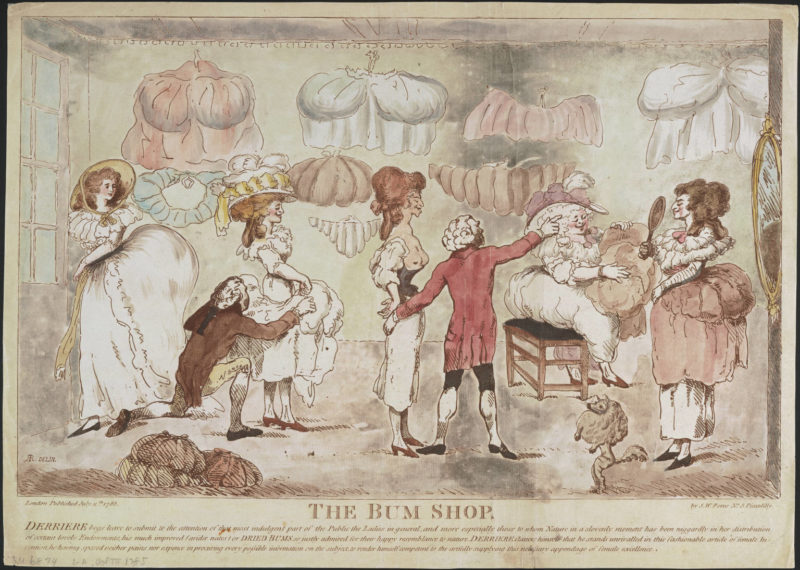
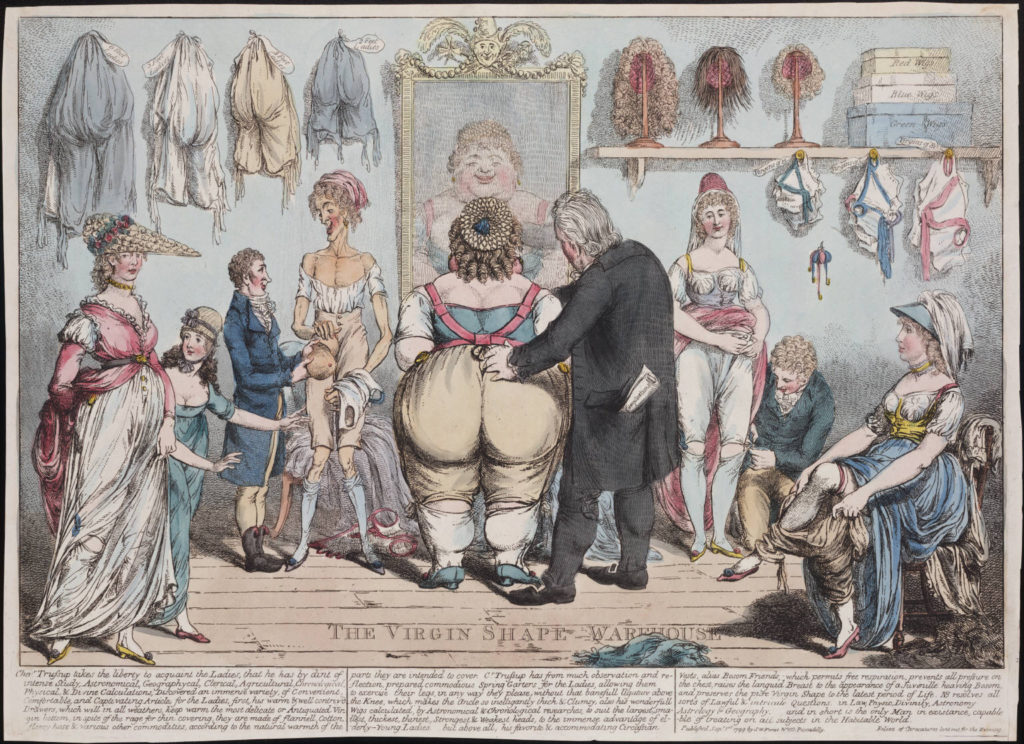
Curved front stays from the 3rd quarter of the 18thc

The Augustas are drafted with a completely straight centre front line, because that’s common on a lot of 1780s stays, and is an easier starting point for sewers used to modern drafting methods. In the Historical version the half front lacing provides flexibility that creates the ‘prow’ front. (the Theatrical version was specifically intended to be a more generic straight front silhouette)

However, not all 1780s stay patterns have straight front seam: some are drafted with a curved front, to further emphasise that fashionable forward thrust.

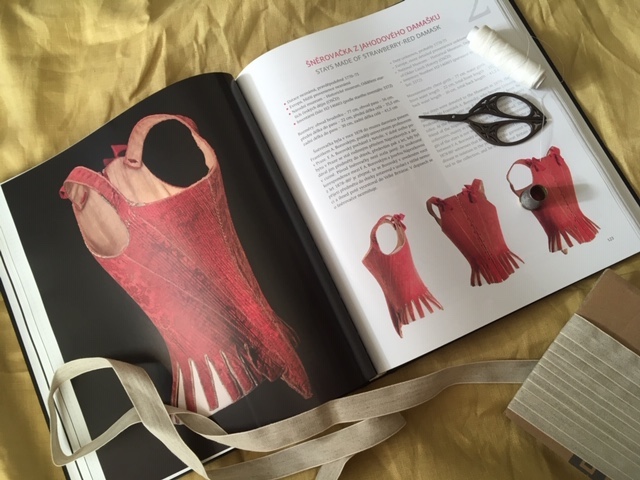
The 1770s red damask stays in Veronika Å ulcová & Dana Szemályová’s Å nÄ›rovačku nebo korzet?  Stays, or a Corset? have a distinct curve to the front seam:

Curved front 18th c stay patterns thedreamstress.com

As do the 1780s brown jean stays in Jill Salen’s Corsets: Historical Patterns & Techniques:

Curved front 18th c stay patterns thedreamstress.com

Both books include patterns of the stays that show their curved front.

Kendra of Demode and Vincent Briggs have both written about curved front stays, and Kendra has compiled a pinterest board with examples.

So, let’s add a curved front to your Augusta Stays pattern!

It’s really easy.

Measurements (aka, the math part)

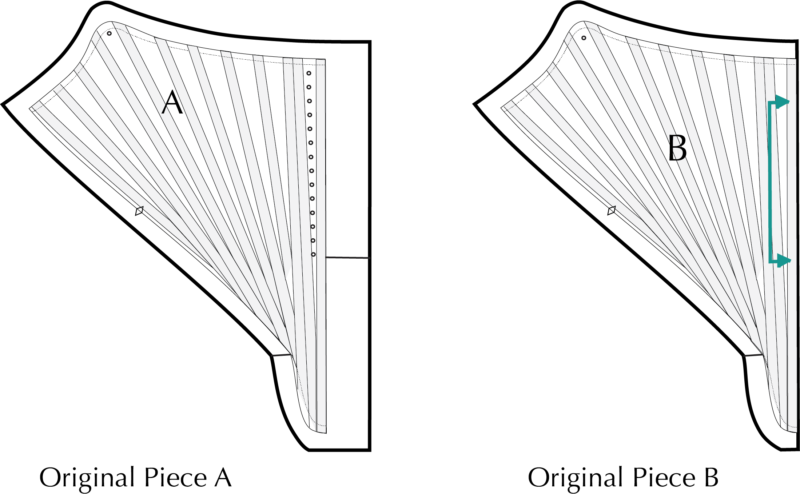
We’ll be working with Piece A (Historical) or B (Theatrical) only.

Augusta Stays ScroopPatterns.com

Measure your bust and waist, and pick the pattern size with the waist size that is CLOSEST to your waist size from the ‘Body Measurements’ section.

Priscilla would pick Size 36 as she has a 27.5″ waist.

Now, subtract the Full Bust measure for your chosen size from your bust measure.

Priscilla has a 37.5″ bust. Subtract 36″ from 37.5″ and she’s left with 1.5″. That’s the amount she needs to add to the front of her stays.

She’ll be adding 1/2 that amount to Piece A (because it’s 1/2 of the front of the stays), so 3/4″.

If you’re doing the Historical version, you can add a little less, and let the lacing take care of the rest.

Adding a curved front to the Historical Augusta Stays:

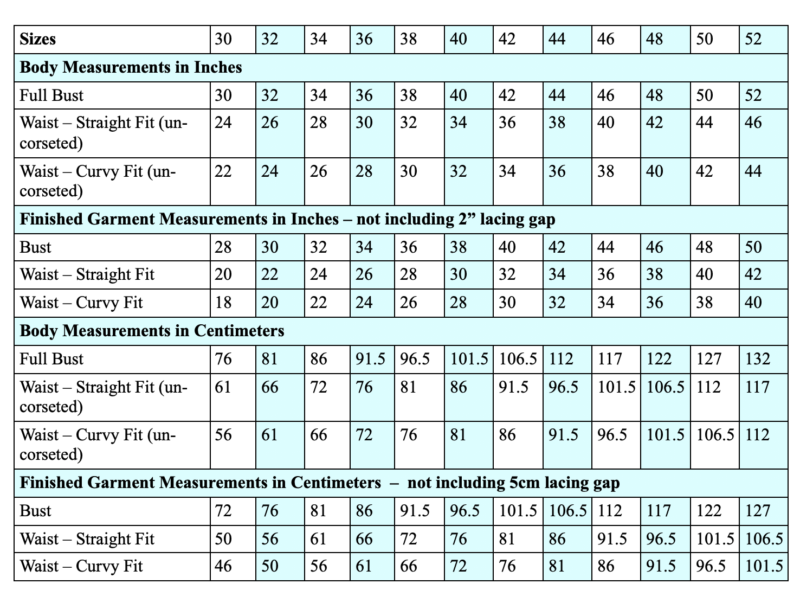
Measure out the amount you need to add to the pattern piece at the top of the stays. Then use a french curve to draw out a gentle curve from the ‘snip’ mark at the bottom of the eyelets, out to the marked point.

I’ve shown the 3/4″ Priscilla will need to add:

Adding a prow front to the Augusta Stays ScroopPatterns.com

Then re-draw the boning channels to mirror the front curve, as shown. You’ll notice that only bones 1 & 2 from the centre front change – bone #3 stays the same. At different sizes your layout might look slightly different, but you always want to think about keeping the bones nicely distributed and fanned out.

Adding a prow front to the Augusta Stays ScroopPatterns.com

I know they look weird, but German Plastic Boning is totally capable of this! In the actual stays the boning will be curving out, away from the body, not at an angle.

And that’s it! After this you can cut and make the Augusta Stays exactly as given in the instructions.

Adding a curved front to the Theatrical Augusta Stays:

There are three options for adding a curved front, and thus more bust space, to the theatrical version of the Augusta Stays.

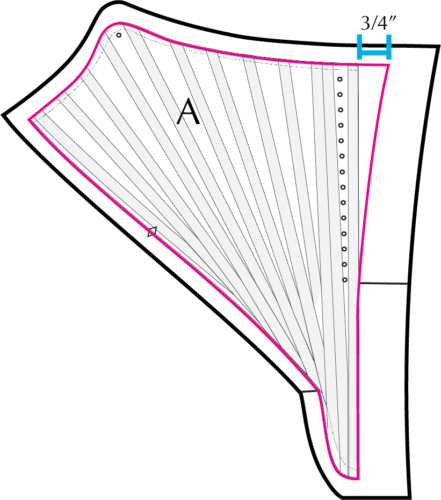
Option 1: a Curved Centre Front Seam

If you’re willing to have a centre front seam in your theatrical stays, you can add a front curve, and a seam allowance, just as we did with the Historical Augusta pattern:

Adding a curved front to the Augusta Stays

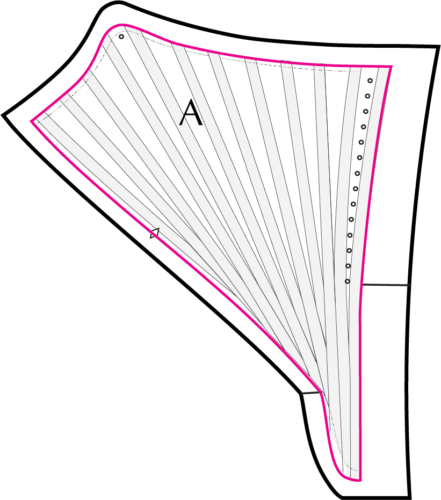
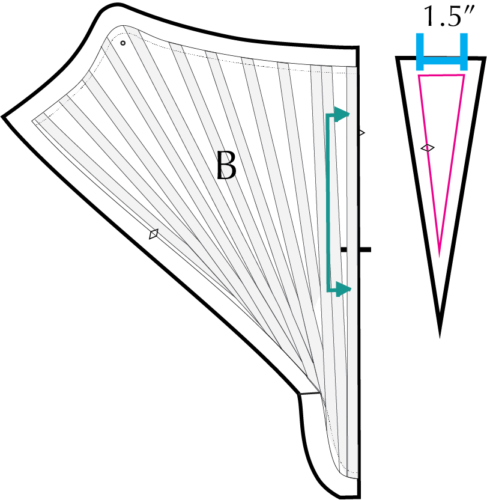
Option 2: A Straight Centre Front Seam & A Godet

If you don’t want to add a front curve to your pattern piece, but are willing to have a front seam, you can add a triangular inset (essentially, a godet) to the centre front seam. It would look lovely with decorative lacing over it.

Adding a curved front to the Augusta Stays

The triangular inset should be as wide as the entire amount you need to add, and as long as from the top of the stays, to the ‘snip’ mark of the historical boning layout.

Option 3: No Centre Front Seam, and an Inset Gusset

And if you don’t want a centre front seam, or have already cut your front piece, you can add a gusset to the centre front.

Adding a curved front to the Augusta Stays

You will need to do this before adding boning channels, using the minimal seam allowances. You have have to rearrange the boning channels slightly to accomodate the gusset (tip: use the boning layout from 1 size down to give yourself enough space).

The triangular inset should be as wide as the entire amount you need to add, and as long as from the top of the stays, to the ‘snip’ mark of the historical boning layout.

Both options with a triangular gusset do exactly the same job that the lacing does in the Historical Augusta Stays. You can even add working lacing over the gusset, to pull it in or let it out.

And that’s it!

Augusta Stays thedreamstress.com
Wedding dress, Silk faille, silk satin, cotton lace (machine), silk and cotton lining, ca. 1880, Musee McCord

Rate the Dress: Here Comes the Bride (ca. 1880)

If last week’s patterned fabric wasn’t to your taste, never fear, there is no print to worry about this week! Or, for that matter, colour, because this week’s Rate the Dress looks at an all-white wedding dress.

Last Week: a Française in chine silk

Not everyone was a fan of the fabric, and the compere front didn’t win any awards, but the overall response to the française was very positive. 18th century prettiness and pattern matching are always popular!

The Total: 8.7 out of 10

A definite improvement on the last few weeks.  

This week:  a ca. 1880 wedding dress

We don’t know the name of the bride who wore this week’s wedding dress, but we can assume she was a woman of some means (or, at least came from a wealthy family).

Wedding dress, Silk faille, silk satin, cotton lace (machine), silk and cotton lining, ca. 1880, Musee McCord

The dress is impeccably made, beautifully fitted, very fashionable, and totally impractical. White wedding dresses had gone from fashionable, but by no means required, to practically mandatory for wealthy brides following Queen Victoria’s choice of a white wedding dress almost 50 years earlier. Even in the 1880s less well-off (and some extremely well-off) brides opted for wedding dresses in more practical hues.

Wedding dress, Silk faille, silk satin, cotton lace (machine), silk and cotton lining, ca. 1880, Musee McCord

The dress displays many typical features of the transition between the first and second bustle era: a long smoothly fitted bodice, showing off the new longer corsets and higher bustline of the 1880s.

Wedding dress, Silk faille, silk satin, cotton lace (machine), silk and cotton lining, ca. 1880, Musee McCord

The skirt features a slim overskirt gathered up at the centre front, meeting the lavish train with a cascade of ruffles at the sides.

Wedding dress, Silk faille, silk satin, cotton lace (machine), silk and cotton lining, ca. 1880, Musee McCord

The skirt is anchored by two rows of pleating at the hem, arranged in clusters of five knife pleats interspersed with plain areas.

Wedding dress, Silk faille, silk satin, cotton lace (machine), silk and cotton lining, ca. 1880, Musee McCord

The bodice features large front buttons, and a rectangle of fringed pleating framing either a false neckline, or a guimpe which can be removed to turn the dress into a lower necked reception gown.

What do you think? Is this your idea of an elegant wedding dress for its era?

Rate the Dress on a Scale of 1 to 10

A reminder about rating — feel free to be critical if you don’t like a thing, but make sure that your comments aren’t actually insulting to those who do like a garment.  Phrase criticism as your opinion, rather than a flat fact. Our different tastes are what make Rate the Dress so interesting.  It’s no fun when a comment implies that anyone who doesn’t agree with it, or who would wear a garment, is totally lacking in taste. 

(as usual, nothing more complicated than a .5.  I also hugely appreciate it if you only do one rating, and set it on a line at the very end of your comment

A late 18th c bum rump

In my continued effort to not have this blog turn into one of those sites where the blogger starts a pattern line and never talks about anything but her patterns ever again, I present my latest totally-not-Scroop-related* historical sewing make:

Making a 1780s bum rump thedreamstress.com

A 1780s bum rump!

To make my bum rump I referred to:

The American Duchess book has a great tutorial on making a 1780s bum rump, and I used it as my starting point.

Making a 1780s bum rump thedreamstress.com

However, I have noticed it makes a slightly ‘corner-y’ bum, that pokes out in a square at the sides. It still looks amazing under anything with a full skirt, like an ‘Italian’ gown or a polonaise, but not so good if worn with a little jacket.

To see if I could make a less poke-y shape, I consulted Kendra’s great blog post, which has been the inspiration for most of my 18th c skirt support exploration. She doesn’t try this type of bum rump, but it’s still a great place to see how different shapes affect the silhouette, and to find many of the period quotes mentioning skirt supports in one place.

I also went back to the source of the AD tutorial, The Bum Shop:

The Bum Shop, 1785. Lewis Walpole Library

The three separate-bum rumps hanging on the top wall of the shop all have a much rounder, shorter silhouette than the AD pattern. Of course, it’s a satirical print: the artist was not a bum maker or patternmaker, and we can assume any shape would be exaggerated.

Slightly later, and showing a different type of bum enhancer (one which fascinatingly, seems to be built into drawers), is The Virgin Shapes Warehouse. It also shows a very round bum, but with these ones the padding has moved entirely to the back, with no fullness over the hips at all.

The Virgin Shapes Warehouse, Ansell, Charles, printmaker. Publish’d Sepr. 1st, 1799, by S.W. Fores, No. 50 Piccadilly, 1799, Lewis Walpole Library, 799.09.01.03

To get my shape, I cut out the pattern gives in the AD book and then trimmed away the corners until I got a shape that’s slightly more an oval, and less a rectangle with rounded corners (image shows the pieces partway through the process).

Making a 1780s bum rump thedreamstress.com

I was scared to do too much: if I do this again I’d make it even rounder, with no suggestion of corners at all.

Then it was on to lots and lots and lots of boring/meditative (depending on which way you look at it) hemming.

Making a 1780s bum rump thedreamstress.com

Then I sewed my bum cushions together, and turned them out. I’m using an inner bag of down-proof cotton fabric, and an outer bag of linen twill, for maximum non-scratchyness.

Then I pleated my half-petticoat on to my waistband, and pleated the bags on to that. The AD pattern says not to worry about what your pleating looks like, but I did some experimenting, and I think that the direction and placement of your petticoat and bag pleating does affect the final shape. By rearranging my pleats and where the fullness of the petticoat was concentrated I could get more or less bump in the centre of the ‘cheeks’, especially once I did some tacking.

With the pleating rearranged to my satisfaction, I stuffed:

Making a 1780s bum rump thedreamstress.com

I’d hoped to use wool rovings for my stuffing material, instead of feathers, but the source I’d used for earlier rumps is no longer supplying rovings, and I wasn’t able to find another source in time to get them before the lockdown, so I reverted to feathers and cannibalised my oldest/yuckiest feather pillow.

Making a 1780s bum rump thedreamstress.com

Feathers make a MESS!

Making a 1780s bum rump thedreamstress.com

Then I played with pleat placement on my bum-cheeks, and basted them in place.

Then it was on to finishing the waistband (definitely a job for a thimble).

Making a 1780s bum rump thedreamstress.com

And hemming the ends of the waistband, which is always my favourite part, because you feel so incredibly virtuous hemming ends!

Making a 1780s bum rump thedreamstress.com

And done!

Making a 1780s bum rump thedreamstress.com

Well, actually, not quite. I put the bum rumps on my dressform and played with tacking the rumps to the half petticoat in places, to hold the corners down, and to hold the fullness in the desired position. Under a light (like a silk taffeta) petticoat it makes a definite difference.

Making a 1780s bum rump thedreamstress.com

Questions people have asked:

What’s the point of the half petticoat?

Well, first, the only period source I know of for this style of bum rump (The Bum Shop) shows a half petticoat – and presumably they had a reason for it.

While I don’t always aim for strict historical accuracy with my costuming, I do find that at least trying to do things as close as possible to the way they were done in-period often teaches you a lot about why a garment was constructed that way, and can lead to better construction techniques. So, since the primary source shows a half petticoat, you should at least try one!

One obvious reason for the half petticoat is more protection from whatever you filled your bum rump with. The known historical filling is cork (ground), which presumably might be a bit scratchy (I’d love to try a ground cork bum some day, but only once I find a more efficient way to source it than collecting wine corks from friends and burning out a dozen blender engines). The AD book has you fill the rump with down – and eventually a few feathers will work through even very densely woven fabric and scratch. So another layer = less chance of itchy scratchy pokeys.

In making my rump and experimenting with shaping and rearranging fullness I also discovered the rump can be tacked to the petticoat in places, holding the fullness where you want it, and preventing that ‘corner-y’ look I so wanted to avoid.

Is it heavy?

It doesn’t feel heavy when I’m wearing it, but it certainly feels heavy when you pick it up!

According to my kitchen scale it weighs 726g or 1lb 9oz.

Why do you prefer to use wool instead of feathers?

Period sources describe cork rumps and rumps stuffed with crin (horsehair).

AD may have found an 18th c bum pad source that uses feather as a filler that I’m not aware of, or they suggests feathers based on the 1838 Workwoman’s Guide’s bustle pattern, which tells you to stuff a bum pad with “either swan’s or the best goose down”. While the book is half a century later than the rump, it does have many patterns and sewing techniques that are identical to 18thc ones, so it’s likely that feathers was a legitimate bum rump filler in the 18th c.

Wool is also closer to crin (a known 18th c rump filler) than feathers in how it behaves. Like crin it has loft, springiness, and the ability to be moulded into a shape which it holds for a long period (until it really gets compressed).

The weight is part of the reason I prefer to use wool as a stuffing: you get more loft for weight with wool than feathers.

Wool is definitely plausible for 18th c stuffings: any woman in the vicinity of a sheep farm would have had access to wool: especially the coarser, poorer quality stuff left over.

And finally, I live in NZ! Wool is what we do! All the sources for feathers/down I’ve found are imported from Asia. Using wool let’s me support a small local business, instead of a big multinational.

But this time I used feathers, because sometimes you make-do. And I enjoyed the opportunity to experiment with feathers. Someday I’ll make a wool one and really be able to compare how the two behave and wear.

Making a 1780s bum rump thedreamstress.com

Thanks to the ladies at American Duchess & Kendra at Demode for their awesome patterns, tutorials and research!

As a bonus, because I didn’t manage to buy wool rovings for this, it fits into the July 2020 HSM Challenge: No Buy

What the item is: A ca. 1785 Bum Rump  

How it fits the challenge:  The linen was inherited from a friends great-aunt, the feather-proof cotton came from a scrap bag someone gave me, the down was a cannibalised pillow. I did buy the thread and tape at op shops years ago, but there was no purchasing done for this challenge!

Material:  linen twill, down proof cotton.

Pattern: the American Duchess 18th c Dressmaking book, and period sources.

Year:  ca. 1785

Notions:  cotton thread, cotton tape.

How historically accurate is it?  It matches the one period image of a similar garment well, and the materials are all plausible. It’s unlikely the bum bags would have been double-layer in-period. 70% maybe?

Hours to complete:  about 12

First worn:  Only to fit a 1780s petticoat over it.

Total cost:  $1 or less

* actually I lied. I can’t promise this won’t end up being used with a future Scroop + Virgil’s pattern 😜