
Here’s a quick and easy tutorial to turn a modern straw hat into a mid-late 18th century bergere style hat. It’s not, of course, historically accurate, but it’s quick, easy, and looks effective.
We’ll go from this:
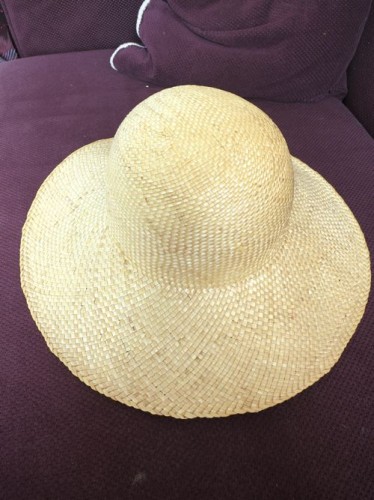
Modern straw hat
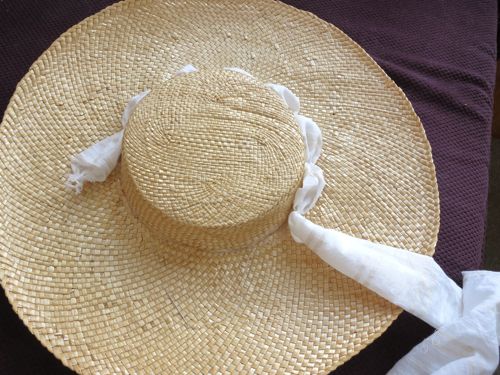
To this:
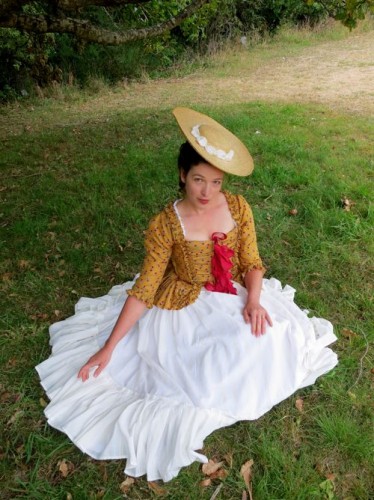
18th century inspired bergere
You’ll need:
– A broad brimmed, woven straw hat. It doesn’t matter if it fits you, but it has to be woven (not braided and sewn together), and it has to be straw.
– Scissors
– Hot water
– A round metal pan or bowl with a flat base approximately 6 inches/ 15 centimeters across
– A hot glue gun
– Needle and thread
– Ribbon, fabric, feathers etc. for trimming.
First, have a look at a few 18th century straw hat inspiration pictures, and decide what style you want. Note that some have very shallow crowns, some (usually later in the 18th century) a bit deeper. Some have teeny-tiny crowns, some much wider. Brims can be broad or narrow, can turn up or down. Plus there are all the variants in trim. All of these help to balance your face, and the look and period of your outfit.
Start with your straw hat:
Modern straw hat
Cut off the top of the straw hat about 1.5″ above the point where the brim turns in to the crown. If your crown is really shallow you can work with it as it is, if it’s a bit deeper (like mine) cut off another 1.5″ strip, and discard it.

Brim, strip to be discarded, new, shallow, crown
Now, time to reshape your brim and crown. Wet them both with hot water.
Flatten the 1.5″ rise of the brim down towards the centre hole so it is flat with the rest of the brim, and dry it flat. I put mine beneath a heavy book slipped in a plastic bag to protect the book from the damp.
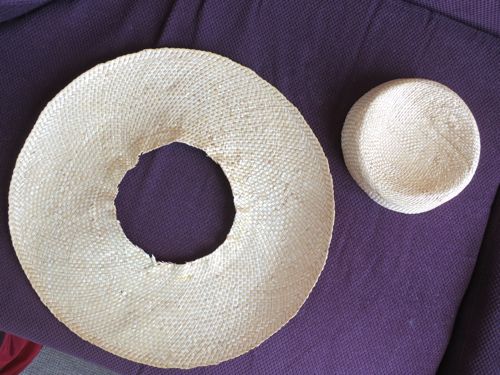
Flattened brim and reshaped crown
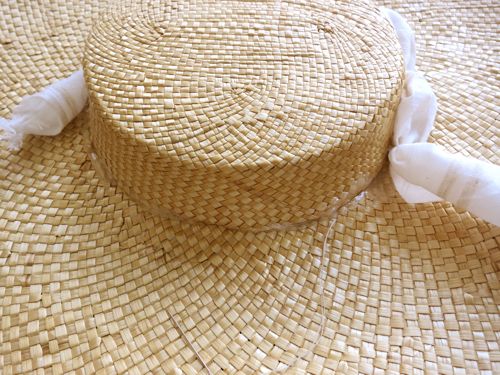
Reshape your crown by molding it over the bottom of your flat bowl or pan, so that it has a flat top and a crisp turn, rather than the rounded bowl shaped crown.
To keep the cut inner edge of the brim from unravelling and scratching you, bind it with some bias tape.
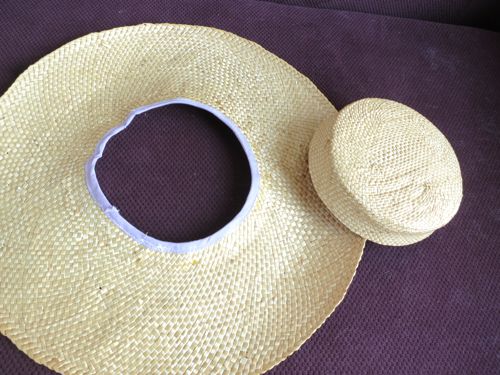
Inner brim edge bound with bias tape
Now, check that your crown is the height that you want it to be, and trim a bit more off if it is too tall. Once you are happy with the height, attach your reshaped crown to the brim with hot glue, ensuring it is firmly secured together.
The hot glue join
Cover the join with trim – I used a tube of fabric sewn into ‘puffs’ (my favourite trim technique), but pleated ribbon, ribbon puffs, and florals and foliage are all options.
Creating the ‘poof’ trim
Add any extra trim or decoration that you desire, and sew some loops or ribbons to help hold it on if needed.
Ta da! All done!


[…] did an excellent tutorial with clear instructions and photos that actually help explain the process. And no wasted […]
[WORDPRESS HASHCASH] The comment’s server IP (216.151.210.46) doesn’t match the comment’s URL host IP (76.74.254.123) and so is spam.
So pretty, and not an impossible task!
And a very timely post – “Oh, I could write a sonnet about your Easter bonnet…”
Haha! I didn’t even think of it! Aren’t you clever!
Lovely! I can’t wait to make one for myself 🙂
Thank you! Can’t wait to see your version!
How fun! I think I will have to try and make myself a bergère.
Thank you! Good luck!
That’s brilliant! I’ll have to see if I can try it with a hat I’ve got!
Good luck! Share if you do!
Also work very well with woven placemats, especially if you are to cover it with fabric, though you need an extra scrap of something to make the sides of the crown. 🙂
Yes indeed! I find placemats are a bit more work, because you can’t reshape, and have to sew/glue more. Also, for some reason good cheap woven placemats never turn up in NZ, but I can find half a dozen suitable straw hats at op-shops any day of the week!
I love the versatility of a bergere, and your tutorial is excellent. And you look so stylish wearing it! I’ve nominated you for the Very Inspiring Blogger award: http://asartorialstatement.blogspot.com/2013/03/my-first-blog-award.html
I did this with a high crown felt hat once. I lined the crown with silk that I gathered into the center and covered with a round of silk that I had embroidered with silk flowers. I then covered the brim edge with some of the silk and covered the join from the outside using the silk as a ruched ribbon. I embellished the ruching by stitching with silk thread to imitate fly fringe. After all this was done and I was proudly showing it off, someone informed me that I had used dupioni silk, so it was correct. I smiled at them at said that that was okay with me, I would wear the hat while gardening at home. And I do.
Were these hats always bare straw or could they be covered with fabric?
[…] Hat” by The Fashionable Past – How to cover a straw hat with pleated silk. “Tutorial: How to turn a straw sunhat into an 18th century bergere” by The Dreamstress – Exactly what the title says! “The Amazing Crafthat Pt. Deux […]
[WORDPRESS HASHCASH] The comment’s server IP (66.155.38.71) doesn’t match the comment’s URL host IP (66.155.9.238) and so is spam.
Just wondering the hot water part….
How long do you leave it in hot water to loose its shape for the hat part NOT the crown???
Thank you for this post, I found the saddest looking hat that was a good quality straw and weave, I think this will help me rescue it and it will make a great gift when I’m done for a friend who stresses waaaay to much about costuming.
I thought the hat was tied on, but I don’t see any ties. How did you attach the hat to your head?
There are bergere with ties, but there are also ones without that, like mine, are held on with hatpins. 🙂