

Someone asked about the finish of the lace edging on my Wearing History 1910s camisoles/corset covers, and I thought you might enjoy a tutorial.
I like this method because it is quick, easy, and provides a strong, neat, and tidy finish to necklines, armholes and hems. And I’ve seen it used on at least one 1910s camisole, so it’s period accurate, even if it wasn’t the most commonly used finish.

For the tutorial you will need:
- Cotton beading lace (for a neckline) or broderie anglaise hem lace (for a hem). You can use this method with any lace with enough coverage to hide the raw edges (I’ve also used it for the tiny bobble lace around the armholes of the camisole above), but it’s easiest to start with a cotton lace. It doesn’t work well with beading lace where the holes extend almost all the way to the edges of the lace.
- A garment that needs its hem, armholes or neck finished with lace.
In this tutorial I am sewing beading lace around the neckline of the camisole shown above.
With this method, the lace will sit beyond/outside the edge of your neckline/armhole/hem, so cut them back the width of the lace minus 1/4″ to compensate for the added width of lace.
For a neckline with a button front, start by folding over the end of your beading lace between two beading holes, so that one beading hole sits over the one behind it. This will leave a single beading hole at the end of your lace:
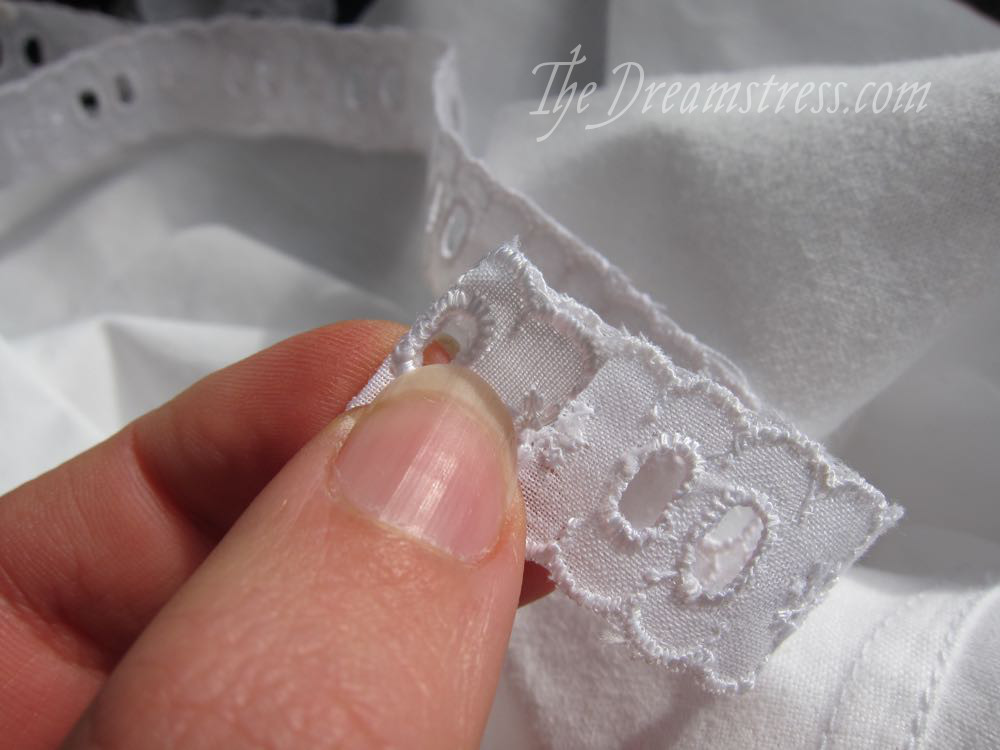
If you are doing an armhole or a hem just place the cut end on the hem at your chosen point.
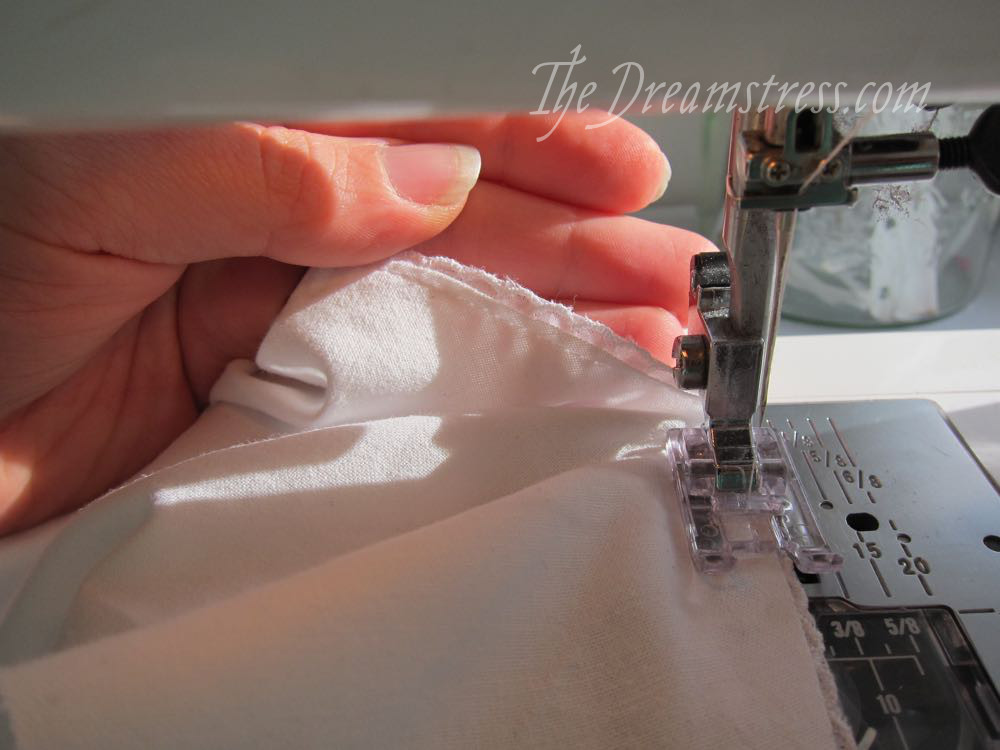
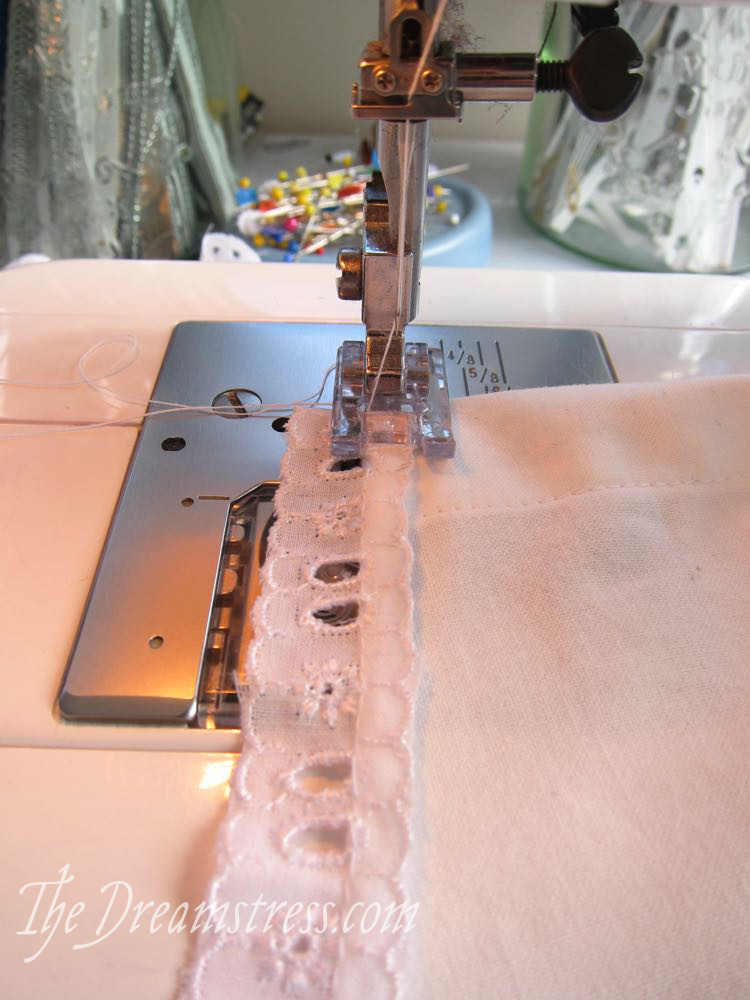
Place your lace on the WRONG side of your garment, so that the lace just covers the cut edge of your hem/neckhole/armhole. Pin, or just hold as you sew if you have a lot of hand control:
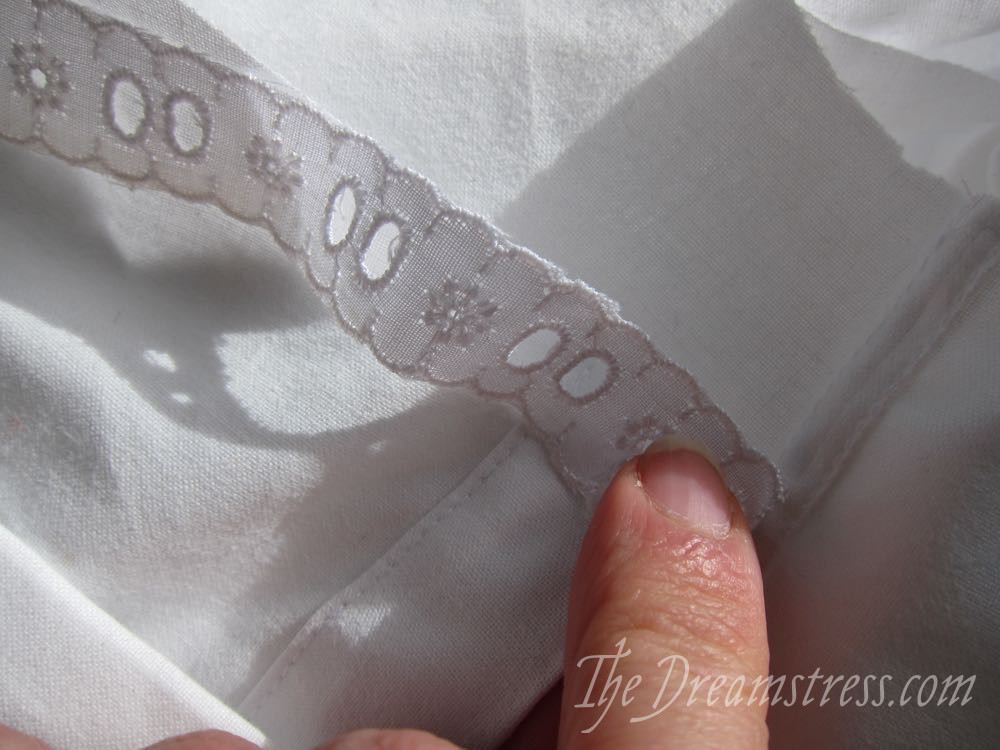
The edge of your lace should just peep out over the cut edge of your garment on the right side:
Sewing from the right side, so that you can see both the cut edge of your garment, and the edge of the lace, sew in 1/8″ or less from the cut edge of the garment:
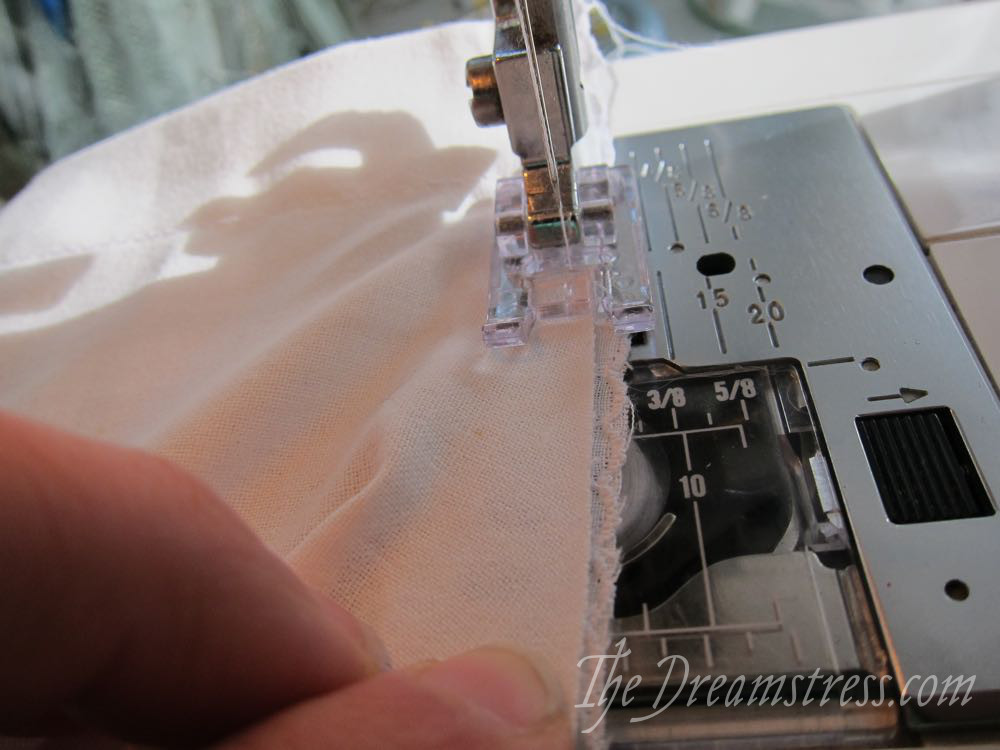
Your stitching should safely catch the fabric of your garment, but should not sew in the beading holes of your lace.
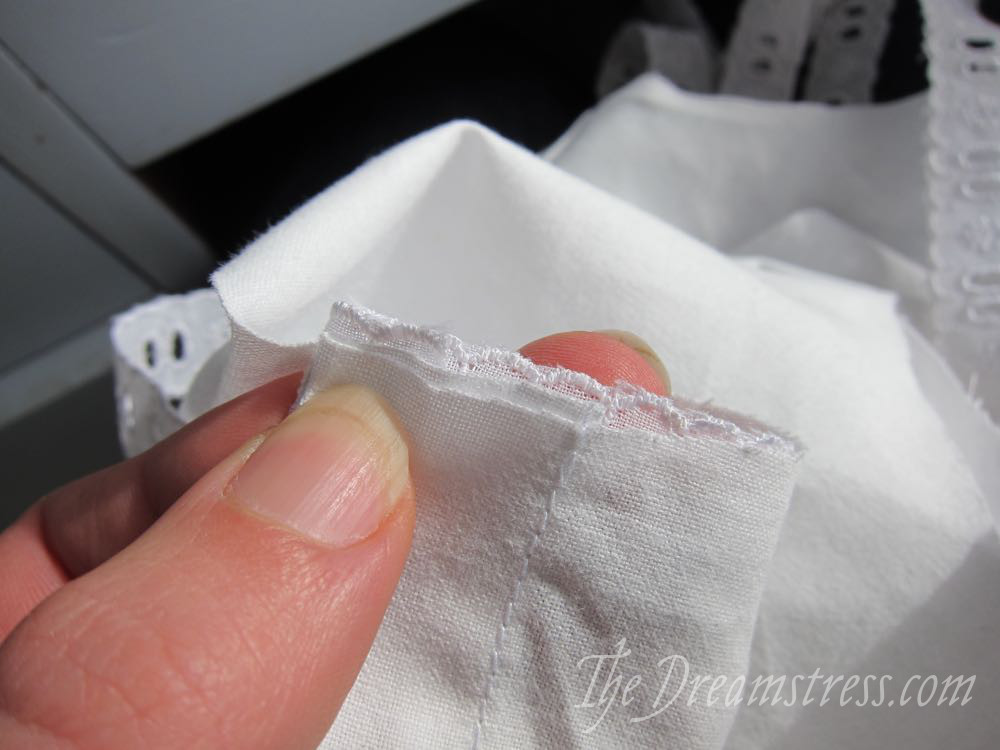
As you get to the end of the neckline, cut your lace off, and fold under the end as you did at the start, so that there is a tidy edge to the lace.
If you are sewing an armhole or a hem, fold under the end of the lace and lay it over the cut end you started with, to hide the cut end.
Here is the sewn-on lace from the wrong side of the garment (see how the stitching is just at the edge of the beading holes):
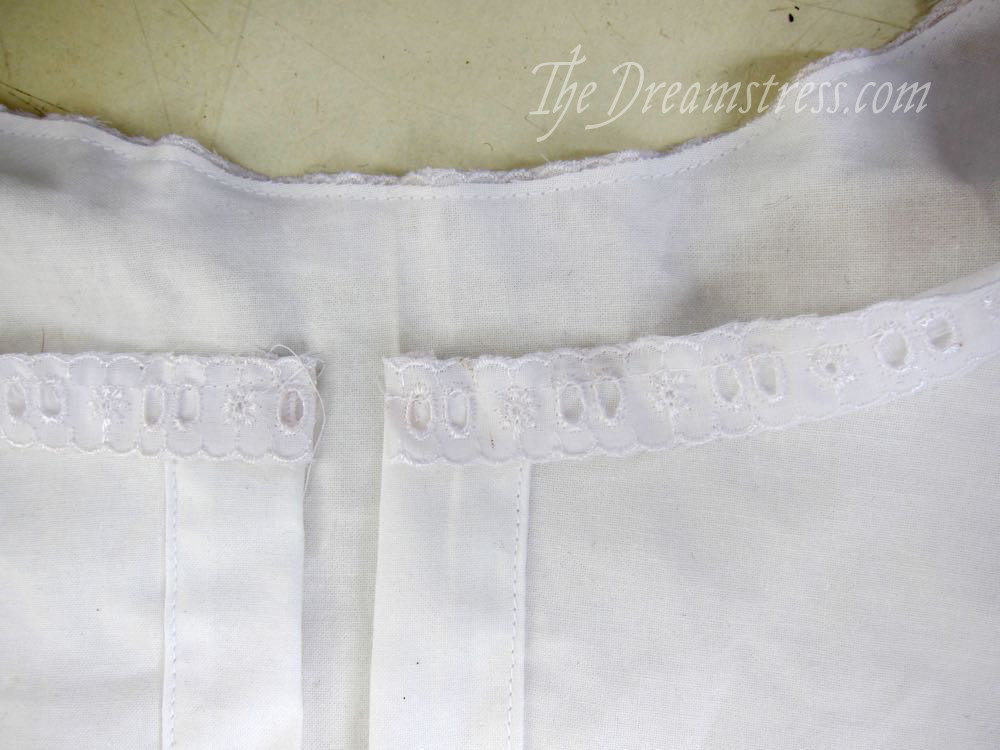
And from the right side:
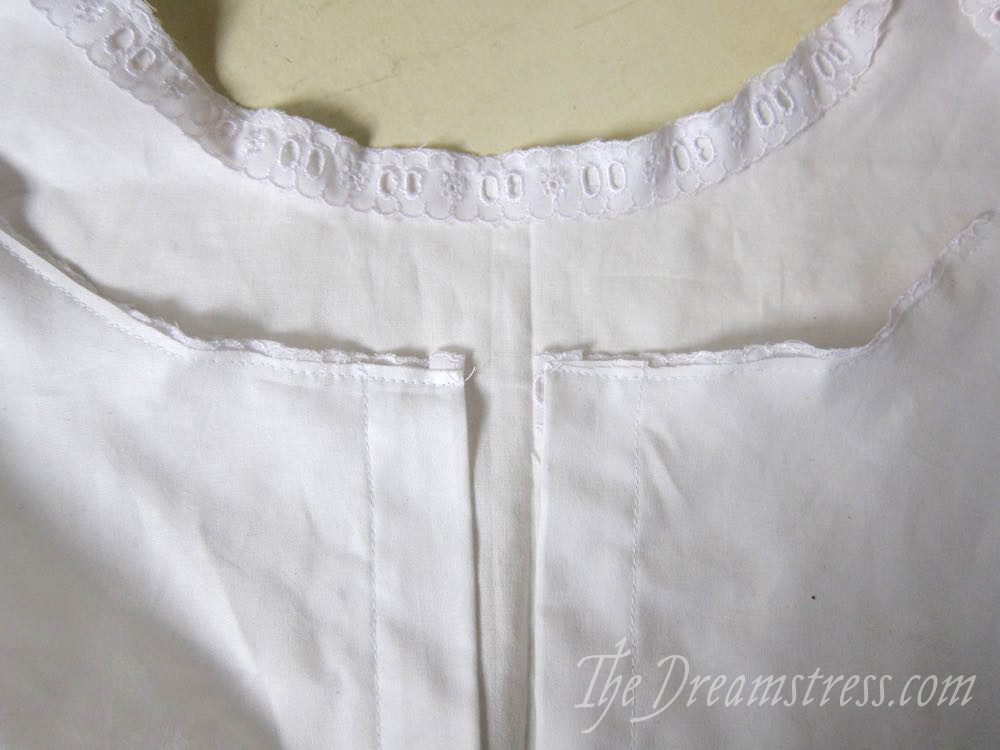
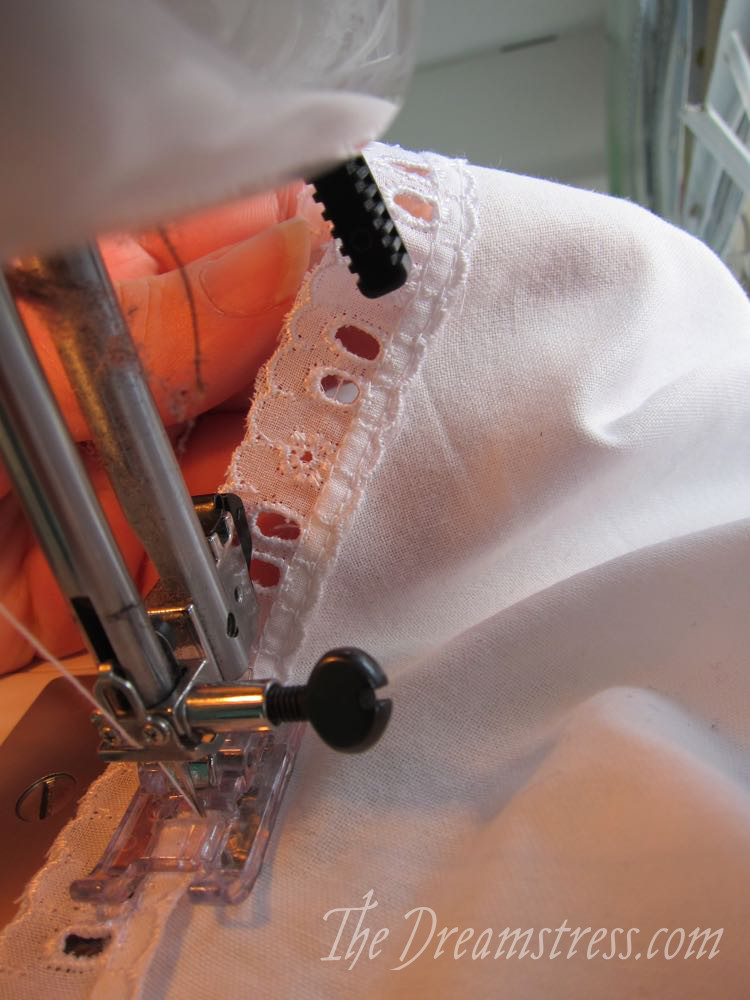
Now you’re going to flip the lace up, so that it’s visible on the right side of the fabric, as shown in the lower hemline in this photo:
I find I get better results finger pressing as I sew, rather than pressing it with an iron beforehand, but feel free to experiment to see what works best for you.
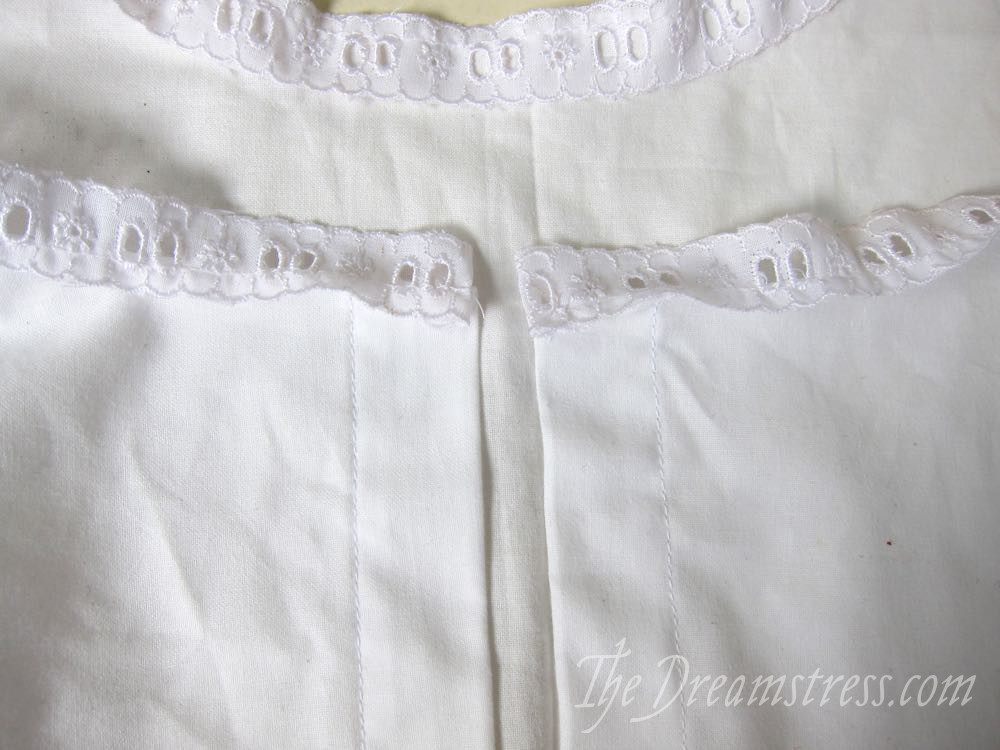
Now you’re going to sew from the right side, stitching along the top of the lace, less than 1/8″ from the edge of the lace, so you just catch it:
The two lines of stitching make a very secure attachment, and any frayed edges are hidden underneath the turned-over lace, making for a perfect finish on each side:
And here is the done result, with the ribbon threaded through the beading:
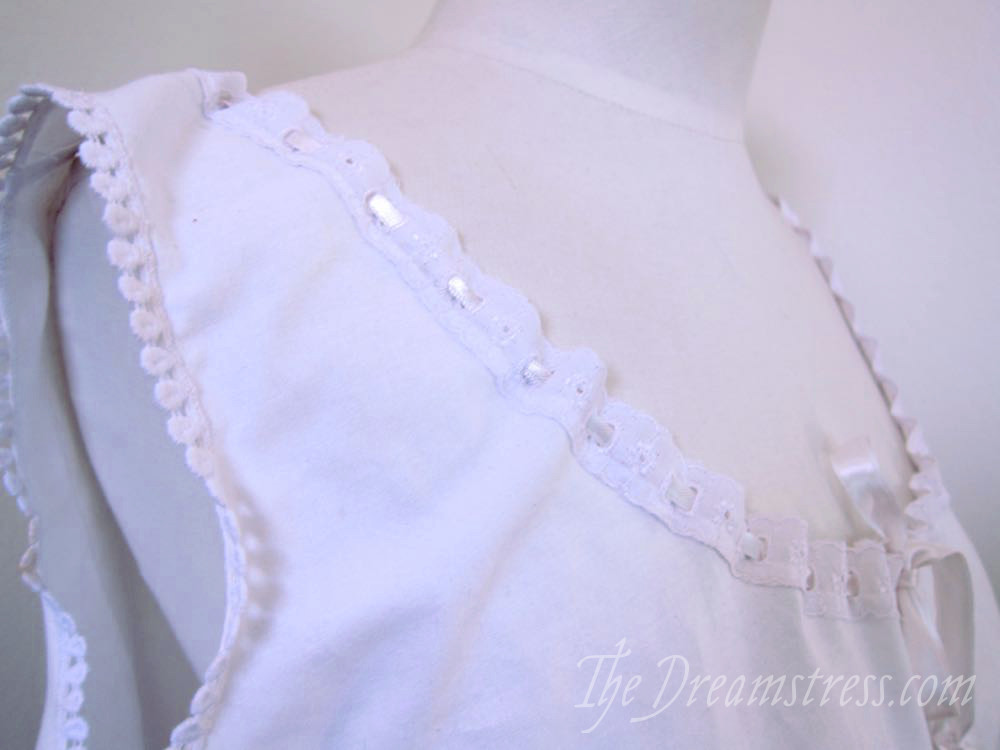
I’ve used the exact same technique to attach the trim around the armholes – there are lots of applications for this, and it’s so easy, and strong, and tidy!
Very nice lace! And it’s comforting to know that we use the same method for clean lace edges. It’s always nice for a relative novice to see the “pros” doing it the exact same way.
Thank you for this tutorial! Most of my Swedish originals have their lace sewn on like this and since I’m just getting started on machine sewing (I usually sew by hand) this tutorial is gold for me!
Can’t wait to try this- thanks for the tutorial! I’m working on some 1910s underwear now so this is perfect timing, and I would love to try this on a modern summer dress as well
How did you know I was making some undergarments and this is just what I needed? Actually making Wearing History’s 1919 combinations, and Truly Victorian’s 1870s combos.
What a great way to finish them. Thank you!
Val
[…] finish the armholes and neckline, I used The Dreamstress’s tutorial of using lace to create a clean edge. I’d like to replace the black poly ribbon with a silk […]
[WORDPRESS HASHCASH] The comment’s server IP (192.0.101.48) doesn’t match the comment’s URL host IP (192.0.78.13) and so is spam.