
You’ve chosen your materials, made buckram, now it’s time to make a mock-up of the Cassandra Stays to make sure that you get the perfect fit with your final pair!
Previously on The Cassandra Stays Sew Along:
Why Make a Mock Up?
It seems like a lot of effort, but making a full mock-up is so important for getting a good fit with your final stays. To be a successful mock up it needs to be as complete as possible: fully boned, in fabric that behaves as much as possible like your final fabric.
The good news is that making a mock-up lets you test some of the final techniques, which will make the actual stays go faster!
The other good news is that you can re-use your bones from your mock-up in your final stays.
Making a Mock-Up
Before you begin your mock-up, make any initial alterations you are sure you will need: lengthen/shorten adjustments etc.
Cut out your pattern pieces. Be sure to use fabrics that act in a similar way to the fashion fabric you plan on using: linens and wools will have more ‘give’, taffetas will have almost none.
I’m making my mock up in two layers of cotton canvas. This should have a similar weight and amount of give to the linen damask, linen, and buckram my final stays will be in.
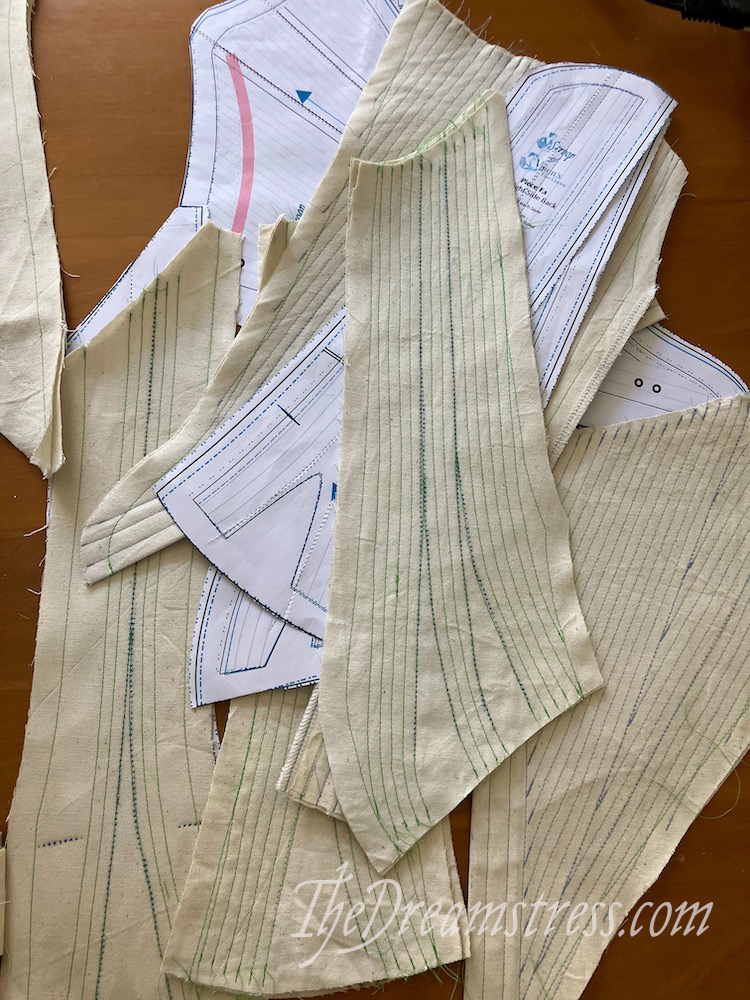
I cut out all my pieces, and transferred only the guide boning lines (marked in black on your pattern pieces) to my fabric:
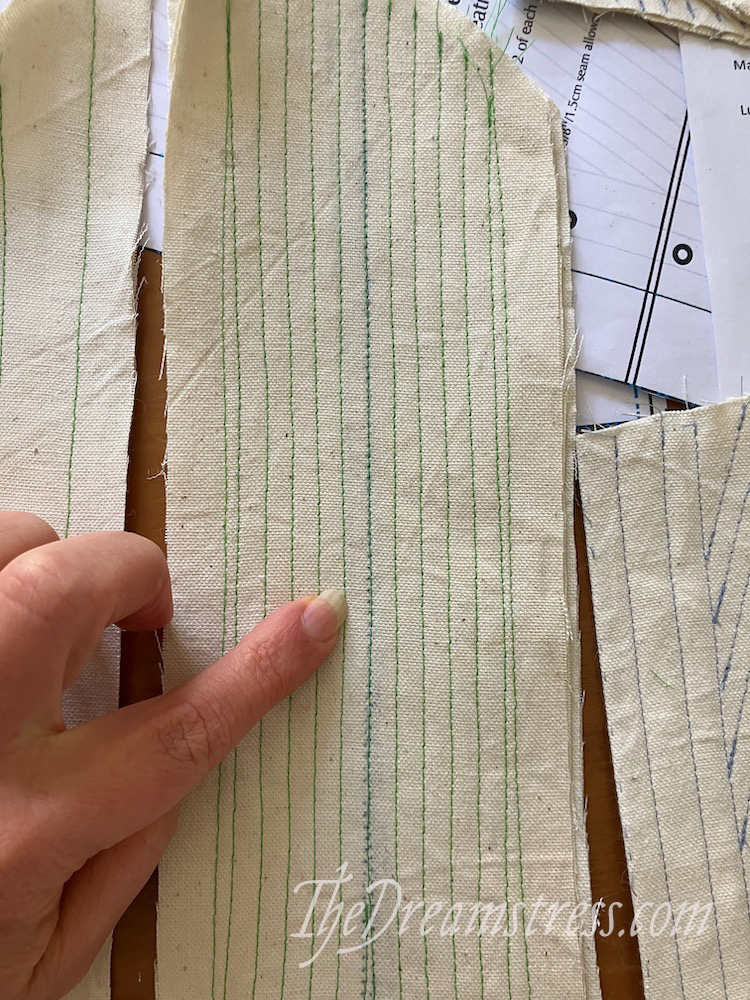
I can then use these guide lines to create all the rest of the boning channels. Each line of stitching is sewn out an even distance from the previous line.

Before I’m ready to insert bones I need to sew lines of stitching that mark the seam allowances on each side of each stay panel. You can also do this before sewing your boning channels.

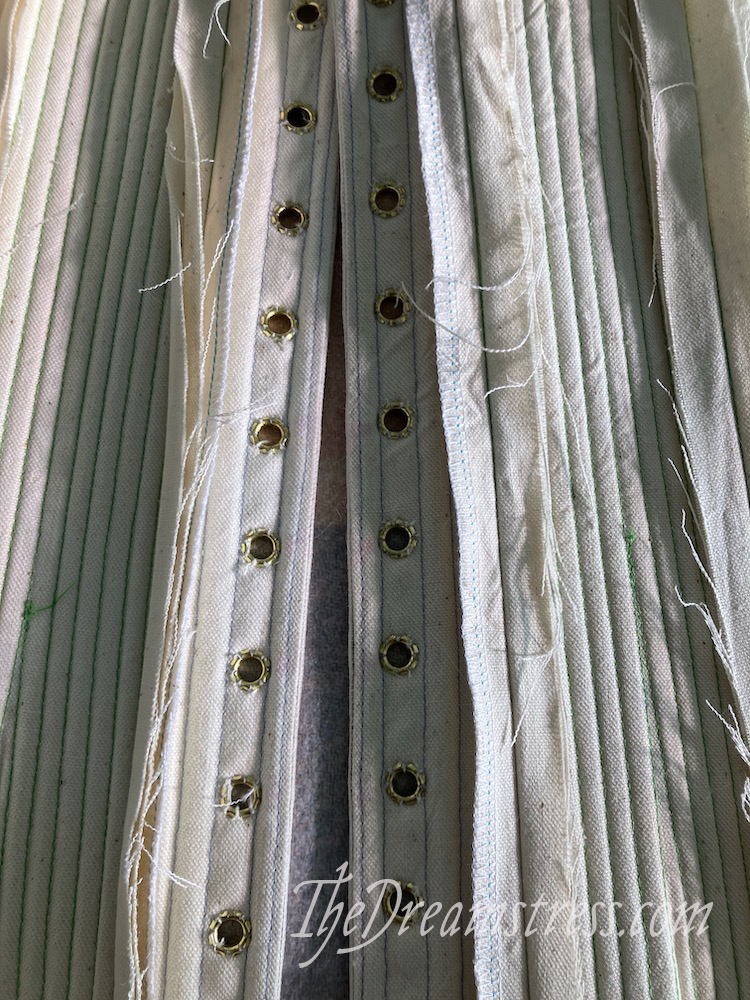
Then it’s grommet time. Insert grommets in to the front (if doing View B) and back of the stays. I find old packets of grommets at op shops fairly regularly, so that’s what I use for grommets in my toiles. It’s cheaper than using nice ones. I’m going to recycle the back panels of my Cassandra toile to be lacing panels for future stays/corsets, so I’ve overlocked the edge of the fabric.
With all my boning channels sewn, seam allowances marked, and grommets inserted, it’s time to cut and insert the boning. If you think there’s any chance that you might need to lengthen your stays you can cut each bone a little longer than the channel.

If your boning makes each panel very curvy you can use the directions on ironing bones in the pattern to gently ease out the curve.

Then, right sides together, matching the waist notches and working up, pin and sew the panels together. Use the seam allowance lines that you sewed to guide you. You may find it easier to remove the bones closest to the seam in order to sew.
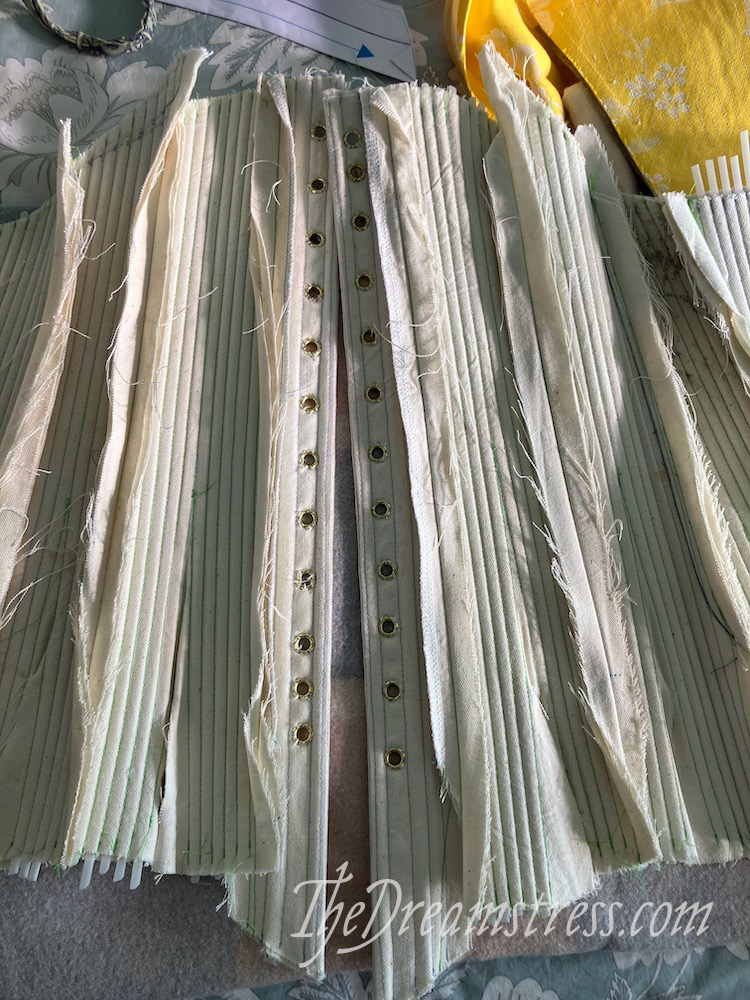
And there’s your mock-up!
Tomorrow: Fitting your mock up!