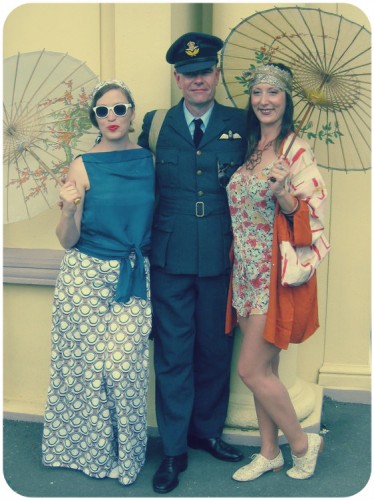
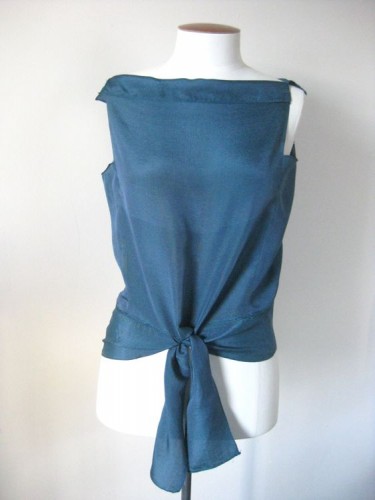
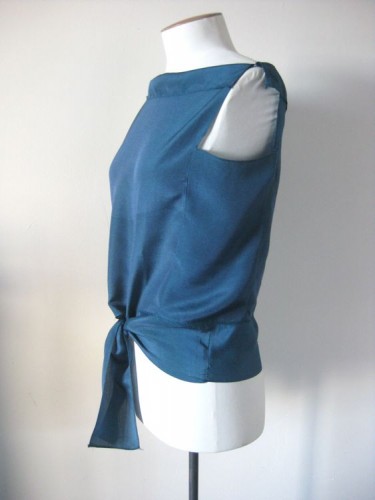
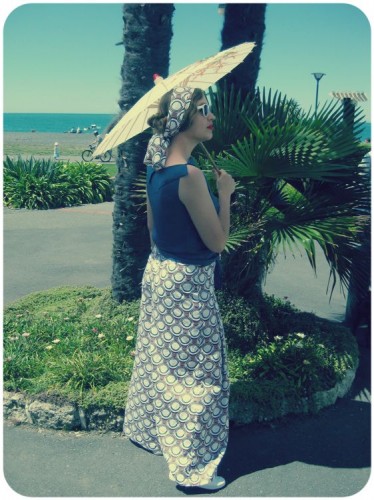
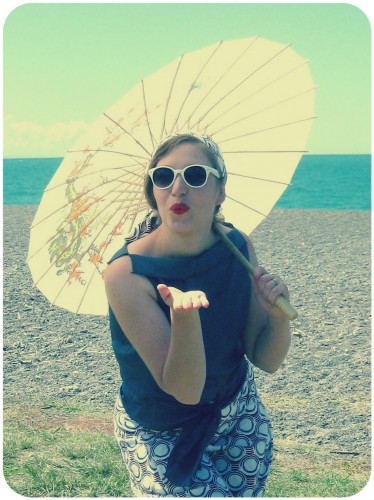
As promised, and per popular demand, a tutorial on my Deco Echo blouse!
First, a caveat. This blouse best suits a figure with a small bust and less than 10″ bust/waist difference. If you have larger bust, you could try adding length and side-bust darts. It would also help to taper the side panels in at the bottom, and to add a opening (either buttons up the CB, or a side fastening with snaps or hooks).
Fabric: I used the panels of silk crepe from the susomawashi (the lower lining) of a kimono for my blouse. I recommend lightweight silk or cotton fabrics. Silk crepes are particularly nice because of their drape.
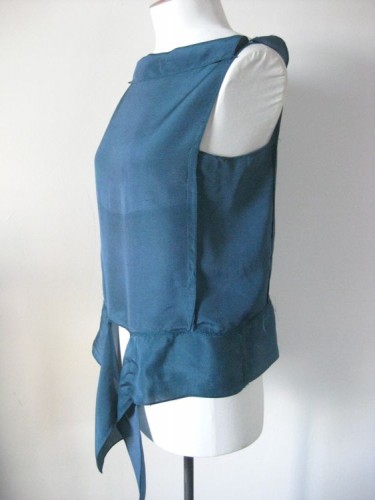
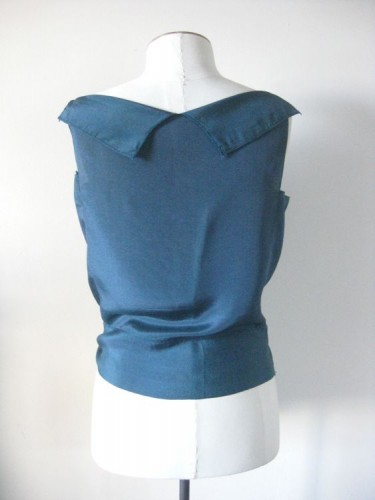
The blouse is made from 5 rectangles – two large ones, two narrow ones, and one really long and narrow one for the waist tie.
To make a blouse to fit a 34″ bust you will need:
- 2x 21″ x 13.5″ (l x w) rectangles – these will be your front and back panels.
- 2x 10.75″ x 6.5″ (l x w) rectangles – these will be your side panels
- 1x 54″ x 4.75″ (l x w) – this is your waistband
To make a blouse to fit a 36″ bust you will need:
- 2x 21″ x 14″ (l x w) rectangles – these will be your front and back panels.
- 2x 10.75″ x 7″ (l x w) rectangles – these will be your side panels
- 1x 56″ x 4.75″ (l x w) – this is your waistband
To make a blouse to fit a 38″ bust you will need:
- 2x 21″ x 14.5″ (l x w) rectangles – these will be your front and back panels.
- 2x 10.75″ x 7.5″ (l x w) rectangles – these will be your side panels.
- 1x 58″ x 4.75″ (l x w) – this is your waist tie.
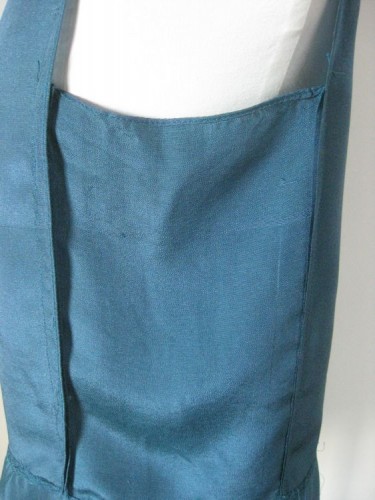
- Step 1: Finishing: Finish all four edges of all the panels with narrow hem stitching. It’s important that all the edges are finished nicely, because the finished seams of the panels also form the armhole & collar edges.
- Step 2: Side seams:Sew the narrow side panels to the front & back panels using 1/2″ seam allowances, right sides together, carefully lining up the bottom edges.
- Step 3: Fitting the sides and shoulders, and checking the length:Hand-baste the shoulders of the blouse together 2 1/2″ from the loose collar ends. Make sure you do it really loosely – so its easy to unpick if it needs adjusting. Pull the blouse on over your head. Check the fit. Is it too loose? Take in the side seams. Too tight? Let them out. Check the fit of the shoulders. If the side panels are too low on you, sew the shoulder tacks lower. If the side panels are too high, let the neckline out. Now, check the length. The bottom as it is should sit right at, or just the tiniest bit below your natural waist. Remember that you have about 4 1/4″ of waistband to add.
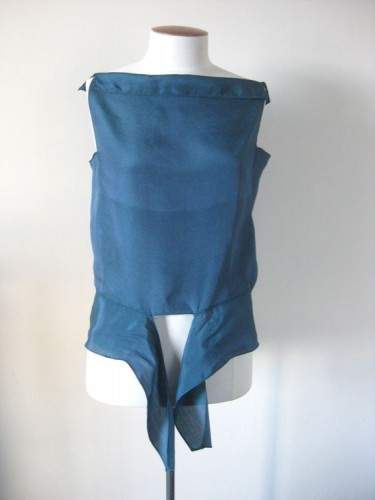
- Step 4: The shoulders: Hand-sew the shoulders together properly – . Use matching thread, because it will show on the outside (I used white so you could see what I did). Sew in from the front of the blouse, out the back, and in through the front again, enclosing the edge in your thread.
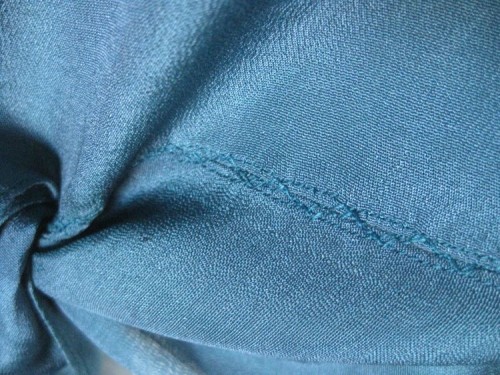
- CFStep 5: The waist tie: Carefully mark the CB & CF points of the bottom of the blouse, and the mid point of the waist tie. Pin the waist tie to the blouse body, matching the CB of the blouse & the mid point of the waist tie. Leave a 3″ gap unpinned at the CF of the blouse. Sew the waist tie to the blouse using a tiny less than 1/4″ seam allowance, or an edge to edge machine faggoting stitch (this is what I did, but it’s a bit trickier), leaving your 3″ gap at the CF. An easy way to do a cheater machine-faggoted join is the lay the two edges right next to each other, and use the stitch that looks like a zig-zag with running stitches.
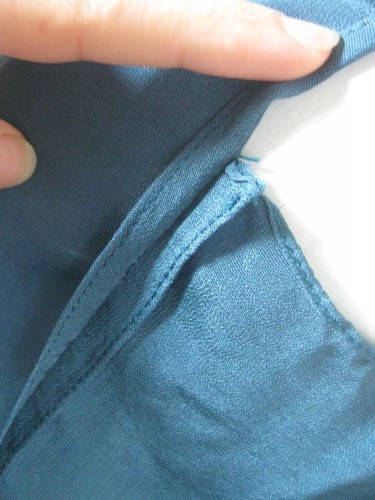
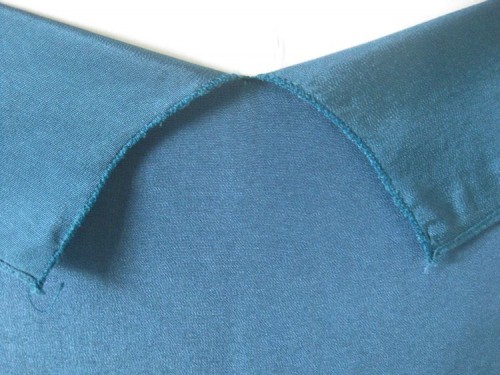
- Step 6: The divided back collar: Carefully mark the CB of the blouse, and cut a line 4″ down from the top of the collar along the centre back line. Finish the edges of the cut with a zig zag stitch with a moderate length, and the narrowest width (basically, a buttonhole zig-zag). Reinforce the bottom of the point. I know it sounds like cheating, but it actually looks quite good!
And that’s it! You are done!
I had fun making my ‘Deco Echo’ blouse – it was so fast and easy. And I had fun wearing it. I hope you have the same experience!
There are all sorts of variants that you could do to this blouse – add a divided collar in front as well as back, or instead of back. Add a button opening up the back. Play – have fun!


kimonoasobi.com).Thank you for the tutorial~ I absolutely love that you re-purposed kimono fabric for this as kimono are a major part of my life (my other blog: http://www.kimonoasobi.com).
I’ve got a large pile of kimono for fabric re-purposing – some in a really lovely light weight silk perfect for this blouse! I’ve also been meaning to make a pair of wide legged pants… Thank you for the Summer outfit inspiration!
P.S. I’ve got a blog post lined up on my kimono blog about a vintage Shufu no Tomo magazine from the early 1930’s that discusses re-purposing kimono fabric. Do you mind if I share one of these images and link to your posts?
Sure, go ahead. And thank you for asking!
This is gorgeous! I want one!
Thank you! You couldn’t give me a better compliment.
I can imagine Vionnet doing very similar things to this in the 1920s, it’s really simple but super effective.
Thank you! She’s definitely one of the inspirations, in a roundabout way via my Vionnet Dress.
Oooh, I rediscovered some cotton in my stash the other day that might work nicely with this. I think I might self face the neck edges though (because of the print). Will share if I do make it!
Oooh, yes please! Fancy it up!
I finally made it! This one is from black with white spots cotton. And nowhave plans for another one made from some silk that is languishing in my stash.
I need to organise me one of those photoshoots. You’d think with a photographer husband that would be an easy thing to achieve…
Fantastic tutorial! I can’t wait to make myself a Deco Echo top…now I just need to find some suitable fabric.
Thank you for this – I’ve got some yummy pieces of silk and would love to use some of them to make a top like this!
I did a double-take when I saw the same of one of your stitches. Sewing words slay me sometimes, because they are so precise, old-fashioned and Anglo-Saxon. Do sewing words ever change? I know that the stitch (aptly) describes how it looks like sticks, but ‘faggoted’ now seems a like word so loaded as to cause a change. Is there a fancy French word, or do you have to use ‘faggoted’ because it’s what everyone calls the stitch?
Anyhow, LOVE the top. It’s generous of you to share your secrets!
I have to say I have never, ever thought of that. Faggoting is the only word I know for the stitch. I think a faggot is also a piece of firewood. And in British English a fag is a cigarette. Fanny, on the other hand, isn’t a polite word at all. I’m such an innocent little gudgeon that I always assume the most inoffensive meaning for any word (True story – I was married before I found out that tw*t wasn’t a nicer, softer variant of twit. Robert Browning and I would have been good friends.).
Oooh, rectangular construction. My favourite! I want to make it like the top half of a peplos.
I love rectangular construction too – there is just so much you can do with such simple shapes! I did play with making it as a peplos myself, but thought that the collar added interest and broke the lines up nicely. If the fabric had a bit more drape I could have added a cowl neck and made it work that way.
What a lovely outfit. The top sounds easy to make.
I like the fabric on the trousers…trying to find some art deco looking prints for a 1920’s dress I want to make. (Not sure what prints are the most authentic but trying my best).
Thank you! I was really excited about the trouser fabric. It’s actually too deco to be authentic. There are lots of lovely books about art deco fabrics.
I had a quick question about the collar finish…would a rolled hem be acceptable too? It’s a technique I keep meaning to use but haven’t found anything to use it on yet.
A rolled hem is just a type of narrow hem, so it would work perfectly 🙂
Loved the concept, looks very elegant.