Last week:
Last week’s Doucet-does-Cubism ensemble brought a resounding affirmation of Doucet’s ability to adapt to the post-Edwardian fashion world. The only major quibbles were whether the cape and beading added or detracted from the outfit. Some of you were extremely pro cape, and thought it made the outfit. Some of you were…not. Same thing with the beading.
The Total: 9.7 out of 10!
No wonder so many of you have added it to your sewing inspiration list!
This week:
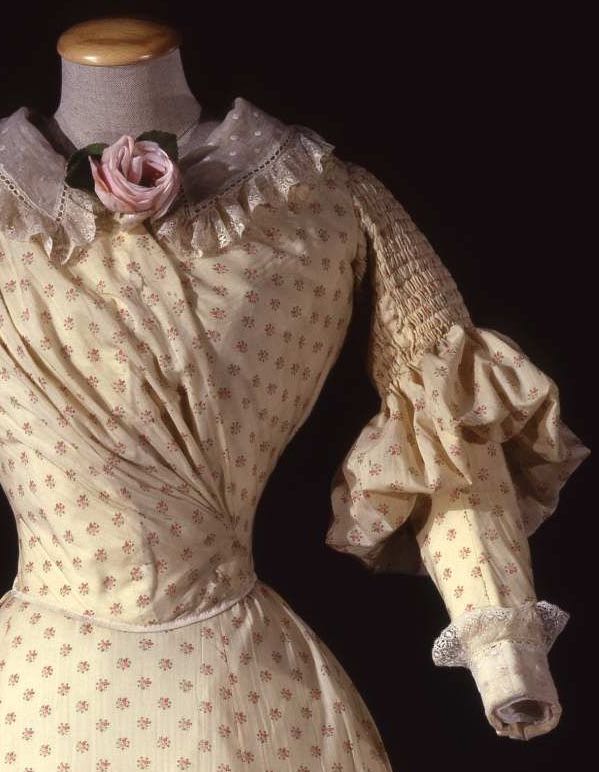
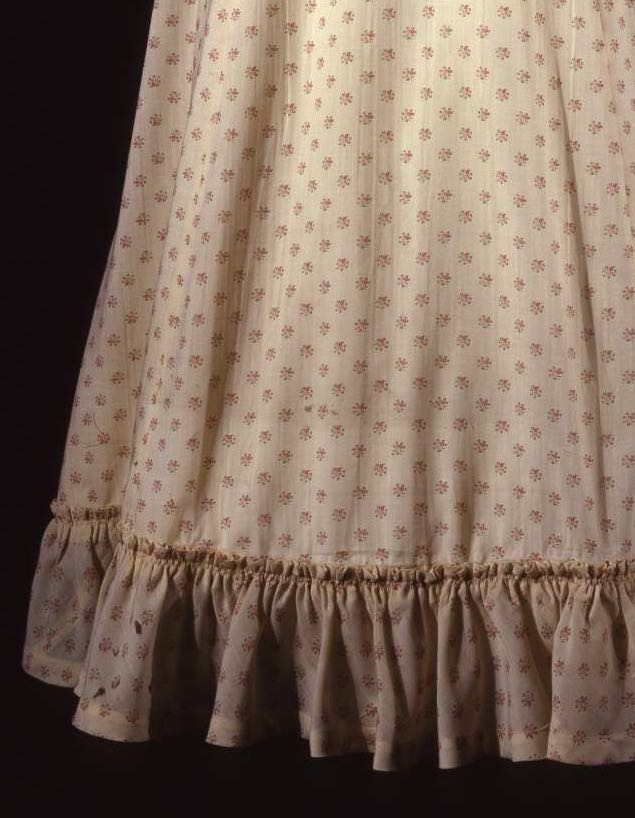
For this week’s Rate the Dress we’re going back to the 1890s, with this ca. 1893 dress in floral printed wool muslin:
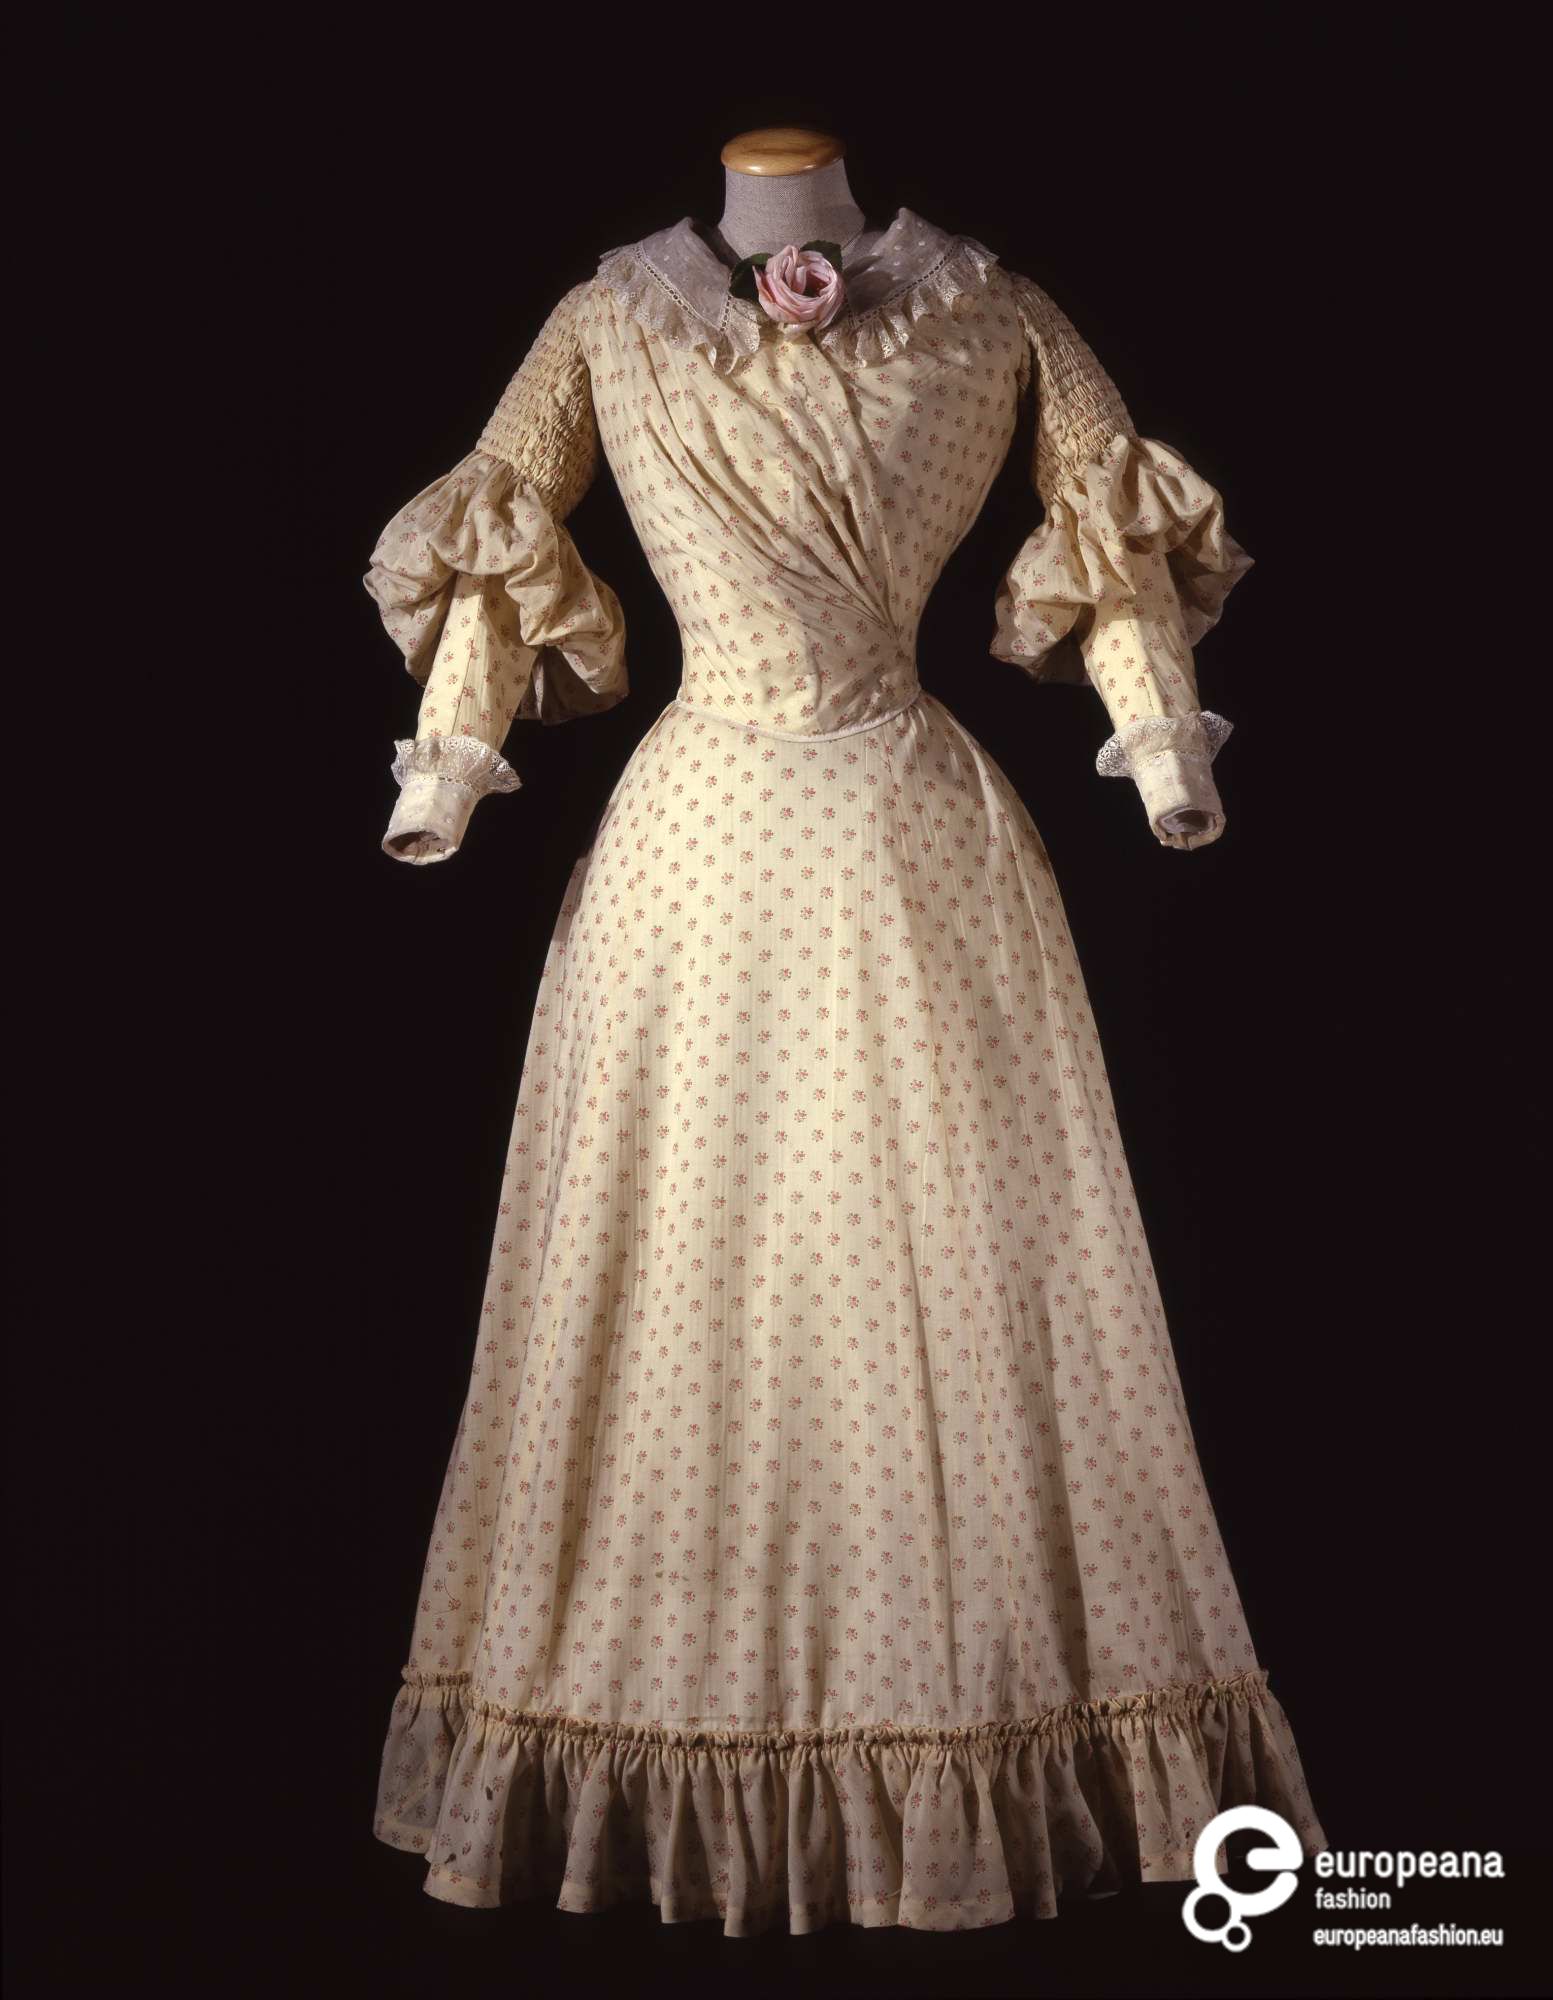
Muelle designed costumes for the Paris Opera, so it’s possible that this dress was a stage costume – though costumers also designed clothes, and major stars went to known couturiers (including last week’s Doucet, who designed for the Divine Sarah, among others) for their stage and everyday clothes.
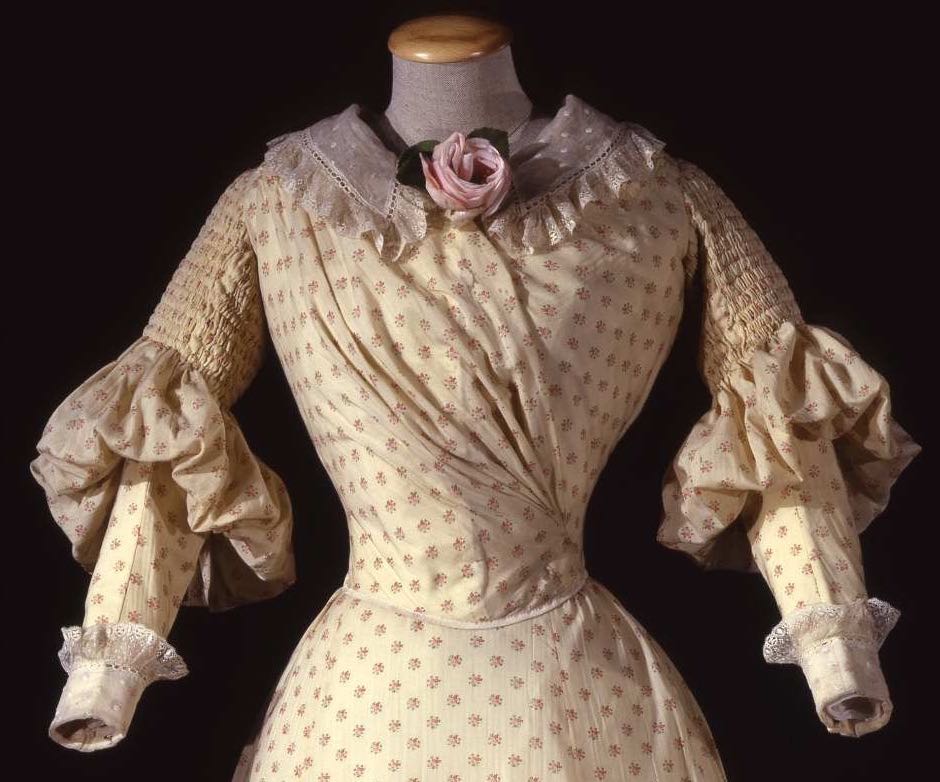
The dress, with asymmetrical draping pulled over a very fitted bodice, A-line skirt, and smocked sleeves, combines typical elements of 1890s fashion. Combined with the light floral fabric and lace cuffs and collar (and flower, which may be a museum addition), the overall effect is very feminine.
What do you think? Is this a dress for a sweet young ingenue onstage, or a diva on her day off? Or is it too boring for either?
Rate the Dress on a Scale of 1 to 10
(as usual, nothing more complicated than a .5. I also hugely appreciate it if you only do one rating, and set it on a line at the very end of your comment, so I can find it! Thanks in advance!)