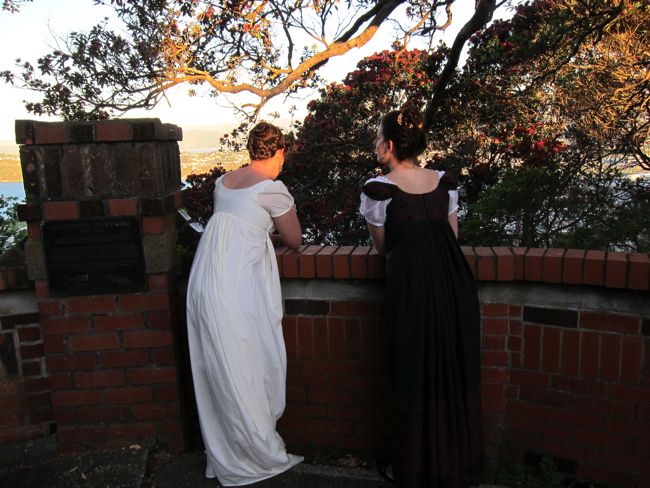
I don’t know how to knit, and sadly I don’t have enough money to purchase endless pairs of gorgeous American Duchess stockings, so having beautiful period looking stockings to go with my outfits has always seemed an unattainable dream. Instead I made do by layering coloured nylon stockings until they were thick enough to look period, or using modern silk blend socks, but I’ve always wanted to come up with a solution that was closer to a period stockings.
After a bit of trial and error, I’ve developed a pattern and method for making a reasonable facsimile of period stockings. It’s not entirely period accurate, but it gives a very plausible effect for 18th-early 20th c wear.

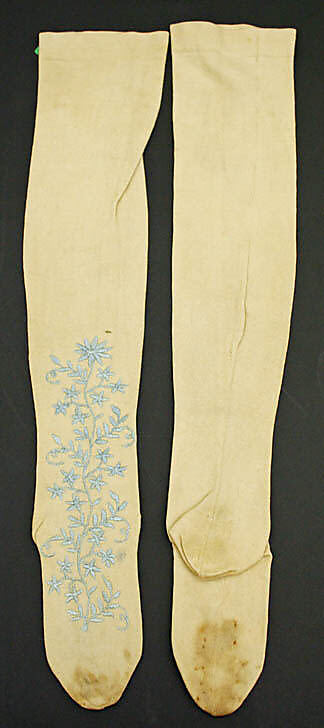
For the pattern, I was inspired by stockings like these:
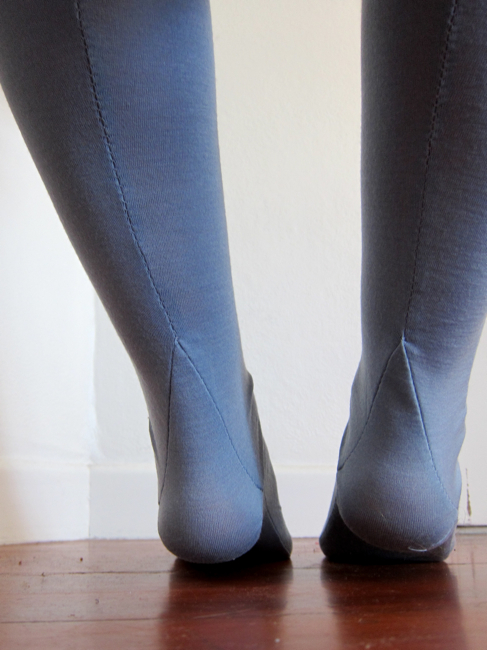
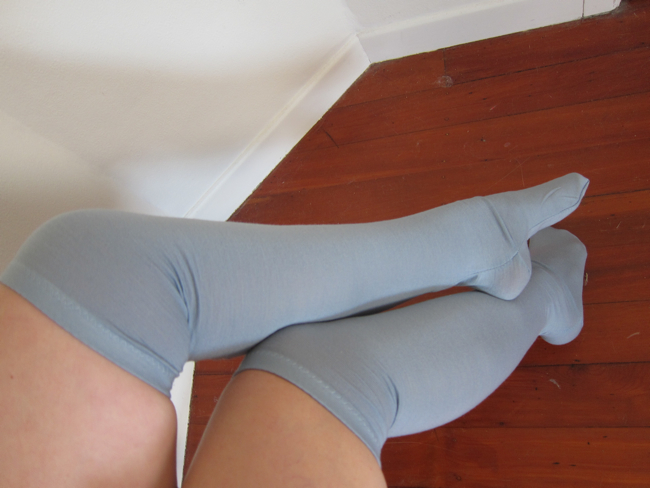
My pattern has a back seam, a pointed back heel detail, darts to shape around the heel and ankle, and seams running around the side of the feet. I chose the pointed back heel detail, rather than the seam that runs all the way down the ankle and joins to a seam under the foot shown in the examples above because I found that seam chaffed and rubbed. It should be fairly easy to adapt this pattern to the ankle/foot seam if desired.
The pattern is named ‘Rosalie’ after Jean-Honore Fragonard‘s daughter (and favourite model), because if there is any artist who knew a thing about a beautifully turned ankle and a nice pair of stockings, it’s Fragonard!

You will need:
- A sewing machine or overlocker/serger (plus scissors, pins, and other basic sewing notions)
- 110cm of fine wool, silk, cotton or rayon knit, with good widthwise stretch (it should stretch from 10cm to at least 13cm) and good recovery (the ability to snap back without loosing its shape). It does not need to have lengthwise stretch, though it doesn’t hurt either. If your fabric does not have enough stretch, the stockings will not fit. If it does not have good recovery, your stockings will stretch out of shape and sag down your legs.
- Thread to match
- 1 metre of 1″ wide elastic (optional)
- The printed out pattern
- Tape
The Pattern:
The Dreamstress ‘Rosalie’ stockings thedreamstress.com
Download the pattern. It will print on two A4/8.5″x 11″ pages. Be sure to select ‘Do Not Scale’ when your print, to keep the pattern from distorting.
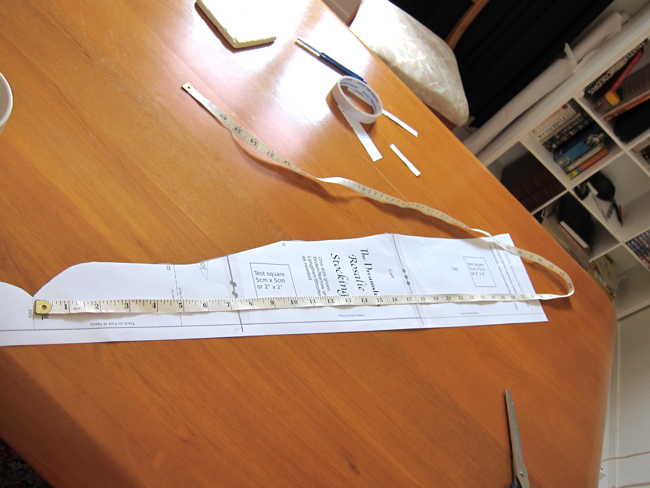
Check the Test Square to make sure it measures 2″x 2″ or 5cm x 5cm.
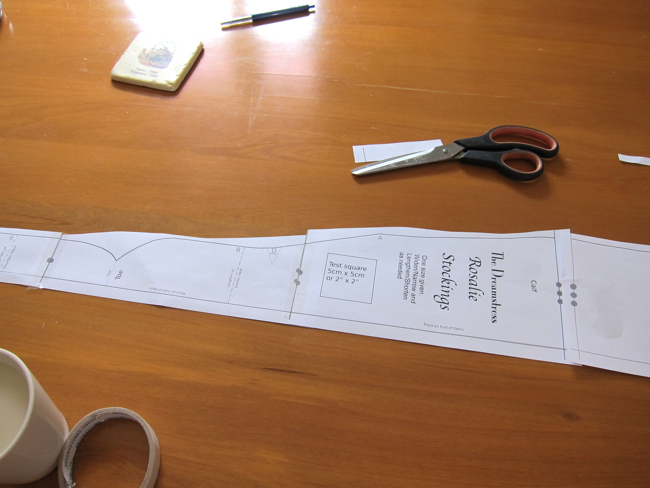
Your pattern will look like this, with four pieces on two pages:

First, you need to join your pieces. Cut the four pieces apart (roughly is fine):
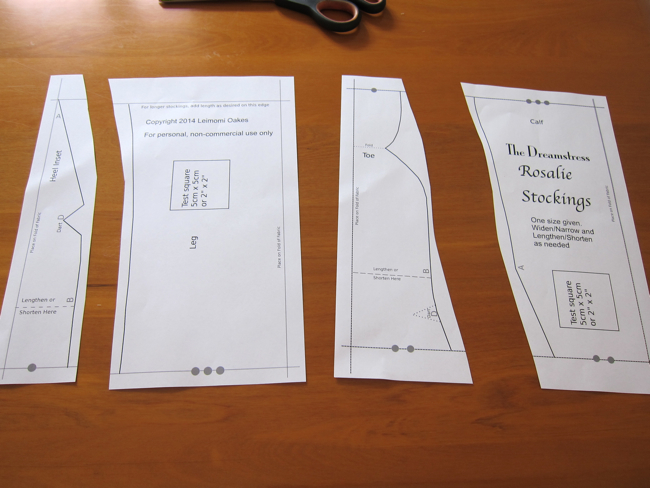
Note the dots on the top end bottom edges of the pieces. You’ll be joining the single dot to the single, double to double, triple to triple, like so, to make one long pattern piece:
Tape your pattern together.
Sizing
Now, check the length and fit.
The pattern is sized for my size 39/8.5 (9.5″ / 24cm long) feet. The sizing has a bit of give because of the stretch of the fabric, but if your feet are more than a size smaller or larger you’ll want to resize.
Lengthen or shorten the foot part of the pattern the same amount along BOTH of the lengthen or shorten lines marked B.
Now, check the length along the leg. The pattern is 27.5″ long from the tip of the toe to the top of the pattern – this puts it just above my knee, finished.
If you have a longer or shorter toe-to-knee measure (measured along the top of the foot and up the leg) or want a longer or shorter stocking, lengthen or shorted at the top end, or along the join line marked with triple dots.
I have just-slimmer-than-average feet and skinny calves, but I have tried this pattern on a range of women with different feet and calve shapes, and they have fit quite well (yay, stretch!). However, if you have very wide feet or calves you may want to make your stockings a little wider – that’s very easy, just add to the centre fold of the pattern.
Cutting & Marking
You can either cut each stocking individually, or cut both at once by folding two layers of fabric at once. If you do two layers, make sure that they are both folded at exactly the same point, so you don’t end up with one slightly narrower stocking!
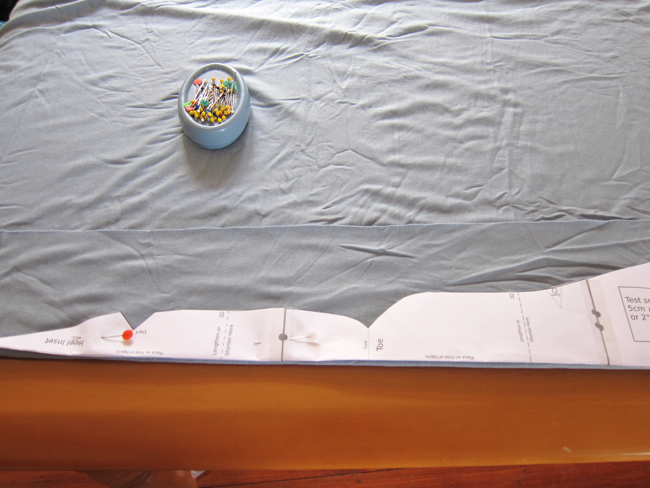
Cut out your fabric:
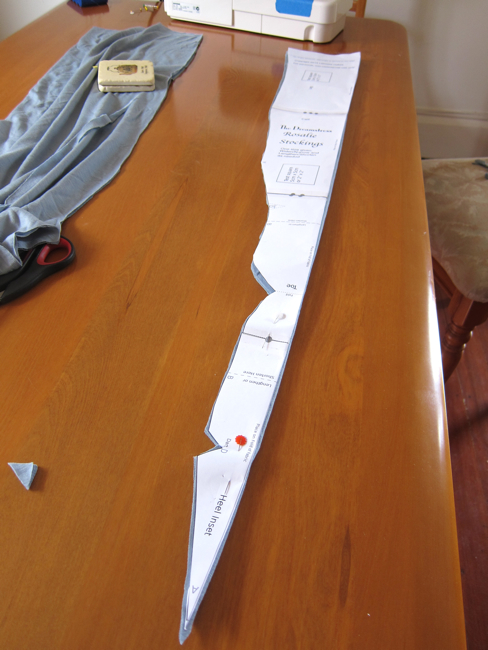
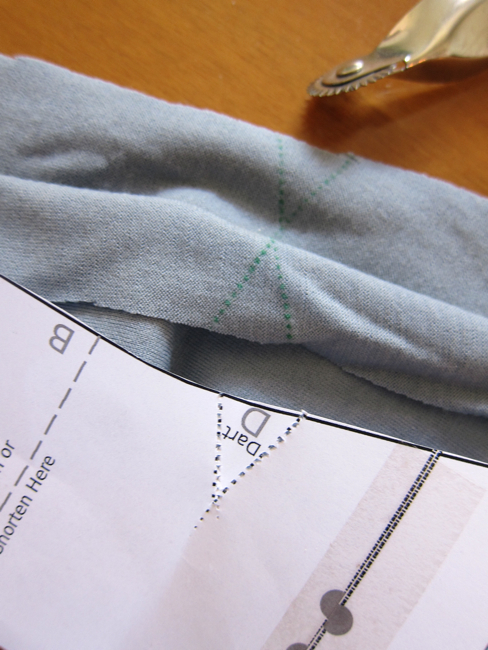
And mark the upper darts D (I used transfer paper and a transfer roller):
Sewing:
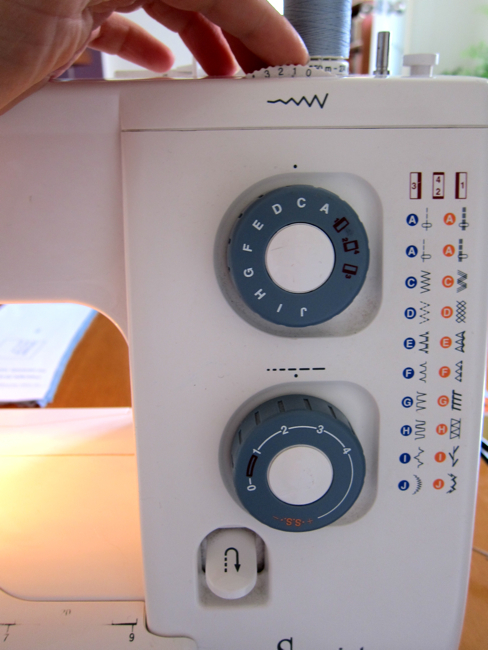
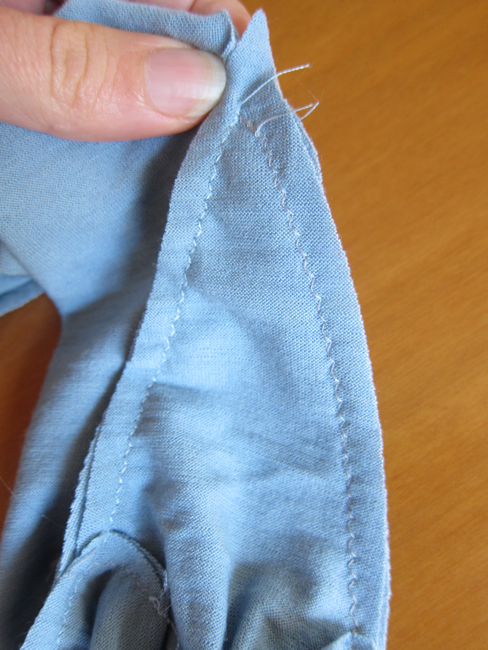
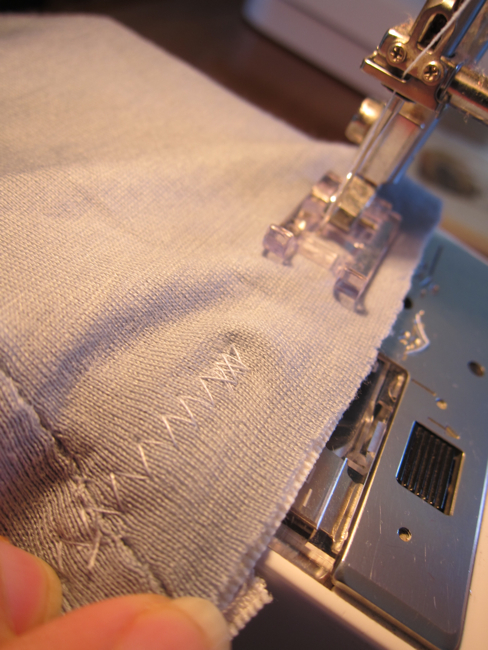
The entire pattern is sewn with very narrow 1/4″ / 6mm seam allowances, so that you don’t end up with big bulky seams running up your legs. This also means that the pattern is ideal for sewing on an overlocker/serger, though I’ll demonstrate it on a sewing machine.
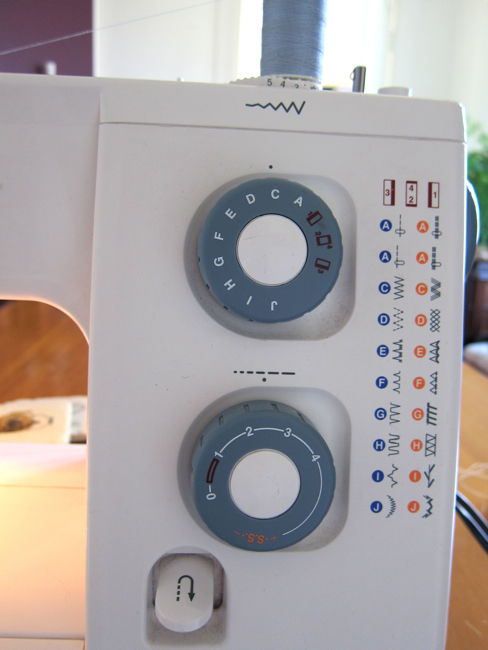
Set your sewing machine to a knit stitch: a zig-zag stitch with a normal stitch length (2.5ish on most machines), and a very low stitch height (1 to 1.5 on most machines)
First, we’re sewing four darts – the ones you just marked, and the ones cut as notches in the pattern. They are all marked with D
Sew the marked ones:
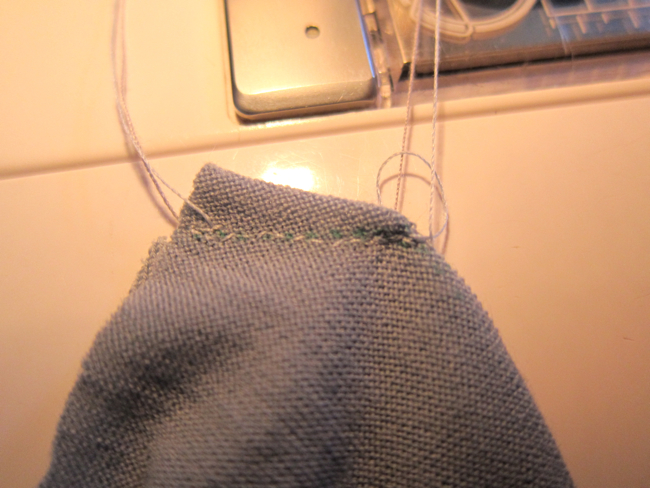
There they are sewn:

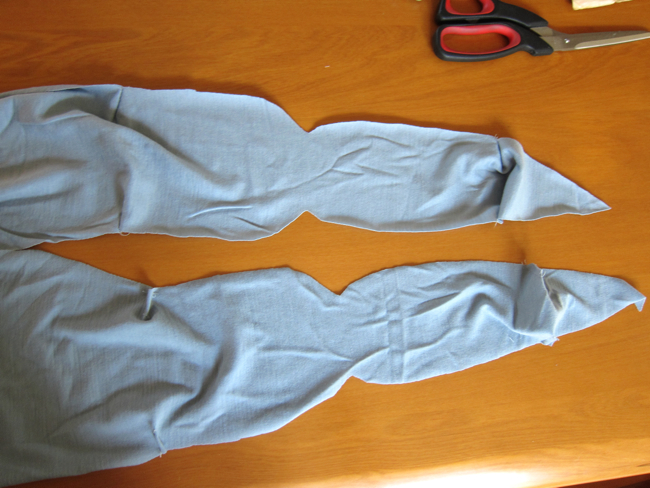
Next we’re doing the notches near the tip of the stockings. Fold up the tip across the narrow cut-in, and sew one side, and then the other for both stockings, using the 6mm/1/4″ seam allowance.
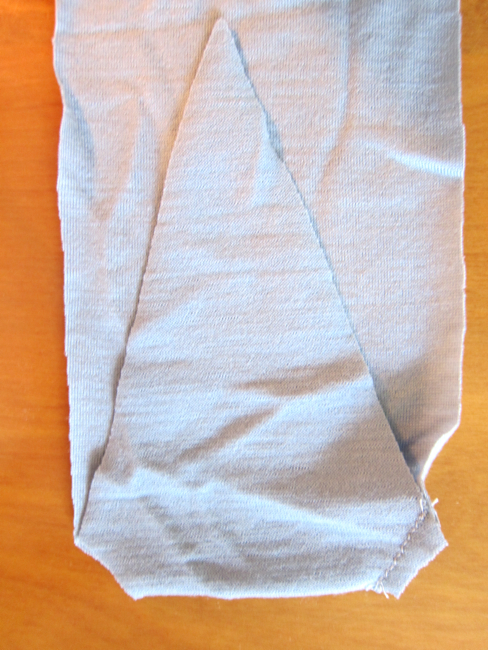
Here are all 8 darts, 4 of each kind, sewn:
Now you are joining one side of the foot. Right sides together, fold your stockings along the narrow cut in that is marked as the Toe fold on the pattern. Pin, easing as needed, so that the lower set of darts D matches the upper set of darts D:

Press the darts up, away from the toe and toward the heel point, as you pin and sew.
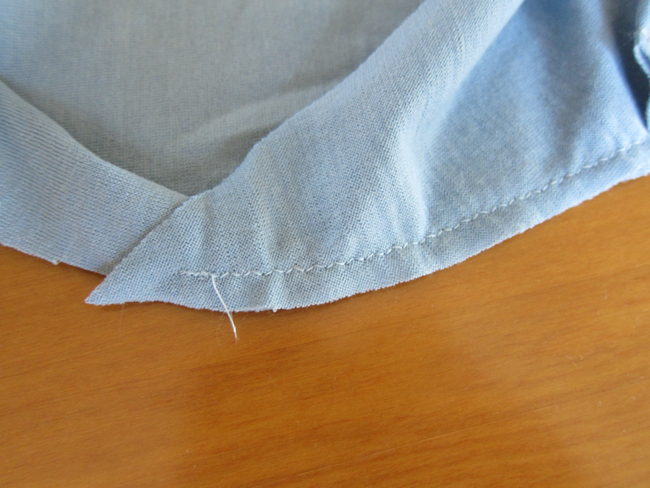
Starting at the toe fold, sew up towards the heel point, stopping 1/2″ / 12mm from the heel point:
Sew one side of both stockings like this:
Now, pin the other side as you did the first, being careful not to catch any extra fabric in the pinning at the top of the heel point:
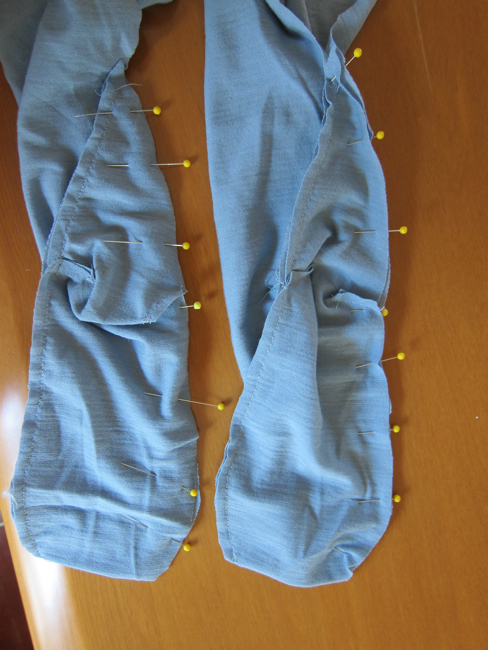
Sew as you did the first side:
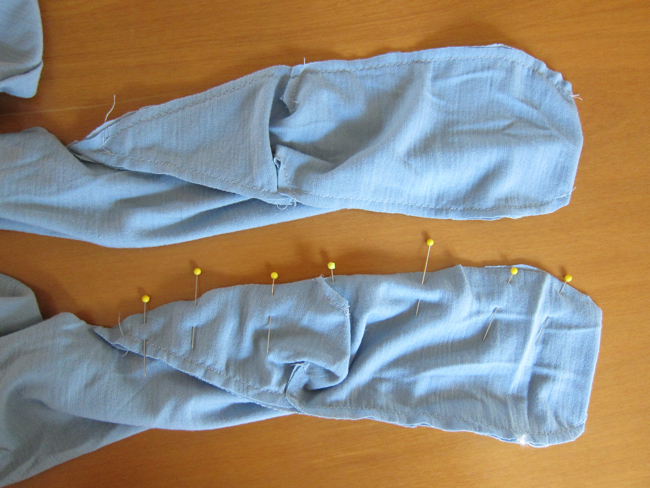
Make sure to stop right as you meet the other stitching at the top of the heel point:
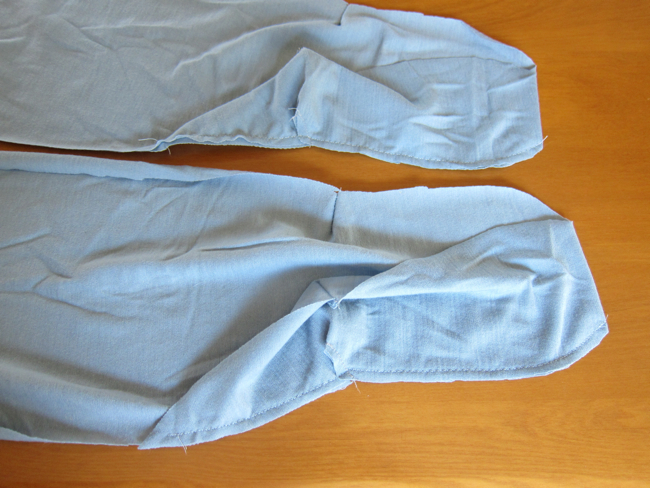
Now, pin along the centre back seam of the stockings, and sew from top (knee) to bottom (heel point), stopping just as you meet the stitching at the heel point, and backstitching firmly:

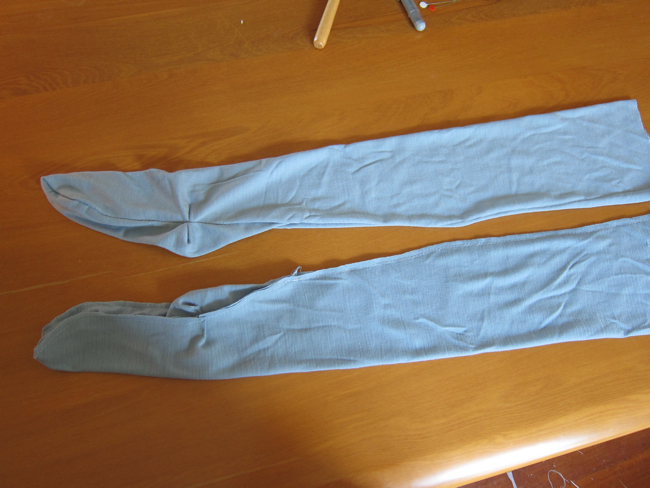
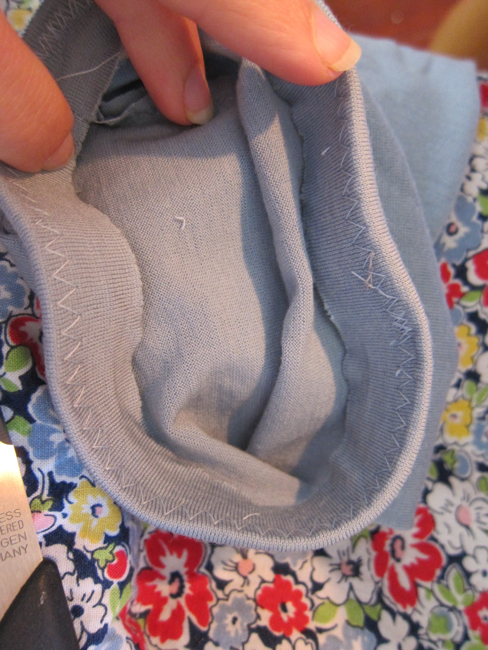
And there are your assembled stockings:
There are a couple of options for finishing the tops of your stockings.
You can leave them raw, as they are unlikely to unravel. You can simply turn them down and sew a knit-hem with a double needle or a wide zig-zag stitch. These options work well if you are using a suspender/garter system to hold up your stockings, or if you are holding them up with period wrapped garters.
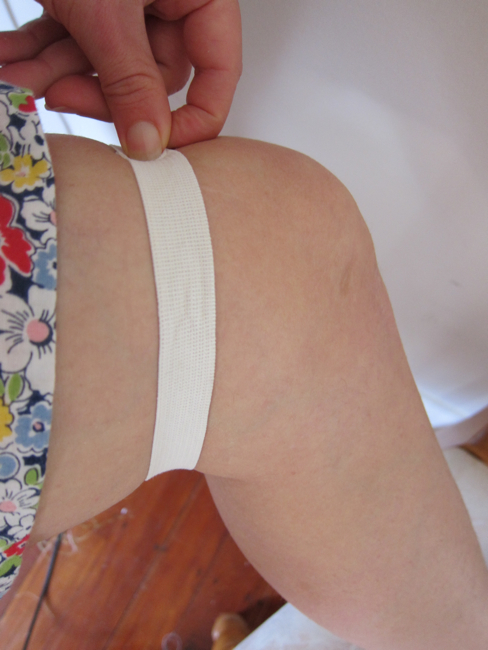
You can also finish the top with a piece of elastic, so they stay up without any extra bits. This option works well if your stockings are ending just above or below the knee.
To finish your tops with elastic, wrap a piece of elastic around your leg just above the knee (or below, if that is your stocking length). Make the elastic snug, but not so tight as to cause discomfort:
Give yourself a bit of an overlap, and cut two pieces this length. With the stockings right side out, pin the pieces inside the stockings along the top edge, overlapping the ends:
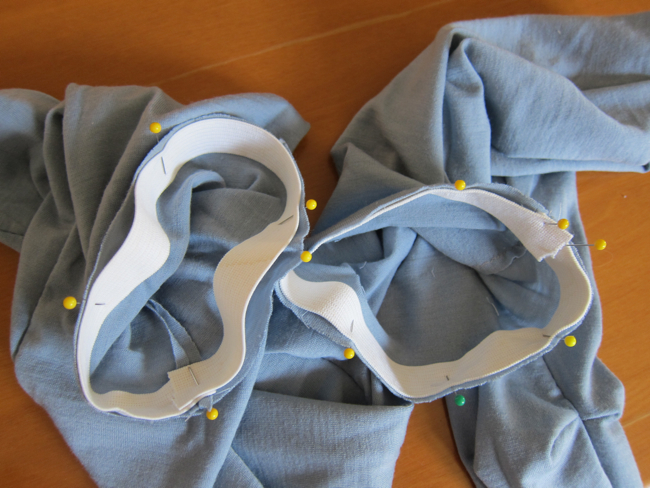
Set your sewing machine to a high but fairly narrow zig-zag stitch:
Sewing near the bottom edge of the elastic, zig-zag the elastic to the stockings:
Here is what it will look like on the inside:

Now, fold the elastic down into the stocking, like so:
Sew again along the new bottom of the elastic.
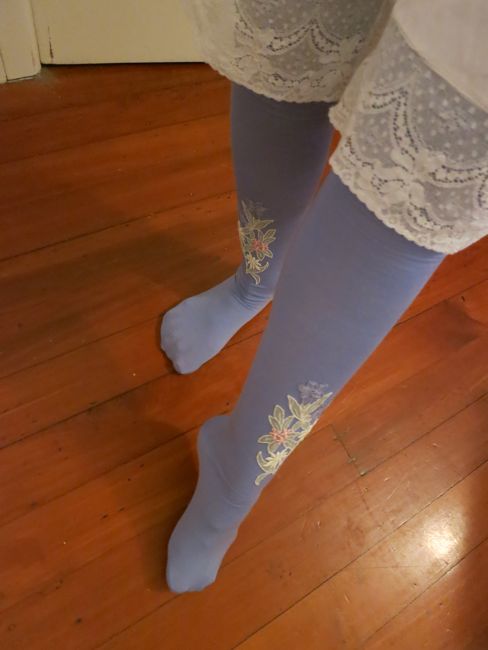
And hurrah, your stockings are done!
You can leave them as they are, or decorate them with lace or applique, as I did the Nana stockings:
Have fun! Make lots!