One of my favourite sewing techniques is flat lining.
Flat lining is used extensively in historical (particularly 19th century) sewing and couture sewing, but it’s a technique that is not frequently taught or used in modern sewing books or patterns, which is a pity, because it’s awesome, and opens up many possibilities for design techniques and fabric use. I used it to make thin, flimsy fabrics strong enough to make corsets and jackets out of, and to make bodices that shape and hide squish without adding bulk and weight.
Though the terms are sometimes used interchangeably, flat lining is not quite the same thing as interlining. These days (according to Shaeffer’s Sewing for the Apparel Industry) interlining is used to mean the same thing to as interfacing, whereas flat lining is an underlining, and is never fused. According to the Singer Sewing Book interlining is meant to add warmth and bulk, while flat lining or interfacings adds strength and support, but bulk and warmth should be avoided.
When picking a flat lining fabric, pick a fabric that, when it is combined with your outer fabric, will have all the qualities that you want the finished piece to have. The best flat lining fabrics are very strong for their weight/bulk, and very stable.
If you want a to add strength to a thin silk for a summer wedding dress, while keeping it light and cool, flat line with silk organza. If you need to stabilise a ‘squidgy’ and moveable piece of fabric (one with a high sheer rate) pick a very stable, but thin fabric. Coutil can be used as the flat lining to an attractive but not-strong-enough-for-corsetmaking fashion fabric, so that you can make a corset out of the fashion fabric. If your outer fabric is strong and stable on its own, but you still want a layer of fabric between your outer and you without a traditional lining, a soft, fine muslin/calico is ideal
Victorian bodices, from Worth creations to those made by humble local dresmakers, are almost always flat lined. One of the most common flat-lining materials seen in Victorian bodices is a thin crisp-but-soft polished cotton, often in an unbleached brown:
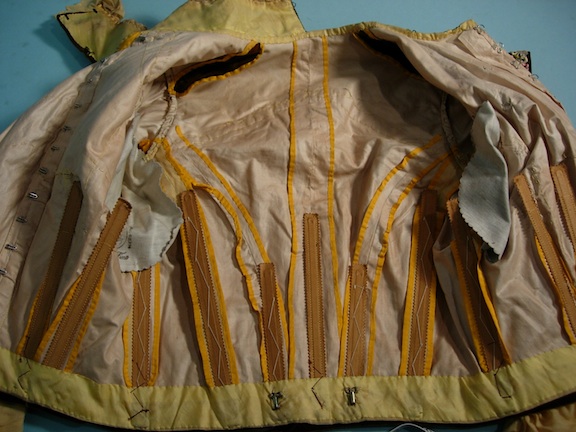
Bodice of Yellow Silk Crepe and Brown Velvet with Embroidery, 1897-8, Antique Textile
There are also many examples flat lined in what is essentially a fine, soft cotton muslin, and many examples flat-lined in silk – usually a thin taffeta.
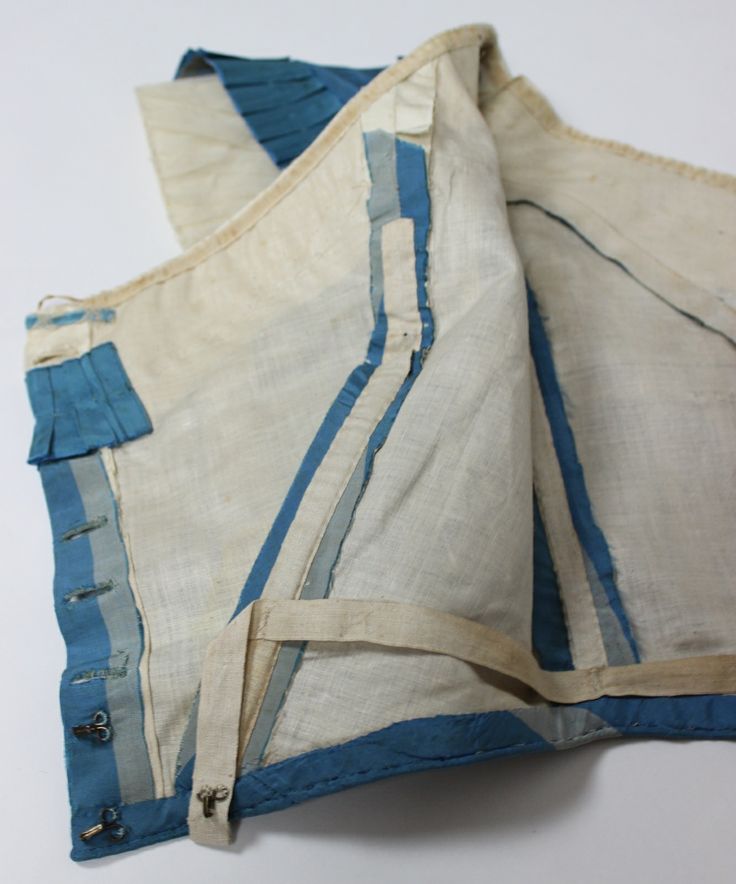
Dress of French Blue with Wide Gray Stripes Silk Taffeta with Two Bodices C 1860, via eBay
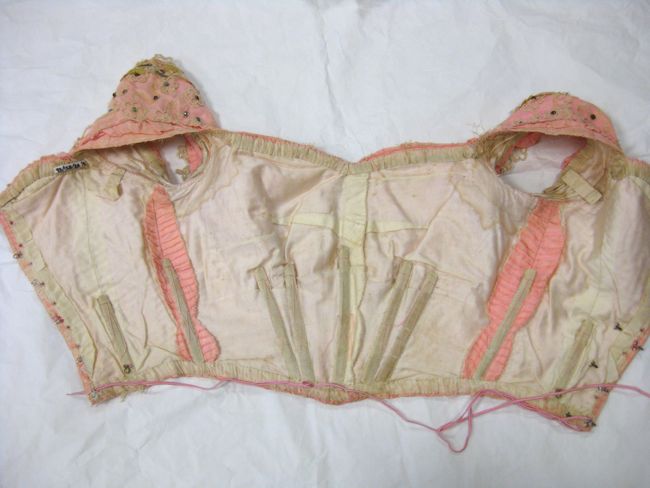
Emily’s dress (bodice detail), silk with cotton lining, 1903, Te Manawa Arts & Cultural Centre
For my example of how to flat-line, I’ll be flat lining the bodice of Rowena’s 1840s evening gown. Because Rowena needed to wear the bodice without a corset, I used a very strong, very stiff flat lining of cotton, to add as much shape and support as possible to the silk of the gown.
So how do you flat line? It’s really simple. Basically you are just sewing your outer fashion fabric to your flat lining pieces, so that they become one piece of fabric.
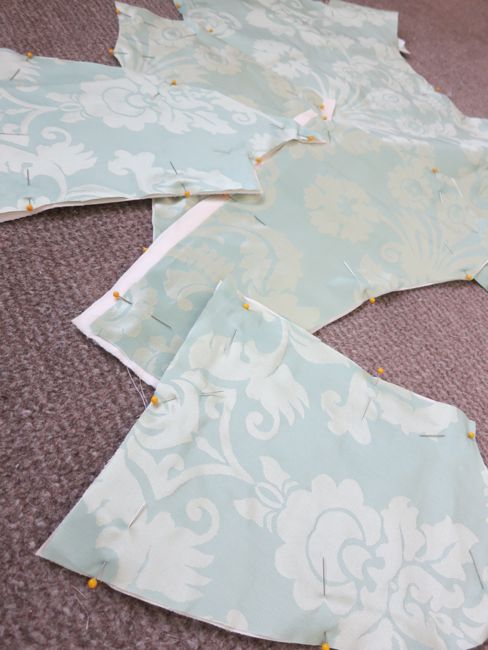
First, cut out your flat lining pieces the same as your outer pieces.

Pin each piece of your flat lining to the corresponding piece of your fashion fabric, WRONG sides together:
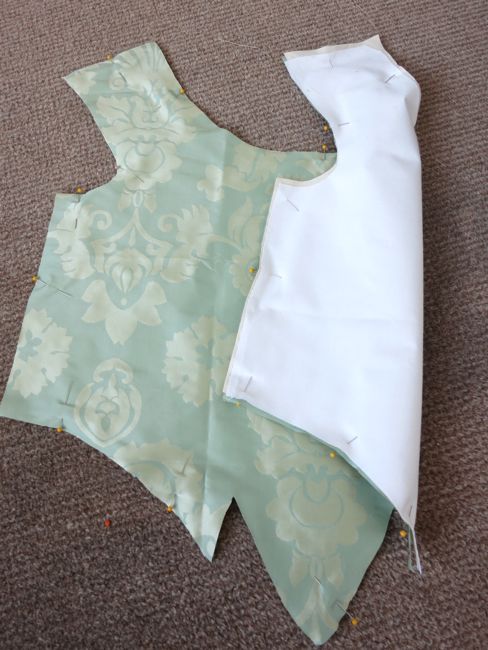
You want to smooth out your pieces and make sure that they fit exactly, with no possible folds or bubbles. Sometimes I iron the pieces and pin as I iron to ensure that they match perfectly.
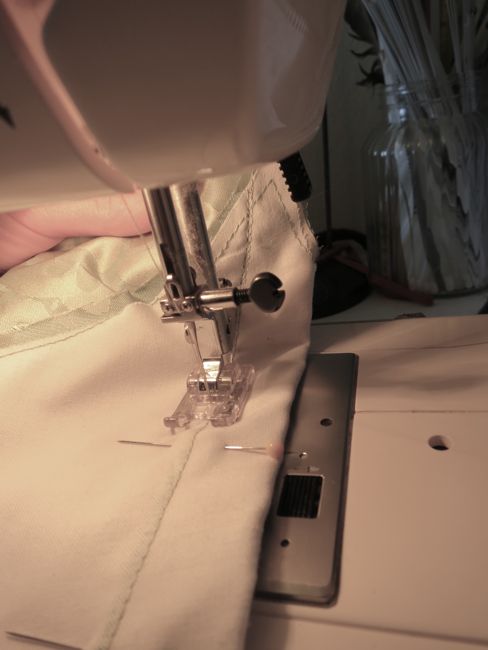
Once you are pinned, sew around all of the outsides of your pinned together flat lining and pattern pieces. I use a slightly-longer-than-normal stitch (3 rather than 2.2-2.5), and a 1cm seam allowance.
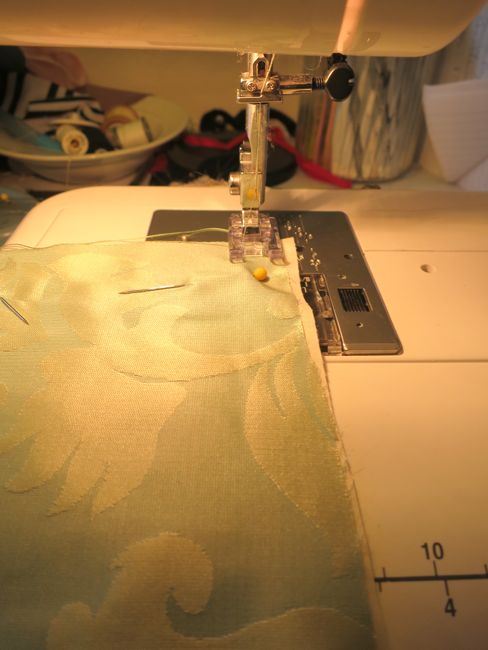
When I come to corners, I just sink my needle, lift the foot, turn, put the foot down again and keep sewing.
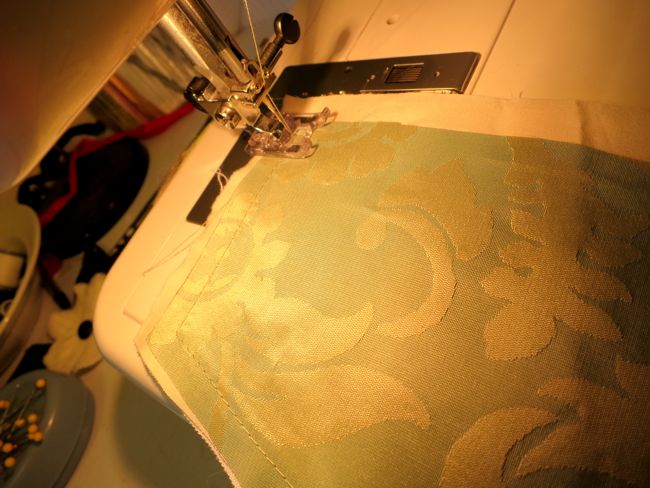
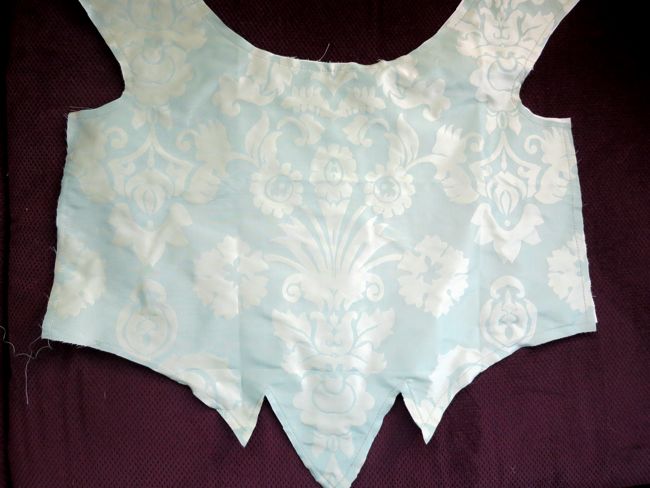
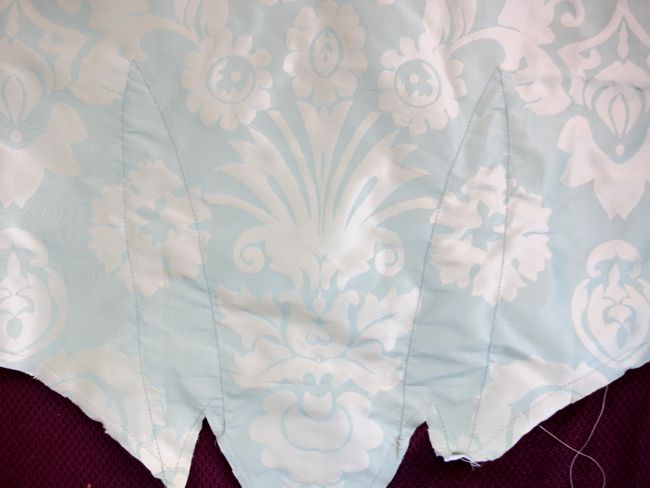
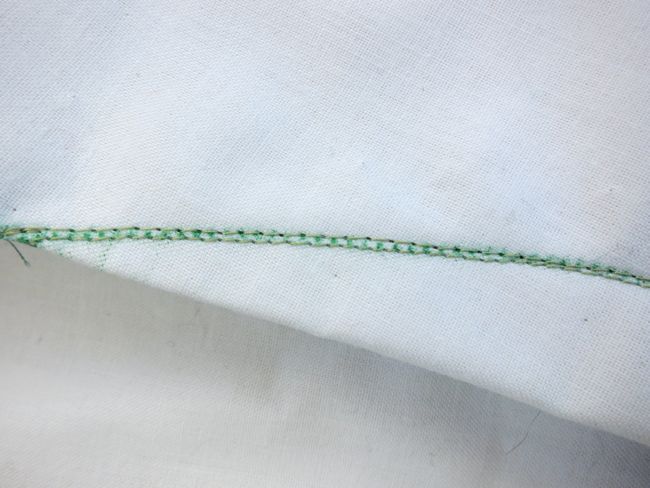
Here is my front bodice piece, with the silk now firmly sewed to the flat-lining.
Of course, my bodice front has darts in it. How do I manage to catch both layers of fabric when I sew those in?
First, mark your dart placement. I’ve used green transfer paper and and a rolling maker to mark it into my flat-lining:

Then, using your slight-longer-than-normal stitch length, sew a line of stitching just inside the line of your dart, through both layers of fabric. At the top point, sink your needle, lift your foot, and pivot the fabric, so that you can sew back down the other side of the dart.
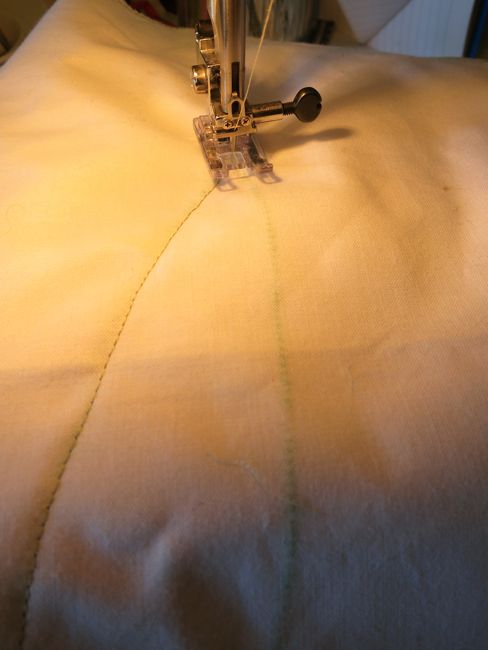
You can see clearly in this photo how the line of my stitch is just inside the marked line of the dart:
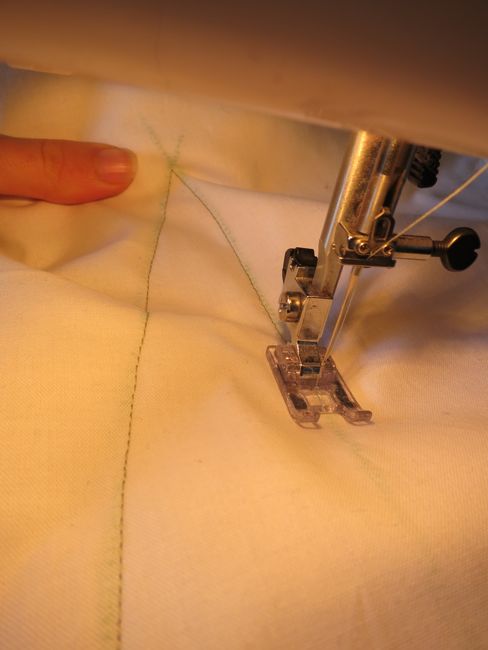
And here is what the sewn-in lines of stitching that mark the dart and hold the two layers of fabric together look like from the outside:
And the inside:

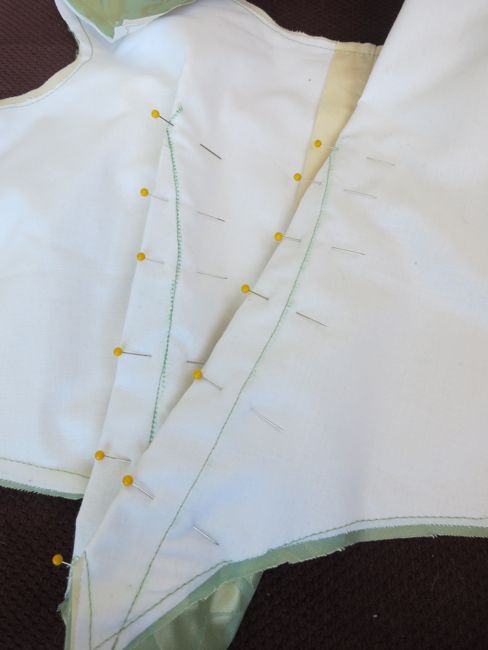
Now, carefully matching both sides of the dart, pin your dart together:
Using a normal (2.2-2.5) stitch length, stitch your dart, stitching directly on to your marked-on dart line, which will be just to the outside of the line you sewed around the dart.
Here are the two lines of stitching – the lower one is the initial stitching line around the outline of the dart, the upper one is the actual stitching line that holds the dart together.
And here is what the dart looks like from the outside. Both layers of fabric caught perfectly, no lines of stitching visible!

And here are the darts from the inside:
The rest of the flat-lined pieces were then stitched together, just as if they were only the outer piece of fabric.
With modern sewing, the raw edges visible on the inside can be finished in any way you want: hong-kong seams, overlocking, zig-zag stitching, pinking, etc. In 19th century sewing, I’ve seen examples of hong-kong seams (though I’m sure they weren’t called that in-period!), pinked seams, seams that were left raw, and, most frequently, seams neatened with hand-stitching.
Emily’s dress (bodice detail of hand-stitched seam neatening), 1903, Te Manawa Arts & Cultural Centre
And here is the finished project:

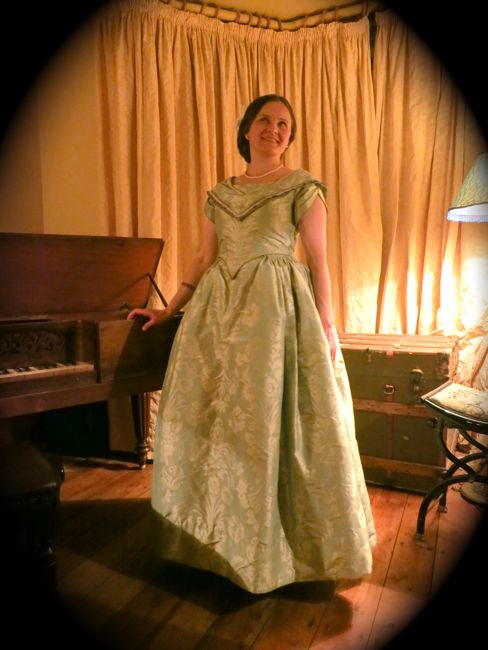
It’s not the same as wearing a bodice over a corset, but the flat lining does help to add support and structure. If I were making a more period-accurate 1840s bodice, I’d still use a flat lining, but I’d use a much lighter, softer flat lining, as the corset would provide a shape for it to sit over.
I hope that was understandable, and useful!