Remember how I told you that I had been sewing like mad, but had been too busy to take photos and show you?
Yep, this is one of the many things I’ve been sewing.
A few weeks ago I had two sewing projects to tackle. Make something Vionnet inspired to wear to teach the Vionnet Dress class at Made Marion, and make something inspired by an old family photo (or two old family photos, to be precise) for the Sew Weekly family inspiration challenge.
The Vionnet was fairly easy (pick a piece of kimono fabric I liked, go from there) and I had my favourite family photos picked out.
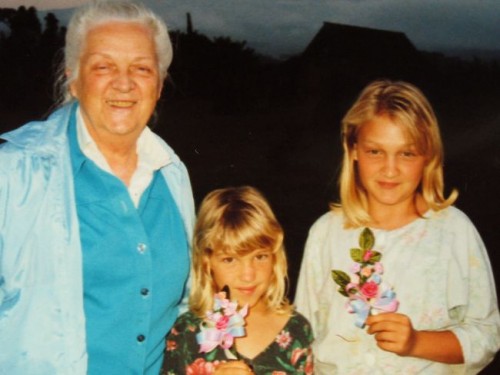
You may remember this photo from this post:
And if you have been reading this blog for a long, long, time, this one:
I love the picture of Grandma, but wasn’t sure how to interpret it as a garment. The wedding picture particularly appealed for the bride and the sophisticated loosely wrapped and draped cocoon shape of her early 20s dress with its hip bow. Using that shape as an inspiration would be easy. And I love a good hip bow.
So I went looking through my stash for suitable fabrics for the family inspiration challenge, and for another length of kimono fabric to make a new Vionnet dress for me. I found a roll of gorgeous vintage kimono crepe in luscious lilac pink, with two resist dyed bouquets of flowers along the length.
Everything about this length immediately reminded me of Grandma. She loved that shade of pink, and roses, and taught me how to make corsages of ribbon roses which looked like the bouquets on the kimono fabric. She also spent time in Japan in the 1960s, learning how to do ikebana (Japanese flower arranging).
And kimono fabric is perfect for making early 20s clothes! I could kill two and a half birds with one stone, make a Vionnet dress that referenced the wedding picture and gave a nod to Grandma.
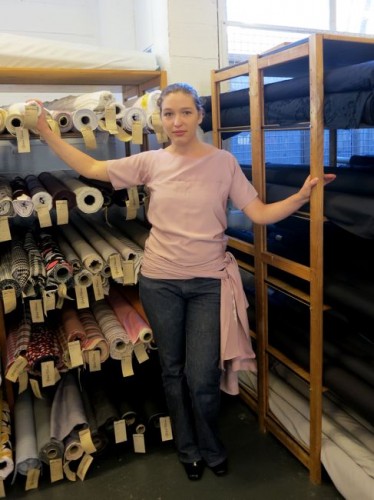
To mix things up a little with my Vionnet ‘Chiton’ pattern, I decided to use the full width of kimono fabric (rather than cutting it into narrow panel), and to omit the draping from the top panels, and to do two drapes on on each side of the hip panels. I made the drapes very long, so I could wrap them and tie them around my hips to reference the draping and blouson silhouette of my inspiration. And that fabulous hip bow.
The top went together super quickly — it’s just a bunch of rectangles joined with machine faggoting, with the ends finished with rolled hems and the neckline with buttonhole stitching.
I finished the inside edges with french seams, and it was done! I did have a little moment where I hated it when it was finished, but by the next day I had gotten over it and liked it again (whew!)
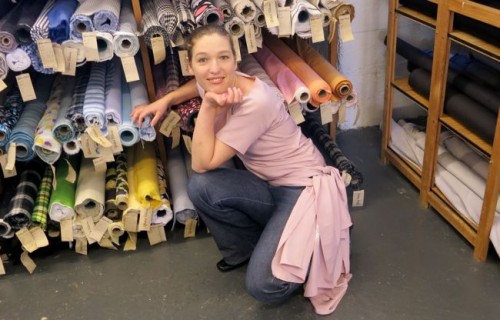
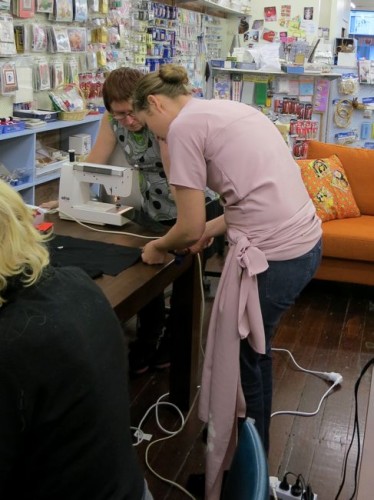
Very appropriately I was actually teaching a course on making the Vionnet Chiton dress the day after I finished this top, so I wore it for that, and got my students to take pictures of me in it during a naughty lunchtime trip to the fabric store (mmmm…fabric!) and while I was teaching.
Other than the hip-bows getting caught under the wheels of the chairs as I sewed, the top was surprisingly comfortable and practical to wear. I bounced around and waved my arms and cut fabric and sewed fabric and ironed and tied and untied the top to use it as a demonstration piece, and it all worked very well. I think I’m rather starting to love it.
Unfortunately, I won’t be wearing it much until the weather warms up again. The synthetic is just too chilly for winter in Wellington. 🙁
I did want to show you photos with the hip-panels untied and tied in different ways, but I put it on again to take those photos, picked up a cup of tea, tripped over the cat, and splashed tea all over myself.
So the top got bundled off and into the sink to rinse the tea out before it could stain and is was draped over the shower rod, dripping faintly pink water all over the floor and smelling terribly (the dyes used on vintage kimono are seldom waterfast, and often reek of chemicals) when I wrote this post.
Boo.
But I’ll try to get photos of it, and do a post with detailed images of the fabric and construction tomorrow, ‘kay?
Just the Facts, Ma’am:
Fabric: A length of vintage heavy synthetic crepe kimono fabric
Pattern: Self made very roughly based on Vionnet’s Chiton dress from 1920.
Year: 2012 with a nod to to the early 20s
Notions: None
Time to complete: 2 hours
First worn: To teach a class on making a replica of the Vionnet Chiton dress
Wear again? Surprisingly, yes. My first reaction was that the colour was terrible on me, and the top too wacky and costume-y, but I rather enjoy it.
Total price: $15. I had a moment of madness when I bought the kimono fabric and paid more than I usually would.




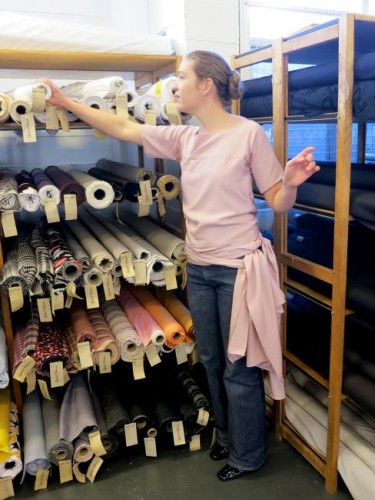
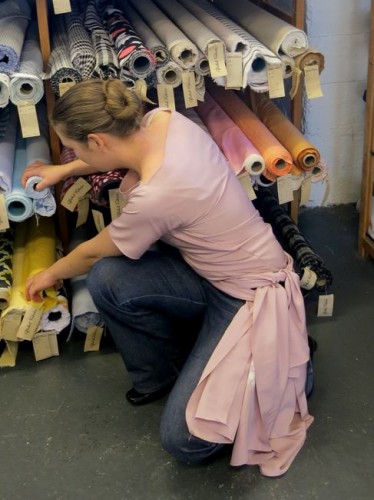
Hip bow, hippo, Ha. I didn’t get that until halfway through the post.
Did you realize it’s also just about the same shade as that flash of pink you see when a hippopotamus yawns?
Haha! I’m glad someone yawns! And I actually did think it was hippo pink too. Quite muted and grey-y.
I love any time you make clothes you can wear yourself! You’ll be a walking advertisement for your classes.
Glad you are enjoying these. It’s fun to be sewing for me (thought not as fun as pure historical) and walking advertisement is exactly what I try for!
I love this top! And even though I try to avoid anything too hippy and too baggy and what else for me, I’m head over heels in love with this one – in the proper fabric and with some proper proportioning, I’m pretty sure it would work for me. Am I deceiving myself?
Oh, and the colour’s not awful on you. It is, perhaps, unusual, but in a good way. It’s toned down and makes this pretty fancy top look quite casual on you. I like that effect.
Oh, thank you! I generally avoid hippy and baggy too, but this top has a lot of ways to wrap it which makes it flattering to multiple shapes. I’ll be posting pictures of it unwrapped soon, which should give you an idea. And it’s a quick-sew, so if you make it and it doesn’t work, it’s not too big of an investment.
I like it! It looks fun, and I love that it can be wrapped in multiple ways, so you get several looks in one.
Most of all, I love how your grandma inspired it.