Latest Posts

The Luna Moth takes flight!

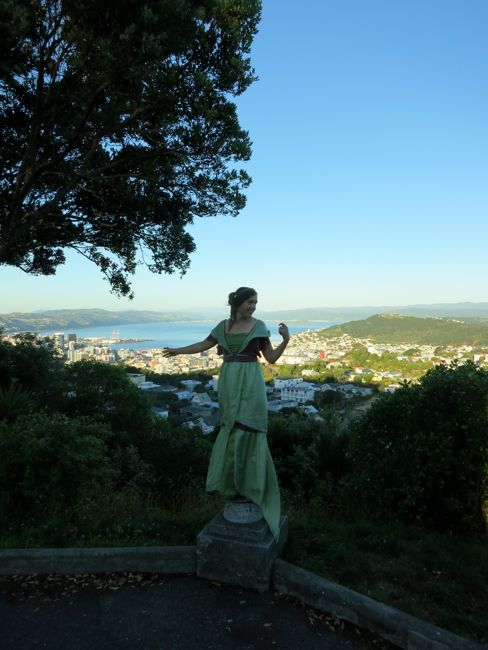
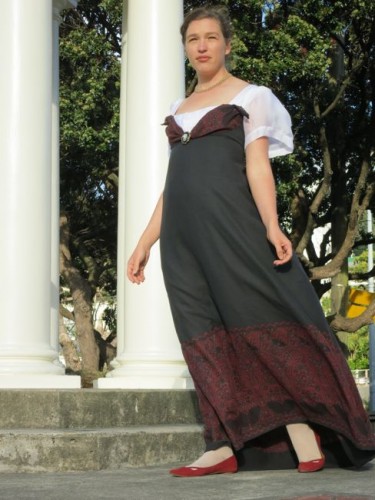
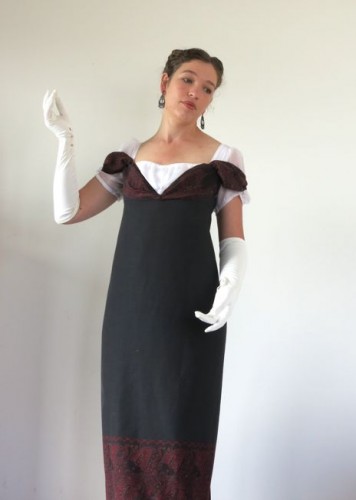
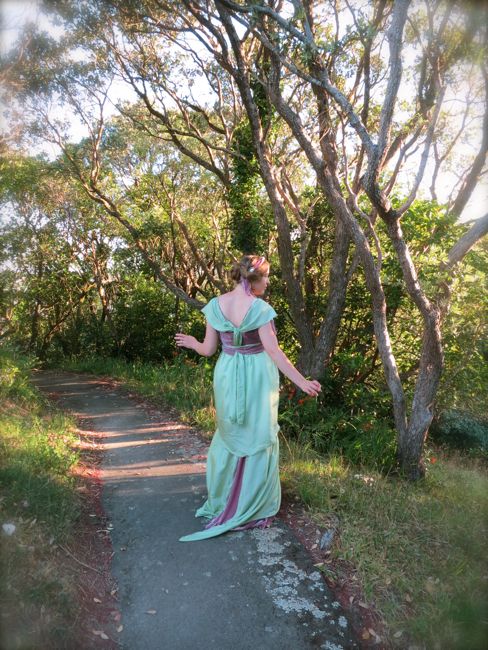
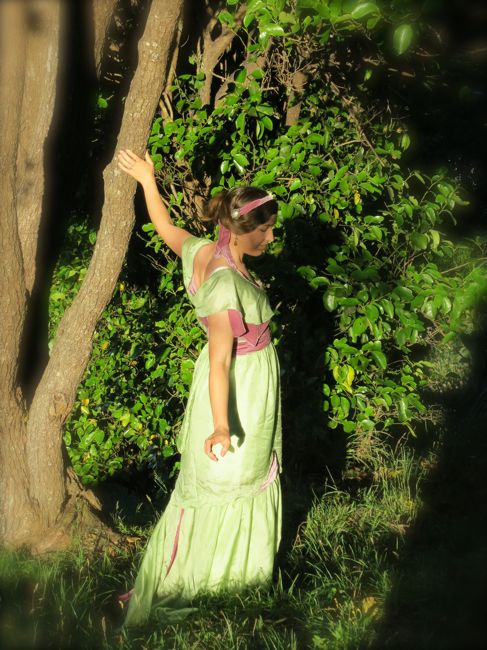
Finally, after all these years, the Luna Moth frock is done!

1910 Luna Moth frock

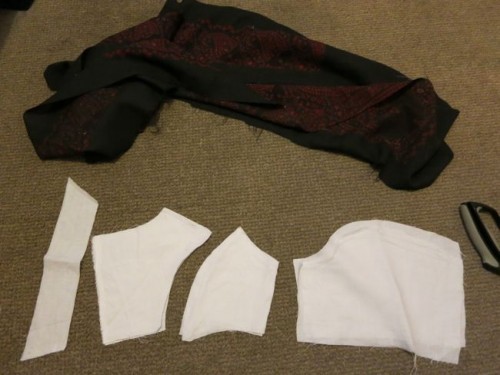
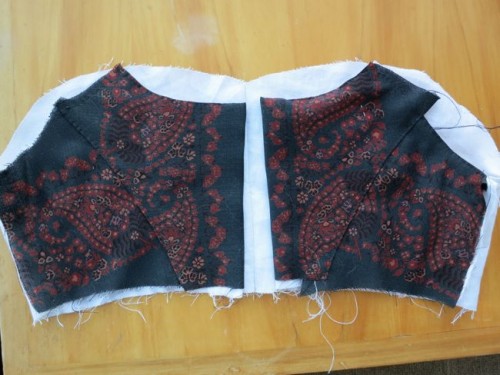
So what still needed to be done on it?  Well, when I posted it mostly done the skirt was only basted on the the bodice, and the skirt components were just pinned together.  Over the last two weeks I re-did the bodice since the green drape on it wasn’t working, sewed the skirt on properly, sewed the layers of skirt together, sewed on the purple velvet skirt drape and the sash, finished the back fastening, and did more beading.

The 1910 Luna Moth frock

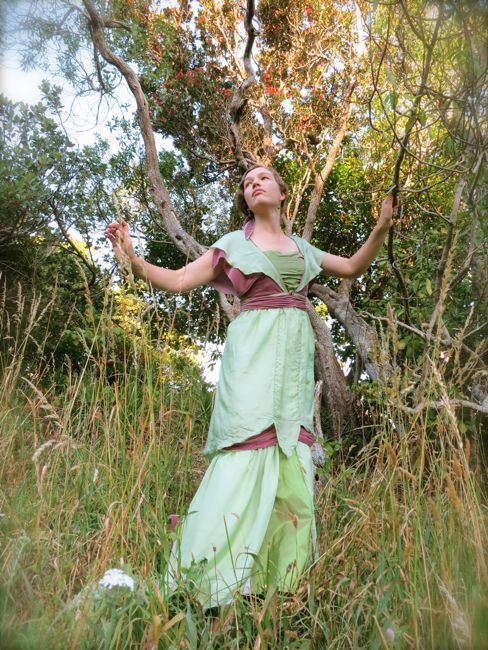
So is it done?  Yes and no.  It was ‘done’ for the photoshoot, but I almost always find with the first wearing of a garment that there are lots of little bits that need tweaking to make them work perfectly.

The 1910 Luna Moth frock

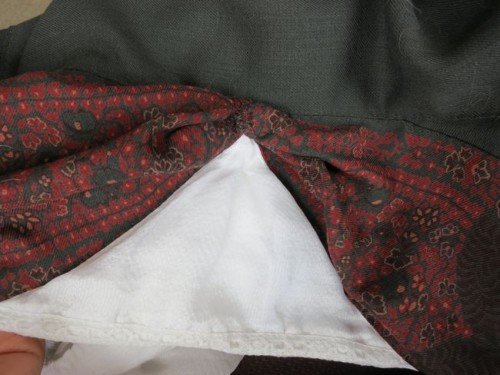
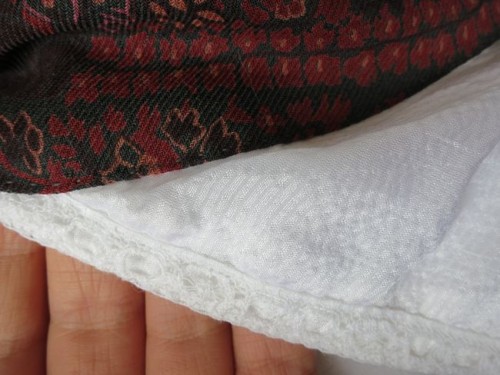
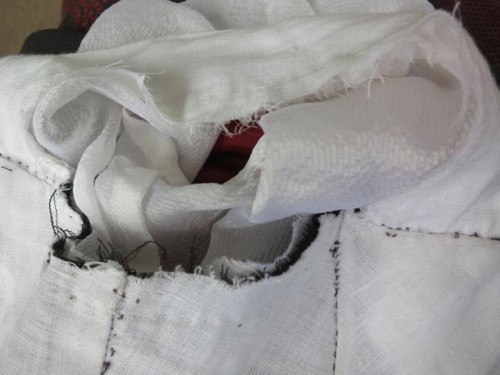
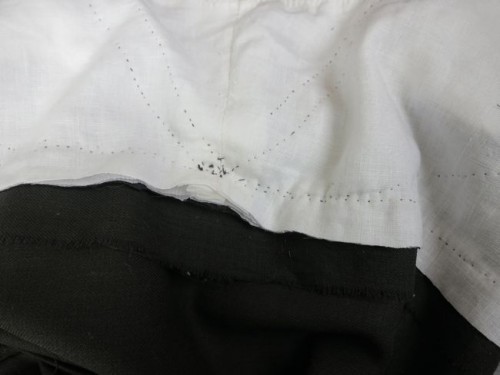
With this dress I need to re-do the bottom-most layer of the skirt as when you pick up the train or when the wind blows it open the white support fabric shows, and that’s just not OK.

The 1910 Luna Moth frock

I also want to sew purple velvet rosette tassels (hard to describe, but I know just what they will look like when they are done) to the bottom of the back sashes, so that they look like they have a reason to exist.  And I want to add beads to the sleeve ends, and perhaps bead along the bodice and basically do a lot more beading.

The 1910 Luna Moth frock

The big question, especially after all the whinging I’ve been doing about not loving the dress and finding it really hard to finish something I was ultimately going to be unhappy with, is, do I like it?

The 1910 Luna Moth frock

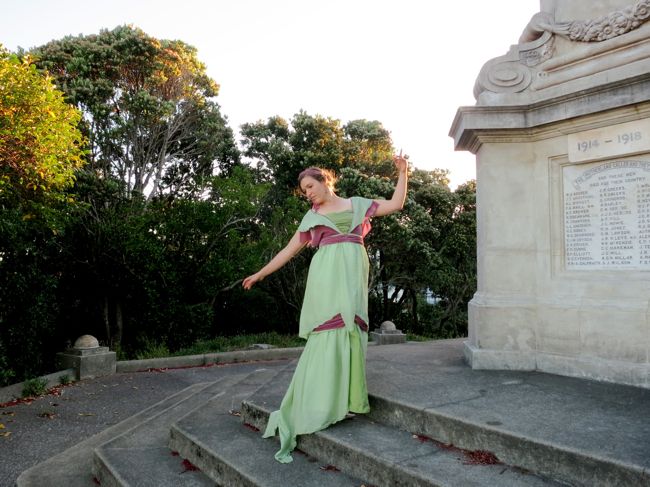
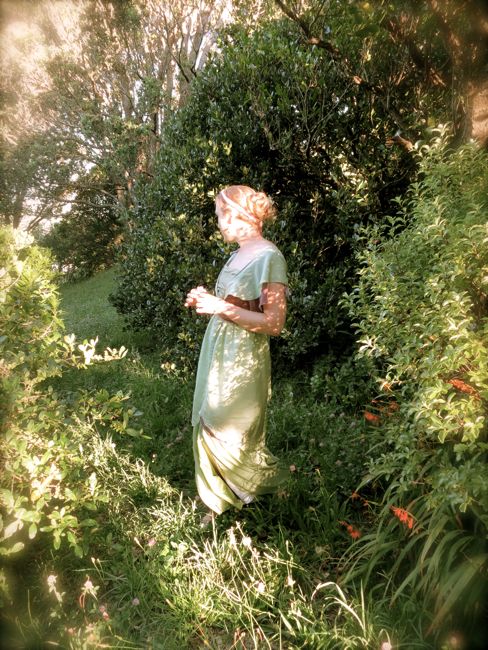
Yes, and no.  I’m tickled pink that it is finished (or wearable finished), and love the way I look in the photos (many, many thanks to Madame O for the photoshoot!), but I’m not happy with it as a reflection of my sewing abilities.  I’ve grown so much in the last 3 years, and even 3 years ago I knew I was making mistakes and cutting corners because I had this great idea and wanted to complete it, even if I couldn’t find the right fabric.

The 1910 Luna Moth frock

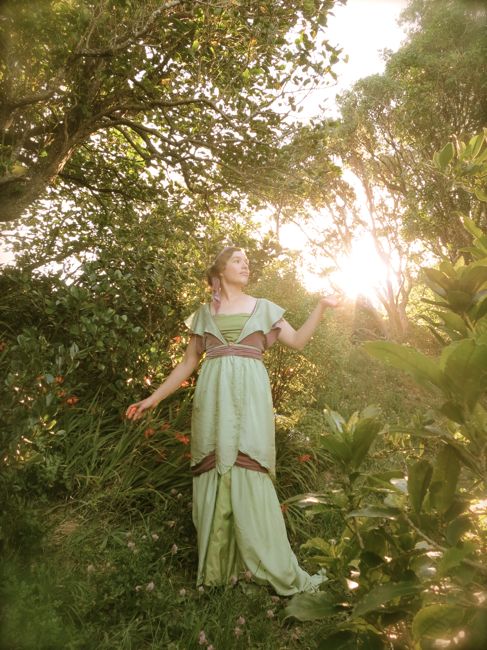
So what’s going to happen to the dress?  Well, I’ll do the last bits to make it as good as it can possibly be within what I have to work with, and then I’ll probably sell it.  If you’re interested now would be the time to put dibs on it.  It’s fits a bust 36, waist 29-30, hips 40, height 5’4″ to 5’7″

The 1910 Luna Moth frock

The Challenge: UFO (Un-Finished Object)

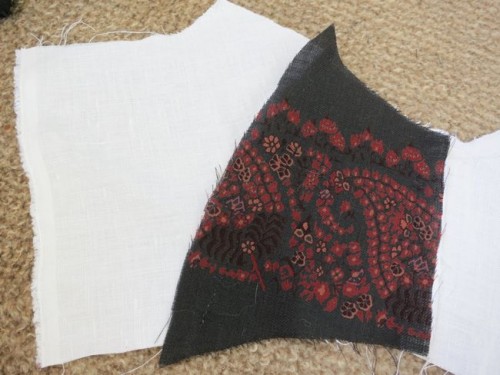
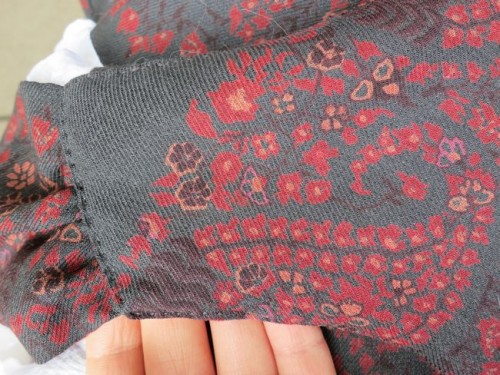
Fabric:  Hand-dyed celadon green silk tissue (I think it was 4m), plum-rose coloured silk and rayon velvet (1m), shot green and gold silk taffeta (1m), with linings and bodice support of white cotton broadcloth, and white linen-cotton.

Pattern:  self-drafted, based on the Lady Maude Warrender Laurel Dress in Janet Arnold

Year:  1909-10

Notions:  Plastic feather-boning, hooks and eyes, hook and eye tape, boning casing, and thousands of glass seed beads.

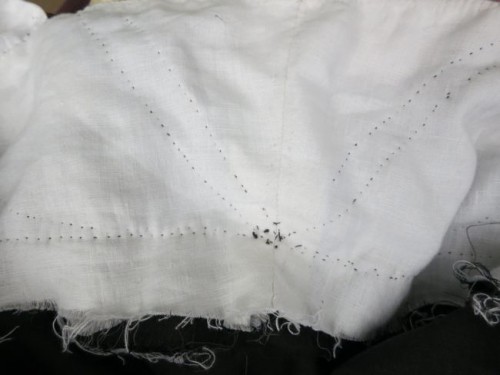
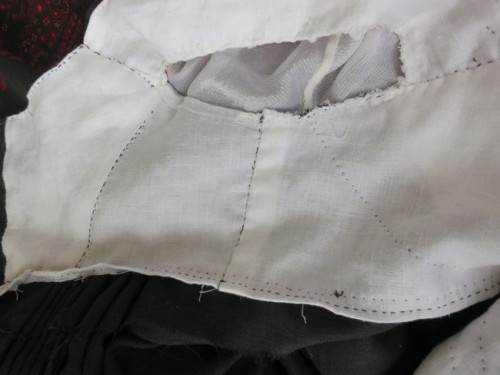
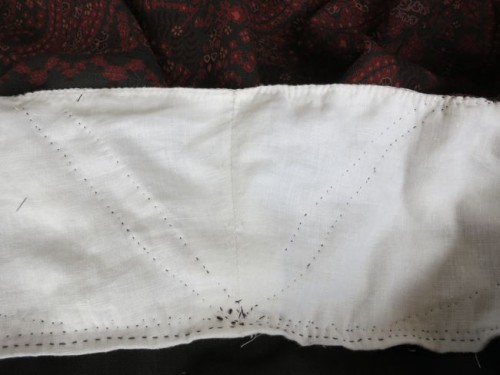
How historically accurate is it?  Ergh.  Parts of it (the bodice support) are meticulously historic, the idea and aesthetic are directly based on historic examples, the fabric is reasonably accurate, but to be honest, I’d still only give it a 6 out of 10.

Hours to complete:  Double ergh.  Let’s not go there.  Probably around 100.

First worn: Sunday 27 Jan for photos

Total cost: it’s been 3 1/2 years, but I think I paid $40 for the tissue, $20 for the velvet, and $20 for the taffeta, plus at least $10 for the beads, and I re-dyed the tissue, so another $10, so $100?  Yeesh.  Maybe it was less.

And one last photo:  Here is Wellington.  I love my city!

1910 Luna Moth frock


Glory Days are here again

OK, I don’t have a proper post for you today, but I do have something which, in it’s own way, is more exciting.

New Zealand finally has a proper vintage lifestyle magazine (albeit an online one, but that’s the way of the future, is it not?) and I’m writing a regular column for it on vintage fashion and textile history.

The first issue has just launched, so hie yourself over to Glory Days  at Issuu.com  and  read my first column ‘Fiesta Fashions’, on the Mexican influence on fashion from the ’30s-50s.  It’s on pages 34-35.

And then you can read the rest of the articles 😉

For now, here is a picture of Felicity looking adorable as she naps on a vintage suitcase:

Naptime for Fiss

The 1813 Kashmiri dress: bodice construction details

I’ve shown you the skirt construction details for the 1813 Kashmiri dress, and promised to do the bodice construction in just as much detail.  I’ve covered them slighty  here as well.

I started by cutting out my bodice pieces in white linen, to serve as a lining/under support.

The cut-out linen bodice under-lining

The cut-out linen bodice under-lining

The inner linen lining/under support layer was sewn together first, and I checked the fit of it.  I ended up letting it out about 1/2 and inch in the centre front.  With the under support sewn together, I began sewing on the wool twill outer layer, starting with the side-back pieces.

The basted on side-back piece

The basted on side-back piece

Then the centre back piece got sewed on, and the centre back and back neckline got finished:

The finished back pieces

The finished back pieces

Then (after lots of dithering and messing with different options) I sewed on the white silk front panel, and sewed the side-front wool pieces to it.  Then the front wool drape got sewn down over both pieces (after lots of draping and pinning to get the look right).  The point where the drape meets at the centre waist is just raw, with lots of over-stitching to keep it neat.  I couldn’t figure out any other way to make it work without too much bulk.

The bodice front, with silk panel and wool drapes

The bodice front, with silk panel and wool drapes

Just before I finished tacking down the top of my wool bodice drapes I sewed a piece of lace across the top of the silk panel, to help snug it in to my insufficient bust and add some texture and interest.

The lace trim at the top of the bodice

The lace trim at the top of the bodice (and the tiny stitches holding down the bodice draping)

You can see in the detail shots that the silk panel actually has a very fine self-stripe, which shows just how wide the possibilities are for the Historical Sew Fortnightly Challenge #6: Stripes are!  Even if you don’t like stripes, you could do something like that.  Anyway, back to the topic at hand…

Because the lengths of fabric I had to work with with the bodice were so narrow the bodice drape doesn’t continue all the way down to the waistline, but does a diagonal seam from the waist to the underarm, roughly mirroring the line an underwire in a bra takes.

The underarm seam and bottom of the bodice drape

The underarm seam (left), bottom of the bodice drape, and waist seam

For the first wearing of the dress, it was unfinished and the tops of the bust drape were still flapping free, waiting for me to attach the sleeve drapes to them.

The loose bust drape ends

The loose bust drape ends flapping in the wind

I attached the sleeve drapes by laying them right sides together over the ends of my bust drapes, with the sleeve drapes hanging over the bust, and sewing a seam right at the top of the bust drapes.  Then I folded the sleeve drapes back over the sleeves, and trimmed and basted down the raw edges of the seam underneath the sleeve drape to hide it.

The finished sleeve drapes

The finished sleeve drapes

I finished the drape in back by unpicking the low-shoulder seam at the top of the back bodice, tucking the other raw edge of the sleeve drape under, and re-sewing it down.  I can’t believe how much hand-sewing I re-did with this project!

The sleeve drape tucked under the back bodice seam

The sleeve drape tucked under the back bodice seam

The back fastens with hooks and hand-sewn hook loops.  I know hooks are period accurate, though the examples I have seen have always had metal loops rather than hand-sewn loops to fasten.  My hand-sewn loops work a lot better, and are much more subtle, so they don’t bug me.

Hand-sewn hook loops

Hand-sewn hook loops

When the dress was assembled I had armhole edges, and a big, ugly, uneven, raw skirt to bodice seam inside the dress to finish off.  I finished the armhole edges very simply: by whipstitching them to strengthen them and avoid the worst of the fraying.

Icky raw armhole edges

Icky raw armhole edges

Armhole edges roughly but effectively finished with whipstitching

Armhole edges roughly but effectively finished with whipstitching

The waist seam was a little more complicated.  It started out dreadfully uneven and messy:

Big, messy, nasty waist seam

Big, messy, nasty waist seam

I trimmed it just enough to even it and get rid of the worst of the fraying.  Then I cut back the wool layer to within 1cm of the waistline.  Then I could fold back the linen layer over the wool and sew it down, enclosing the raw edges of the wool in linen.

The trimmed waist seam

The trimmed waist seam

The folded back and sewn down waist seam

The folded back and sewn down waist seam

In the interior shots you can see the sewing lines where I have sewn down the different panels of wool twill over the linen lining/support, and the lines where I have sewn down the silk panel and bodice drape.

Interior stitching lines

Interior stitching lines

So, that’s how I did the 1813 Kashmiri dress bodice.  It’s certainly not period-perfect, but I feel it’s a reasonable balance of first-decade-of-the-19th-century techniques, the demands of the fabric, and my learning curve.  Next time I’ll aim for period perfect!

I’ll do one last post about the construction of this dress covering the sleeves and some decorative details.