I’m working on the eyelet holes for the back of Ninon’s bodice and it is soooo boring, and quite hard work.
Pushing the threads of a tightly woven duchesse silk satin and three layers of linen far enough apart to make a decent lacing hole takes a lot of effort.
I considered a couple of options for how to construct the back and the back lacings, some of which might have been easier to do.
My first idea was that I could make a hidden placket by wrapping the lining of the bodice from the back of the bodice over to the front, and then put the eyelet holes through that. Then I could fold back my satin fabric, and sew it over the eyelet holes in a placket to hide the lacing from the outside. This is basically what Katherine did with her 1660s bodice.
I was tempted to do this because it would be easy, and (if it worked), would look very neat. But it doesn’t always work. And, more importantly, it’s not historical.
Another option was to finish the back basically the same way I do corsets – with the lining and exterior fabric meeting exactly at the centre back, both folded back under themselves and whipstitched closed. Very easy, I do it all the time with corsets so I have lots of experience doing it, but I have no evidence that it is period to the 17th c. So it’s out.
Instead, I’m doing my back finishing in the same way it is done on the Bath bodice – e.g. the historical way.
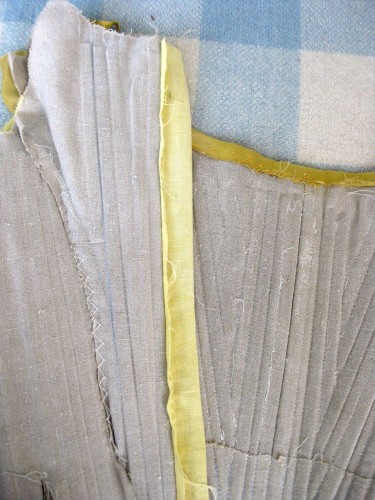
As far as I can tell by looking at images of the Bath bodice, the front finish fabric is folded over the centre back bone to the reverse of the bodice, and then folded over the lining and whipstitched down. Since this is what I have evidence for, this is what I am doing.
In some of the photos of the Bath bodice you can see some sort of fold that covers a bit of the eyelet holes in the front finish fabric near the bottom of the bodice. Unfortunately it’s covered by trim in for most of the bodice, so I can’t figure out exactly what is going on, so basically I’m ignoring it. If I end up adding trim to my bodice back at some point I will lap it over the eyelets slightly.
So, to recreate the back finish of the Bath bodice as closely as possible sans the mysterious fold, this is what I did.
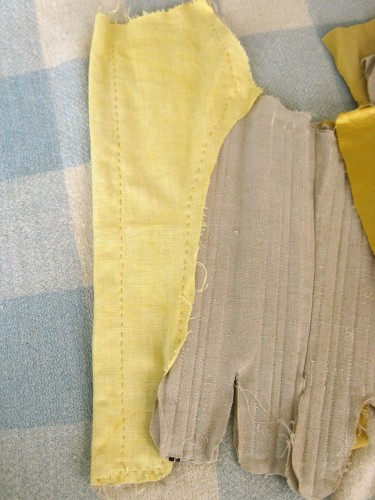
I basted on the back lining piece, and folded it over the back bone to the front of the bodice, where I basted it down again.
I realised after doing this that I should have basted it right at the bone/turned edge and then cut off the extra fabric. I just made more work for myself by folding it over for 3/4 of an inch which added an extra layer of fabric for me to work my eyelet holes through. Blast!
Anyway, mistake made. Next time I’ll know better.
With the fabric folded over and basted down, I sewed another line of stitching right along the bone at the centre back, to help hold everything perfectly in place while I basted and folded over my front fabric.
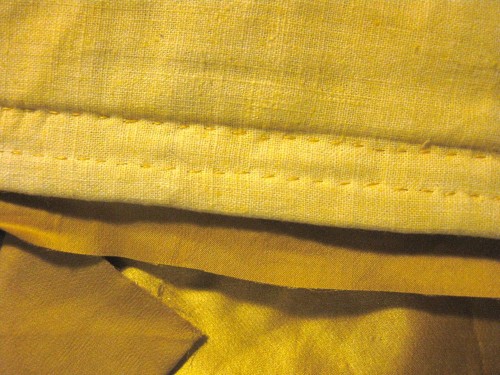
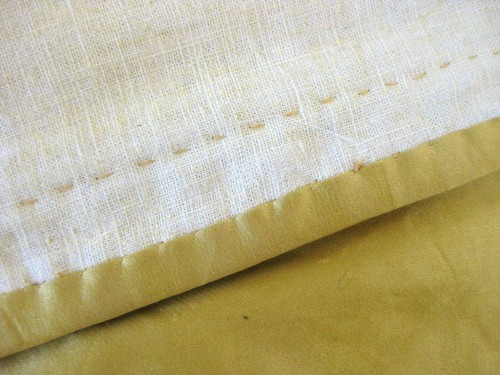
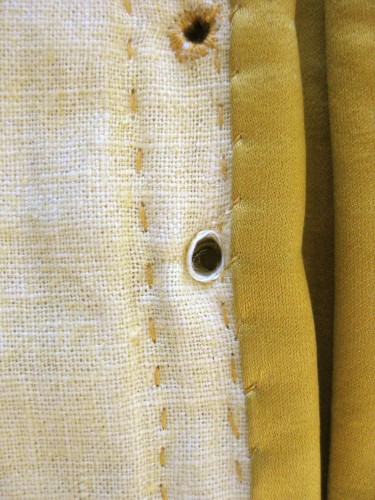
Then I took my duchesse silk satin front finish fabric piece, basted it at the top and bottom, and folded it over the centre back bone to the reverse of the bodice. I then folded it over the lining fabric and whipstitched it down.
The tricky thing with this was to keep the fold and whipstitching very narrow – no wider than my centre back bone, so that they didn’t interfere with the eyelet holes which would sit right next to the centre back bone.
I’m actually doing this step before I sew down the centre and side lining panels, and before I sew down the side seams of the outer fabric because I want to do my eyelet holes and do one final fitting before I sew those down.
So now I’m working on my eyelet holes, which has got to be the most time consuming, and boring part of this whole costume. Even more time consuming and boring than the boning (and you found that pretty boring).
The Bath bodice and the V&A bodice both have lots of eyelet holes. I counted 22 on the Bath bodice and at least 18 on the V&A bodice. Ergh. I really don’t want to do 40 odd eyelet holes! So I’m spacing my holes an inch apart, and will only have 12 on each side. That’s my first real cheat.
For every eyelet I have to bore a hole in through four layers of linen (two layers of lining linen, and the two layers of linen that support the boning) plus the duchesse silk satin.
Once I bore the hole, it needs to be bound with thread. Bound eyelets in later decades and centuries (such as in the Emily dress) are usually finished with beautifully done buttonhole stitches, but in my experience the earlier the garments, the rougher and simpler the eyelet finishing, so I’m just finishing these eyelets with a simple whip stitch. The binding stitches on the Bath bodice are certainly nothing to brag about, so I don’t feel bad if mine doesn’t come out exquisitely.
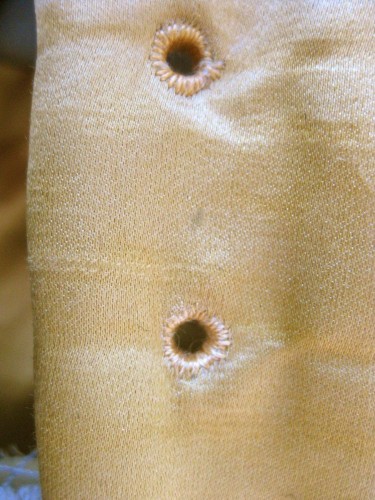
I am encountering one major issue in making my eyelet holes. The duchesse silk satin is so dense that when you bore a hole in it big enough for a lace to pass through it creates a dent in the fabric from all the threads being stretched and relocated.
So there are little 1 inch long stripes going up the back of the bodice. Once I trim the bodice and the lacing goes on they won’t be noticeable, but they do bug me just a bit.
So that is everything I could possibly think of to tell you about the eyelet holes so far. Now I just need to do the other 12!





Wonderful detail – thank you.
You simply amaze me with this. I would put it off for about a year until I absolutely HAD to get back to it–obviously, I don’t have much motivation when it comes to tough details.
Awww….thanks! If I put stuff like this down I never get back to it, so my strategy is to start and just charge all the way through it!
Y0u have an eyelet buddy, right? Gah! I can’t wait to see this. I took a baroque lit class while getting my masters in French. I’m having fun remembering the better things I read.
Nope. No eyelet buddy, no idea what an eyelet buddy is!
Oooh…and if you took Baroque lit you may be able to tell us more about Ninon! There is so little written about her in English!
I focused more on the language side of things, but I’d be happy to nose around. You are right that she was well-known, so let’s see!
Isn’t it funny how the English language and the French language have recorded people differently? Mary Stuart is described in French as being kind, vivacious, and elegant. Very different from our Elizabeth-centric view!
You’re amazing! I can’t imagine myself ever having the patience to do that!
Oh my it’s looking totally scrumptious, clever you! Can’t wait to see it for real in all it’s golden glory and accompanied by angels singing. Squeee