In the last Otari Hoodie Sew Along post I covered choosing fabric.
Now that you have your fabric, it’s time to do any pattern alterations you need to get the fit you want.
Buy the Otari Hoodie Pattern Here
Choosing your size
First, you need to pick your general size. I recommend choosing your size for the Otari based on your bust size, grading out or in to your hip size.
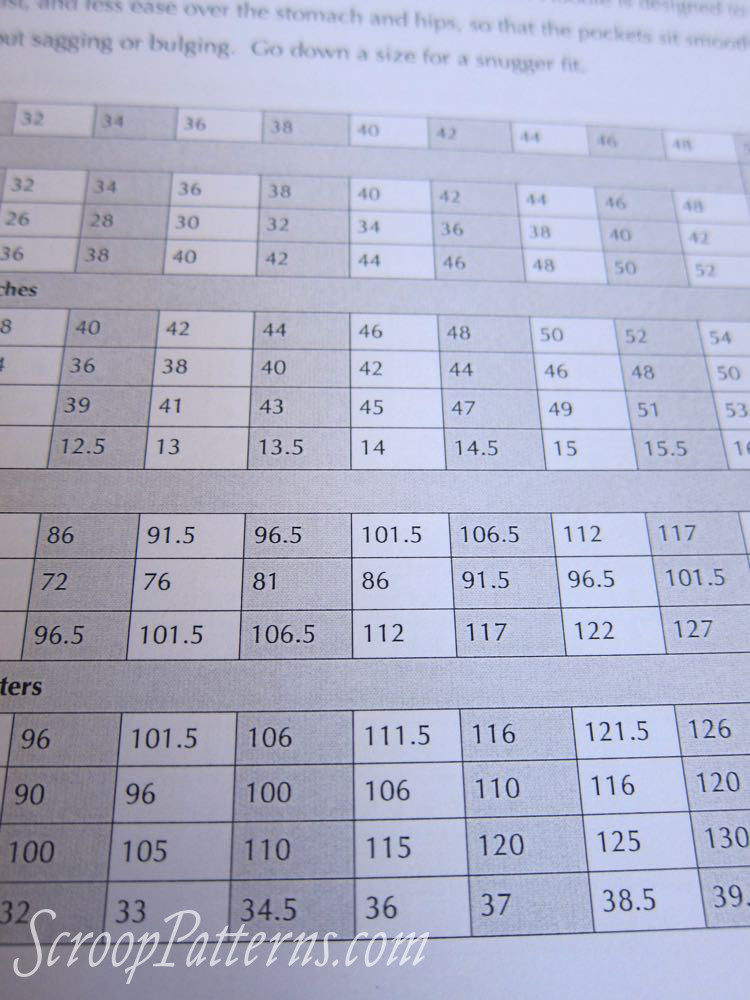
I’m a 38″ bust, so I’ll be making a size 38.
You also want to check the Finished Garment Measurements (the second and last columns in the image above).
You can see from these that the Otari is cut with lot of ease in the bust and waist, (the finished bust measurement for a size 38″ is 44″), and a tiny bit of easy in the hips (finished measures of 43″ for 42″ hips). This provides a garment that allows a lot of movement in the shoulders, chest and arms, and that floats over the waist, and sits fairly smoothly over the hips and stomach.
Some knits patterns are cut with negative ease (where the finished garment is smaller than you, and relies on the stretch of the fabric to stretch around you). The Otari still has ease, because it’s an outer garment and is meant to be wearable over layers of clothes.
Drawing between sizes:
OK, so you chose your size based on your bust, but what if your waist or hip measures are quite different than the standard pattern sizes?
In that case, you’ll want to draw between sizes (sometimes called grading between sizes). Drawing between sizes is just what it sounds like – moving between sizes in a pattern, to get the fit you really need.
For example, if you have slim hips in comparison to your bust, you can go down a size or two in the hips in the pattern.
Here I am using a french curve to draw a nice smooth line from the original patterns waist, to a smaller hip size:
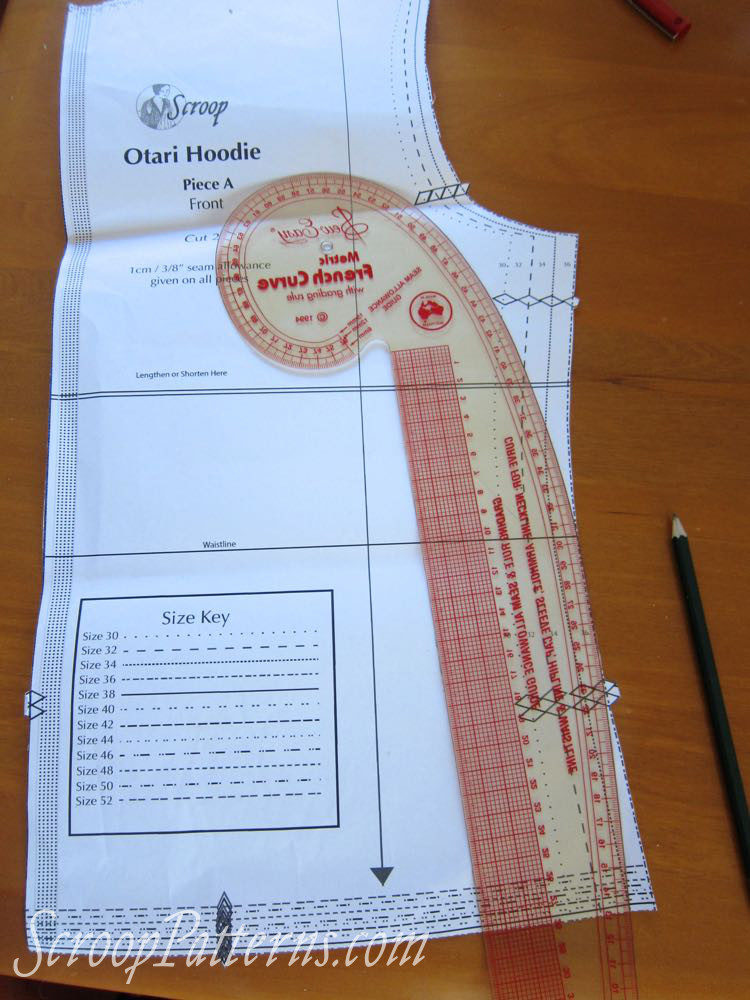
You can now cut your pattern on the new line, and have the Hoodie sit closer to your hips.
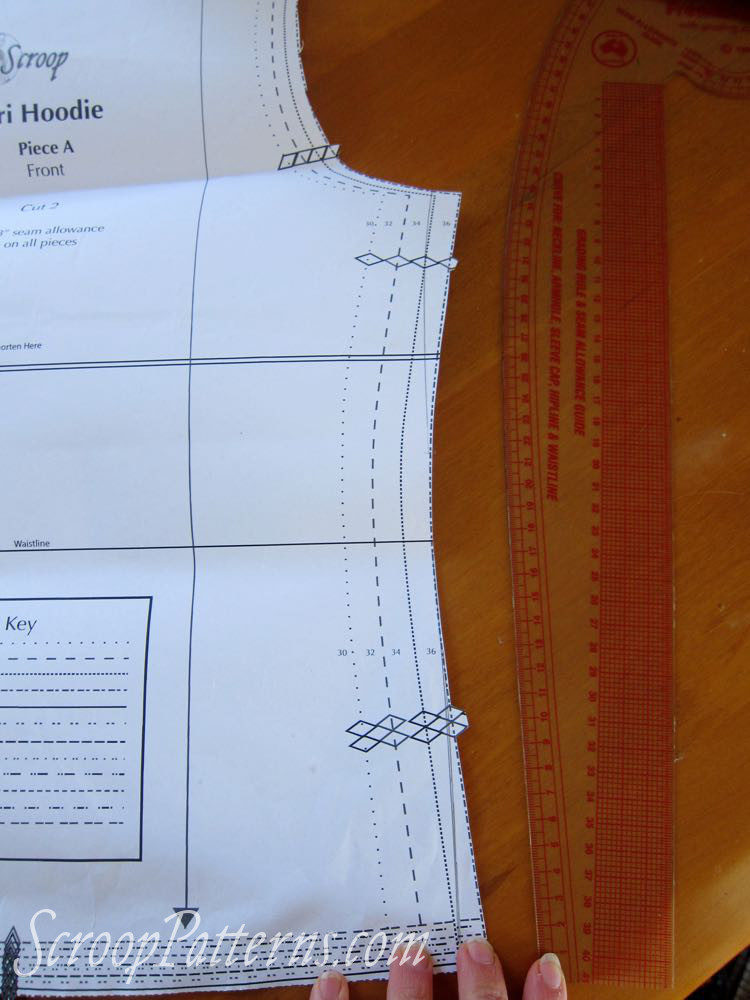
If you have a very straight body, with wider shoulders, you might want to draw in at both the hips and the bust, as shown below. This will give you a very straight pattern, with wider shoulders
Fit Comparison:
Because the Otari is made of stretch fabric, and cut as a looser fitting garment, you have a bit of leeway in choosing sizing. If you want a really roomy Hoodie, you could just go up a size or two.
If you want a slimmer fit, you can go down a size, particularly if you are using a fabric with reasonable stretch.
Here is what Jenni, size 36, looks like in her size 36 Hoodie:

And here is size 38 me in her hoodie:

You can see it’s a little snugger over the bust and hips, but definitely still fits reasonably.
Here is size 34 Priscilla, in her size 34 hoodie:

And size 38″ me:

You can see that it is very snug in the bust and body, and a tight in the arms – but I can still put it on.
It’s also too short in the arms and body, and that’s because I did length adjustments on the pattern, to fit Priscilla’s petite body.
Length Adjustments:
It’s easy to shorten and lengthen the Otari Hoodie.
First, you want to figure out where you need to shorten and lengthen the Hoodie.
Measure from your shoulder to your waist, and from the pattern’s shoulder to waist:

Be sure remember to discount the 1cm seam allowance in the shoulder seam.
Open the hoodie pattern along the Lengthen/Shorten seam, and add or subtract whatever you need to make the waistline measure match yours.
Measure the length of the sleeves, and compare to your arm measure, and add or subtract as needed, along the lengthen/shorten line. Remember that the sleeves will have a 2″ cuff.
If the waist is the right level, but the pattern is still longer or shorter than you want, you can lengthen or shorten at the hem.

I want my double-knit Otari to be a little bit longer, so I’m adding 2″ at the hem, like so:

And here are my pattern pieces:

Cutting Out:
And now you’re ready to cut out!
Pay attention to the grainlines on your pattern. You can cut the View B pocket piece on the bias or the straight grain.
Notice the major mistake I’m about to make in my layout below? Don’t make that mistake!
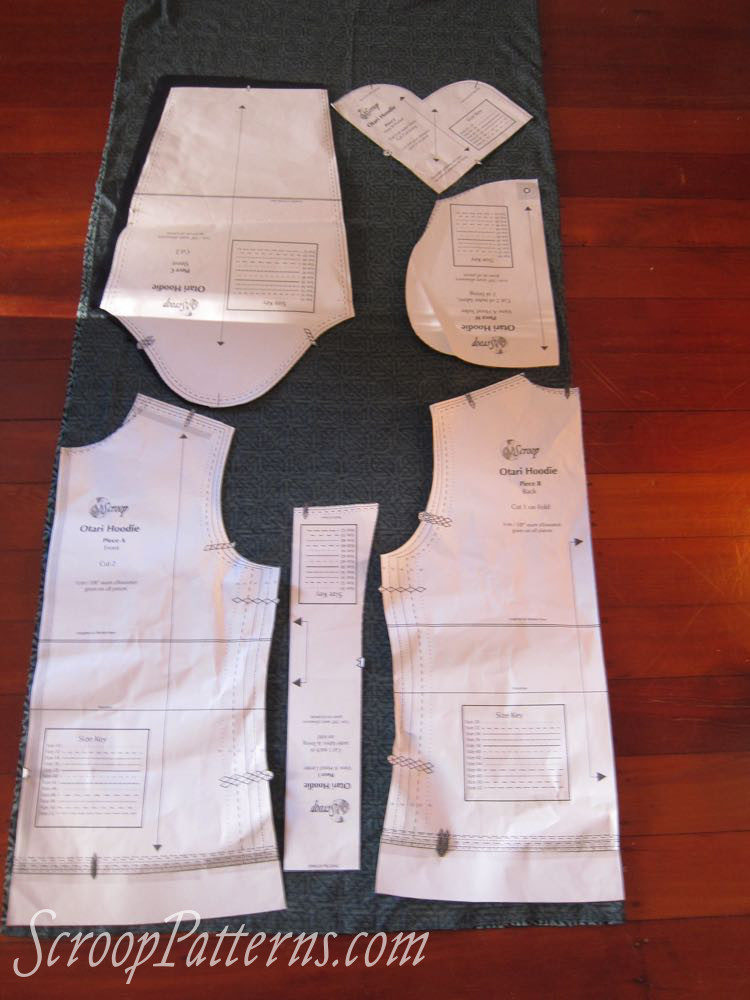
(don’t worry, I moved my hood piece so it would be cut on the fold before I cut it).
Happy cutting!
In the next Sew Along post:
Sewing Preparation
Want to join in? Buy your Otari Hoodie Pattern Here

yes! this is exactly the type of pattern is was looking for! I’m planning to make it with a kind of lining: I want the inside to be made of minkee or some other soft and warm fabric. Do you think I should go up a size?
I’d definitely recommend going up a size if you’re planning to line it. You’ll probably want to attach the lining at the zip after the zip is installed, to keep it from getting too bulky. Good luck and happy sewing!
Thanks for the advice! I now have my fabrics and am going to start sewing it. It’s great to have the resource of the sew-along
Thank you! Happy sewing