I had this week’s Rate the Dress all picked out, and the post written for the dress part. All I had to do was add in the ratings from the last Rate the Dress.
And then I discovered I’d already posted the frock I’d picked for this week!
So, back to the drawing board, which is why this post is a bit late.
Last week: A very-fitted 1880s dress in cut velvet
Ooooh, last week’s dress was divisive. Some of you loved the bold pattern and ‘sleek’ silhouette, and thought it was ‘delectably severe’. Others could not get past the pattern placement on the bust (personally I love it when Victorian dresses do that, because it’s such a excellent illustration of how perceptions of ‘good’ placement change!), and thought it somehow both ‘dolorous and loud’, with a ‘dismal’ colour scheme.
If nothing else, there’s something to be said for a dress that evokes very strong opinions!
The Total: 7.4 out of 10
Not a single person gave the dress a rating of 7.4 out of 5, so sometimes the average really does not reflect the predominant sentiments in regards to an outfit!
This week:
Last week quite a few of you didn’t care for the dark colours, and the week before some didn’t care for the bold, clashing colours, so this week I’m seeing if pastels are more popular. Since my first pink choice has already been used, here’s the standby:
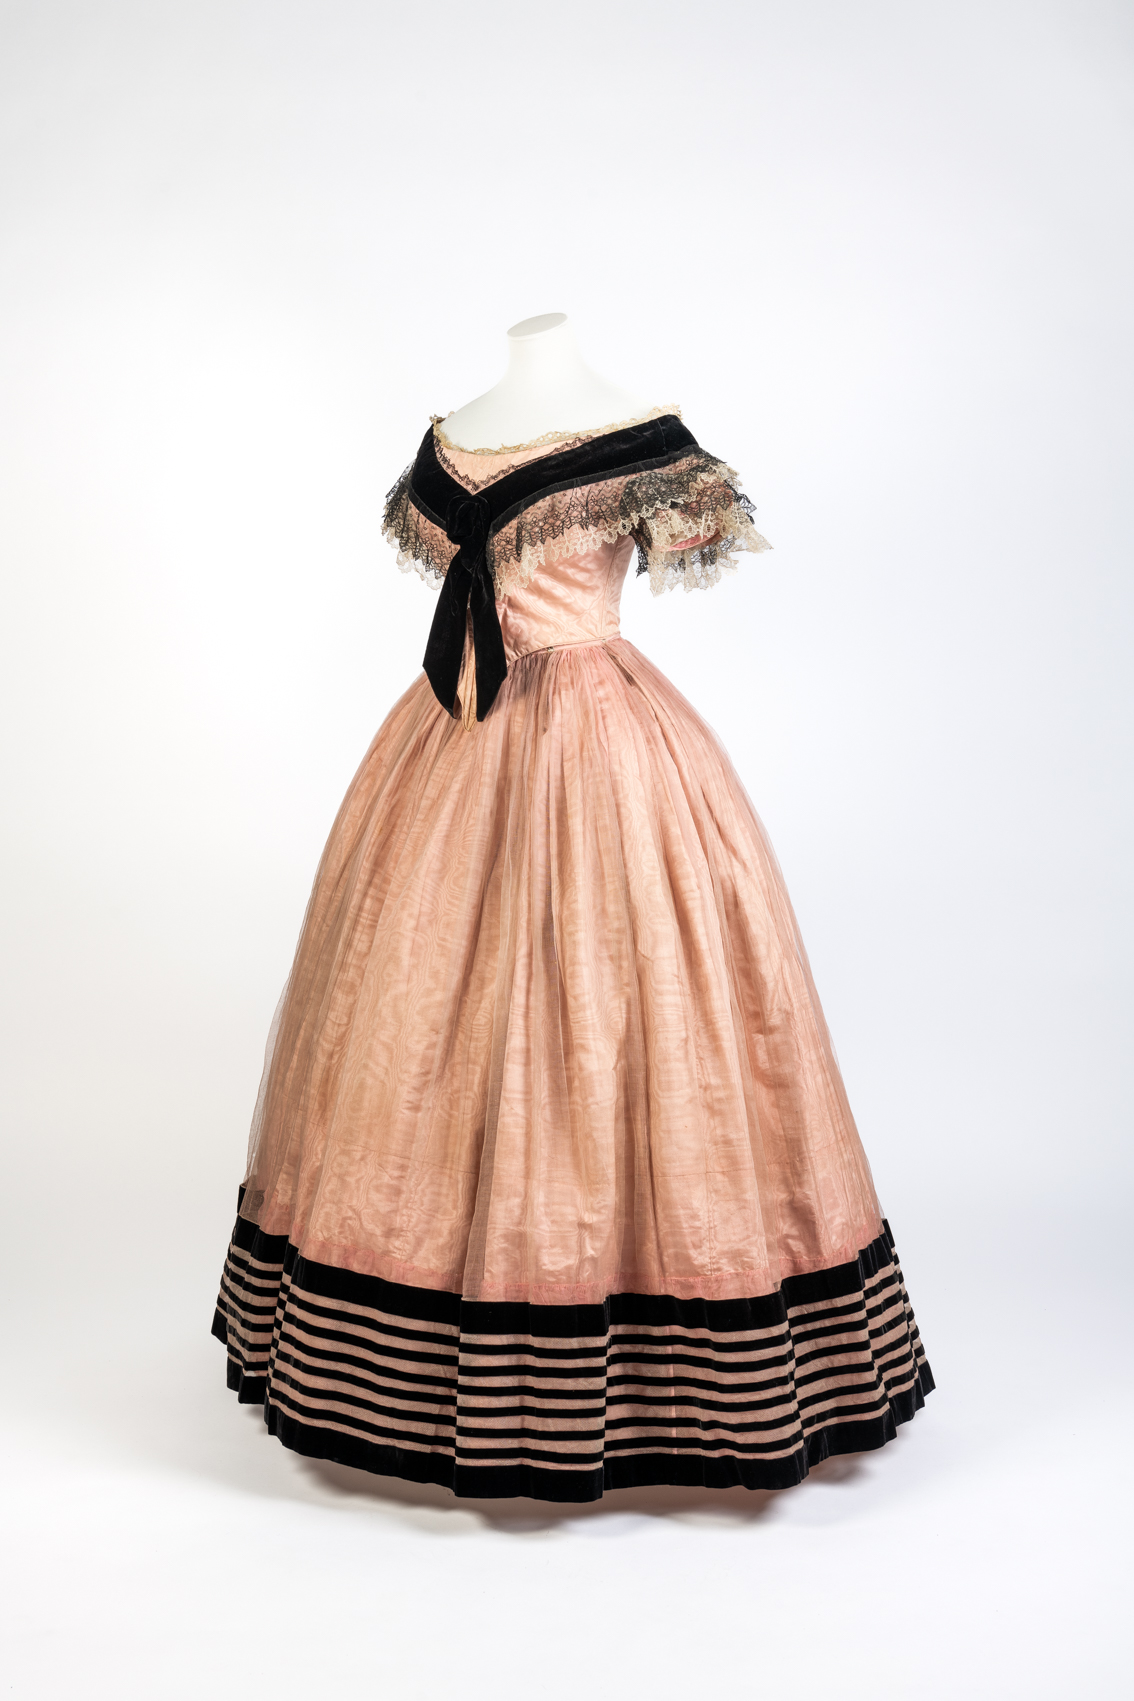
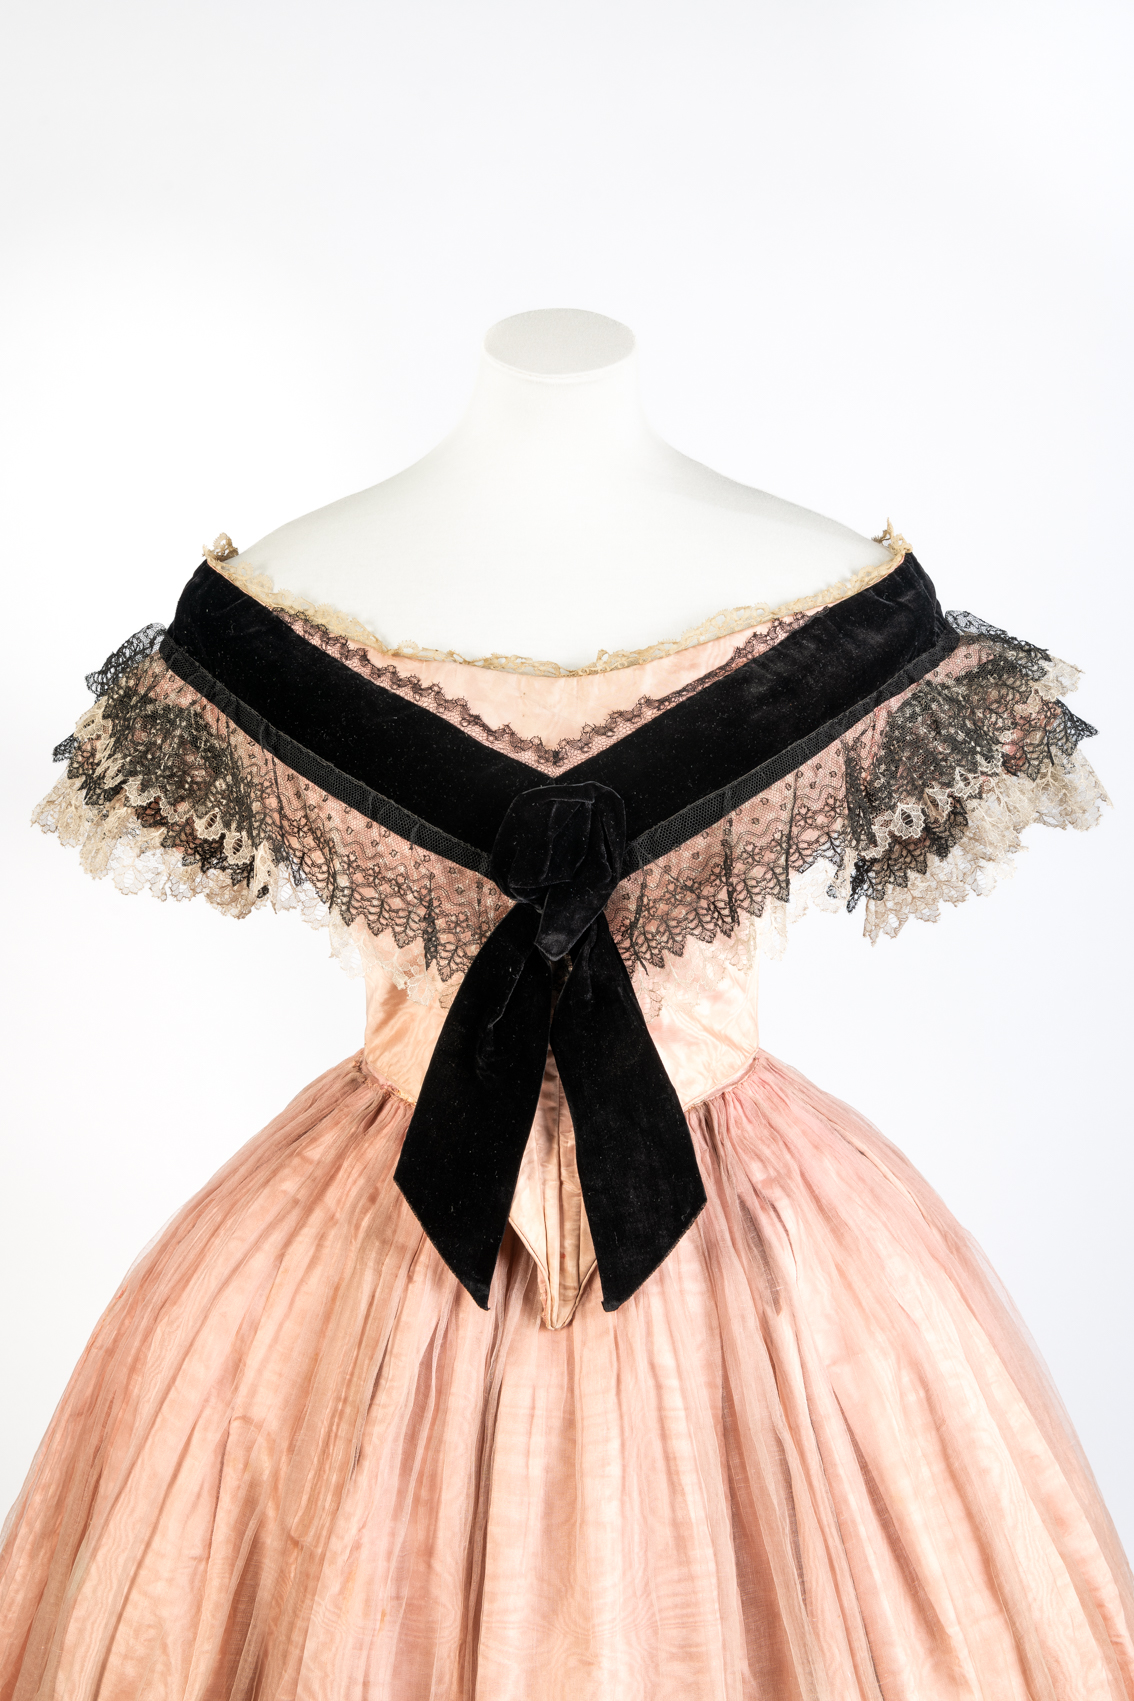
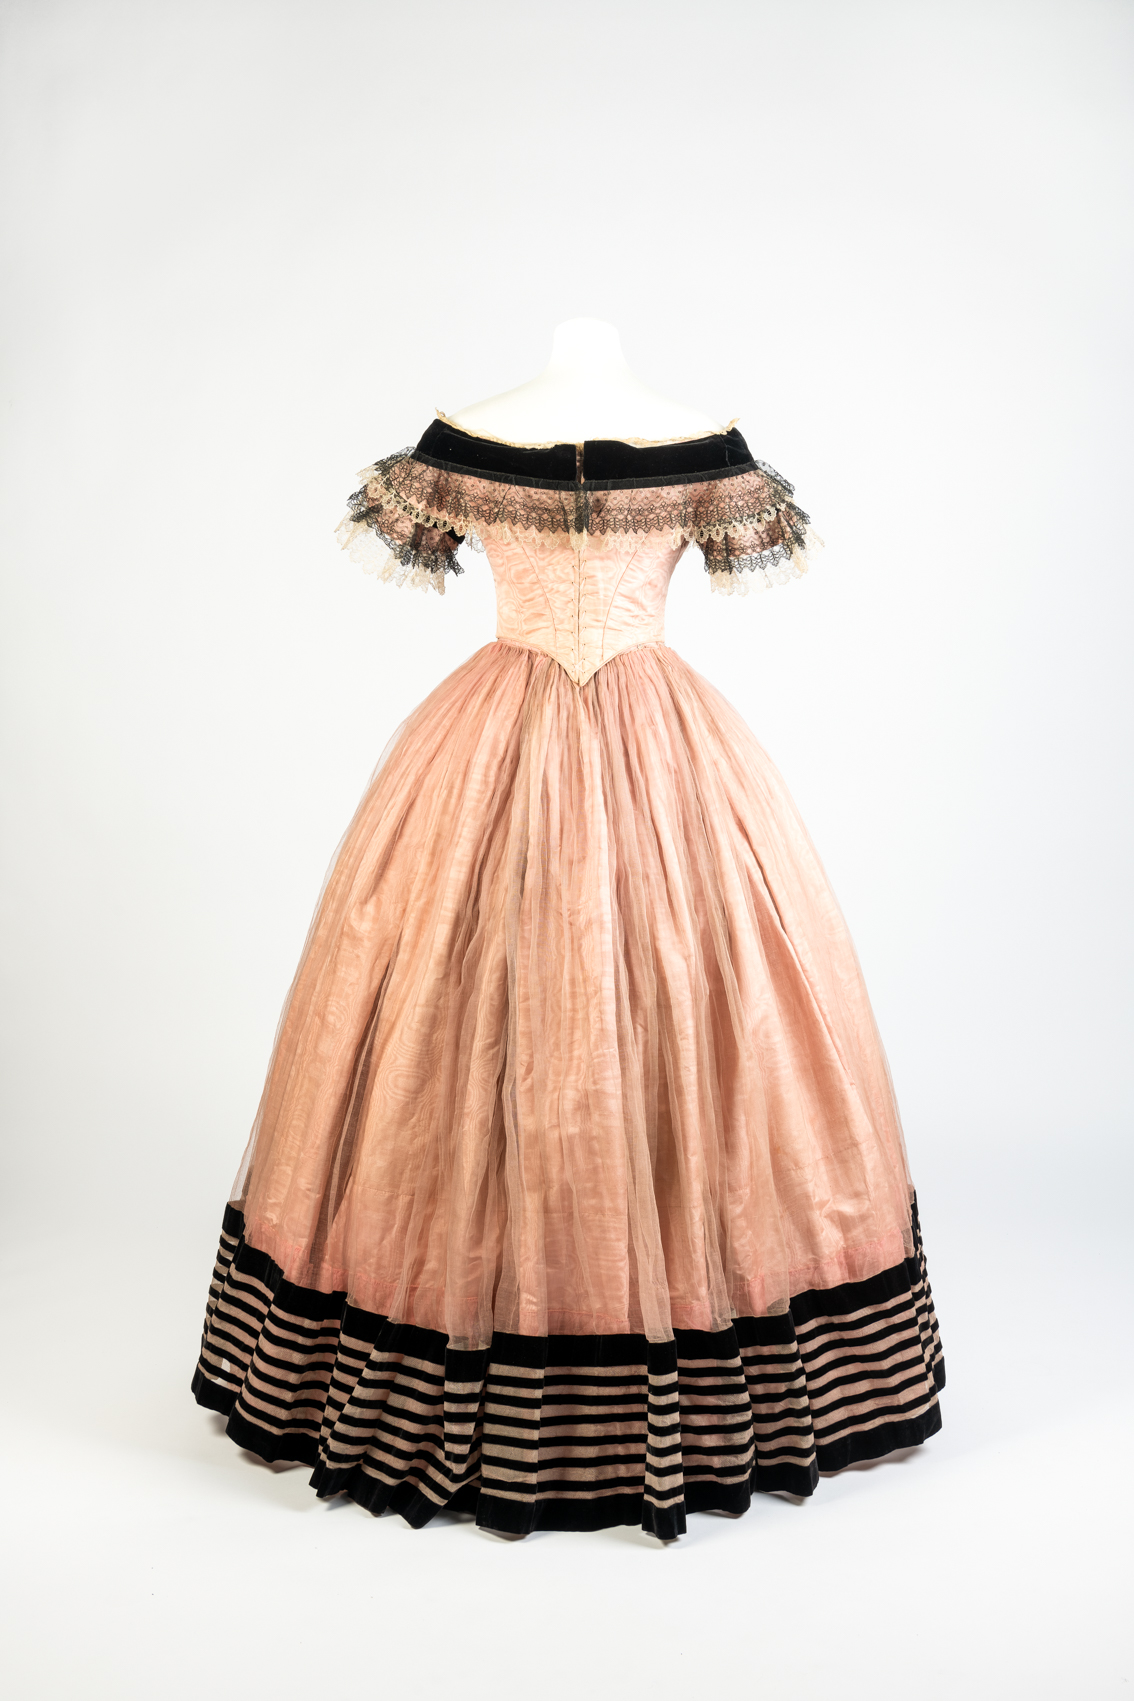
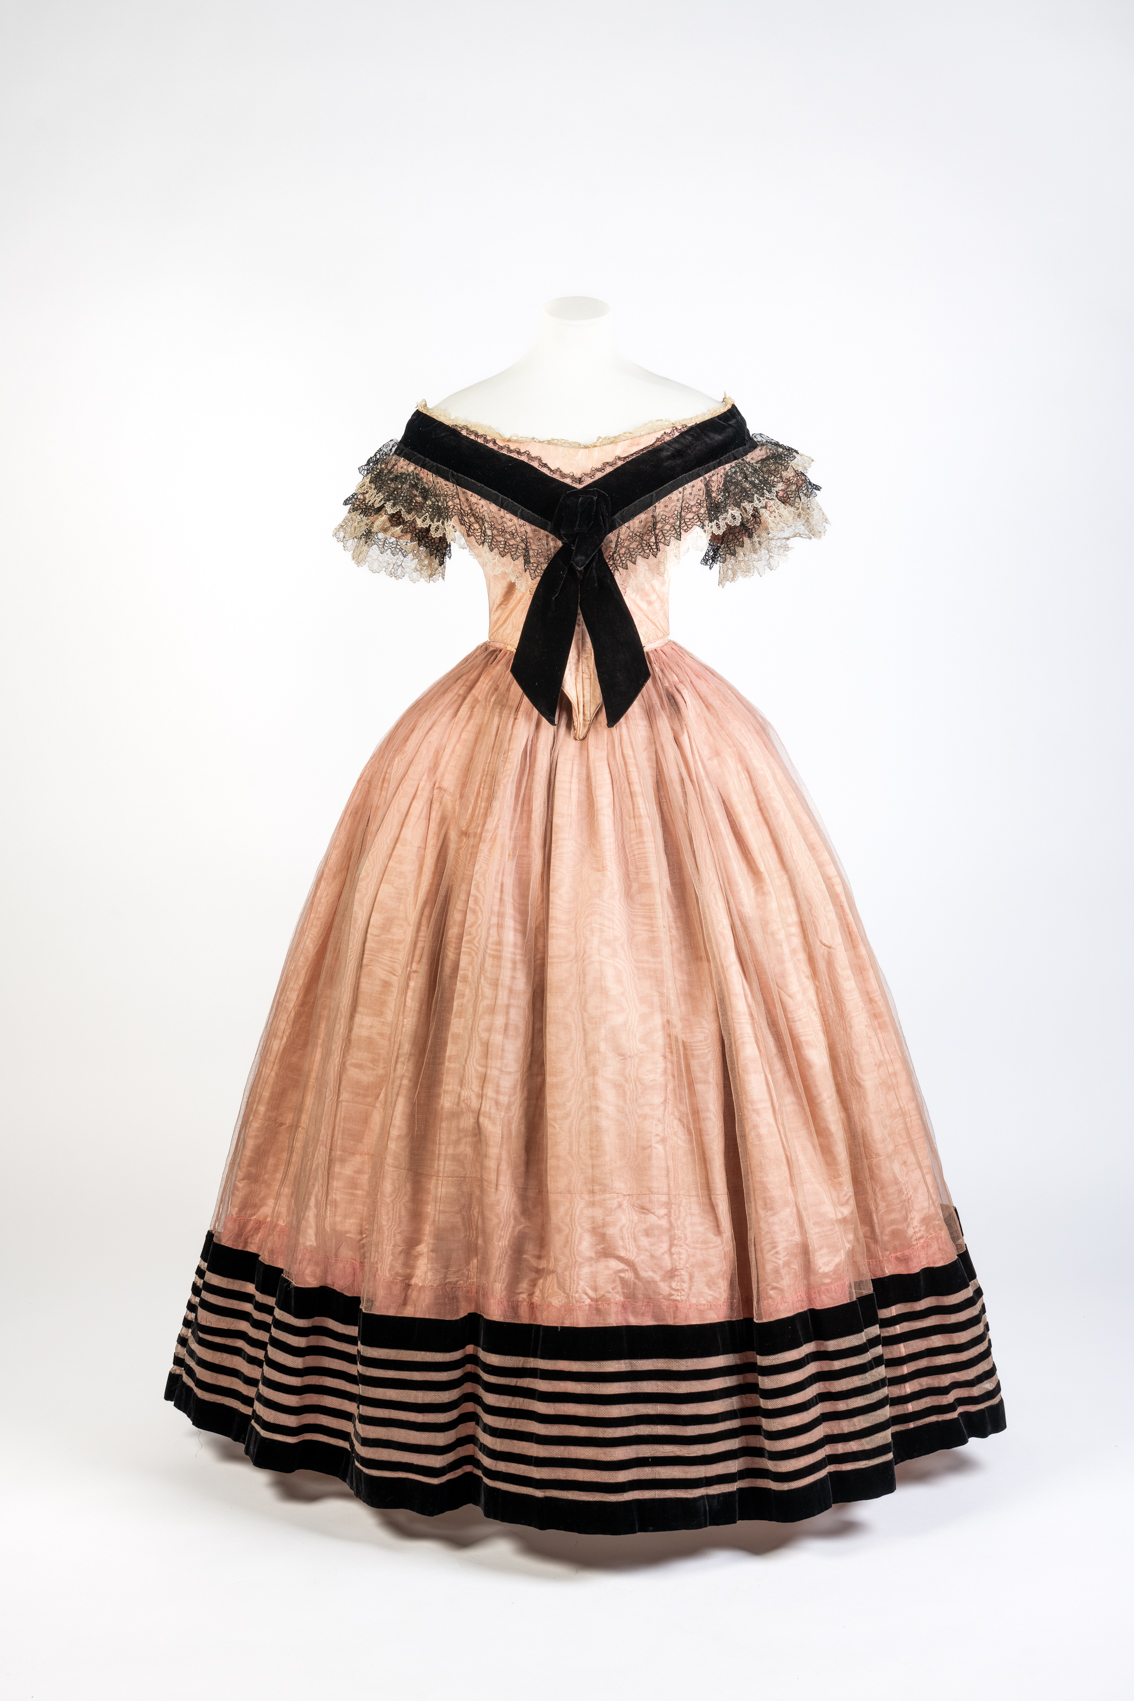
Pink Silk Moire Evening Dress, early 1860s, Fashion Museum Bath
This early 1860s evening gown is made of pink silk moiré, trimmed with black velvet, blond and black lace (probably machine made), and sheer silk. It is probably in two parts, with a seperate bodice and skirt. The skirt is tightly gathered in to the waist with tiny pleats. There is slightly more fullness at the back of the skirt than the front, as fashion transitions from the bell shaped hoop of the 1850s to the elliptical shape of the 1860s. The bodice sits off-the-shoulders, creating the sloped shoulder silhouette that was fashionable at the time. The neckline is framed with a shallow V-shaped ‘berthe’ in velvet ribbon and lace. The lace trim of the berthe merges with the lace ruffles of the short sleeves. The bodice comes to an exaggerated point at the waist, and is finished with narrow piping.
Pink Silk Moire Evening Dress, early 1860s, Fashion Museum Bath
This dress has a hint of the frou-frou of the late 1850s/early 1860s in the layers of delicate blond and black lace that frame the ribbon bertha. At the same time the striking stripes that frame the hem anticipate the bold, graphic decorations popular in the mid-1860s.
Pink Silk Moire Evening Dress, early 1860s, Fashion Museum Bath
This dress does, admittedly, have a very stark contrast between the pink silk and the black velvet trim. However, pink and black are a very classic colour combination.
The pink moiré fabric and harsh black lines are softened by an overlayer of delicate gauze, to which the black stripes are stitched. The overlayer would have added movement and interest as the dress was worn, particularly if worn for dancing.
Pink Silk Moire Evening Dress, early 1860s, Fashion Museum Bath
What do you think? Is this pink and black confection just the thing for the belle of the ball? Can it at least beat the rather lacklustre ratings of the last few weeks? Or is it too, not to your taste?
Rate the Dress on a Scale of 1 to 10
A reminder about rating — feel free to be critical if you don’t like a thing, but make sure that your comments aren’t actually insulting to those who do like a garment. Phrase criticism as your opinion, rather than a flat fact. Our different tastes are what make Rate the Dress so interesting. It’s no fun when a comment implies that anyone who doesn’t agree with it, or who would wear a garment, is totally lacking in taste.
As usual, nothing more complicated than a .5. I also hugely appreciate it if you only do one rating, and set it on a line at the very end of your comment.