
I’ve been sewing like mad on the 1813 Kashmiri dress that I am making for the Historical Sew Fortnightly Bi/Tri/Quadri/Quin/Sex/
I’ve based my pattern on the 1805-9 dress in Janet Arnold with reference to patterns from other slightly later extent garments, and my inspiration fashion plate and extent garment, to bring it up to date for a dress that would be the latest fashion in January 1813.
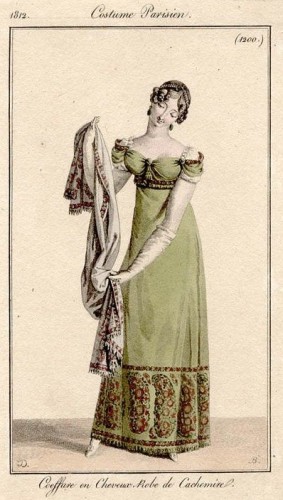
Fashion plate featuring a dress made of Kashmiri shawls, 1812
The bodice will be fully lined with white linen, so I started with that, sewing the linen together, and then sewing the wool pieces to the support lining, using careful little 14 stitches to the inch (OK, sometimes it was only 12 or 13).
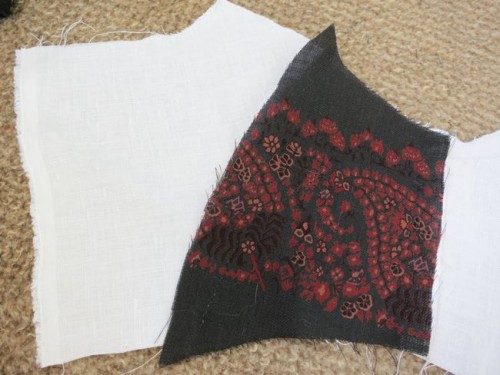
Linen bodice assembled, sewing down the first piece of the wool
The side-back panels went first, followed by the back panels:
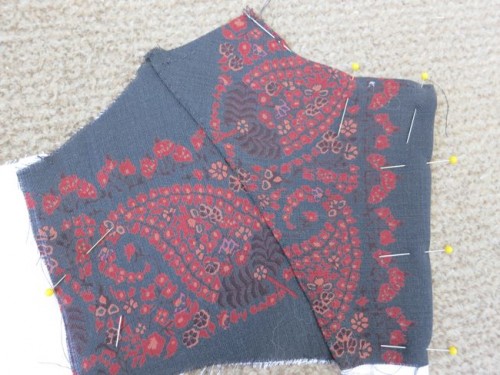
Pinning and sewing the centre back panel
There was no ideal layout for the paisley border print, so I just did my best. I quite like the way the pattern meets at the centre back.
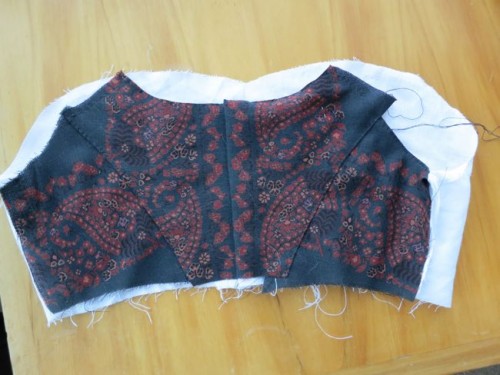
The centre back of 1813 Kashmiri dress
I originally considered having the centre back fasten with buttons like the 1805-9 dress in JA, but I didn’t have any suitable buttons in stash, and decided that hooks and loops would work better with the fabric, and be easier. The wool is too heavy for the tie fastenings used in this dress to be an option:

Dress with a paisley border, ca. 1810, Musee Historique de Tissu de Lyon
With the back all constructed, I put the bodice on Isabelle and pinned on the skirt to play with sleeve and bodice front options.
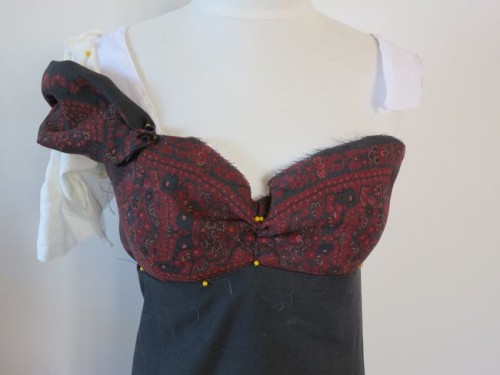
Bodice options
I love the white under-sleeves in so many of the inspiration images, and the sleeve-swags in my main inspiration image – there is a lovely tension between the pure white sleeves rising above the dress, and the slight suggestion that the dress is about to slide right off the wearer.
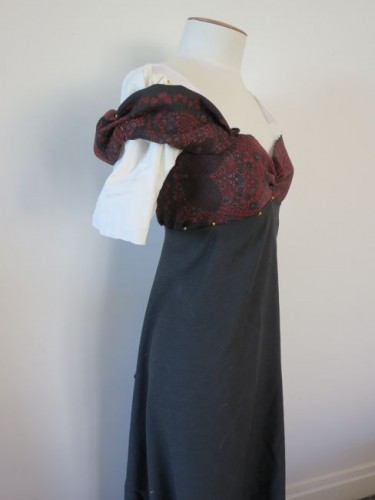
Playing with sleeve options
However, as so often happens, what looks good on the mannequin doesn’t work on the body, so when I actually sewed the dress together, what happened was a little different:
The mostly-finished 1813 Kashmiri dress
I’m afraid I have no real source to authenticate what I have done with my bodice, but it does echo what you see going on in paintings of Kashmiri dresses such as this one, and it actually worked with my fabric, and my body:

Salome Louise Coulmann, comtesse Walther by Robert Lefevre, 1811, Versailles
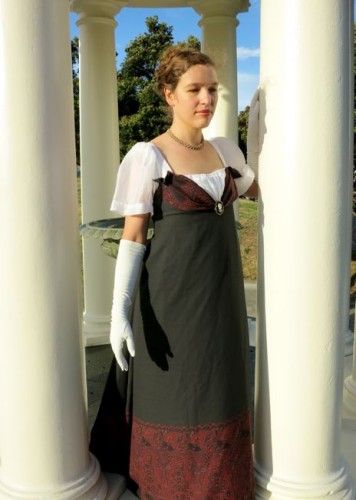
These photos were taken at the Basin Reserve with the last of the sunshine on a very windy Saturday. It was supposed to be a photoshoot for the finished dress, but that didn’t quite happen.
1813 Kashmiri dress and pohutakawa tree
Still, I’m not entirely sad the photoshoot didn’t work out – it’s great to give the dress a test run to figure out what is working and what isn’t, and now I have two days (well, one now) to get everything perfect before my deadline.
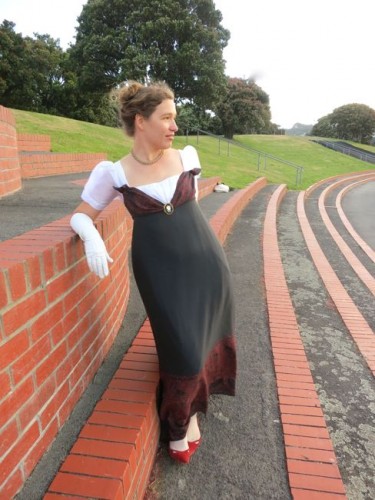
Unfinished 1813 Kashmiri dress at the Basin Reserve
So what needs to be done? This:
- Re-do skirt pleating at centre back, pleating in a different way and bringing the pleats out from the CB slightly more. While I do this I may get rid of the demi-train, because fetching as it is, it’s not accurate for a dress made of Kashmiri shawls.
- Give the sleeves an organza underlining, re-sew them on, and gather them at the bottom.
- Sew on the sleeve swags (you can see the little pieces that they will be attached to in the pictures)
- Sew hooks and loops to the bodice-skirt meeting, and possibly the skirt opening
- Figure out why the heck the back of the bodice turned out so low, and fix it if possible (I mean, I wanted it to be low – the orange dress above has a low back, but this is ridiculous):
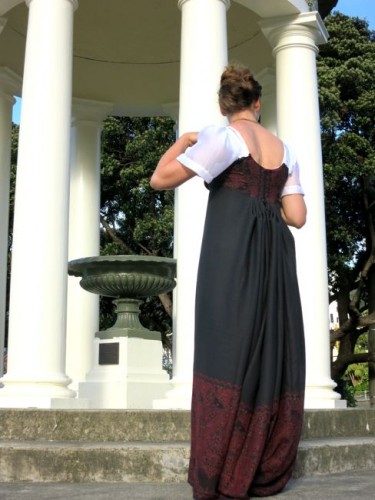
Way too much back!
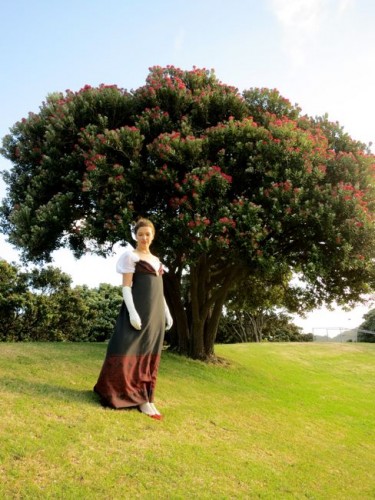
Still, the dress generally looks quite good, especially paired with the last of the pohutakwa blossoms:
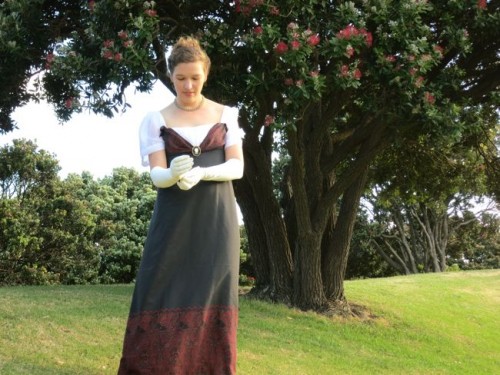
1813 Kashmiri dress and pohutakawa blossoms
Well done! Looks amazing.
It does look pretty good!! One thing I’d note, you mention the back is rather low – I didn’t notice the too-much-back so much as the way the skirt fullness seems to fall rather low down on the back, it’s high waisted in the front but seems to drop to an almost natural waist in the back. Was that supposed to happen, and if the backlessness is resolved, will the apparent lowness of the waist also resolve itself?
That wasn’t supposed to happen – it’s all part of the back problem. I need to try it on and have a good look, but I’m pretty sure it’s the weight of the skirt + the low back, and if I pull the back up, and re-do the skirt, it will all get fixed.
I was going to comment on this as well – after mentioning how stunning I think this is going to be!
I made an 1812-ish dress last spring out of a cotton voile sari. I tried to do the bodice that curves up at centre back (I’ve always really liked that line), but the weight of even just the gathered voile at the skirt back pulled down almost all of the curve. I’m still in London, still examining 18th century dresses, which ends up sometimes including early 19th century. In the late 18th century (c. 1780 onwards) it seems to have been fairly common for a few pieces of boning to be inserted in the bodice centre front edges and even more often in the bodice back (either side of the centre back seam and at each middle back seam). Interestingly, I’ve discovered that bodice construction in the early 19th century remained remarkably similar to late 18th century (virtually the same, infact), especially at the bodice back – inlcuding the boning. I’m now wondering if adding some light boning to the bodice back would help support it better against the weight of the skirt, keep the fabric from streching? And while possibly less period accurate, how about some stay tape applied inside the bodice from the shoulder to the waistline for additional support?
What Carolyn said – but also you may be able to add some reinforcement to the back through some kind of twill tape hidden under the sleeve swags or undersleeve attached at the shoulder seam? It just looks as though the weight is dragging the whole garment off balance from front to back. Its been a while since I looked at dresses on this era up close, but I’m sure I saw one example where the front and back were tied together at the shoulder and then the sleeve (your swags) hooked on over the top to hide the tapes? Tis lovely though!
Lovely. Have you got any tassle/trim for the bottom edge of the skirt in your stash? Some how I think that would further the representative shawl look. Still, I’m picking over the details. It is a great dress to have sewn “on the clock.”
I’ve thought of tasseled trim, but don’t want to go that route unless I actually unpick the wool itself to create a fringe. Otherwise it’s just a costume pastiche, kwim?
Yes…I know exactly what you mean! What’s the point of all that careful hand stitching on the bodice if you capitulate and slap something inauthentic on the hem? Why, you could have saved time and used a sewing machine to create such an abomination! (I speak with tongue in cheek of course.) Steady as you go Dreamstress. Can’t wait to see the final version.
That is a very beautiful dress
It looks beautiful! I can’t wait to see it completely finished.
A very beautifull dress ! Where have you found such a wonderfull fabric ?
Maybe re-pleating the skirt would help with the back, too. It looks like there’s way too much fabric bunching up in the back at a very narrow spot – maybe distributing the fabric more evenly (hopefully that’s historically plausible?) would reduce some of the pulling…
And I love how the front turned out! The contrast with the white sleeves/underbodice looks really good in this fabric, and the brooch adds that final touch.
I just wanted to let you know how much I admire you making your own kashmiri dress and pattern. It looks very promising, can’t wait to see the finished dress!
It’s looking lovely! The fabric really is beautiful. Is it a heavier weight than an actual Kashmiri shawl? Because the dresses in the paintings strike me as rather drapey and yours seems a bit stiffer.
I like what you did with the bodice, it’s interesting! I think you’re right to get rid of the demi-train – by that point, they were generally made by shaping the hem rather than doing it from the waist, so I wouldn’t be surprised if the extra weight right there were what was pulling the back of the dress down.
Back issues notwithstanding, it’s looking good so far. The skirt has a lovely line to it.
I’m sad to hear you are deailing with fiddling issues but encouraged to know it’s not only me. However I must say the gown is gorgeous and I would love to make one of my own someday! I scrolled through these earlier right before my photo shoot and at a glance I was enjoying your gorgeous gown, not realizing it wasn’t even finished. You’ve definitely got the effect…can’t wait to see it completely completed! It will be great!
Laurie
It is absolutely gorgeous from the front. I agree the back isn’t doing exactly what it should, but it looks like simply pulling it up will fix the problem from what I can see here. Do show us what it looks like when you finish it!
This dress is making me seriously re-evaluate my usual dislike of Regency styles. It’s early days, but I think you may even have converted me.
Ohhh! It is so beautiful!!
I would like to study the history of costume, it is like my dream, but I am so practical(or try to be) that I always think what will I do with this knowledge!%))
So may be I will look at you and the will decide to sew something historical just for my own fun without any practical side and this will be my study of this perfect subject like historical costume!
I’m so reassured to know that fitting issues can happen to anyone, as well as issues trying to make do with the fabric you’ve got on hand. This dress is going to so gorgeous when finished!
It’s going to be stunning when finished! Love the fabric, colours, design – everything!
Did you know I never noticed the white undersleeves on that gown, or even any gown? Now the off-the-shoulder look makes sense! I’ll have to keep looking for that on others.
I love it and would definitely join in this challenge if I could sew!! Glorious day in Welly – hope you are enjoying the summer! xx M