
I posted the fun stuff about my Sherbet Seersucker dress yesterday, here are all the construction details for Anne Adams 2653, and a few thoughts on the pattern, for anyone interested in 1930s sewing patterns and techniques.
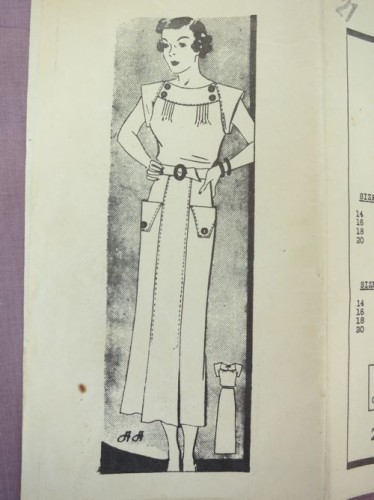
Anne Adams 2653
The Good:
It’s adorable, comfortable, practical, and goes together in a matter of hours – even with a lot of hand finishing.

Anne Adams 2653 in yellow seersucker
I used a size 34 bust (I have a natural 37″ bust, but find that size 34″ patterns from the 1930s generally fit me perfectly), and it fit perfectly, though I did have to use all the ease given at the side seams.
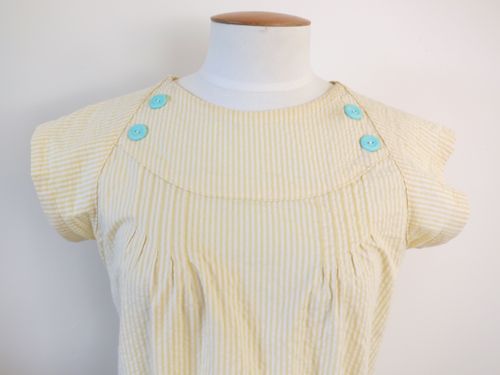
This is an ideal pattern for working with stripes. The pleating, pockets, pin-tucks, cap sleeves, and yoke all lend themselves to interesting stripe placements.
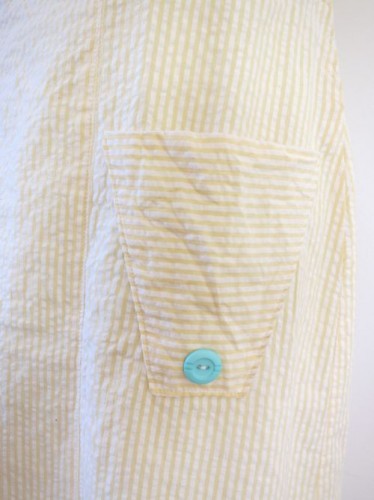
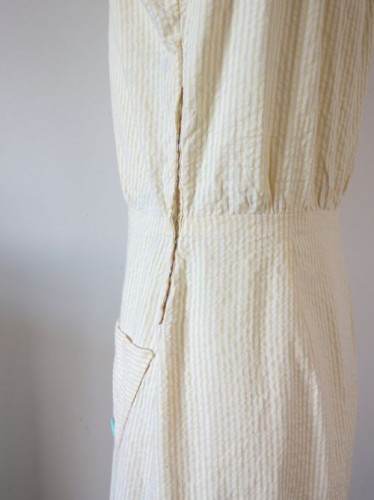
Horizontally striped pockets
I cut the main body of the dress with vertical stripes, set my pockets and cap sleeves with horizontal stripes, and did the same thing on the sleeves. I matched the stripe pattern where the bodice front met the yoke, and finished the insides of the sleeves with strips of fabric cut on the longways stripe, giving an interesting glimpse of the interior as I moved my arms.
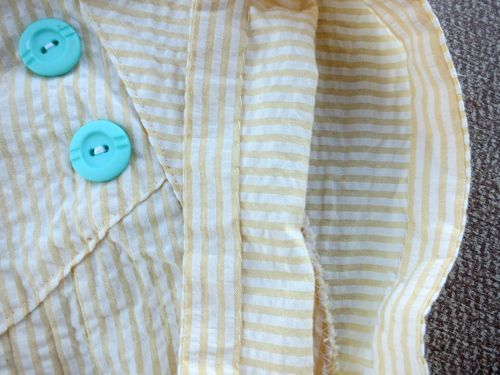
Sleeve stripes and sleeve finishings
The Bad:
The bodice is really short. I mean, really, really, really short! I’m very high waisted, with a quite short torso, and the waistline in the bodice fell half an inch up on my ribcage. I ended up having to re-cut the main bodice pieces (and re-sew the pintucks – my favourite), adding 1.5″ to the bodice length, to get it to fall at my waist. Note to self and other sewers: add extra length to the bodice in this style of dress, because you can always cut it out later.
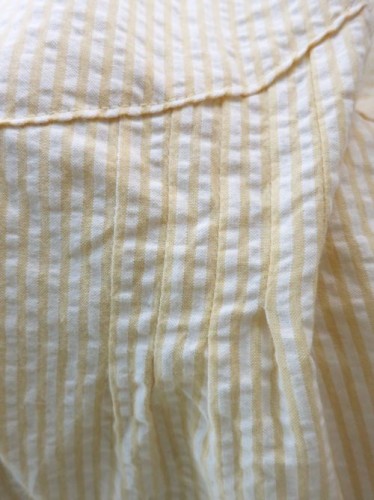
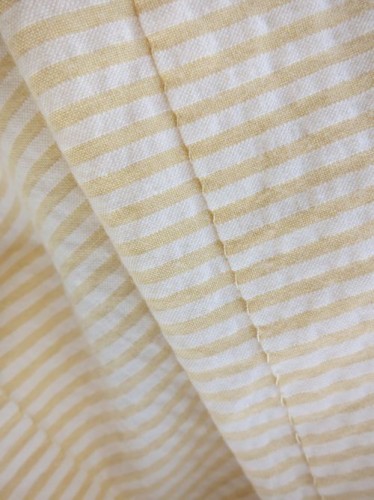
Stripe-matched pintucks in the bodice front
Changes I made:
Other than lengthening the bodice, the only other major change I made was to simplify the back fastening, switching it from two bound buttonholes which would close with a double connected button (time consuming, fiddly, and fiddly to wear) to a simple button and worked-loop closure.
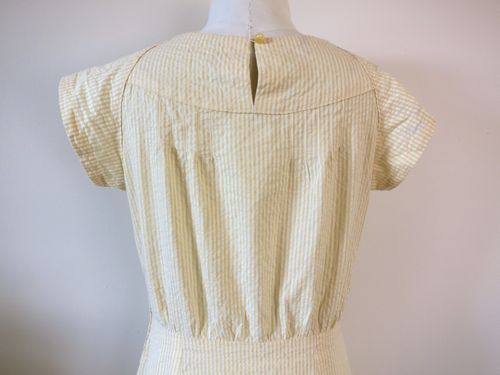
Back fastening with button and worked loop
Changes I would make next time:
None but the lengthened bodice, the pattern is pretty much perfect as it is, and I’ve got plans for it in a number of other pieces of stash fabric.
Just perfect!
And the inside?:
Zig zag to finish the main seams (yes, that is period accurate, though hand-whipstitch and pinking were more common), hand hemming, bias finished neckline.
Hand hemming
The dress fastens at the proper left side with a continuous lap placket, a hook and hand-worked loop at the waist, and domes (snaps) for the rest of the placket. And yes, it stays closed, and stays flat and smooth.
Side opening placket
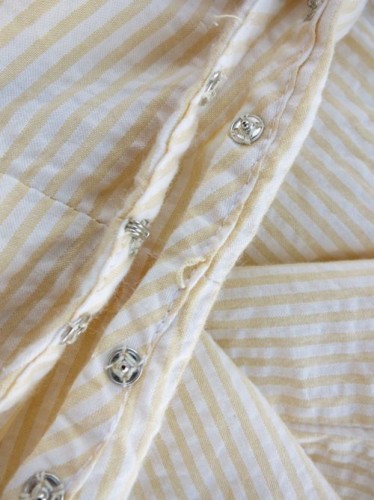
Hook, loop and domes to fasten the side placket
Update: I’ve located the new belt! Isn’t it pretty?

The belt, with vintage shell buckle and velvet ribbon
I wasn’t able to find an aqua buckle, but this vintage shell one tones in well, and picks up the lagoon blue of the buttons well, and the velvet ribbon (which I’ll also put on my hat) pulls the whole outfit together nicely.
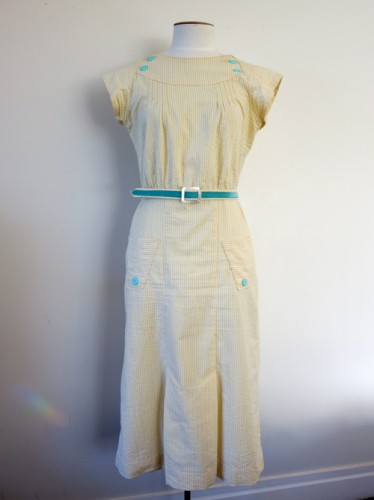
Anne Adams 2653 now with belt
Just the Facts Ma’am:
The Challenge: Stripes
Fabric: 2 metres of 100% cotton seersucker, 145cm wide – $12pm
Pattern: Anne Adams 2653
Year: circa 1934
Notions: 6 aqua buttons, 1 yellow button, 1 hook, domes (snaps), thread, vintage shell belt buckle, lagoon blue velvet ribbon.
How historically accurate is it?: Perfectly. Period identical fabric, period sewing and construction techniques. The buttons are a modern plastic, but other than that it is 100% accurate.
Hours to complete: 6 – despite having to re-cut the bodice
First worn: Art Deco Weekend 2013 (but I still needed to make the proper belt)
Total cost: under $30 including notions
It’s beautiful! But what did you end up doing for the belt?
Blast! I was hoping no-one would notice that omission! Confession time: I can’t find it! Just finished it, couldn’t find it for the photos, don’t know where it is!
Oh that’s awful! I hope it does show up again. And that we get to see it when it does 🙂
Just lovely. The aqua buttons are a perfect contrast without being overwhelming.
Looking at the pattern, I take it that the skirt front is a single piece with a pleat sewn down on each side?
Thank you!
The skirt front actually consists of three pieces, with seams hidden in the fold of the pleat. It could be cut of one piece if you could get fabric wide enough though.
Your attention to the details really makes this a fun dress. I really do love the little sleeves.
Thank you! Detail oriented is definitely one of those phrases that would be on my CV 😉
Aren’t the sleeves fantastic? They are like little sun-shields to keep your shoulders from getting too burnt!
This dress is SOOOOO. CUTE. I can’t even handle it. I love the details, and you always do such crisp, gorgeous work! It’s amazing!
Wow, you really know how to flatter a girl! I’m tickled pink that you are as in love with it as I am!
I adore this. I want to wear clothes like this again. I really need to lose some weight and inches (for health reasons, not just for fashion). If I made this for me right now, I have the feeling I would just end up looking like a giant circus tent. You, on the other hand, look absolutely marvelous.
Thank you!
I’m actually always amazed at how flattering ’30s styles can be on bigger sizes – they are always drawn on little pencils, but made up a lot of the dresses look great on women of all shapes. If it’s for health though, best of luck with loosing weight and inches!
This is wonderful? I love the details with the stripes and pleats. The buttons look fabulous with the yellow.
Lovely!
I have a copy of this pattern, too, but haven’t made it yet. I love seeing them “brought to life”.
Do you have a picture (from the original paper pattern instructions) of the double buttonhole detail back neck closure? Can you post?
Thanks, love the dress!