
For those of you making the View B pockets in the Otari Hoodie Sew-Along, we’re here! You can finally start actually sewing. In this post I’ll be showing how I sew the Art Deco inspired cloud pockets of the Otari Hoodie View B. I’ll be covering both the pocket construction method shown in the pattern, and a hack where you add binding to the pockets.
If you want to join in you’re not to late to catch up with the Sew-Along!
Buy the Otari Hoodie Pattern Here
In the previous Otari Hoodie Sew Along posts I covered:
- #1 Choosing fabric
- #2 Pattern alterations to get the perfect fit, & cutting out
- #3 Sewing Preparation: interfacing & choosing stitches
- #4 Sewing the View A Pockets
Ok everyone excited about the View B pockets, let’s make them up!
Standard View B Pockets:
For this part of the Sew Along I’m going to be using images taken when making the original sample Otari Hoodies for the pattern launch.
The numbering of the instructions in this post corresponds to the numbering of the pattern’s instructions.
6. Place your pocket J lining and outer right sides together, and sew around the top curved edge of pocket.
7. Reinforce the inner edge of the angle with a second line of stitching – this will help to keep the angle crisp and accurate as you turn the pocket right side out.
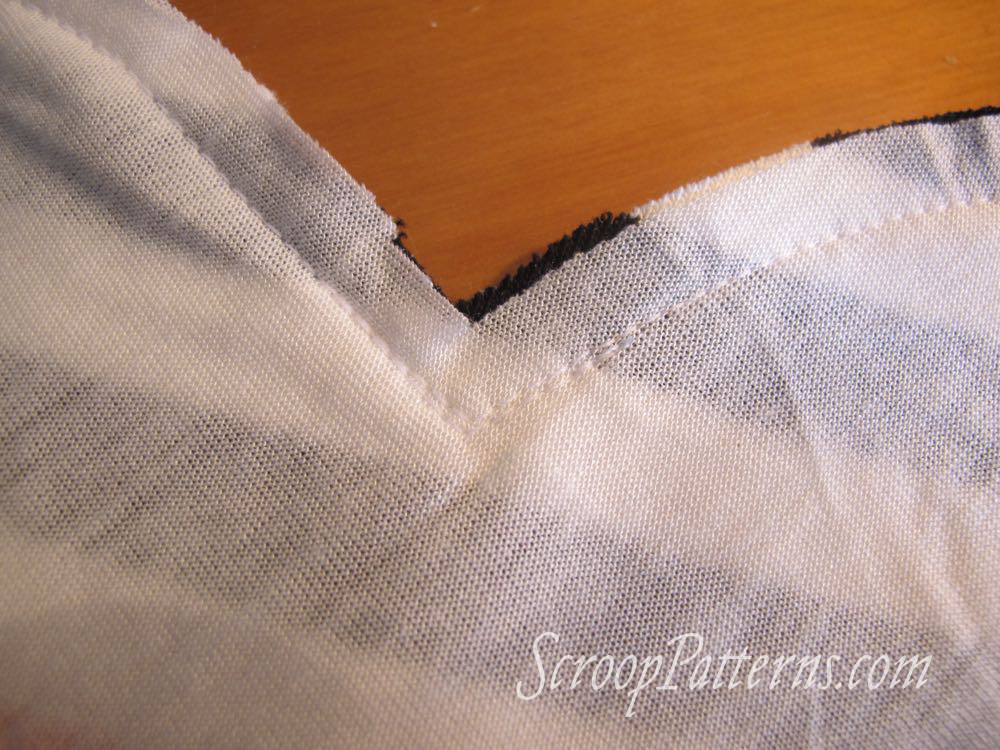
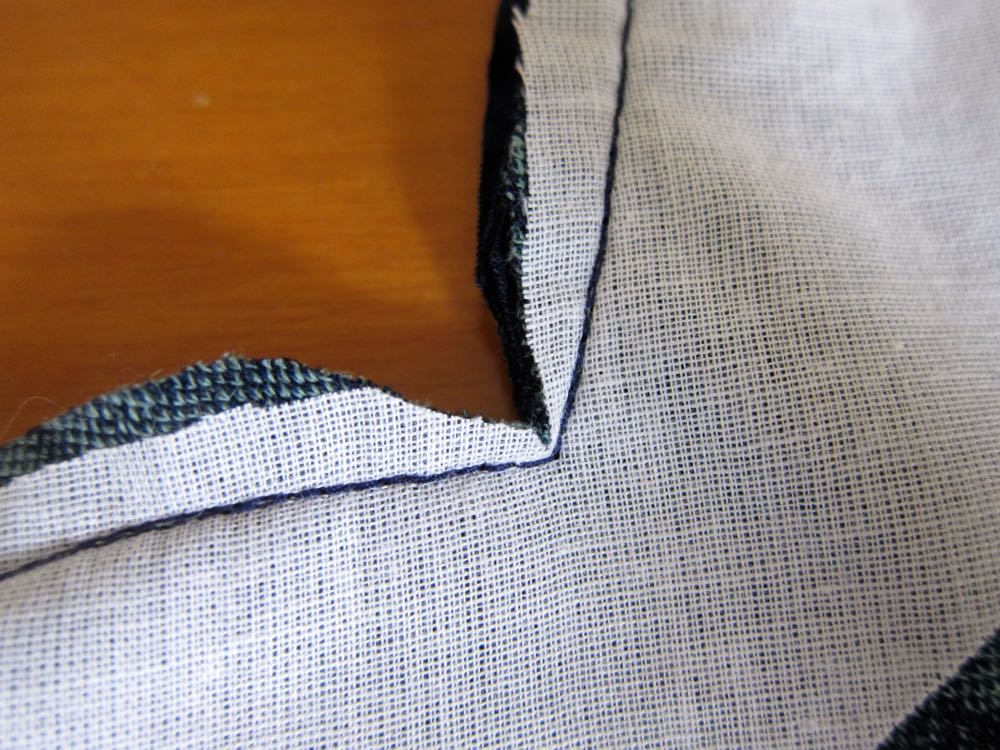
8. Notch a V into the inner corner of the pocket.
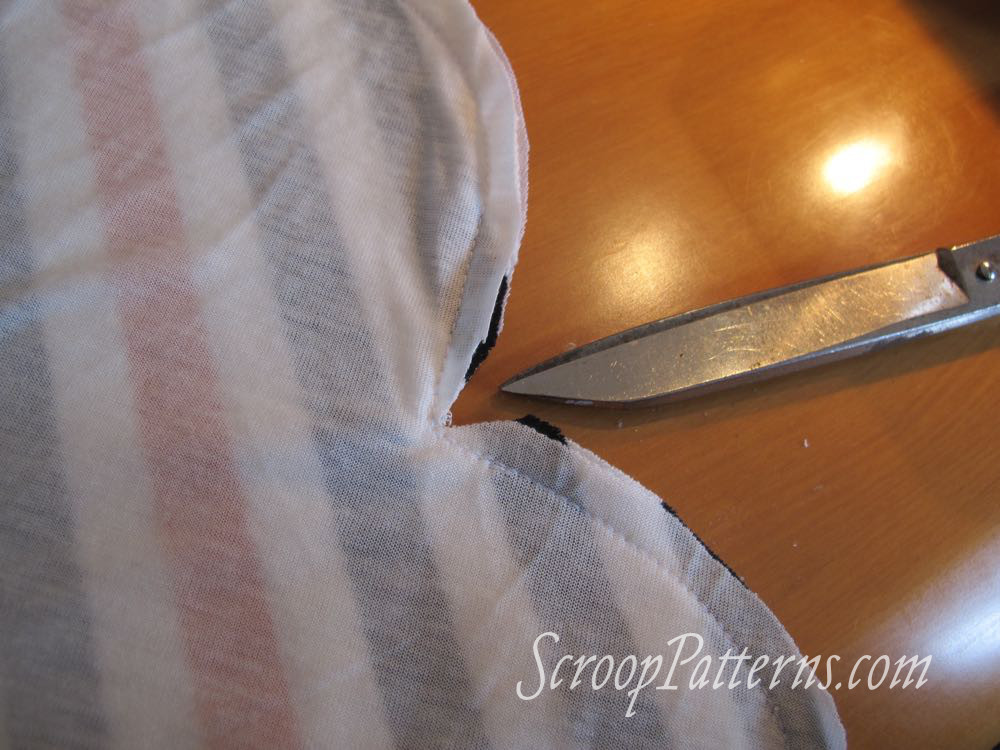
Grade your seams and notch along the curves of your pocket. The heavier your fabrics the more grading and notching you’ll need to do. With very light fabrics you may not need to do any notching.
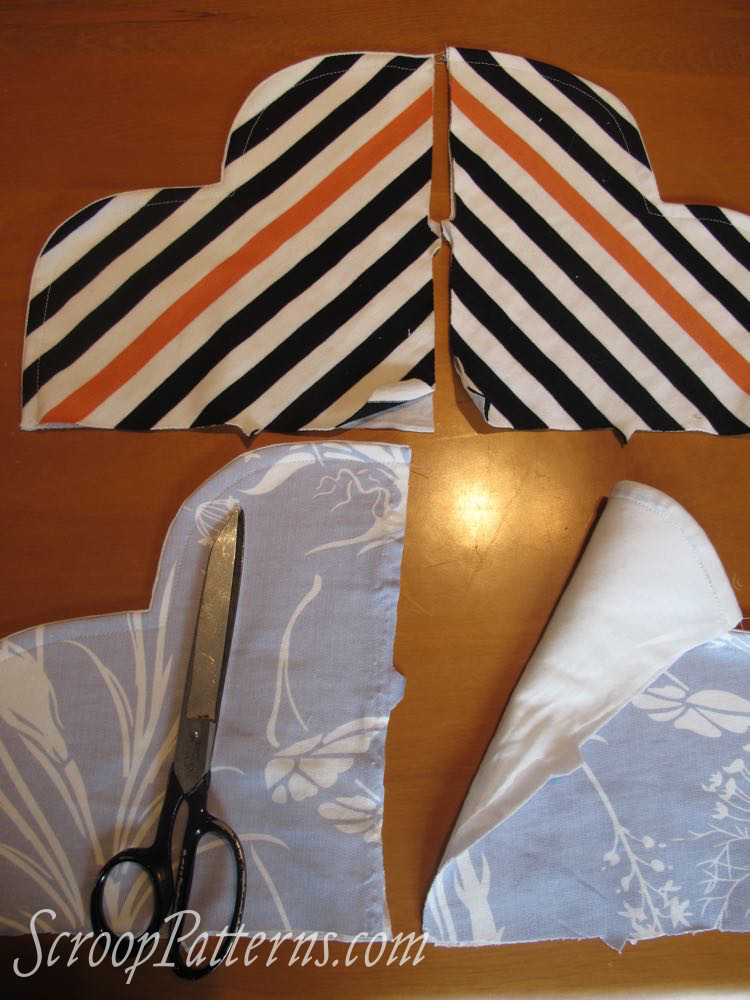
Turn your pocket right side out and press.
You can choose to leave a little edging of the lining fabric visible along the edge of your pocket as a contrast – this works particularly well if your lining fabric is lighter than your outer:

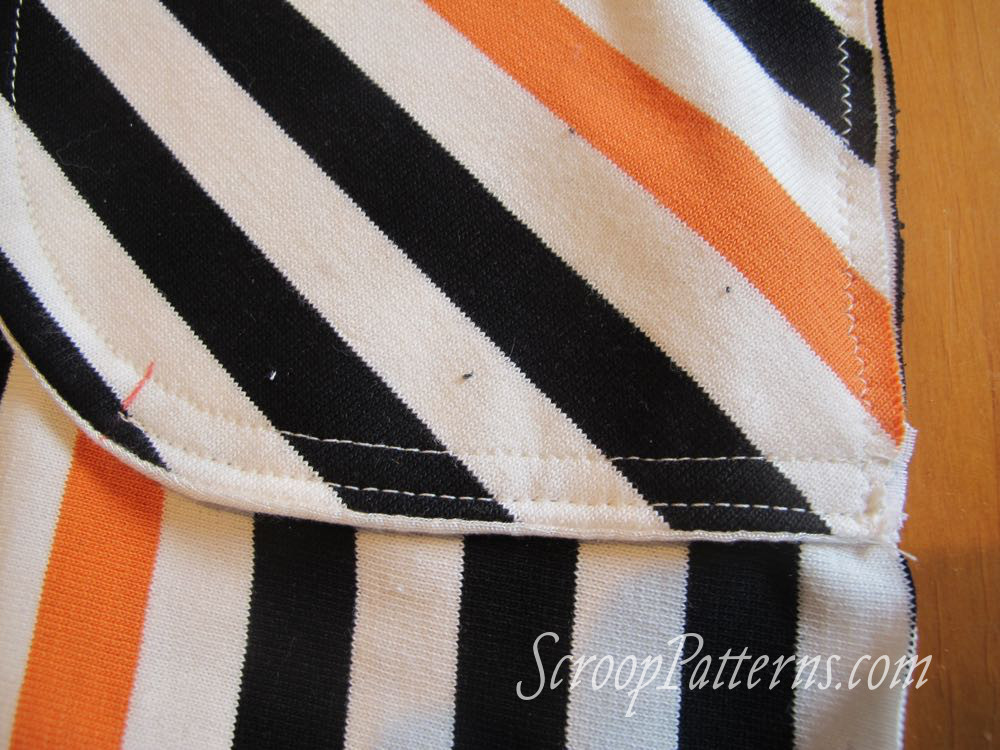
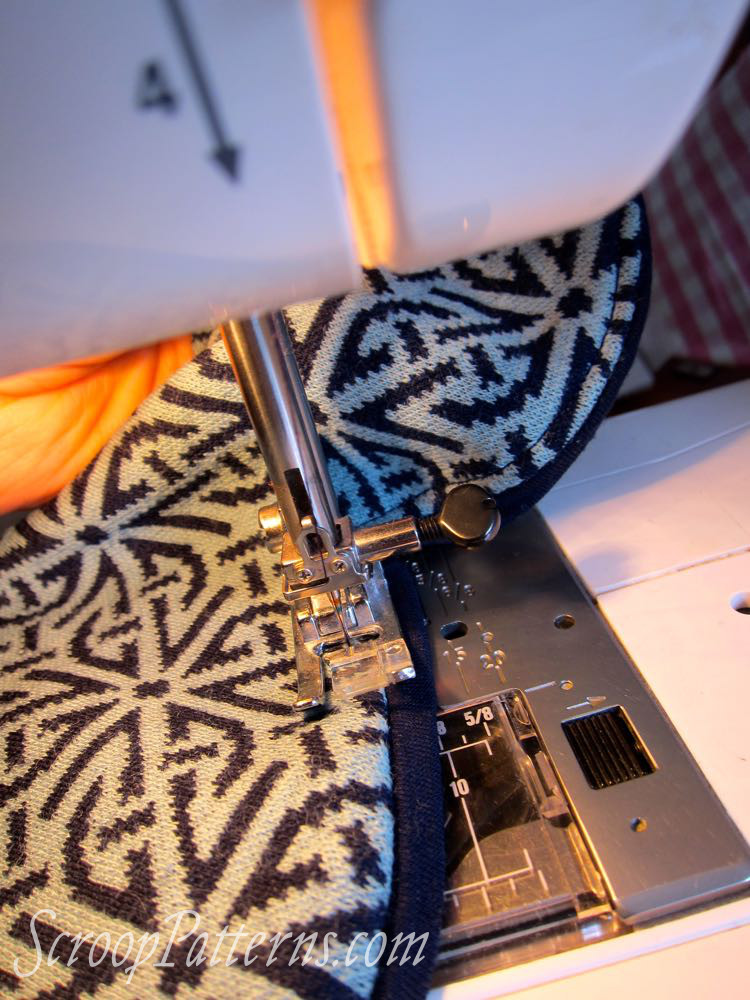
9. Using a straight stitch, topstitch along the pocket edge, 3/8″/1cm from the curved edge, sinking and turning your needle at the inner point of the pocket:
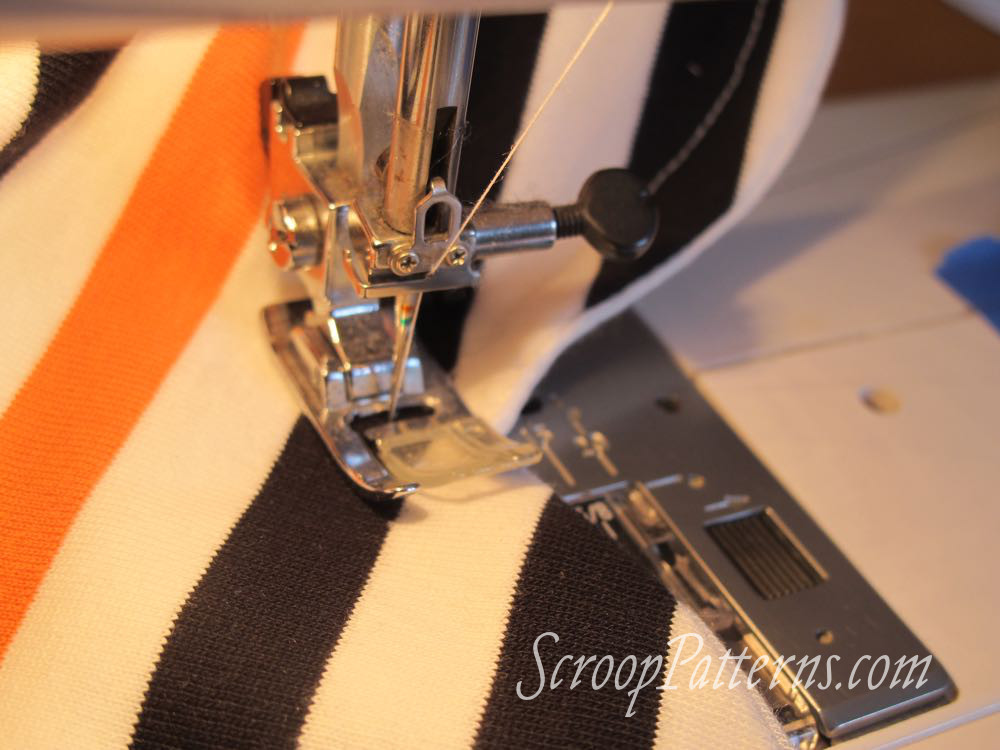
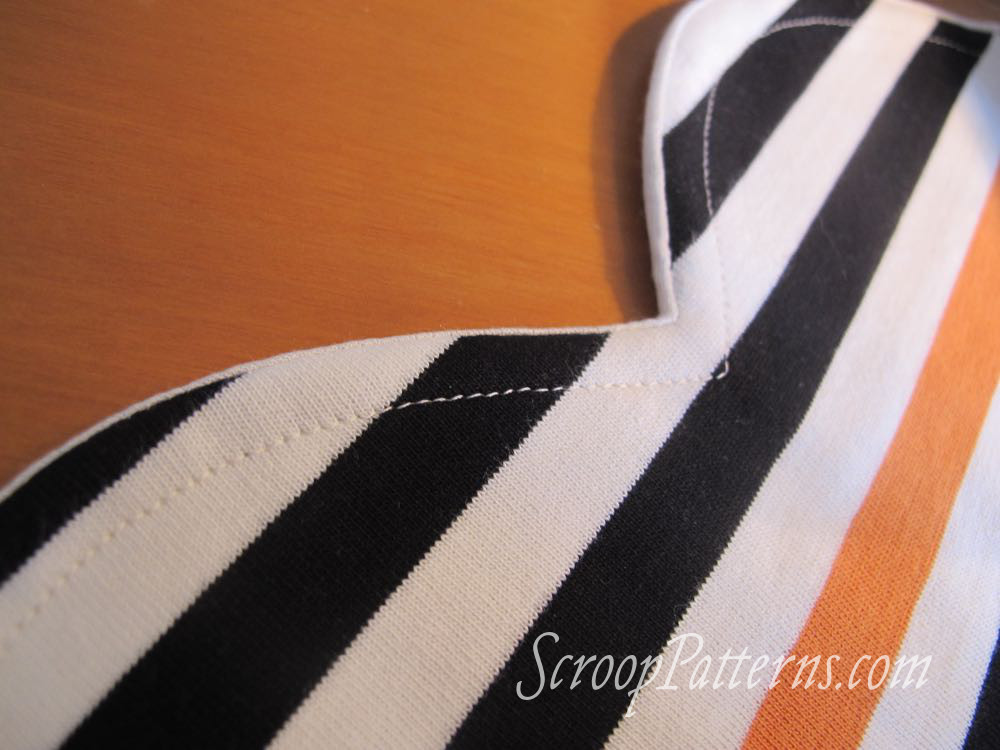
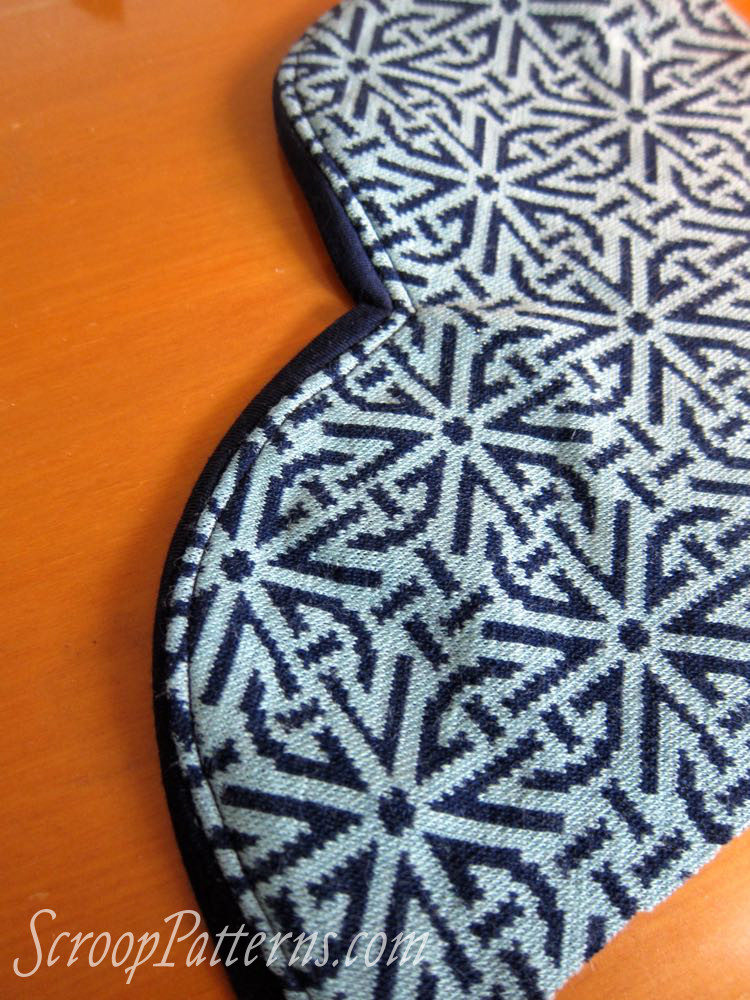
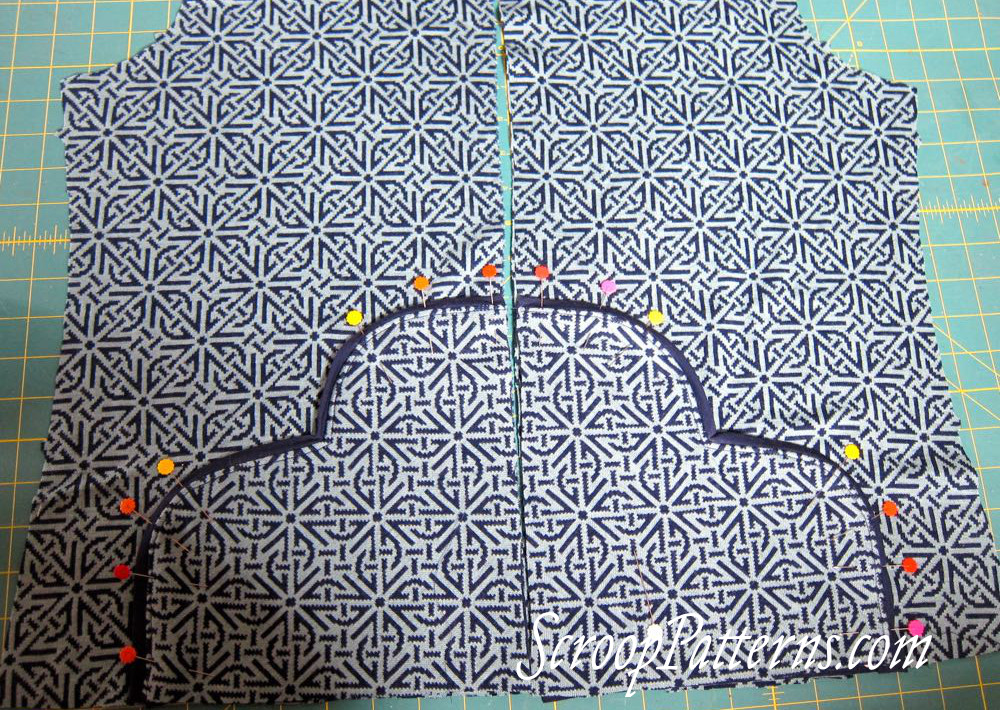
And here are two sets of topstitched pockets, ready to be attached to the hoodies:
Attaching the pockets to the Otari Hoodie:
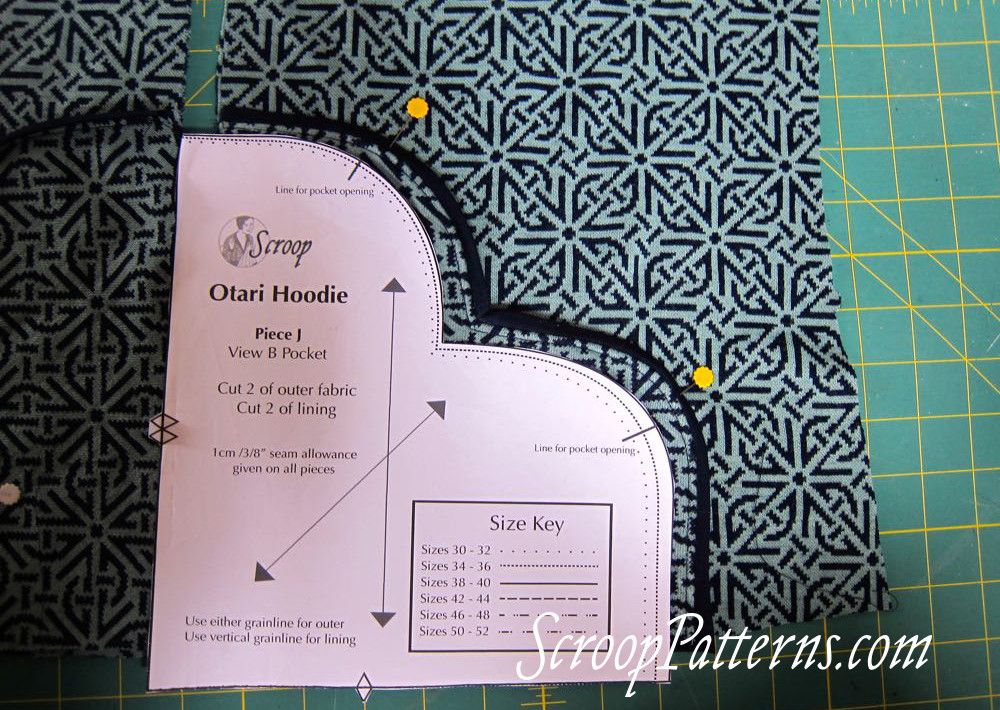
Use the pocket pattern piece to mark the pocket opening lines:
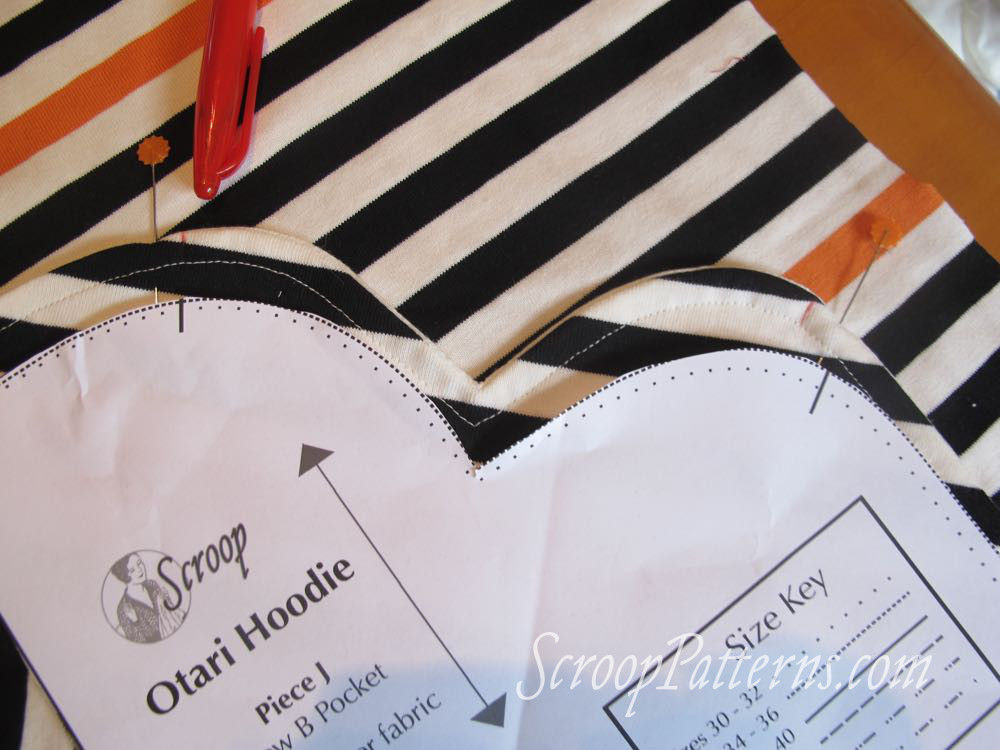
10. Place your pockets on the front of the hoodie, matching notches. Sew along the notched centre front and bottom edges.

11. Sewing 1/8″/3mm from edge, stitch along the top and side edge of the pocket, stopping at the lines marked for the opening for your hand.

Your View B pockets are attached to your hoodie!

Alternative View B Pockets with Binding:
For my double knit merino jacquard Otari Hoodie I’ll be doing the View B pockets with binding, to add more visual contrast (View B chosen by commenters here and on IG, with 29 votes for B vs 12 for A).
Here is how to add a binding strip to the View B pockets.
You will need the pocket outer and lining, plus a binding strip the width of the View A binding strip included in the pattern, and the following length (sorry, no imperial measures as they got so complicated and messy looking):
- Size 30: 34cm
- Size 34: 34.5cm
- Size 36: 35cm
- Size 38: 35cm
- Size 40: 35.5cm
- Size 42: 36cm
- Size 44: 36cm
- Size 46: 36.5cm
- Size 48: 37cm
- Size 50: 37cm
- Size 52: 37cm
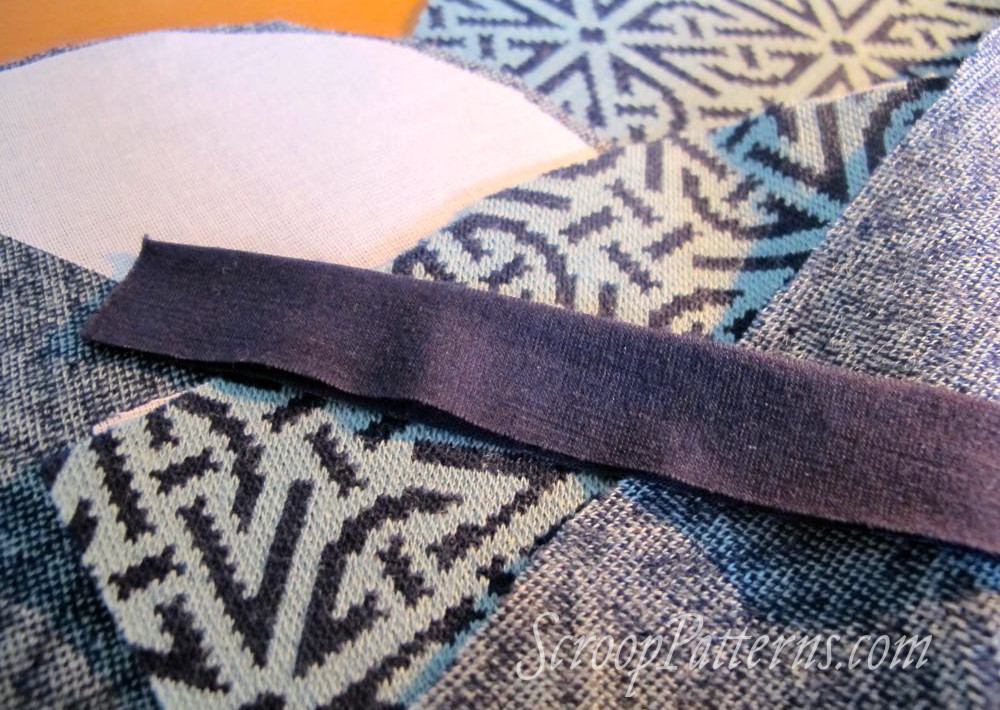
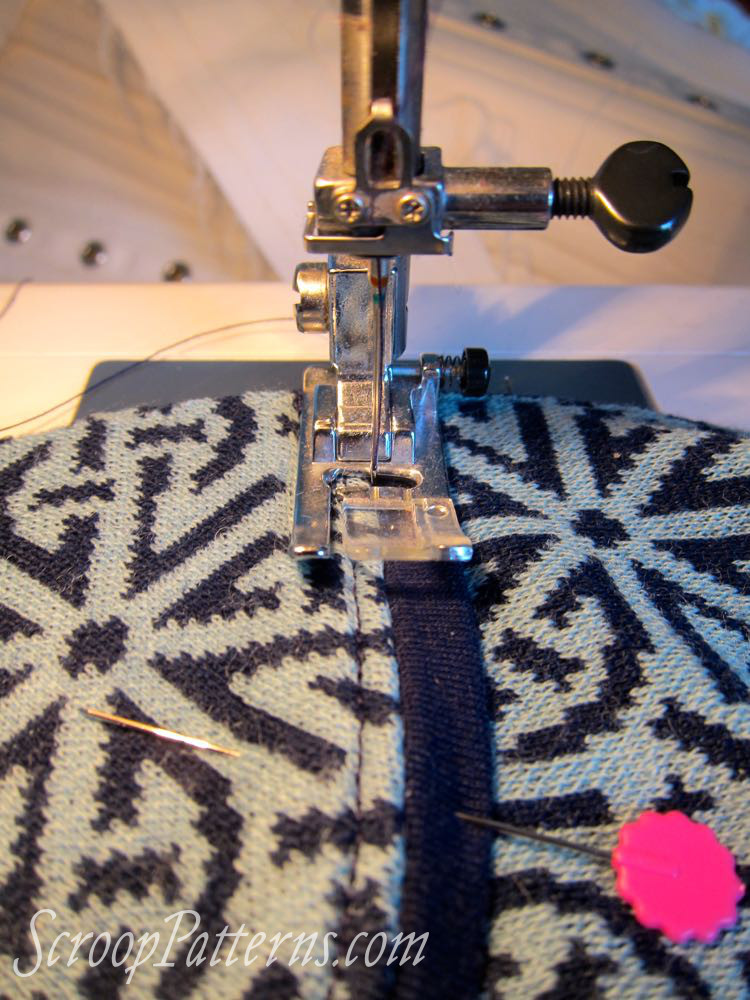
1. Wrong sides together, press your binding strip in half lengthwise
2. Working with your interfaced pocket outer, match the cut edges of the binding to the cut curved edges of the pocket. Either pin/clip along the whole length, distributing the stretch evenly, or start at one end, and pull the binding as you go to distribute the stretch evenly.
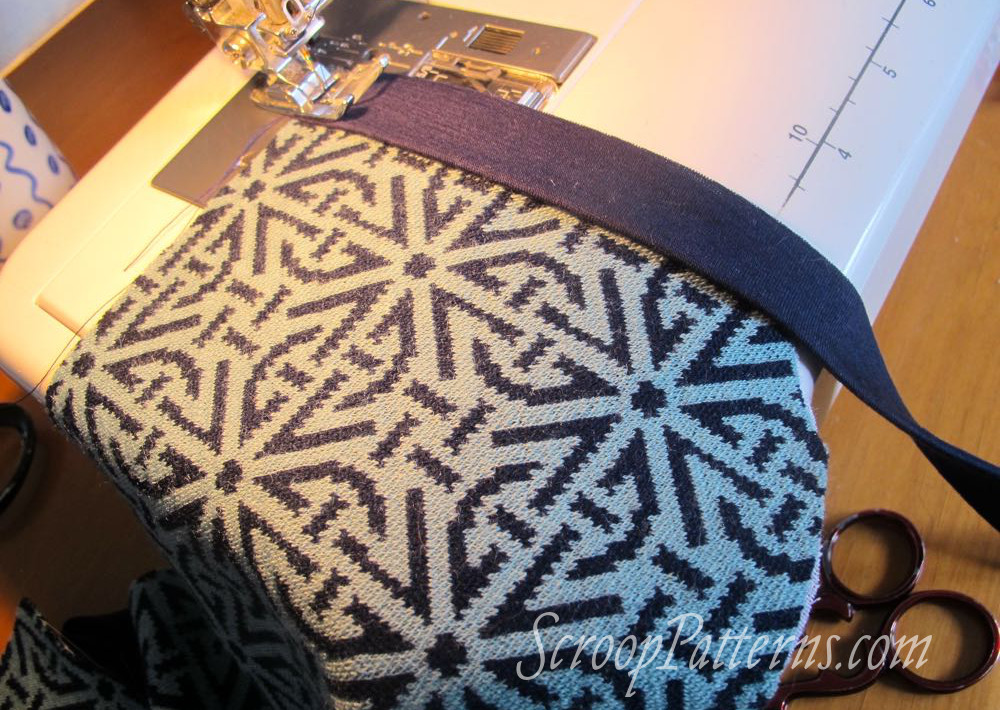
Your pocket may curl slightly as you do so, because the binding is shorter than the outer edge of the pocket, to keep the binding crisp and taut:
3. Once your binding is sewn on, place the pocket lining on the pocket, right sides together, with the binding sandwiched in the middle:
4. Working from the pocket side, so you can see the stitching that hold the binding on, sew the pocket and lining together.
5. Notch in the the V of the pocket, and grade the seams:
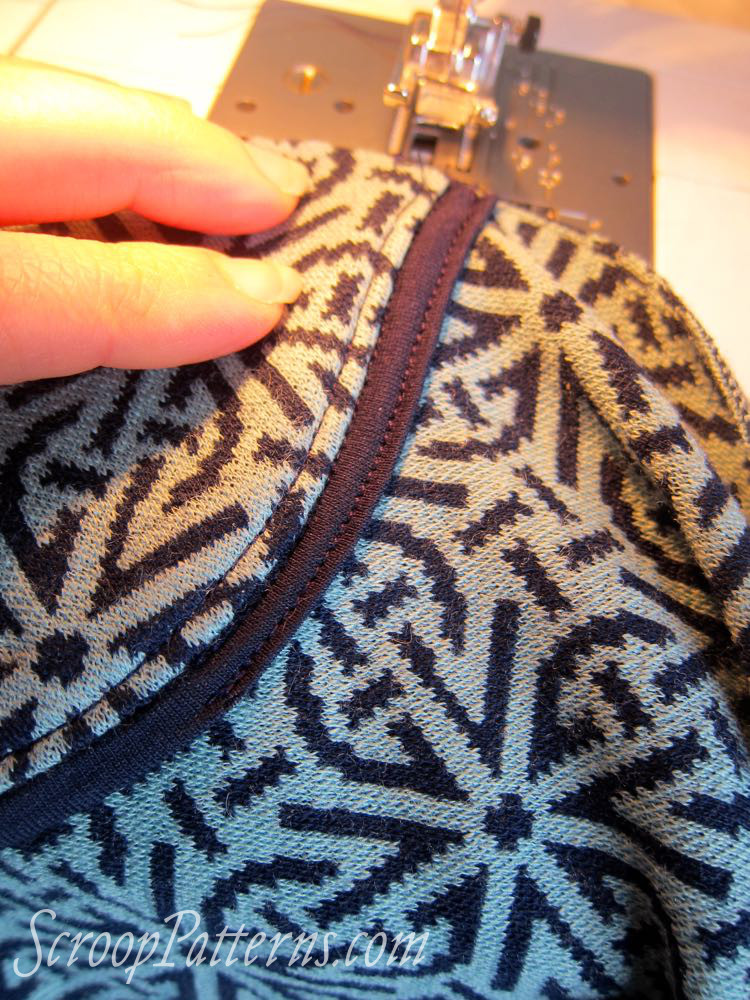
6. Flip your pocket right side out, and press. The binding with have a little crease at the V of the pockets:

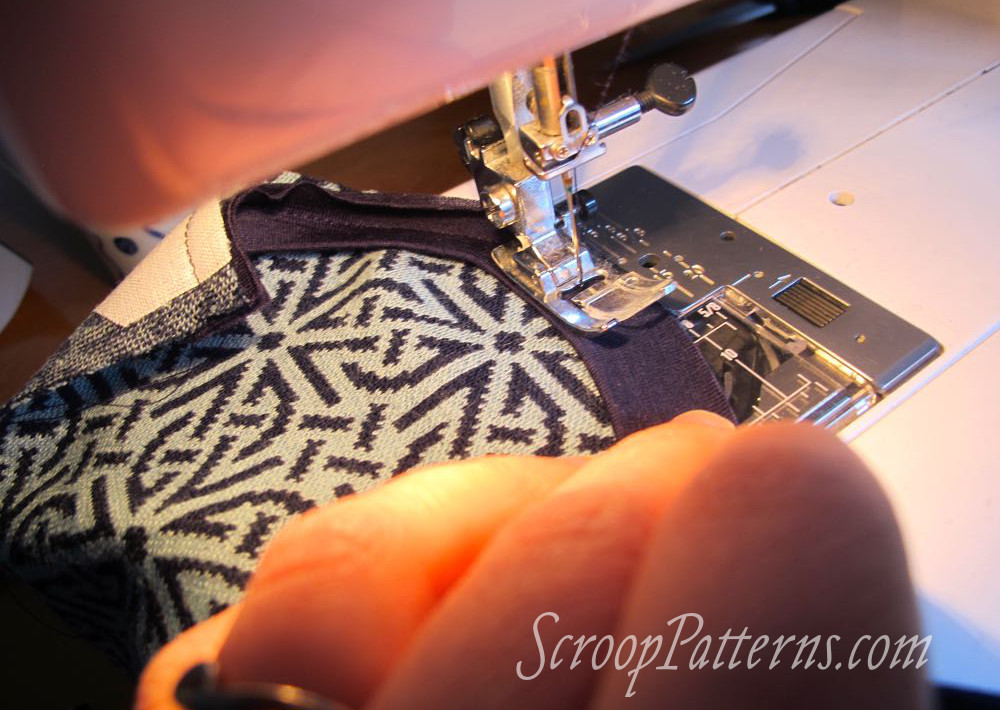
7. Topstitch along the edge of the pocket, 1/8″/3mm from the binding:
Attaching the pockets to the Otari Hoodie:
8. Mark the pocket opening start & end points:
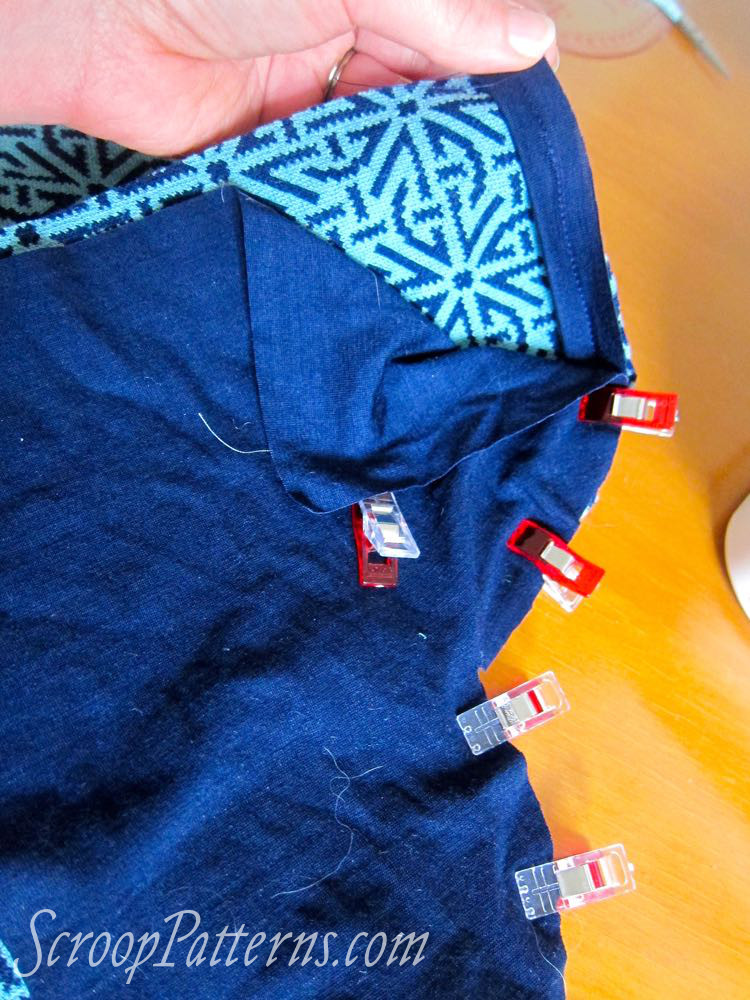
9. Pin the pockets in place on the front pieces of the Hoodie, making sure that the top edges of the pockets are lined up:
10. You’ll be sewing two lines of stitching to attach the pockets to the Hoodie. For the first line ‘stitch in the ditch’ joining the binding and pocket fabric, stopping at the marked pocket point (the yellow pins in my photo above) and backstitching.
For the second line, sew 1/8″/3mm from the outside edge of the binding, backstitching at the same end-point.
11. Baste your pockets to your Hoodie along the notched centre front and hem edges:

Your pockets are done!
In the next Sew Along post:
Sleeves and bodies! (aka, turning the Hoodie into a thing you can try on!).
Want to join in? Buy your Otari Hoodie Pattern Here