Latest Posts

A medieval moment in my 1350s-80s gown

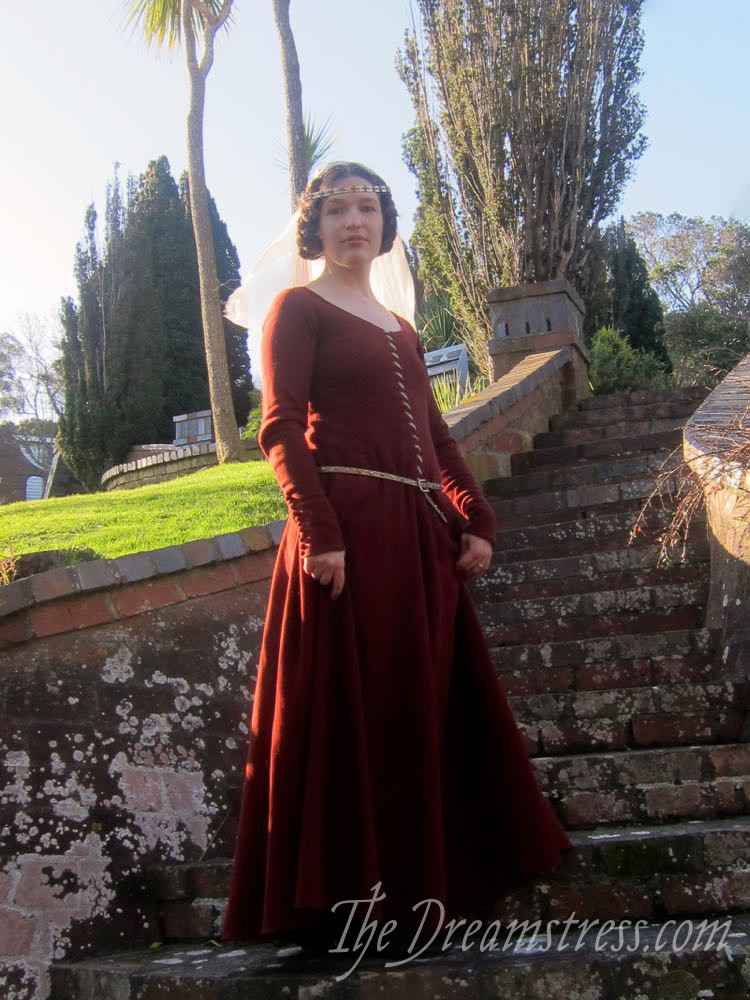
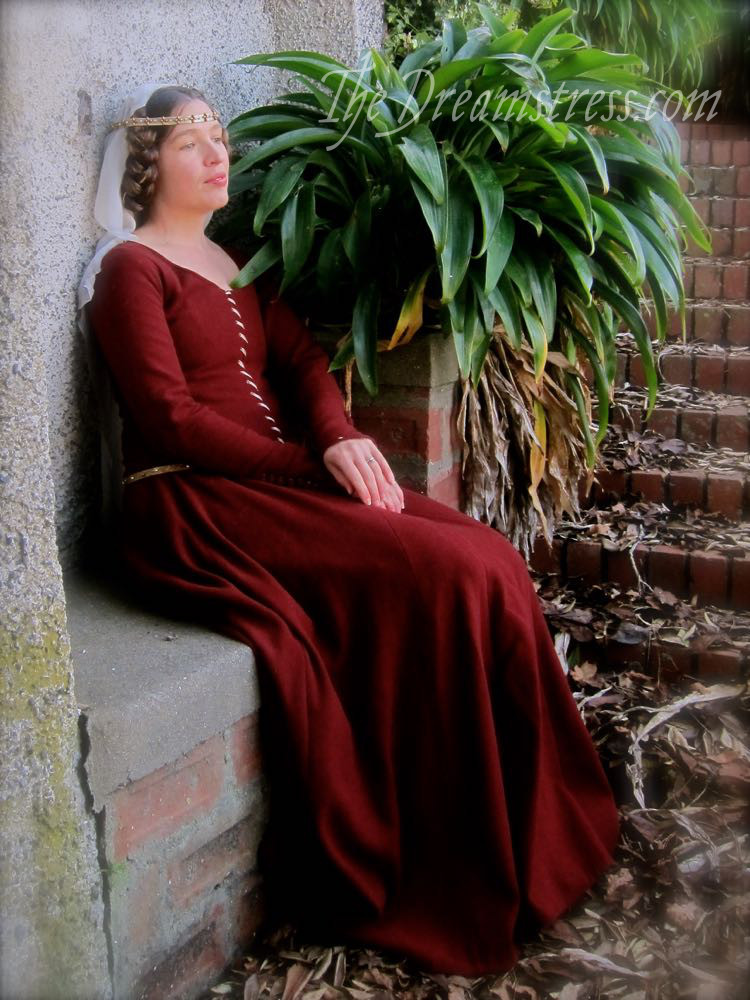
At long last, after lots of research, lots of work, some triumphs, and a few setbacks, I’ve finished my first proper medieval garment.

I got it completely ready to wear, except for sewing four buttons on the cuffs, for a historical dinner on Saturday.  I wore it for the dinner with cuffs unbuttoned,  and then I finished the buttons on Monday.

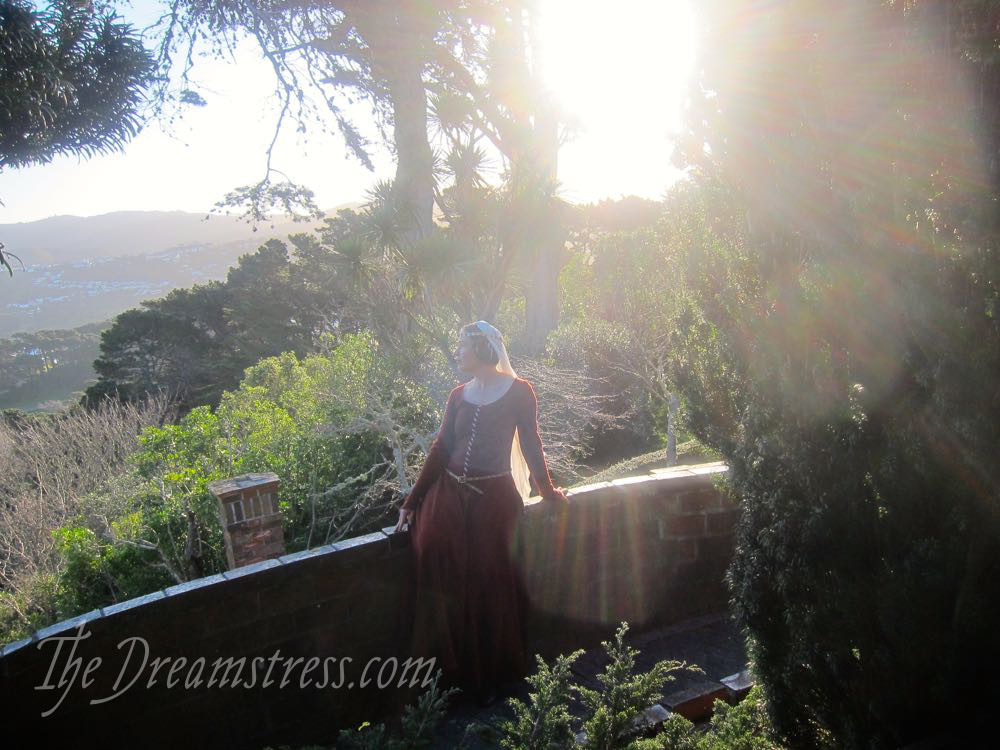
On  Thursday the weather was beautiful (if cold) and the gorgeous Elizabeth of Ills Winter  and I spent the late afternoon hanging out at the Sir Truby King gardens, taking pictures and generally having fun.

1350s-80s medieval gown thedreamstress.com01

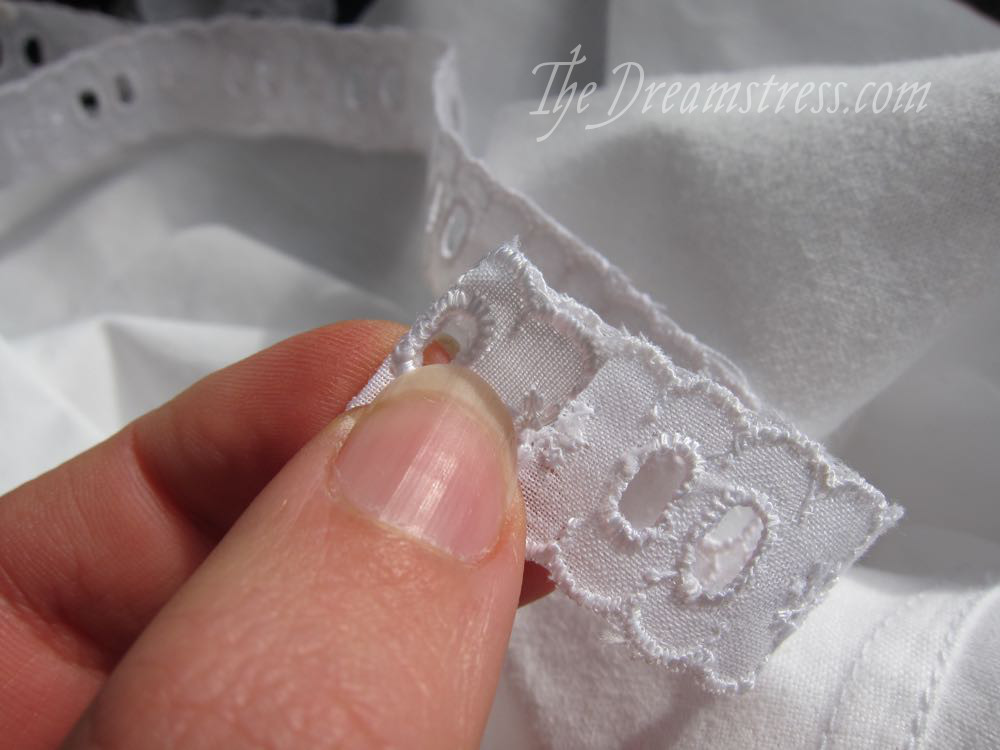
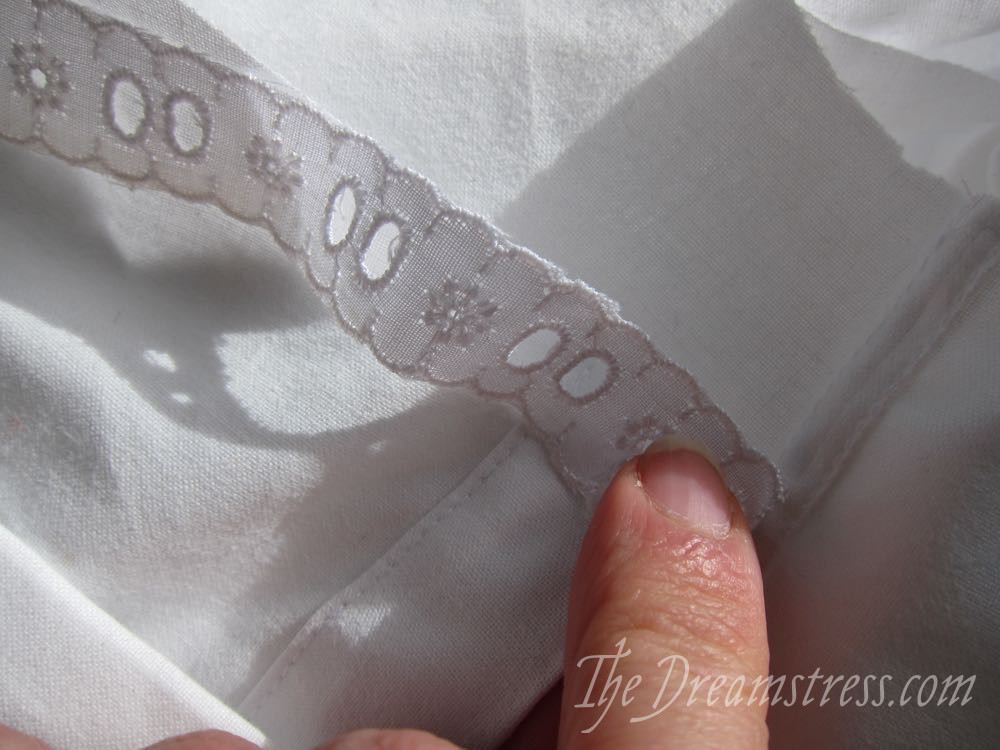
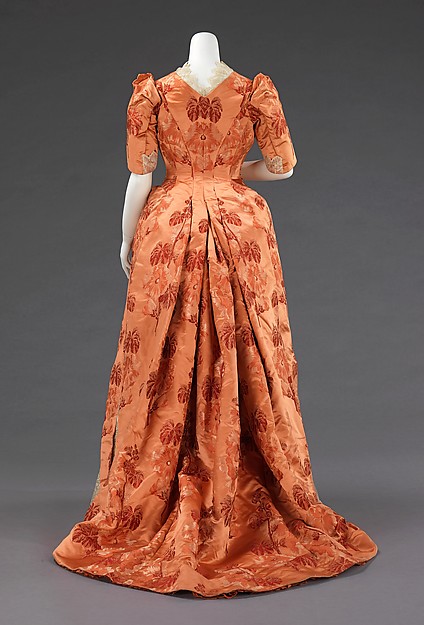
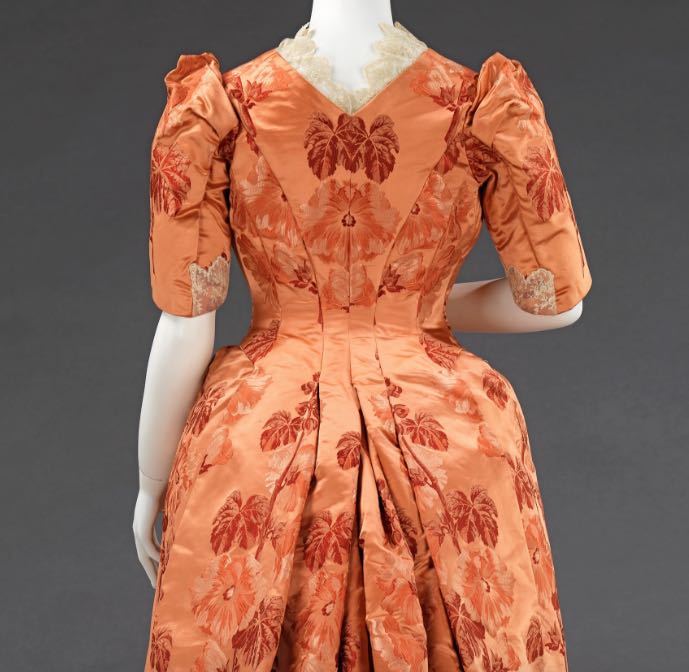
I only ended up putting 11 buttons on the sleeves, because of buttonhole issues (more about that in a later post), but I could add more later if I wished.

1350s-80s medieval gown thedreamstress.com02

I’m reasonably happy with the finished result.  The neckline is a little too scooped, the sleeves a little too long, my buttonholes more than a little rubbish, but as a learning piece, it’s not bad at all!  The next one will be much better!

1350s-80s medieval gown thedreamstress.com11

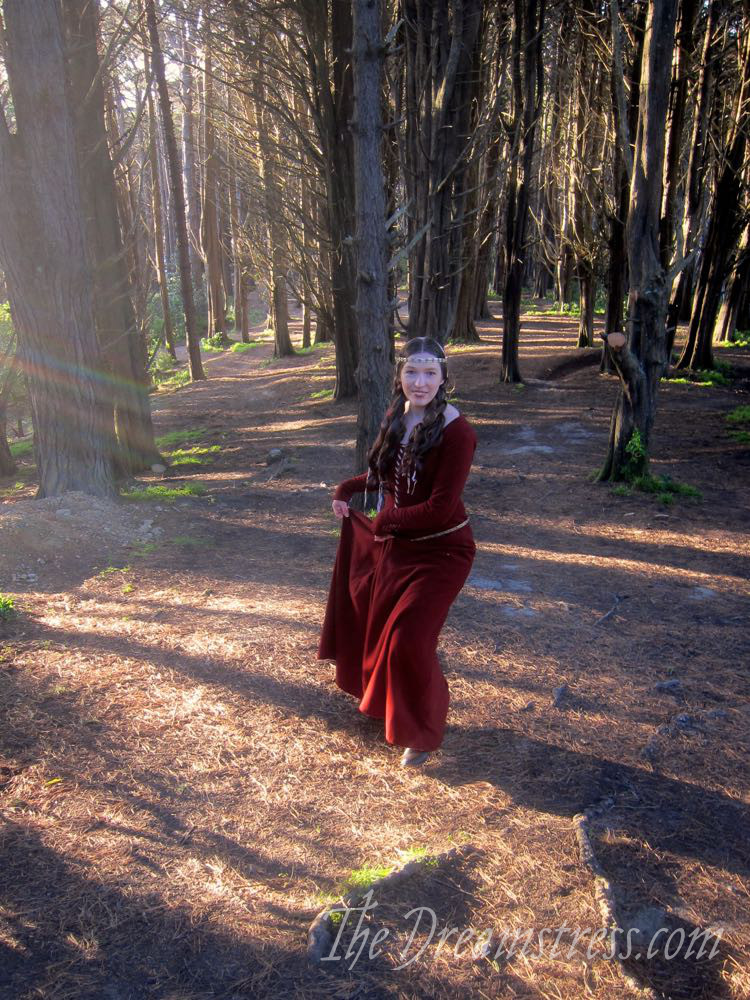
I definitely feel I’ve got the right silhouette for the 1360s-70s – the quite androgynous, flattened chest, the dress beginning to tighten at the waist, but without the real waist emphasis of later decades.  In a pinch it will do for anything from 1350s-90s.  Not that I have many  events  to go to where real date-specific period accuracy for this period is called for!  Still, I think looking at a very specific, narrow period, and trying to make it fit exactly that really helped me to think about period accuracy vs. modern interpretations of fit an attractiveness.

1350s-80s medieval gown thedreamstress.com06

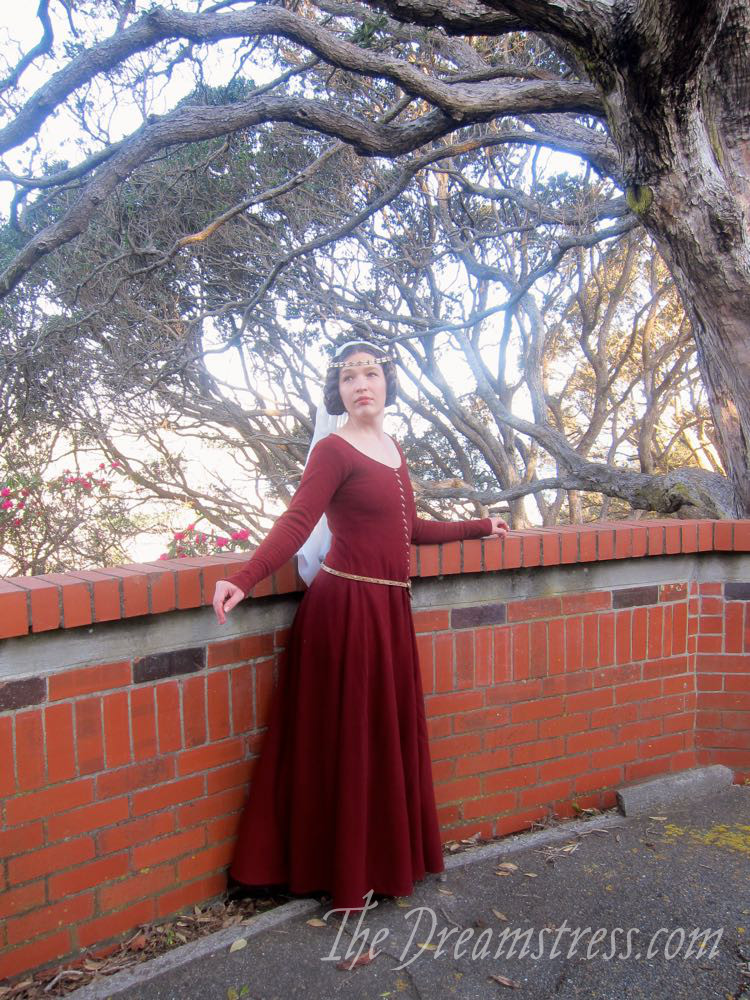
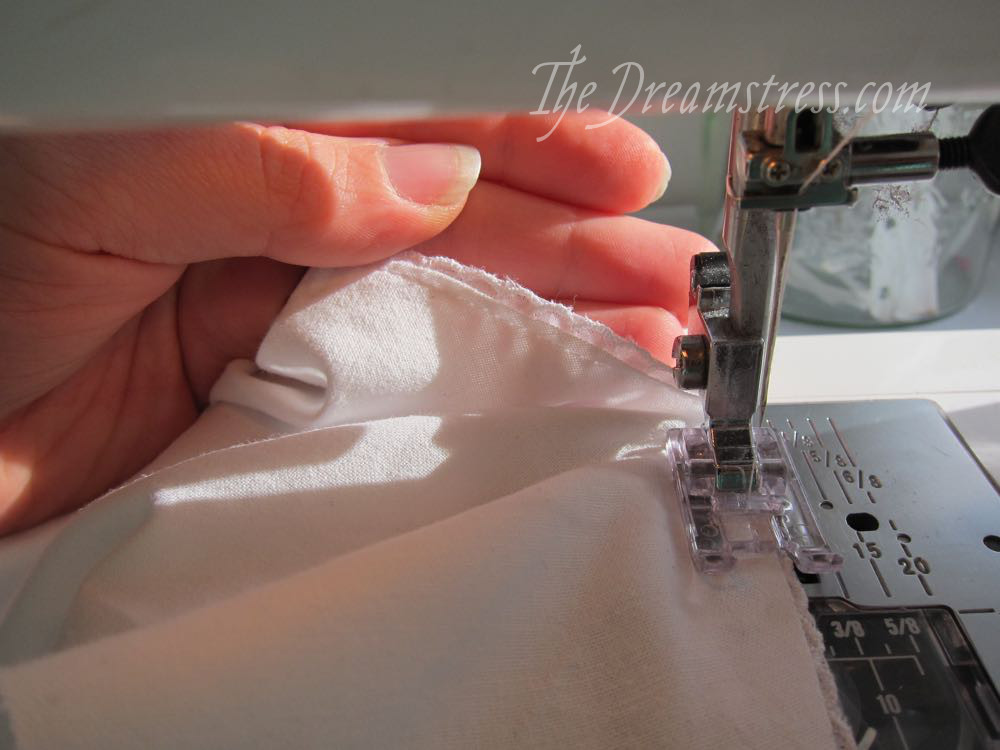
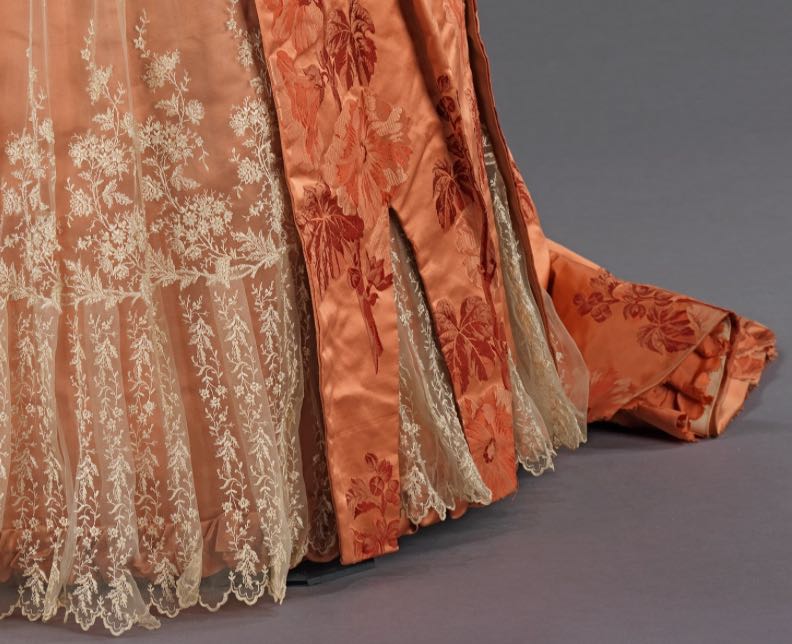
Side note: can we talk about my seriously impressive hemming job?  I got a friend to pin the floor length at all the seam lines, but too many pins fell out before I was able to get to hemming it, so I ended up doing it almost entirely by myself, using a mirror propped on the floor, and carefully cutting away tiny bits where the fabric brushed the ground, until it was even all around.  It almost makes up for the buttonholes!

1350s-80s medieval gown thedreamstress.com08

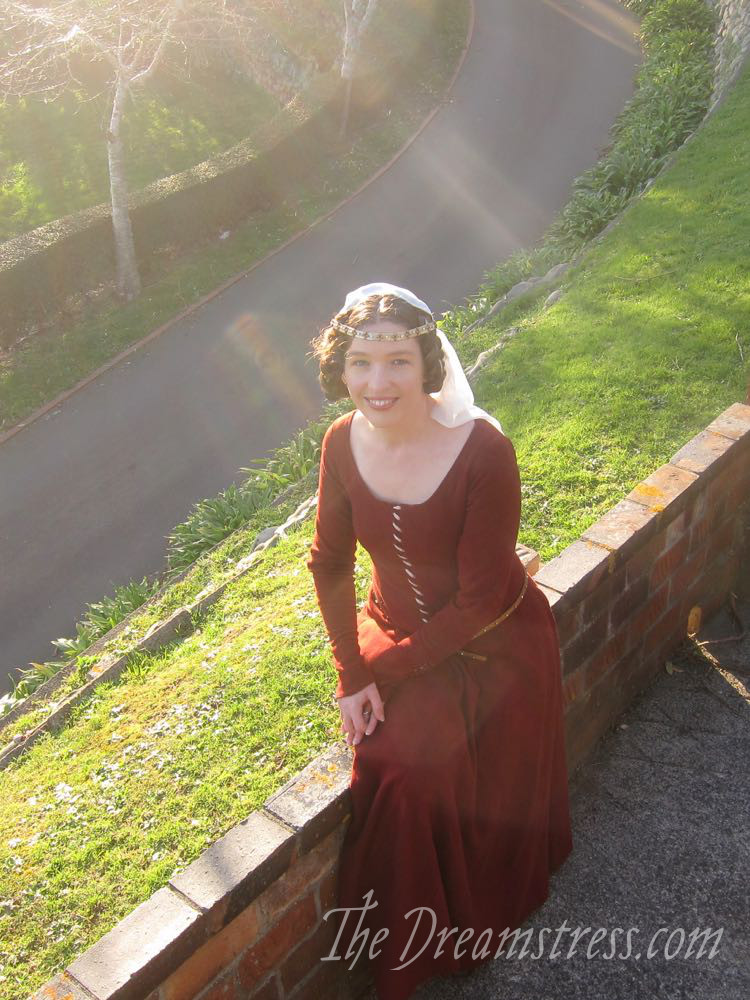
The circlet, belt and veil are just quick costume jobs, but they were quite fun to do and are very effective.  I’m almost done with a proper veil in very fine linen, but didn’t quite get the rolled hems done in  time for the photoshoot.

1350s-80s medieval gown thedreamstress.com09

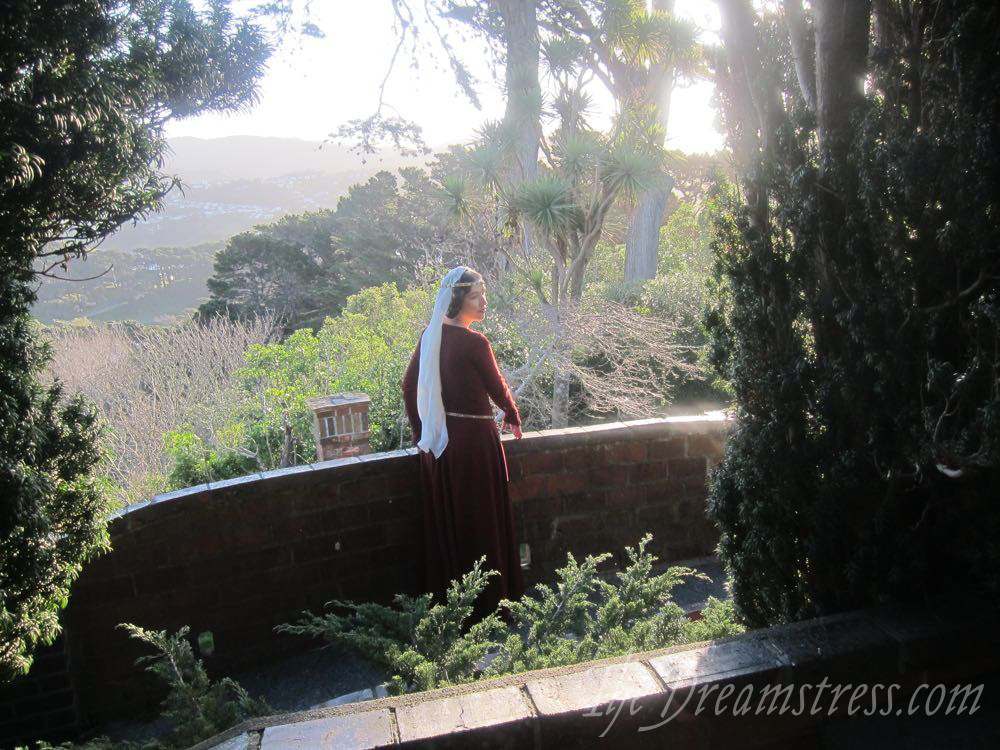
Taking photos at the Sir Truby King gardens, or anywhere in NZ for that matter, pushed the medieval boundaries a bit.  Everywhere I look there were trees that did not exist in Medieval Europe!  Like that cabbage tree in the photo above.

Or this ringa ringa lily:
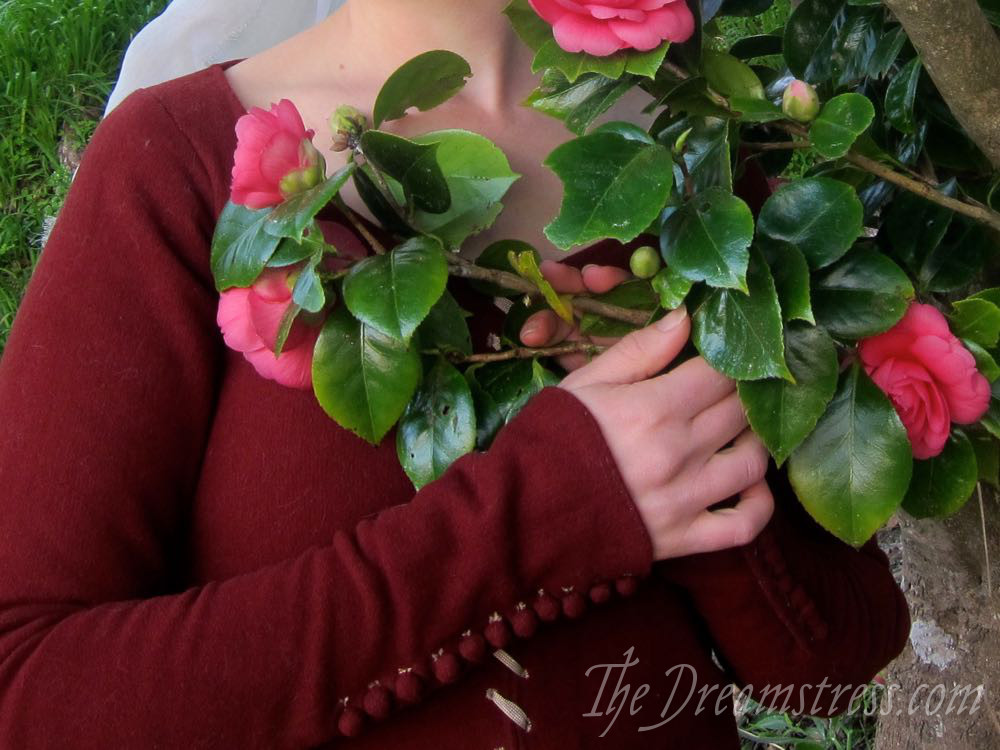
1350s-80s medieval gown thedreamstress.com04

Or this camellia:

1350s-80s medieval gown thedreamstress.com03

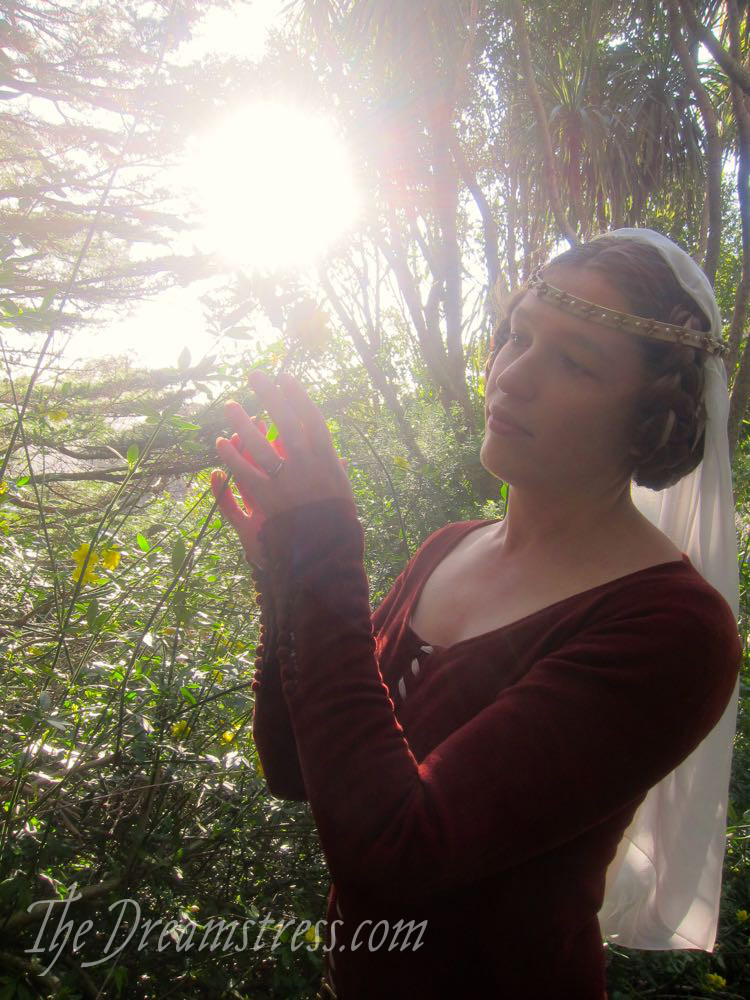
We finally settled on a pine wood as reasonably plausible.  For those ones I unpinned my braids and took off the veil, for a more romantic Pre-Raphealite take on the Middle Ages.

1350s-80s medieval gown thedreamstress.com13

And just to be totally a-historical, the final  photo works best if you either make Jaws noises or sing ‘Little Bunny Frou Frou, creeping through the forest…’  in your spookiest voice to it.

1350s-80s medieval gown thedreamstress.com12

Tutorial: quick, easy, and tidy lace edgings (for historical undergarments and everything else)

Someone asked about  the finish of the lace edging on my Wearing History 1910s camisoles/corset covers, and I thought you might enjoy a tutorial.

I like this method because it is quick, easy, and provides a strong, neat, and tidy finish to necklines, armholes and hems.  And I’ve seen it used on at least one 1910s camisole, so it’s period accurate, even if it wasn’t the most commonly used finish.

Wearing History corset covers thedreamstress.com5

For the tutorial you will need:
  • Cotton beading lace (for a neckline) or broderie anglaise hem lace (for a hem).  You can use this method with  any lace with enough coverage to hide the raw edges (I’ve also used it for the tiny bobble lace around the armholes of the camisole above), but it’s easiest to start with a cotton lace.  It doesn’t work well with beading lace where the holes extend almost all the way to the edges of the lace.
  • A garment that needs its hem, armholes or neck finished with lace.

In this tutorial I am sewing beading lace around the neckline of the camisole shown above.

With this method, the lace will sit beyond/outside the edge of your neckline/armhole/hem, so cut them back the width of the lace minus 1/4″ to compensate for the added width of lace.

For a neckline with a button front, start by folding over the end of your beading lace between two beading holes, so that one beading hole sits over the one behind it.  This will leave a single beading hole at the end of your lace:

Easy lace edging thedreamstress.com01

If you are doing an armhole or a hem just place the cut end on the hem at your chosen point.

Place your lace on the WRONG side of your garment, so that the lace just covers the cut edge of your hem/neckhole/armhole.  Pin, or just hold as you sew if you have a lot of hand control:

Easy lace edging thedreamstress.com02

The edge of your lace should just peep out over the cut edge of your garment on the right side:

Easy lace edging thedreamstress.com03

Sewing from the right side, so that you can see both the cut edge of your garment, and the edge of the lace, sew in 1/8″ or less from the cut edge of the garment:

Easy lace edging thedreamstress.com04

Your stitching should safely catch the fabric of your garment, but should not sew in the beading holes of your lace.

Easy lace edging thedreamstress.com05

As you get to the end of the neckline, cut your lace off, and fold under the end as you did at the start, so that there is a tidy edge to the lace.

If you are sewing an armhole or a hem, fold under the end of the lace and lay it over the cut end you started with, to hide the cut end.

Here is  the sewn-on lace from the wrong  side of the garment (see how the stitching is just at the edge of the beading holes):

Easy lace edging thedreamstress.com06

And from the right side:

Easy lace edging thedreamstress.com07

Now you’re going to flip the lace up, so that it’s visible on the right side of the fabric, as shown in the lower hemline in this photo:

Easy lace edging thedreamstress.com08

I find I get better results finger pressing as I sew, rather than pressing it with an iron beforehand, but feel free to experiment to see what works best for you.

Now you’re going to sew from the right side, stitching  along the top of the lace, less than 1/8″ from the edge of the lace, so you just catch it:

Easy lace edging thedreamstress.com09

The two lines of stitching make a very secure attachment, and any frayed edges are hidden underneath the turned-over lace, making for a perfect finish on each side:

Easy lace edging thedreamstress.com10

And here is the done result, with the ribbon threaded through the beading:

Easy lace edging tutorial thedreamstress.com1

I’ve used the exact same technique to attach the trim around the armholes – there are lots of applications for this, and it’s so easy, and strong, and tidy!

Rate the Dress: Damask and lace for dinner, ca. 1886

Last week I showed you an evening gown worn my Marjorie Merriweather Post, in muted shades of blue and green.  Ratings were divided into those of you who thought it was the epitome of muted elegance, those of you who thought it pretty, but not a stand-out dress, and those of you who found all the soft half-tones too dull and drab, and gave it very poor ratings indeed (and one vote that I disqualified for not rating on a scale of 1 to 10, because that’s cheating 😉 ) .

I’m halfway through tallying the ratings, but it’s bedtime, so I’ll finish those up first thing tomorrow!

UPDATE: MMP’s 1910ish evening dress came out at 8.1 out of 10, which seems like the perfect rating for restrained rather than sensational  elegance.

This dinner dress from the Metropolitan Museum of Art features a design feature that has always been slightly problematic for you raters: a laced front bodice.

While you can choose to dislike the feature in and of itself, I am 99.8% sure that the original lacing cord has disappeared, and the one shown is a replacement, so please, dear readers, do not mark the dress down for the specific cord itself!

This dress features a classic 188os fabric: a sumptuous  brocaded silk in a rich colour,  with a large, striking  pattern with a single theme: this time of hollyhocks.  The rich persimmon orange tones of the dress are slightly unusual, but the overall tonality is absolutely typical of the period.

Also typical is the pairing of the heavy silk with a very light, delicate lace overlay.

The lace both hides a plain persimmon underskirt, and is hidden in turn by the brocaded overskirt, which features hem slits which allow the lace to reveal itself again.  The whole effect adds to the tension between the heavier and lighter fabrics, and to the slightly historically inspired feel of the dress.

At the back, the hollyhock fabric takes centre stage, mirroring itself at the centre back, and carefully arranged in the pleats of the train, so that a flower appears at each fold.

What do you think?  A masterful mix of fabric and usage of pattern?  Or a waste of good fabrics? Or are the fabrics themselves to blame for any fault in the dress?

Rate the Dress on a Scale of 1 to 10.